As a high-end retoucher, I’ve been using Lightroom for more than 13 years now and, therefore, I can tell you about all the advantages and disadvantages for me as a professional constant user in this Lightroom review.
Lightroom is a well-known software that retouchers and wedding/event photographers like for its high performance, tool organization, and exporting capabilities.
This review will help you decide whether you need this software for photo organizing and editing.
Adobe Lightroom is a program used by professional photographers and retouchers.
What I like the most about the software is the number of tools available, whether you need to edit exposure, color balance, contrast, tones, or something else.
Many photographers also sometimes use Lightroom presets or Creative Profiles to speed up photo edits.
Lightroom also has tools that help you organize and manage your photo library, including metadata, keywords, ratings, and labels.
These tools help retouchers with large photo libraries organize and find the images they need quickly.
The application also supports various Lightroom plugins that let you perform different tasks, like organizing the files, editing, and exporting, easily.
Also, Lightroom is integrated with other Adobe software, like Photoshop, which lets you ease your working process by introducing additional features.
In my opinion, this is really convenient, if you use only Adobe products.
| Feature | Description |
|---|---|
|
Supported platforms |
Windows, macOS |
|
Supported file formats |
RAW, JPEG, TIFF, PNG, PSD, DNG, and more |
|
Image editing tools |
Comprehensive set |
|
Digital asset management |
✔️ |
|
Batch processing |
✔️ |
|
AI-powered enhancements |
✔️ |
|
Mobile app sync |
✔️ |
|
Free trial |
7 days |
|
Linux version |
❌ |
|
Best for |
Photographers who want all-in-one software that features advanced functions |
For quite a while, I had been waiting for Adobe to release their feature updates (especially the one with AI tools), and now they’re released in the last version.
Here is a list of recent tool changes, and in my opinion, the first one is the most significant since the software release:
| System Requirements | Windows | macOS |
|---|---|---|
|
Operating System |
Windows 10 (64-bit) |
macOS 10.15, macOS 11 (Big Sur), macOS 12 (Monterey) |
|
Processor |
Intel or AMD with 64-bit support |
Multicore Intel processor with 64-bit support |
|
RAM |
8 GB |
8 GB |
|
Graphics |
DirectX 12 compatible GPU |
OpenGL 3.3 compatible GPU |
|
Display Resolution |
1920 x 1080 or greater |
1280 x 800 or greater |
|
Hard Disk Space |
2 GB of available space for program installation |
2 GB of available space for program installation |
|
Internet Connection |
Required for product activation, cloud storage, and some features |
Required for product activation, cloud storage, and some features |
There are a lot of hacks to make Lightroom on your PC faster, but the main advice is to have enough RAM, a modern GPU, and a fast HDD or SSD.
A lot of users, beginners in general, are often asking about the difference between Lightroom Classic and Lightroom CC.
They are two different versions of Adobe’s photo editing software, and they are designed for different user preferences.
| Feature | Lightroom Classic | Lightroom CC |
|---|---|---|
|
Platform Availability |
Windows, macOS |
Windows, macOS, iOS, Android |
|
File Management |
Stores files locally on computer |
Cloud-based storage |
|
Storage Options |
Local storage with option for external drives |
Only cloud storage (Adobe Creative Cloud) |
|
Editing Tools |
Comprehensive, including advanced features |
Fewer tools, simpler editing options |
|
Performance |
Quick when working with photos on your computer |
Might be slower because it’s online |
|
Importing |
Supports importing from local storage, cameras, and media |
Import from local storage and cloud sources |
|
Exporting |
Various export options, including export presets |
Limited export options |
|
Presets and Plugins |
Extensive support for presets and plugins |
Not as many extra things to add on |
|
Connectivity |
Requires periodic synchronization with Creative Cloud |
Needs to be connected to the internet all the time |
|
Price |
Part of Adobe Creative Cloud subscription, standalone option available |
Part of Adobe Creative Cloud subscription, standalone option available |
Importing RAW photos into Lightroom Classic is a first step that will help you start the editing process.

After you open Lightroom Classic on your computer, go to the Library module by clicking the "Library" tab in the top right corner.
After that, click the “Import” button at the bottom left corner. You’ll see a panel “Source” on the left-hand side, where you choose a device or your camera, memory card, or computer folder. Lightroom Classic will display thumbnails of the photos that you can import.
You can also click on photos to select or deselect them. If you need to select all, you can use a shortcut: "Ctrl + A" for Windows and "Cmd + A" for Mac.
After the preview area, you can change your import settings:
File Handling: Select how Lightroom Classic should manage files during import, like copying or moving them, renaming files, and applying metadata.
File Renaming: Optionally, you can rename files during import. Customized naming templates are available to use if you wish.
Apply During Import: Apply Develop settings, keywords, metadata presets, and other metadata to imported photos.
Destination: Specify where on your computer you want to store your imported images.
After selecting your import settings and picking the photos you want to import, click the "Import" button in the bottom right corner of the Import dialog.
After that, Lightroom will copy selected photos to the destination of your choice and apply the import settings.

After the import process is complete, you can navigate to the Library module to view your imported photos.
They will appear in the Grid view, where you can organize, rate, keyword, and begin the editing process.
As a studio photographer and a retoucher, I can tell you that оrganizing photos in Lightroom Classic is important to keep your workflow efficient and avoid messiness.
As one of the best photo organizers, Lightroom Classic uses a folder-based organization system, that is similar to your computer's file structure.

Therefore, you can create different folders to categorize your photos based on the date it was taken, the location, or the event.
To create new folders or import existing ones, you need to right-click on the “Folders” in the Library module.
Collections in Lightroom are useful if you want to group photos without moving them on your drive.
You can create collections for projects, themes, or specific editing tasks.
Collections can be organized hierarchically, which means you can create collections within collections to further manage and organize your photos.
To make the images easier to find, you can also add keywords and metadata. This will help you quickly find the specific photo you need.
Keywords can be added individually or in batches with the Keywording panel in the Library module.
Additionally, you can create metadata presets to apply information to multiple photos at the same time.
Lightroom Classic also has flags, ratings, and color labels to help you quickly find and categorize your images.
You can use flags to decide which photos you are using and which ones should be rejected.
You can also rate the photos and their quality or apply color labels to mark the stage of your editing process.
Moreover, filters and smart collections can be used to narrow down the number of photos based on specific features (file type, camera model, or metadata criteria).
If you want to easily maintain and organize your photo library, I suggest creating some rules, that will help automatically update your smart collection.
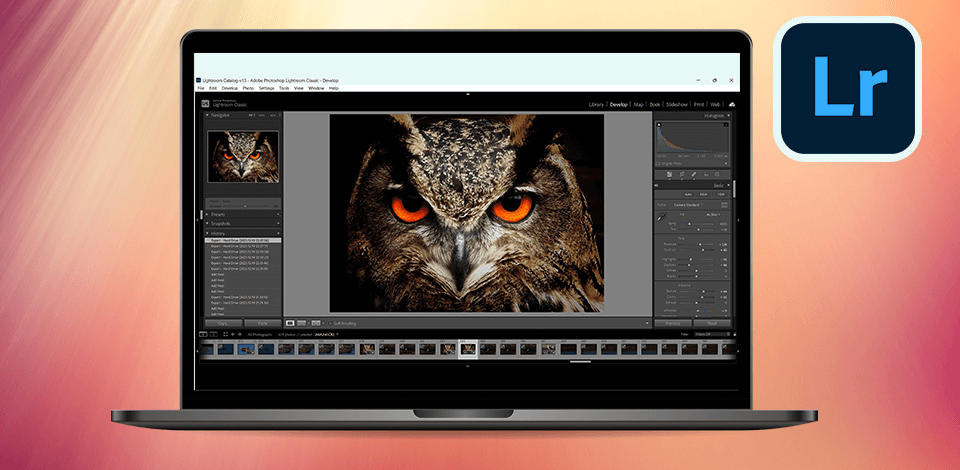
After importing the photos, switch to the Develop module.
To do so, click on its icon in the top-right corner of the Lightroom Classic interface.

To edit photos in Lightroom, you can use different tools:
Histogram Module – histogram, spot removal, red eye correction, cropping and straightening, graduated filter, adjustment brush.
Basic Module – the temperature of the white balance and tint, exposure, recovery, brightness, and contrast.
Tone Curve Module – Point Curve, Highlights, Lights, Darks, Shadows.
HSL/Color /Black and White Module – Hue, Saturation, Luminance.
Split Toning Module – Highlights, Hue & Saturation, Balance, Shadows Hue and Saturation.
Lens Correction Module – chromatic aberration, lens profile, distortion, vignetting.
Effects Module – roundness, vignetting style after cropping, amount, middle, pen tool, highlights, grain amount, size, roughness.
Batch editing in Lightroom is a big time saver, especially if you have shots from the same scene and in the same lighting conditions as it lets you alter a batch of photos at once.
Unfortunately, batch editing isn’t available in Lightroom (CC) or the Lightroom Mobile App.
As an alternative, you could try just copy and paste the edits to another photo.
After editing the pictures, you will have to export them. Lightroom Classic allows you to save photos in different formats with different settings so that you can export them for sharing, printing, or archiving.

Here are Lightroom export settings for Facebook and Instagram:
Go to the library and select the photos you want by clicking on them while holding Ctrl (Windows) or Cmd (Mac).
Open Export Dialog: Click on "File" in the top menu and select "Export".
Alternatively, you can use the shortcut Ctrl+Shift+E (Windows) or Cmd+Shift+E (Mac).
Click "Export": after you’re done with all the settings, click the "Export" button to start the export process.
When the exporting process is complete, your photos will be saved in a folder of your choice on your computer.

Lightroom offers five other modules that provide additional functionalities apart from the Library and Develop modules:
Map Module - it allows you to organize and manage your photos with the location data that is plotted onto a map.
This is particularly helpful for people who travel or who are working on a location-based project and find it easier to search through the pictures geographically.
Book Module - here you can create custom books and magazines using your images.
This module was useful for me when I had to make a collage in Lightroom, as it offers a lot of different templates and just customization options that allowed me to create a professional collage for my project.
Slideshow Module - can be used to create slideshows using your photos.
You can also add text overlays and transition effects to create professional presentations and show others your work.
Print Module - it is designed to specify how the photos and contact sheets will look when you print them.
You pick the layout, paper size, and print settings to get high-quality images printed directly from Lightroom.
Web Module - lets you create web galleries to show your projects online. There are various templates available to be customized.
The branding, layout, and colors can be personalized as well to share your work with others.
When comparing Lightroom vs RawTherapee, one of the best alternatives, I learned that Lightroom’s AI tools are great for automating the workflow.

Here are a few key AI-based tools that you can use in Lightroom:
Enhanced auto-tone - Lightroom uses AI to help you decide what is the optimal exposure, contrast, and color balance settings for a photo of your choice.
The "Auto Tone" quickly sets the basic image parameters to improve the quality of the photo.
Face recognition (Sensei) -Lightroom introduced an AI-powered face recognition technology called Sensei that automatically finds the faces in photos to easily organize them based on the person you took photos of.
The feature makes it easy to tag, sort, and group photos of people together.
It also helps with applying metadata and quickly editing portraits in Lightroom.
Adobe Super Resolution technology is useful if you need to increase the resolution of digital pictures.
Adobe Super Resolution feature doubles the image's resolution by quadrupling the number of pixels while keeping details clear.
This feature is built in, so it’s available to users who have a Cloud Photography Plan.
Smart suggestions tools use machine learning to recommend adjustments for photos based on their content, making it easier to enhance them quickly and effectively.
Automatic categorization and keywords helped me a lot with organizing photos in Lightroom.
It automatically assigns categories and keywords based on the photo's content.
This tool makes it easier to find and organize photos in the library, improving workflow efficiency.
Comparing Lightroom vs Dxo Photolab, as one of the main competitors, I can say that Lightroom’s interface is more convenient in my opinion, due to minimalistic design where all the main features are easy to find.
The main modules (Library, Develop, Export, etc) are located in the top panels, which provide quick access to all the necessary tools.
From photo import to editing and exporting, every step is organized in a logical order.
The editing tools in Lightroom come in the form of simple controls, such as sliders and toggles.
All the tools come with explanatory captions, making it easier for users to understand what they are editing in their images.
Lightroom allows you to have custom settings, which helps the retoucher adjust the interface to suit their needs.
For example, I customized the layout of the panels, selected a toolbar and I also created the shortcuts that I use every day.
If you are new to the software, there are free Lightroom tutorials available, including articles and guides.
These will help you learn how to use the basic and advanced tools for photo editing.
I’ve been a photo retoucher for 15 years now, and I can say that Lightroom definitely is powerful and efficient software, which makes it one of the best tools for organizing and editing photos.
However, some limitations could be improve to increase the efficiency.
The user interface of Lightroom responds instantly to user input, providing a smooth, fast experience.
This makes working with the program convenient and efficient.
Lightroom manages your computer's resources well, minimizing CPU and memory usage.
This allows the program to work quickly and efficiently even on computers with limited resources.
Lightroom offers a variety of pricing options, making it accessible to a wide range of users.
There are three options.
The first option is the Lightroom Single Plan.
In my opinion, this plan is best suited for those who only need organization and basic photo editing. It's priced at $9.99 per month.
The second option is the Photography Plan.
For photographers, like me, the Photography Plan is the best solution.
If you are a photographer and retoucher combined, you will benefit from this plan as it gives you access to Lightroom, Photoshop, and 1TB of cloud storage. Lightroom and Photoshop package will cost you $19.99/mo.
This plan is the best option if your type of activity is related to photography and its processing.
And there is the third option -the All Apps Plan.
If you are a marketer, content creator, or web designer, this is for you.
This plan allows you to download more than 20 desktop and mobile apps, such as Premiere Pro, Photoshop, Illustrator, Lightroom, and InDesign. The cost will be $659.88/year, or $54.99/month.
Also, you can get Lightroom for free for 7 days as part of a free trial.

Using the knowledge of experienced photographers, our presets make it simple to enhance your pictures. They work with different Lightroom versions, like Lightroom 4-6, Lightroom CC, Lightroom Classic, and Lightroom Mobile, regardless of whether you're using RAW or JPG files.
Adding presets to Lightroom will allow you to save time on processing your photos, especially if You are a wedding or event photographer who edits photos in entire sessions.
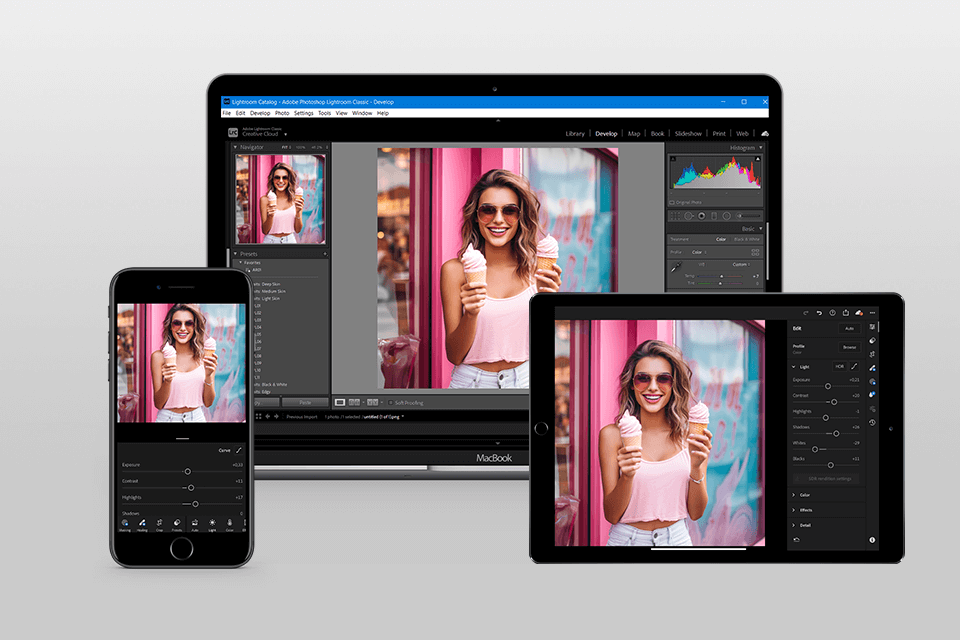
Lightroom Classic is a desktop app that stores files locally and has advanced editing tools. Lightroom CC is a cloud-based service for users who prefer a simpler workflow across devices.
Yes, Adobe offers a free 7-day Lightroom trial as part of Creative Cloud. You get access to all of Lightroom's features to see if it fits your needs.
Yes, Lightroom allows batch processing for applying edits, presets, and metadata adjustments. The feature is particularly useful for improving the workflow and saving time.
Yes, Adobe provides Lightroom mobile apps for iOS and Android. You can also capture, edit, and sync photos across devices.
Yes, you can import photo libraries from other software like Photoshop, Apple Photos, and Aperture while maintaining your organization.
I highly recommend checking out the Adobe Lightroom Photography Plan which comes with 1TB of cloud storage and explore the option for your needs.
Although the subscription cost is quite high, I think that the advantages of Adobe's cloud-synced software with Lightroom's great editing and organizing tools are worth it.
In addition, Adobe provides a lot of Lightroom discounts and other offers that would help users save some money.
Lightroom keeps getting better with regular updates.
They improve the functionality and make new camera models compatible with the software to improve the editing experience for their users.
The interface is user-friendly, which makes it easier for users to try things out and learn without any difficulties.
Their easy-to-use approach makes it an ideal platform for beginners who want to edit their photos and learn how to retouch them professionally.


