If you’re new to editing, and don’t know how to import RAW files into Lightroom, then this tutorial is for you. I’ll run you through the entire import process in Lr desktop and mobile versions. You’ll also learn how to fix the common import problems you may encounter.
A RAW file is a group of unhandled datum. It means the file hasn't been modified, no compressions were made or no operations were produced by the PC. These files can only be handled by RAW photo editors and RAW file converters, such as Lightroom.
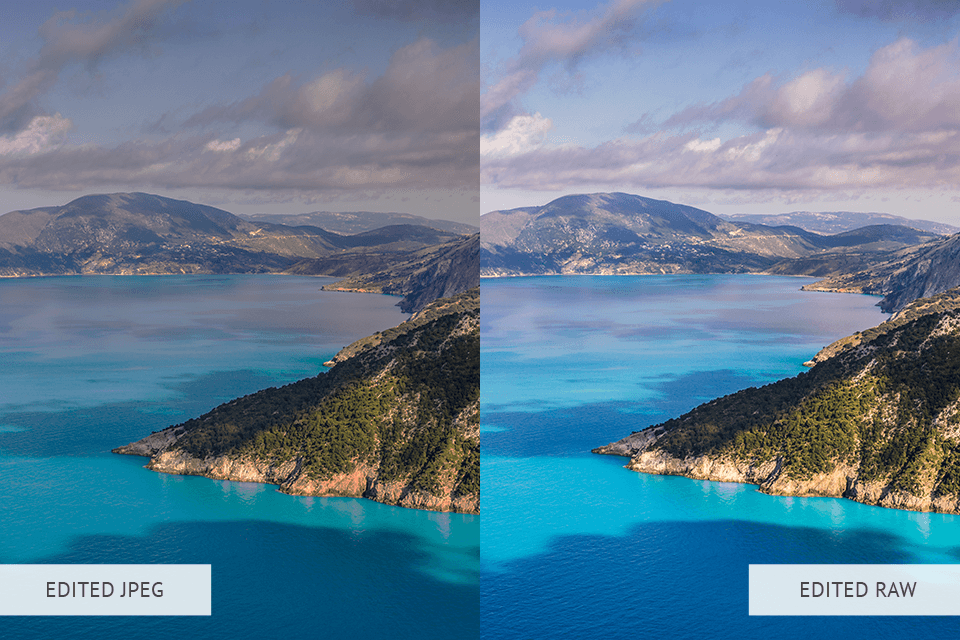
The changes you are making during a RAW file editing are called «non-destructive» methods because they are not permanently implemented. The alterations are not embedded into the file, they are kept next to it as a block of orders. Taking your snapshots in RAW is one of the optimal ways to gain total control over your images in editing.

There's no difference between RAW and JPEG at the very moment the photo is being taken because JPEG begins as a RAW file. But the photo camera compresses a file into JPEG to save it to the storage card. Similar to the difference between JPEG and PNG, RAW has a much bigger file size, since it stores all the original data. There's also a difference between the formats – it's the "depth" of the pixels. JPEG uses 8-bit, while raw files use 12 or 14 bit, thus storing more color data.
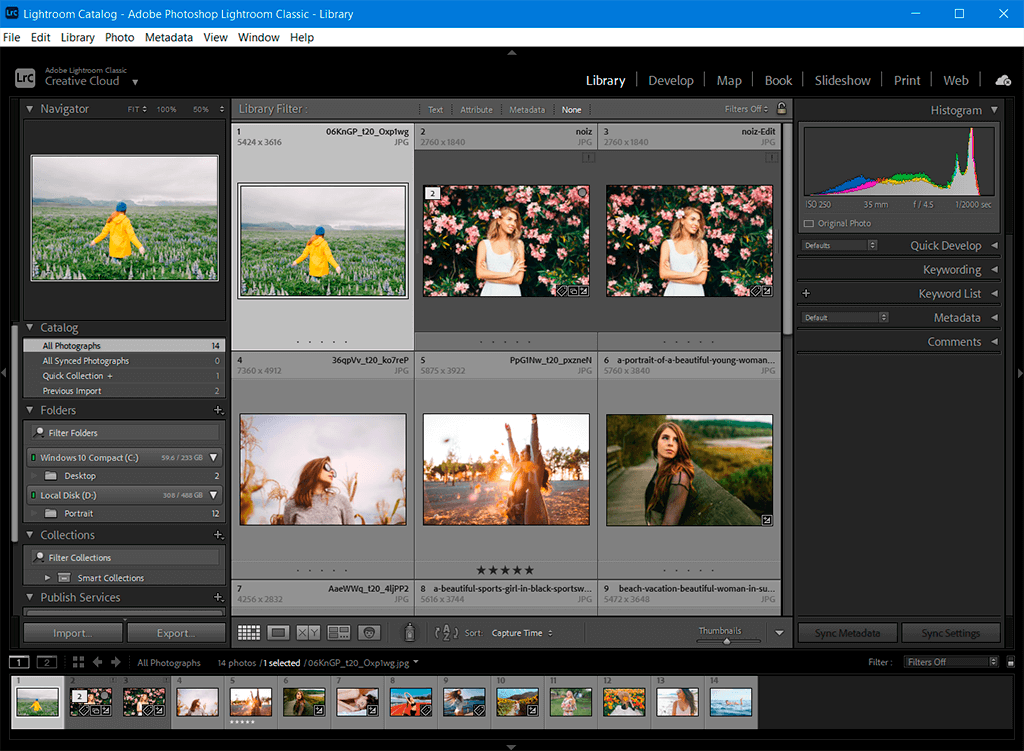
The first step of editing photos in Lightroom, is to plug in your internal storage device to your PC and open the Lightroom program. An import window should automatically pop up in the program when it detects your external storage device.

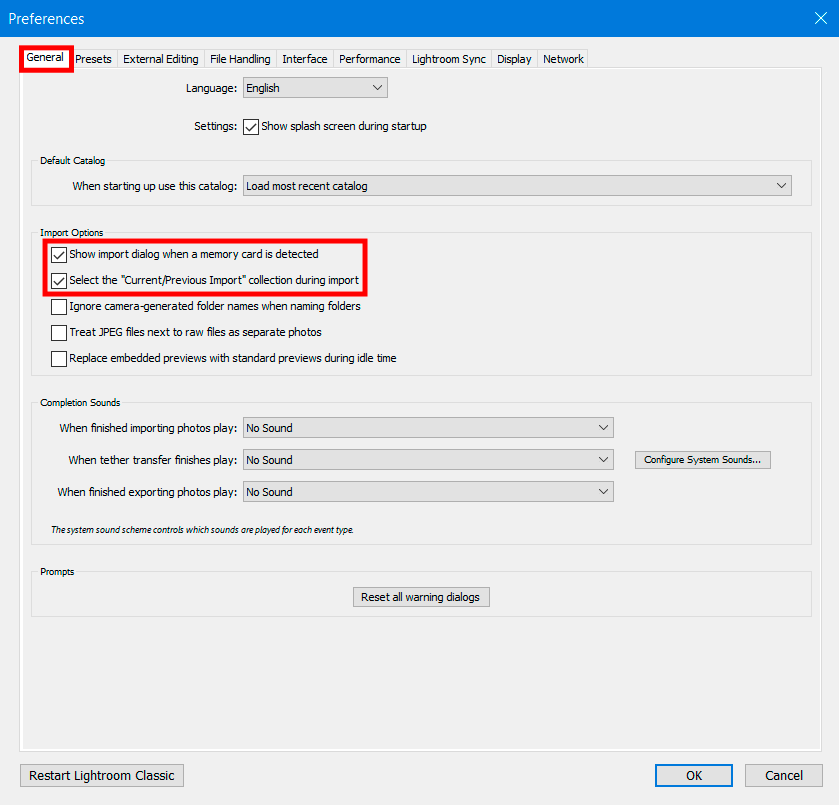
The next action is to press on “Edit” and choose “Preferences” in the window.
In the pop-up window click on the “General” tab. Now you need to find “Import Options” and tick the first two options.
Show Import Dialog When a Memory Card Is Detected allows launching the Auto Import dialog box after a camera or other peripheral is connected to your PC.
Select the Current/Previous Import collection during import option opens the completed import in a collection when the uploading of new files is completed.
Ignore Camera-Generated Folder Names When Naming Folders makes Lightroom Classic disregard the folder names generated by a camera.
Treat JPEG Files Next to Raw Files as Separate Photos option. It is a handy feature for photographers who take RAW+JPEG pictures. It allows uploading the JPEG as a separate image. If the option is selected, you can view RAW and JPEG images and edit them in Lightroom Classic. If deselected, the program considers the copy of JPEG as an alternate file, and the RAW images will be available with the RAW and JPG extensions.

Next, you need to open the “File Handling” tab. Look for the “File Extension” box and select .dng extension.
Import DNG Creation allows specifying which versions of Camera Raw you want your DNG files to be compatible with. Besides, users can select JPEG preview size for DNG files that are being uploaded. The data specified in the “Import DNG Creation” can be matched with the info in the image below.
Reading Metadata box allows you to designate a period ( . ) or forward-slash ( / ) between keywords for determining a hierarchical list of keywords.
File Name Generation box allows you to define the irregular characters and spaces that are used for labeling the uploaded images and indicate how they can be substituted.

Select the source you want to import RAW photos from. A window should appear with thumbnails of all your photos for more convenience.
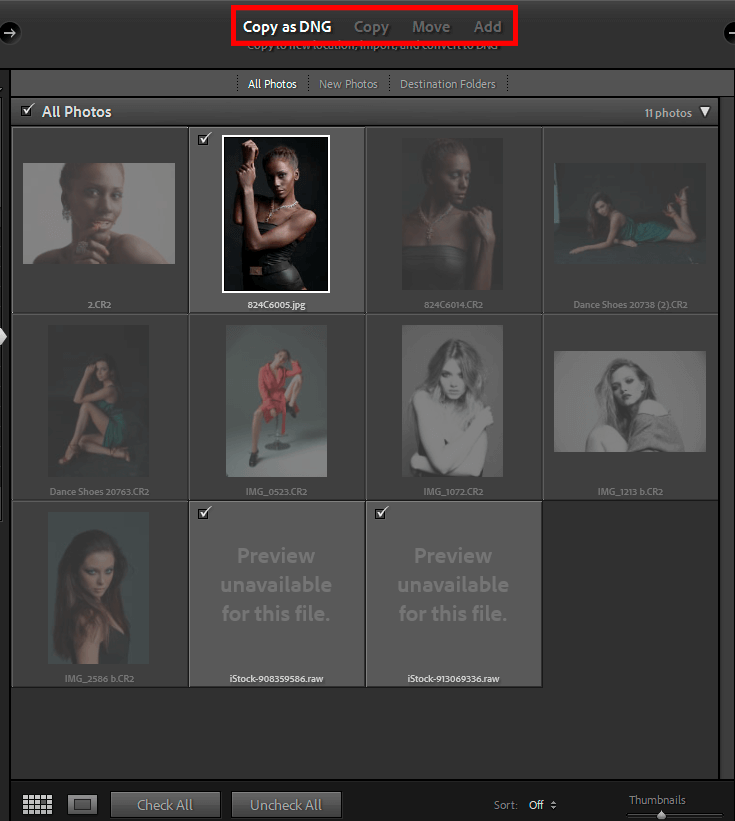
After completing these steps, you can move, copy, add, copy as DNG.
“Move” setting allows relocating the images from the source to Lightroom.
“Copy” option lets you duplicate your pictures, without affecting the original formatting.
“Add” means that you are not going to relocate the file, but change it in Lightroom.
“Copy as DNG” serves for copying images to Lightroom in the Adobe file format. Pick the files you need to upload and activate the “Copy as DNG” option.

Find the “File Handling” box on the right. Check off a box next to “Add to collection”.
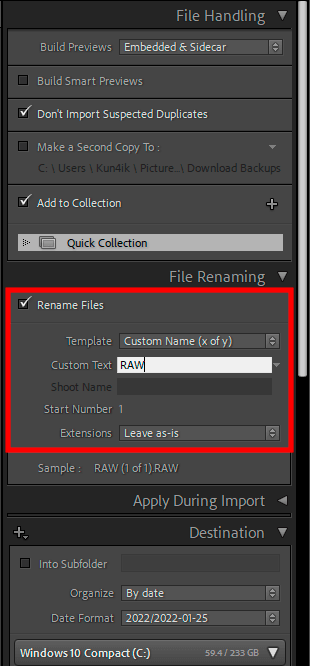
Moving on to the “File Renaming”, check off a box, next to “Rename Files”. Below it is “Template”, change it to “Custom name”.
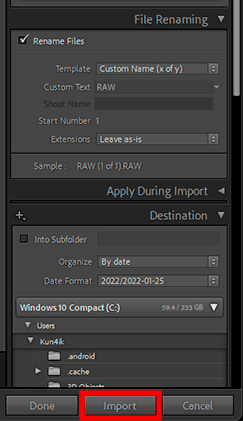
Once you’ve done it, click on the “Import” at the bottom of the screen.
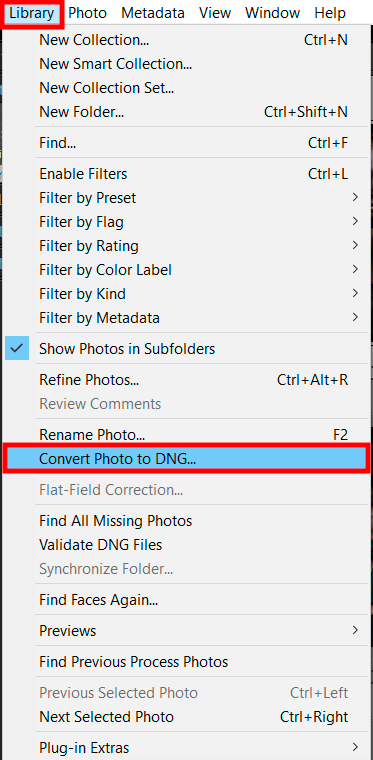
Now, all you have to do is click on “Library” and find the “Convert Photo to DNG” box. Click on it.
Finally, check off the 2 boxes in the “Source Files” and click on “OK”. It’s that easy! The first box gives your permission to convert only DNG files, and the second one is responsible for deleting originals after successful conversion.

Now, you can start editing your portraits in Lightroom and enjoy the results! Now they offer much more opportunities for finetuning. Don’t edit every photo individually. Instead learn how to batch edit in Lightroom to apply the same effects to multiple photos at once.
If you find it difficult to learn how to import RAW files into Lightroom and edit them, you can always turn to our professional service. This is the easiest way to achieve professional results without any effort. Our specialists will fix lighting issues, correct the exposure, and remove all imperfections on a professional level. All these tasks will be performed in a short time and at an affordable price.
There are 3 main methods you can import RAW files into Lightroom mobile app:
STEP 1. Open the Photo from the Photos App
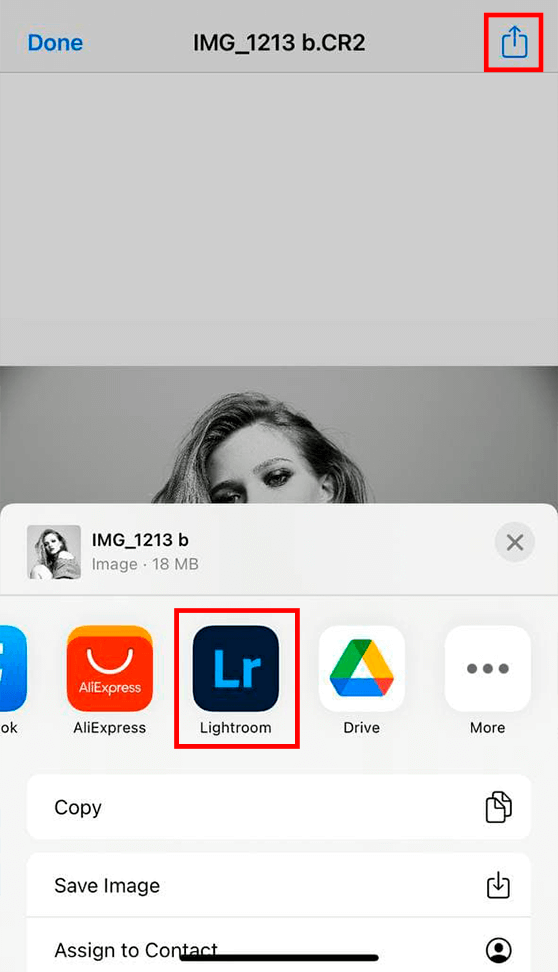
The first method is importing the RAW file while looking through images in the Photos App. Click on the Share button and choose the Lightroom icon from the available options. This will automatically import the photos to the app.
STEP 2. Click on “Launch Lightroom Now”

You’ll see a pop-up box confirming the photo have been successfully imported. You can either click on “Got It” to close the box and continue to browse through the Photos App, or choose “Launch Lightroom Now” to open the app straight away.
STEP 3. Start Editing the Photos

The app will open up with the RAW photo ready to be enhanced. You can also install Lightroom Mobile presets to improve colors quicker.
STEP 1. Click on the “Add Photos” Button

For the second method, open the app, and click on the “Add Photos” button at the bottom right corner of the screen.
STEP 2. Choose the Photo Source
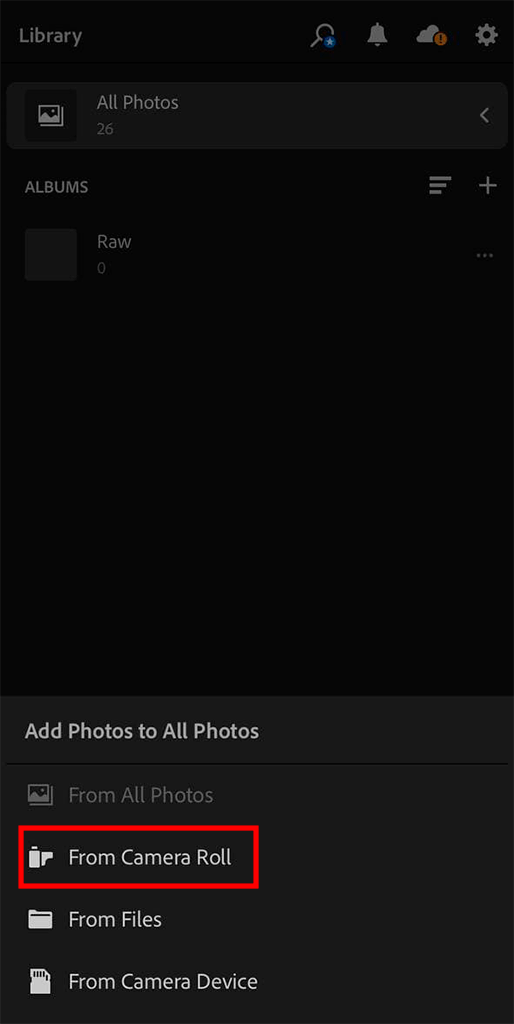
Then, you need to specify the source of the photo. You can choose between camera device, Files, and camera roll. I’ll be using a photo from my camera roll.
STEP 3. Pick the RAW Images
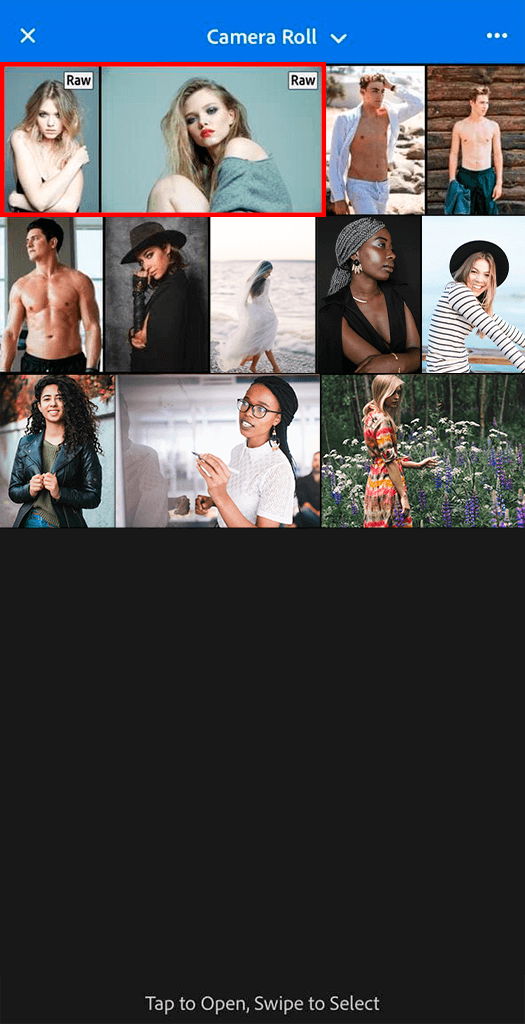
You’ll see that RAW photos are marked at the top, so it’s very easy to find them. You can tap to open, or swipe to select.
STEP 4. Start Editing
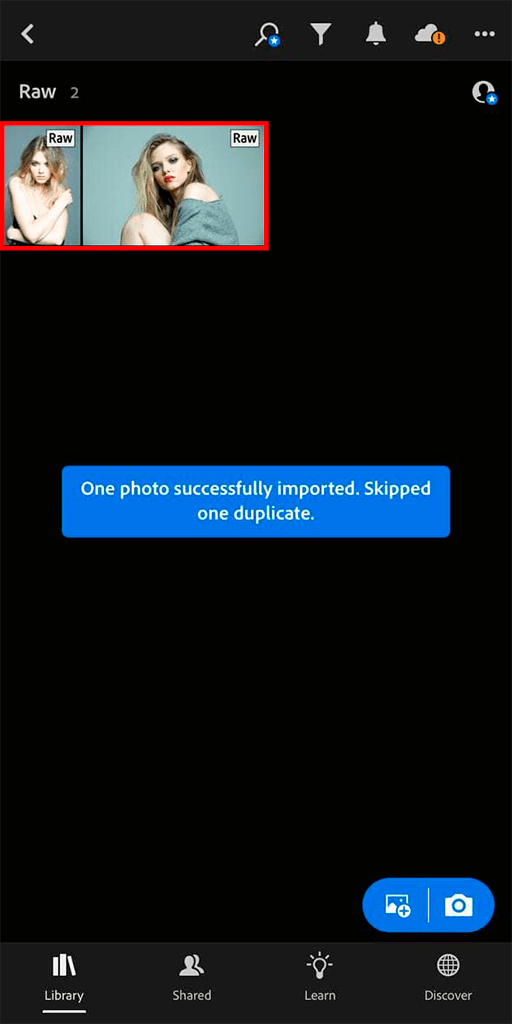
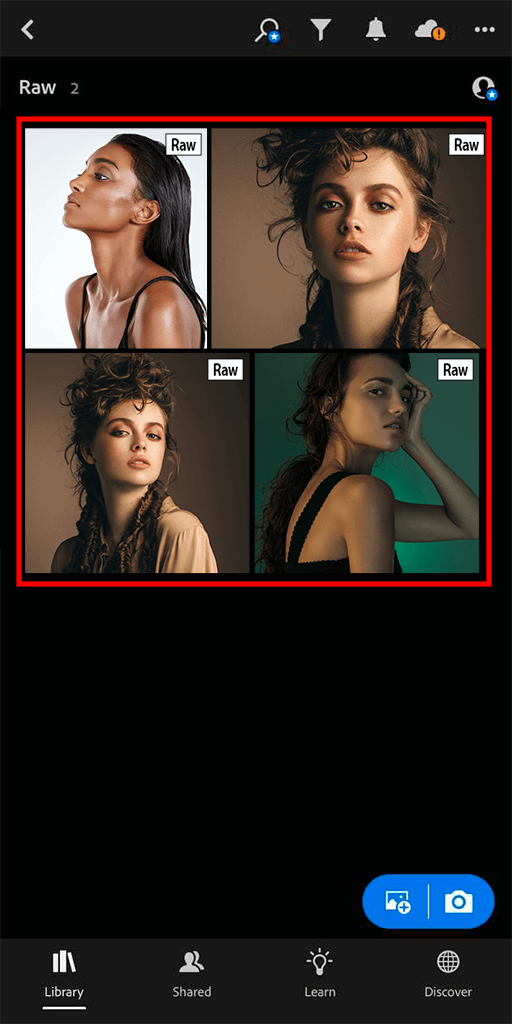
You’ve successfully finished importing RAW fles into Lightroom Mobile. They can be found in the app’s Library. Now, you can apply your favorite Lightroom presets free and paid versions to improve your images in several seconds.
STEP 1. Sync the Desktop and Mobile Libraries
The third way is to sync your library files between Lightroom CC and Lightroom Mobile. All you have to do is to download them to your computer and wait for them to sync with Lightroom Mobile. After the file is synced, you will see the "RAW" icon in the top
corner of any RAW file in your mobile library.
STEP 2. Double-Check the Synchronization Status
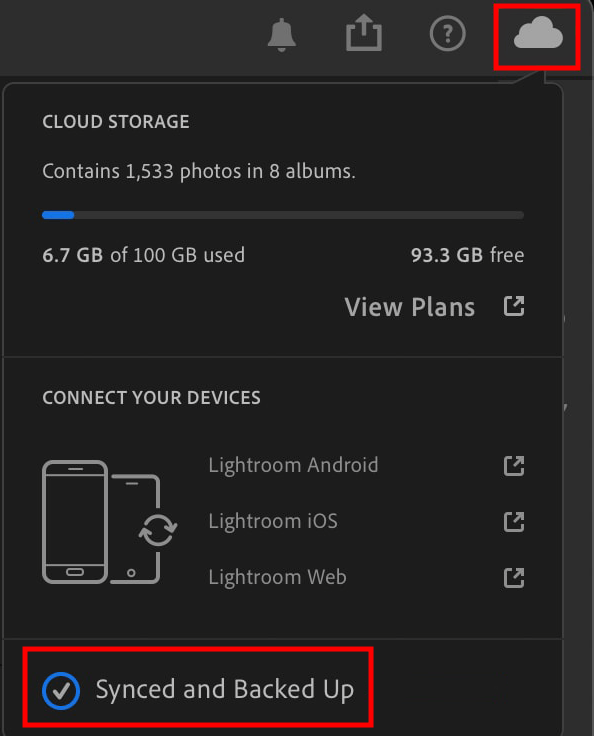
Your libraries should automatically sync after uploading a new file. However, you can double check this by clicking on the cloud icon in the top corner of the app.
If everything is ok, you will see the check next to "Synced and Backed Up". If there’s not one, you can sync the libraries manually.
The main reason why Lightroom won't import RAW is because you have bought a brand-new camera. Adobe always tries to update the files as soon as the photo companies release their latest models. As each company has their individual types of RAW files, it takes Adobe up to 90 days to update the software to support each photo camera type that is produced.
You will have to wait until Lightroom and Photoshop release the new version. Sometimes this procedure is quicker if the corporation provides a to-be released camera to Adobe in advance (or if it has only insignificant updates).
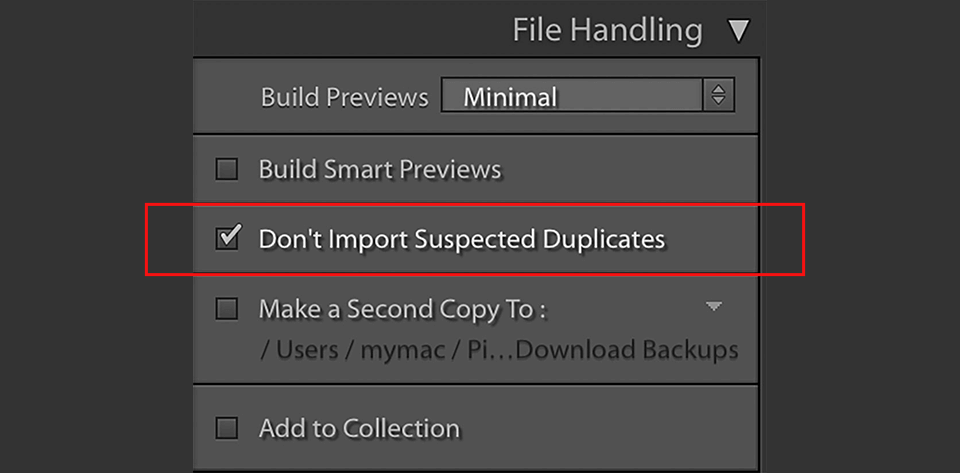
Lightroom prevents uploading any duplicate images. If you have several copies of files, the size of your catalog will greatly increase taking much space on your PC. Besides, the process of image categorization will be a real challenge. You can find the “Don’t Import Suspected Duplicates” option in the Import window.
Check it and the editor won’t add file copies into your library. If this is your case, look through Lightroom Library to find images in question. If you have managed to detect them, memorize their location and send them to a new folder. In case your search was unsuccessful, uncheck the “Don’t Import Suspected Duplicates” option to let the editor import duplicates.
Make sure that you are using the latest Lightroom versions, as older versions are compatible with fewer file formats and camera models. For instance, people using Lightroom 6 may face difficulties while transferring images from a camera to the program.
Take into account that even Creative Cloud subscribers don’t necessarily use the latest version of Lightroom. You can check whether some updates are available in the Creative Cloud app on your PC or by navigating to Help > Updates in the software.

You can speed up RAW file processing with the help of these tools. They are great for any photography type. Learn how to install Lightroom presets on Mac & Windows, and apply these filters to turn even the most boring photo into a bright and interesting picture.
You can find artistic filters that will give your images a painterly, watercolor, or sketch-like look. Besides, there is a classic vignette effect that helps draw the viewer's attention to the subject and create a more immersive visual experience. So, feel free to browse the pack to find ideal effects.


