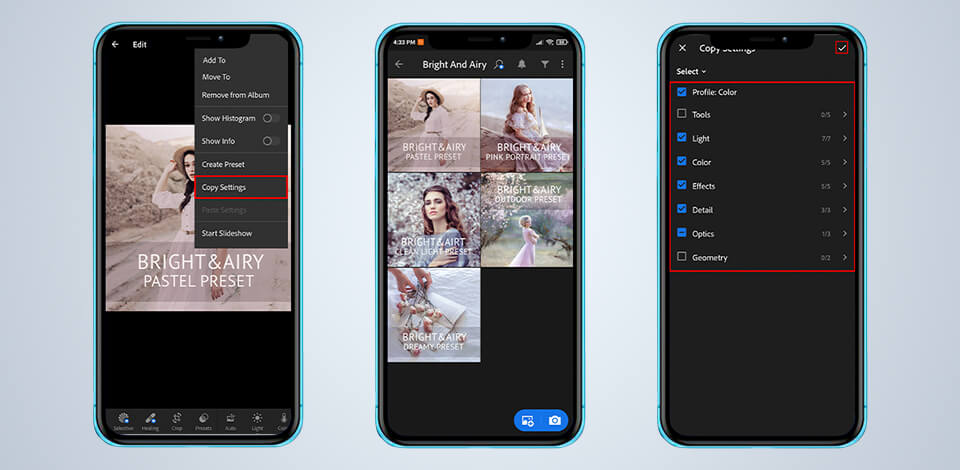
If you want to install Lightroom Mobile DNG presets on your smartphone, make sure to learn more about the two main ways to do it. I will provide you with a step-by-step tutorial on how to install Lr presets more quickly. You can follow this guide even if you have never worked in Lightroom before.
If you don’t use a desktop version and want to apply Lightroom presets to your photos in a mobile app, first, you need to install them. Follow the steps below to find out how to install Lightroom Mobile DNG files to your smartphone and use them in a free Lr app.
Mobile presets are saved in DNG format. It is a type of RAW file that stores image metadata, including the information about the adjusted settings. It allows you to save a photo with an applied preset. Thanks to this format, Lr Mobile will be able to recognize what preset was applied to the image.
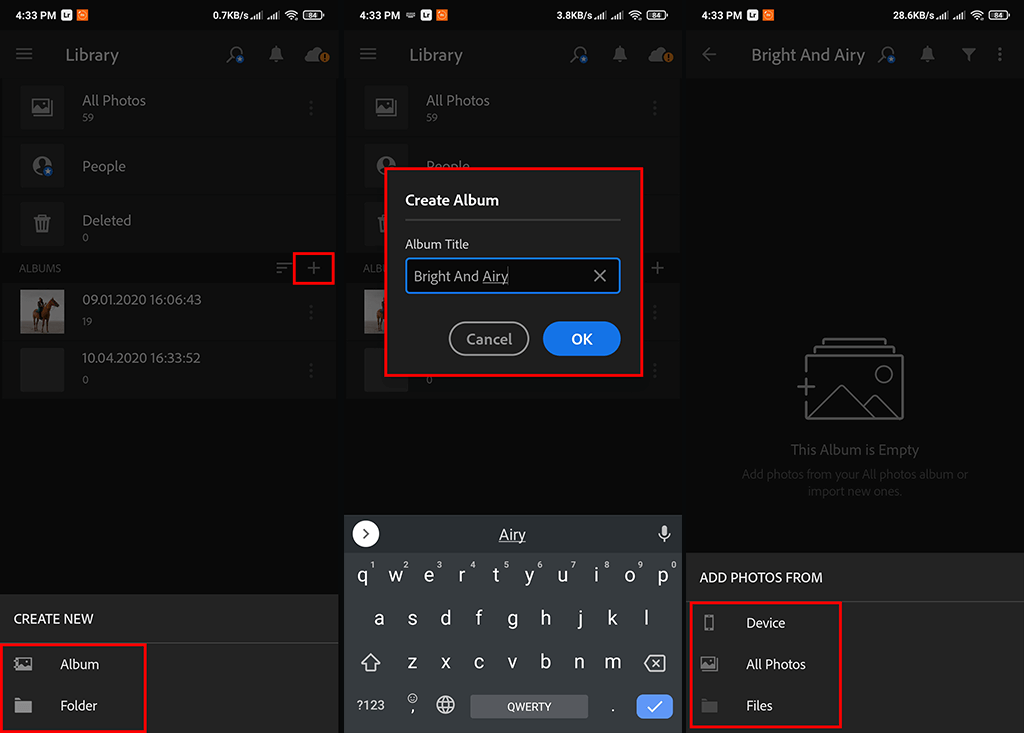
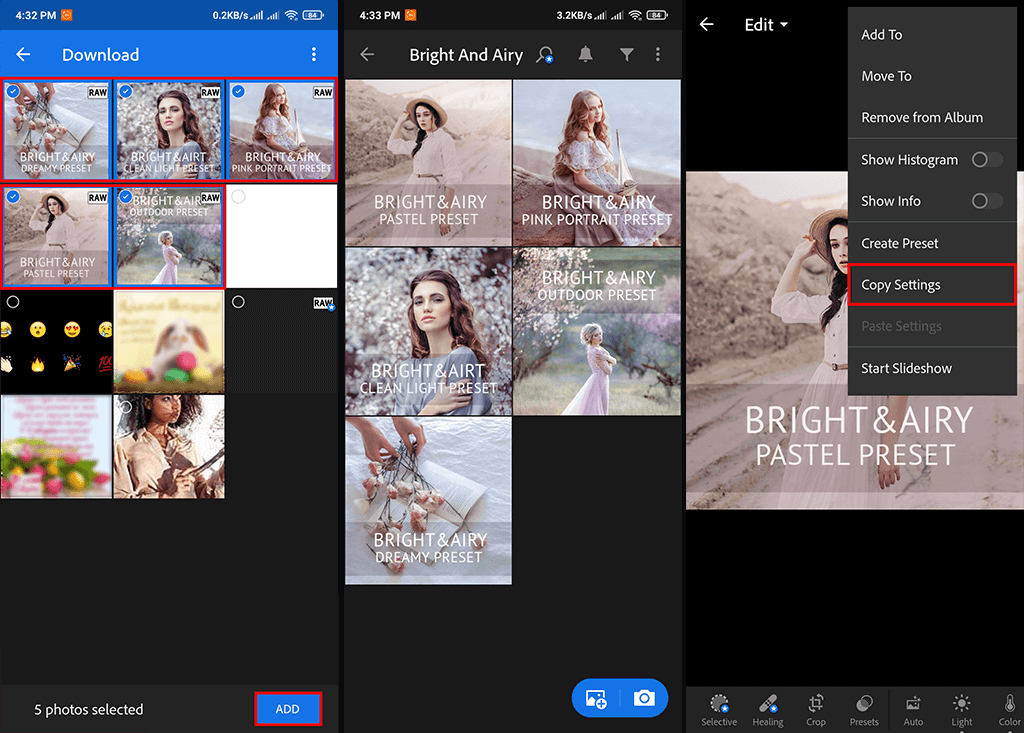
Once you have downloaded the DNG files you need, run the Lightroom Mobile app and create a new album for the presets you are going to use. To do it, tap the “+” icon to the right of the “Albums” panel. You will see the “Album” option at the bottom of the page. Choose a new name for the Presets folder and click on “Add Photos.”
Find the folder on your smartphone with downloaded .dng files and double-click on the file you would like to use. This way, you can install Lightroom Mobile DNG presets. Then, you just need to select a photo that you need to embellish, click on the “…” button to open the Settings menu and select “Copy Settings.”
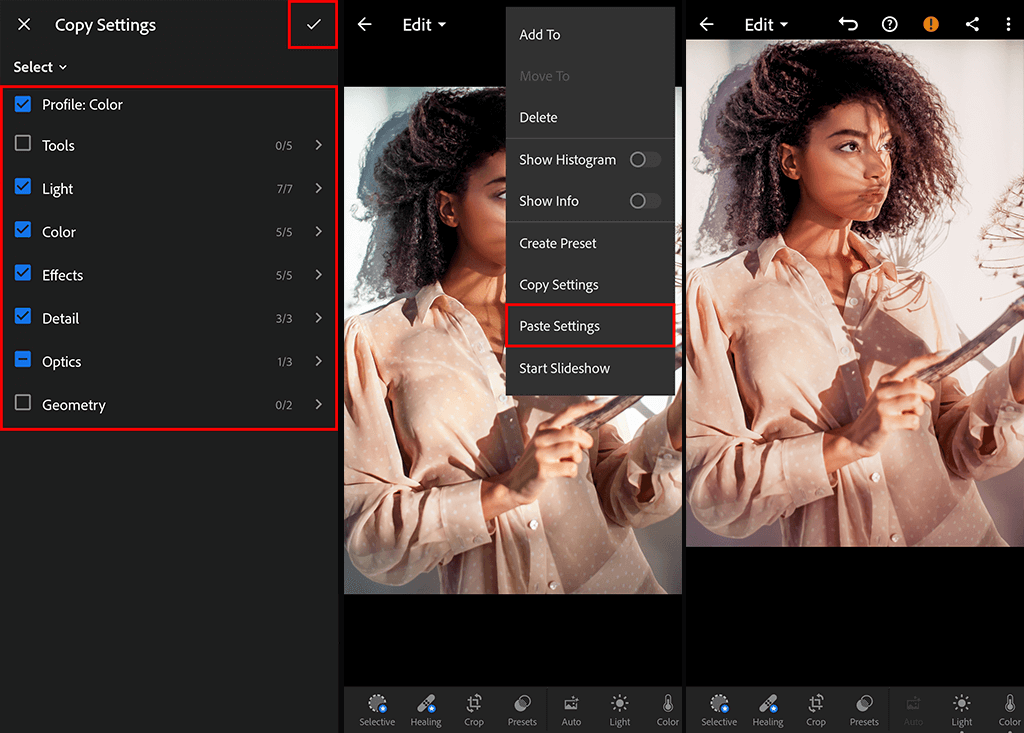
Select the settings that you want to copy and click on the “OK” button. Then, you need to choose an image that you want to enhance in Mobile Lightroom. Click on the “…” button and then select “Paste Settings.” When everything is ready, you can batch edit in Lightroom and enhance several photos at once with the help of handy presets.
If you don’t have much experience in photo editing, you can save your time by contacting a professional image retouching service. They will take all your requirements into account and send you a perfectly edited photo for an affordable price in no time.
If you already have Lightroom on your computer, and want to use presets you already have there, you can simply sync them between the desktop and mobile versions of the software. After installing Lightroom presets on Mac & Windows, follow the steps below.
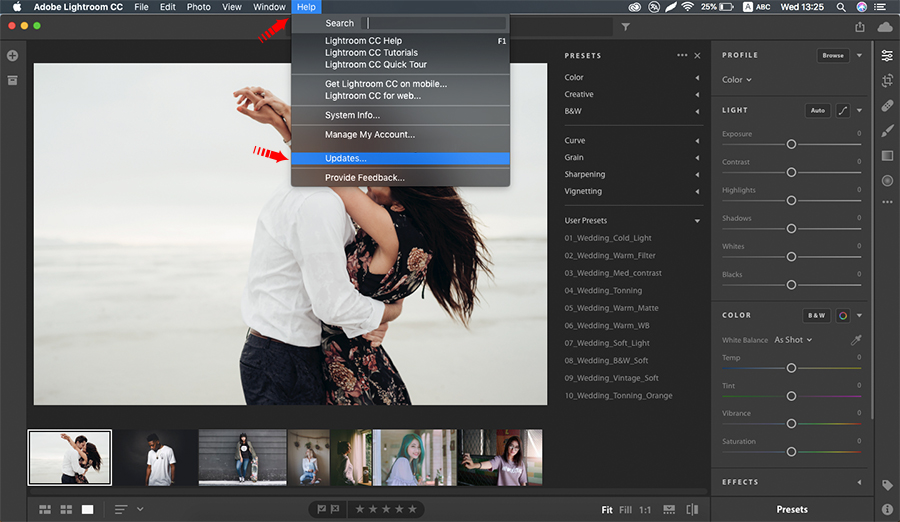
For stable operation with mobile presets, you should update your desktop and mobile Adobe Lightroom versions to the latest one. You can check your software’s version by going to Lightroom CC -> Help -> Updates. The program will open Adobe Creative Cloud where it will list all your Adobe programs with their state about updates.
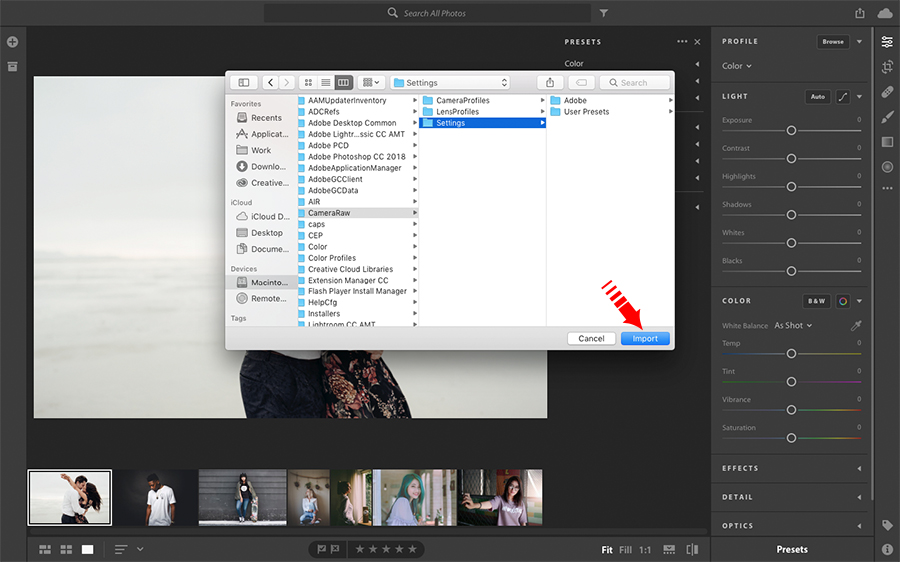
For the latest macOS Sierra users, your Lr presets should be transferred to the folder by the following path: Library> Application Support> Adobe> Camera Raw> Settings.
For the earlier version of macOS users, this path will look like this: Users> Your name> Library> Application Support> Adobe> Camera Raw> Settings.
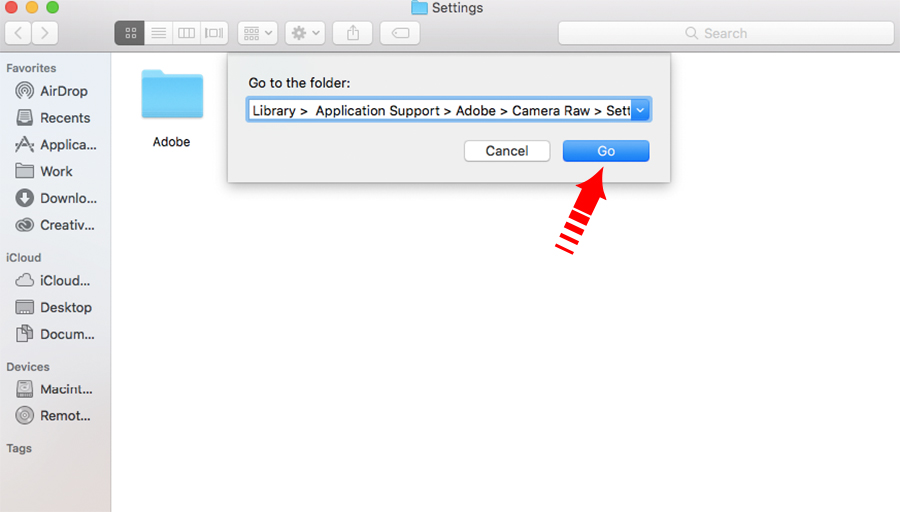
If you do not have, or do not see the library folder, you may need to press Shift+Cmd + G/Shift+Ctrl+G and paste the copied path specified above into the window "Go to the folder" because the user library folder may not be available.
For Windows users: C: > Users - [Your name] > AppData > Roaming > Adobe > Camera Raw > Settings.
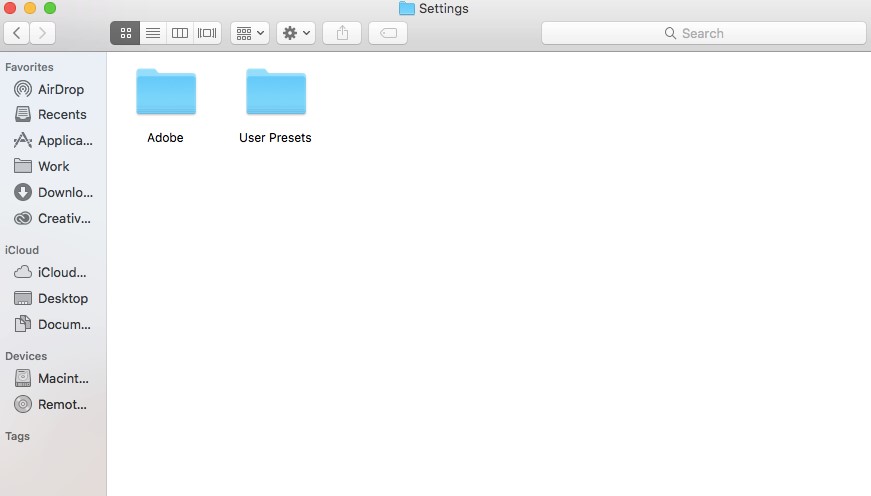
Next, you should move the folder with your Lightroom plugins to the Settings folder so that it becomes next to Adobe folder (to move it, you may need your login and password). Only if your LR presets are installed to this folder, they can be synchronized with Lightroom Mobile.
To synchronize you need to run Lightroom CC on your computer and first select the Presets button.
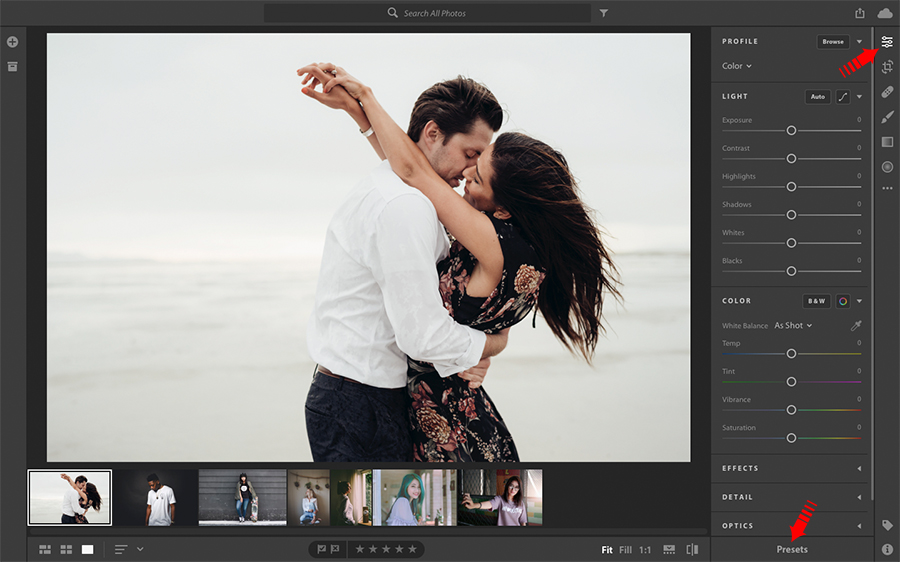
Then click the drop-down menu, located under three dots. Select "Import presets" from the flyout menu.
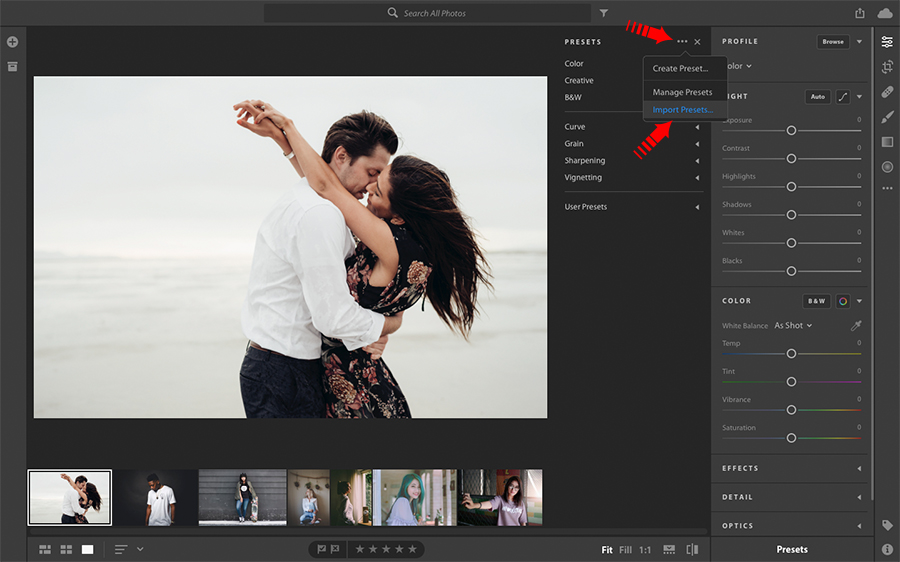
Import the presets from the location we’ve discussed above. Lightroom CC may automatically transfer your Lr presets from the folder on its own, so you can skip this step, if you see that the presets are already there.
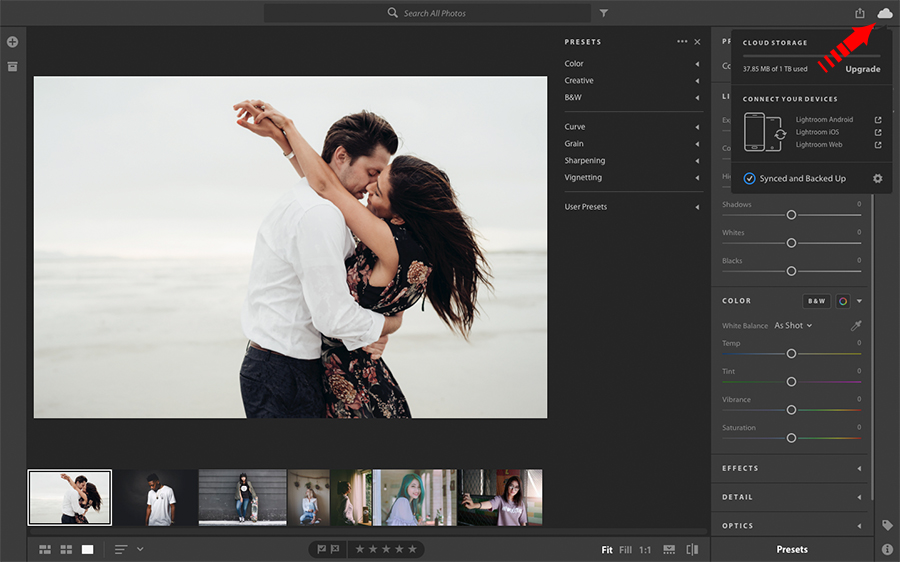
When you have done all the above actions, just in case, check the synchronization status by clicking on the cloud in the upper right corner. Your settings, as well as presets, now are synced with Lr CC Mobile.
To get those presets into the app, launch Lr CC Mobile and open the folder with your photos.
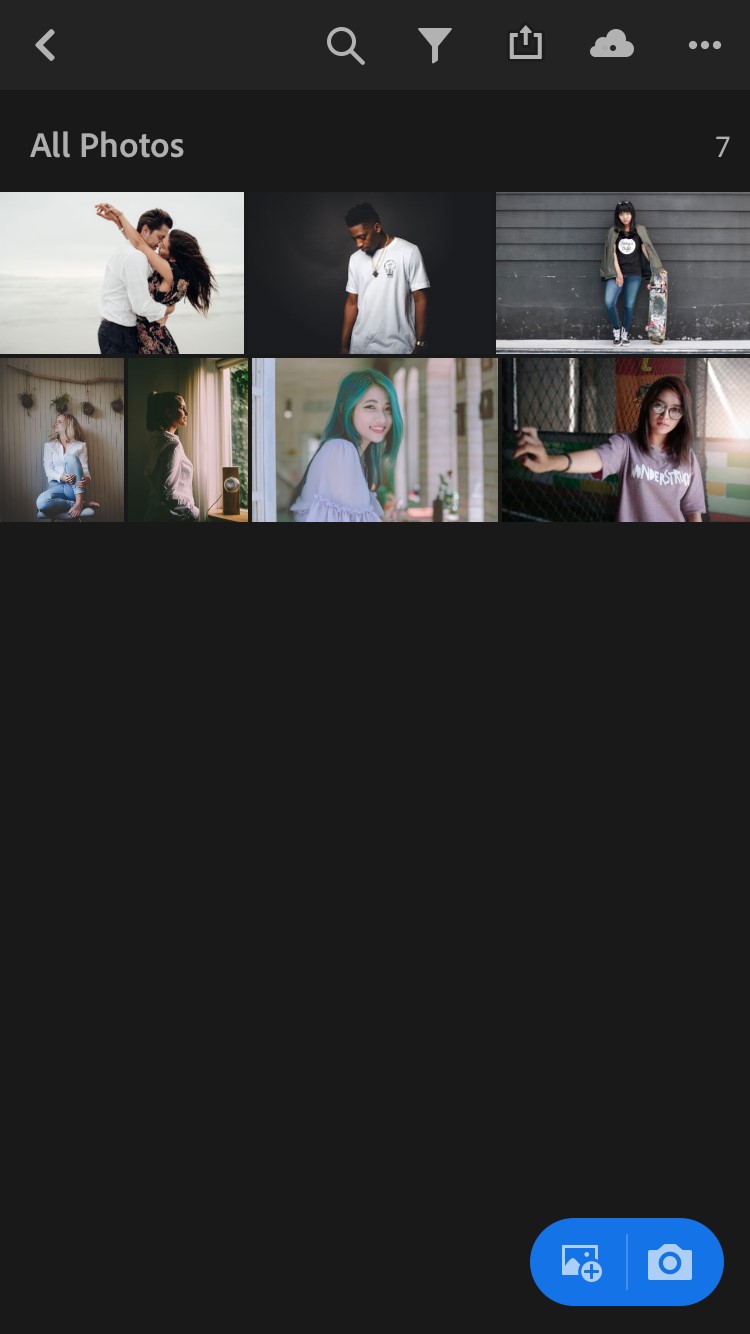
Select a photo that needs to be edited, and click on the “Presets” button.
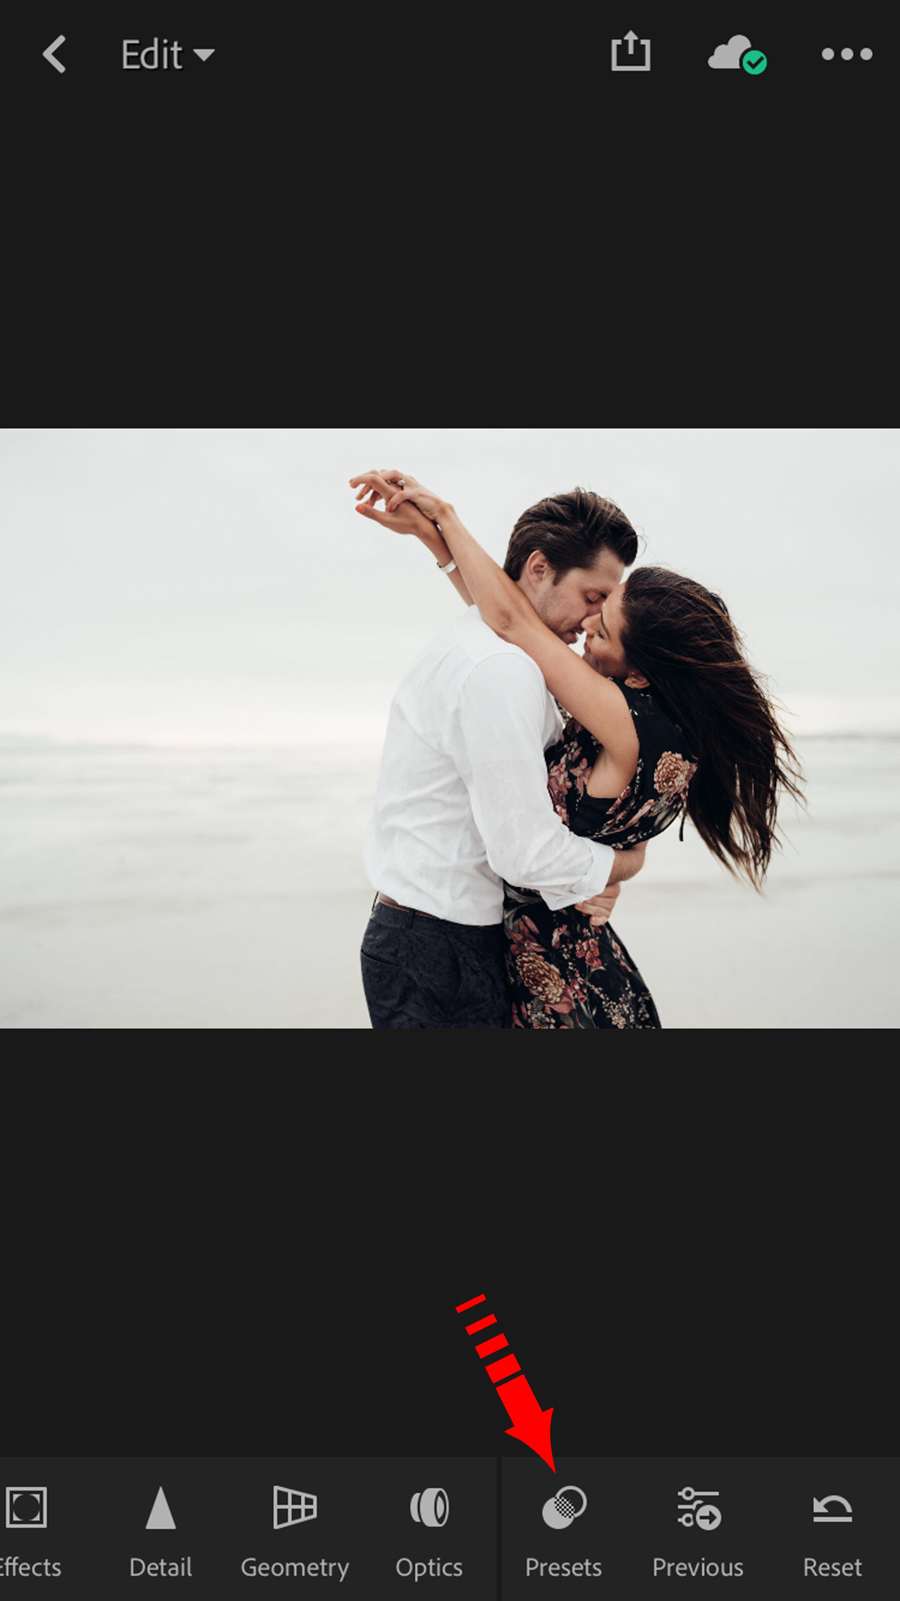
Swipe all the way down, and click on “User Presets.”
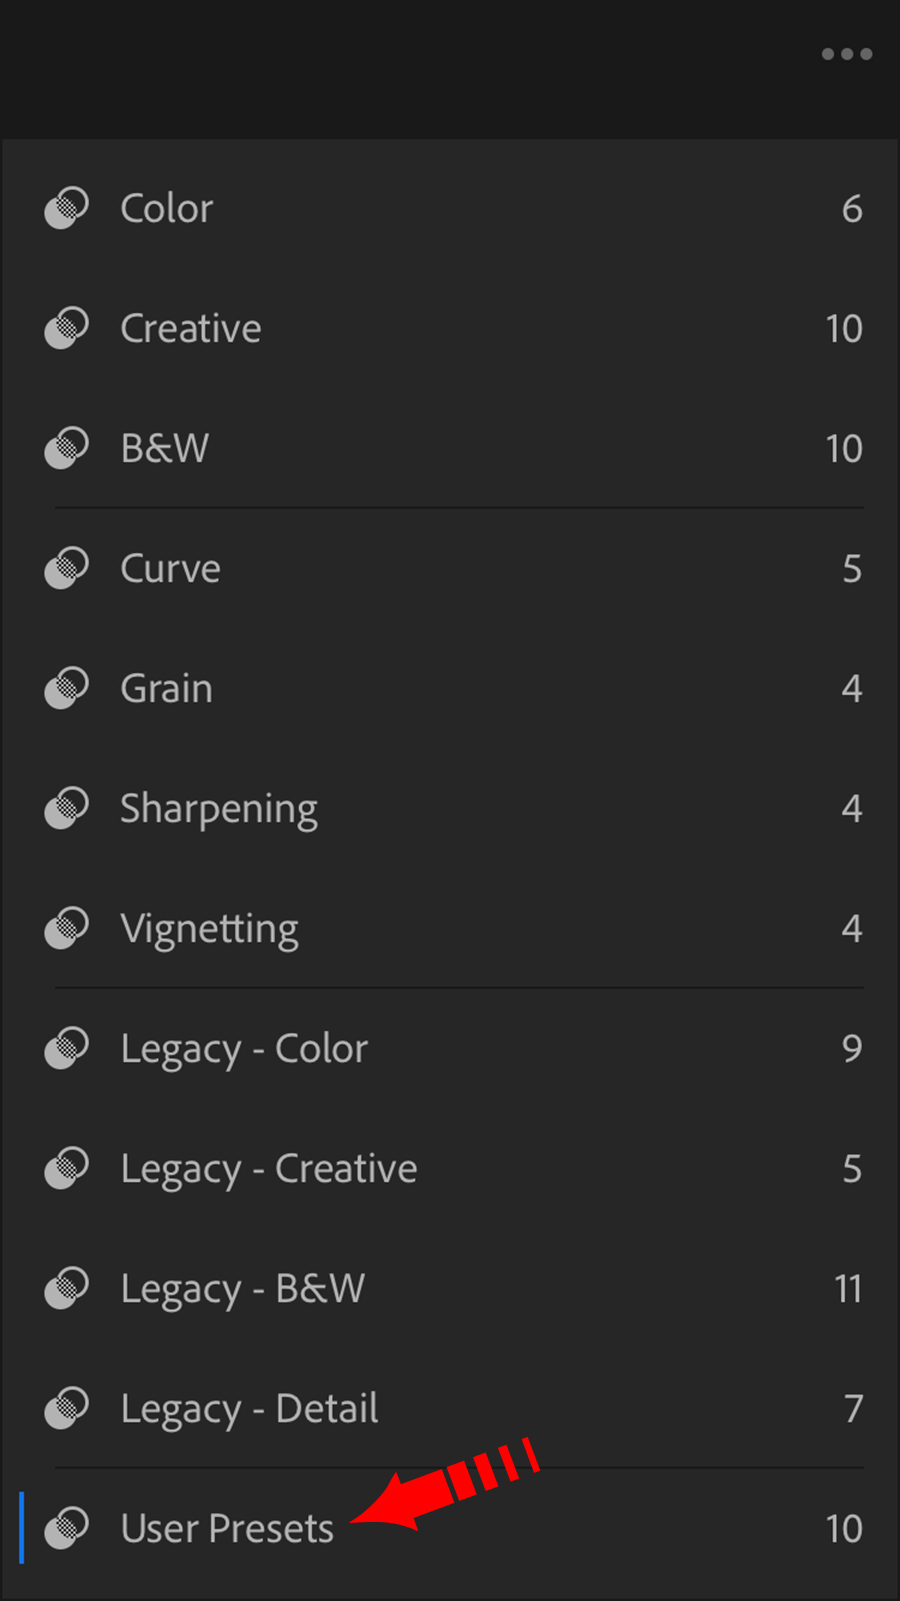
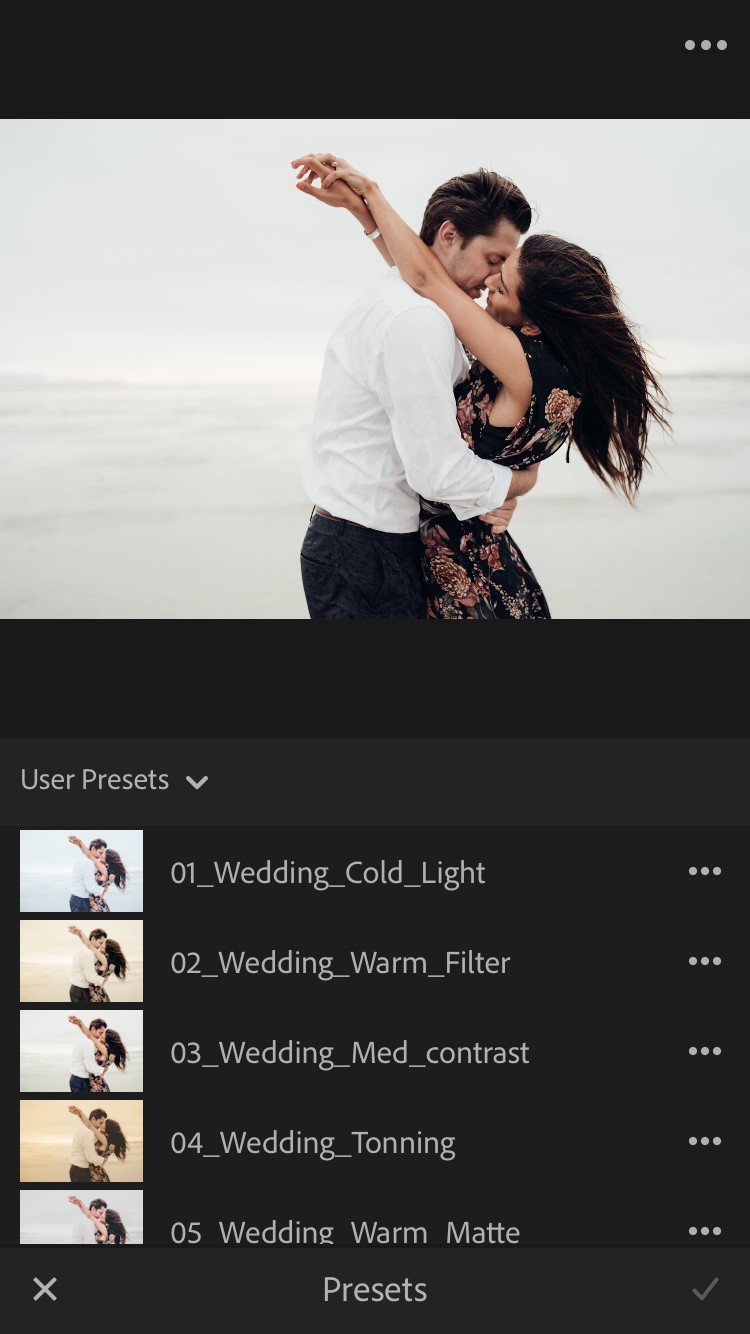
Click on the name of the folder with the presets you need.
Now you have all Lr plugins on your phone. As you can see, it takes only 5 minutes, but it simplifies editing photos in Lightroom mobile version greatly.
It might be difficult to find high-quality, free, mobile presets since, in most cases, you need to pay for them. To make your task easier, I have created a collection of the best filters that you can use without paying a dime. With them, you can make your photos look professional in a few clicks.