Nowadays, many photographers want to find out how to add text in Lightroom for a variety of reasons. Some shooters need to add metadata to an image before publishing it on the web.
Others want to add some text or titles to the shots for identification. Besides, many photographers use watermarks and identity plates for protecting images and preventing their illegal usage on the Internet.
The great news is that you can use Lightroom for adding text to images. The process is quite similar to a similar Photoshop procedure. You can add some text directly in the Print module. To do this, you need to layout an image as if it were on a sheet of paper and then save it using Print to File.

To add text to photo in Lightroom, you need to find the Page Setup menu in the bottom left corner of the window. Then, you need to go to the Paper Size tab and click Ok. Before this, you can adjust various configurations according to your preferences.
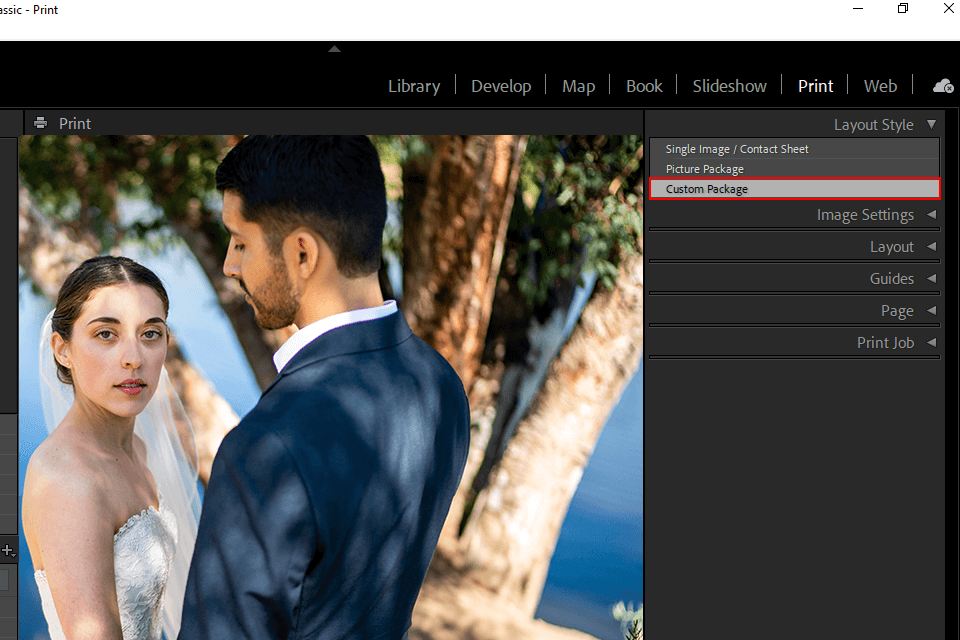
If you have never processed pictures in the Print module, you need to learn mo about how to use templates. First, find a template with the word “custom” in its name. It should be included in the Custom Package. You can drag images from the photo bin at the bottom of the window to the black-outlined picture slots in your print layout.
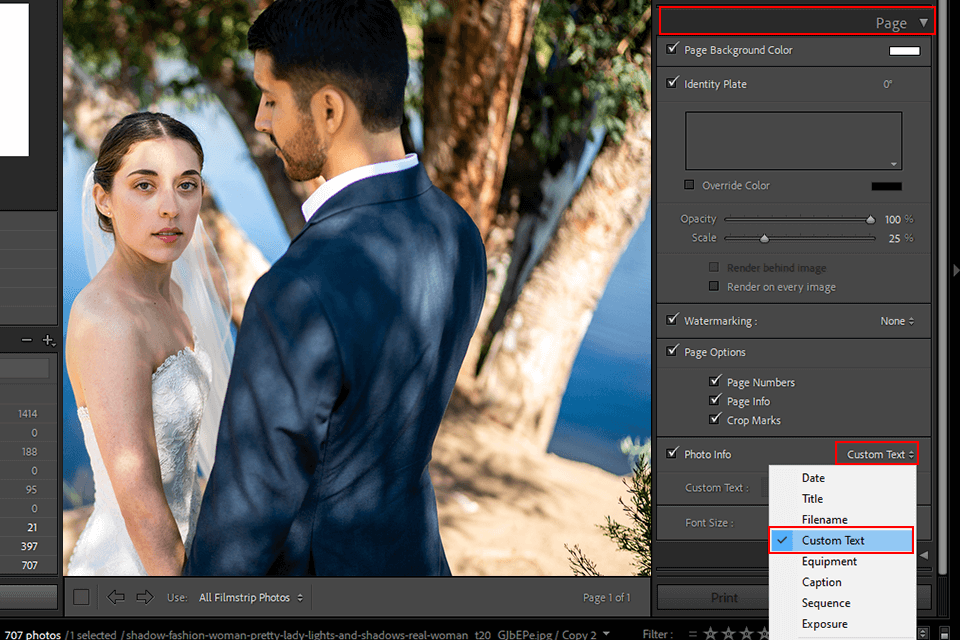
Then, you need to go to the Page menu and configure settings for displaying the text. You need to check the Photo Info box. After that, you can select the type of text in the drop-down menu.
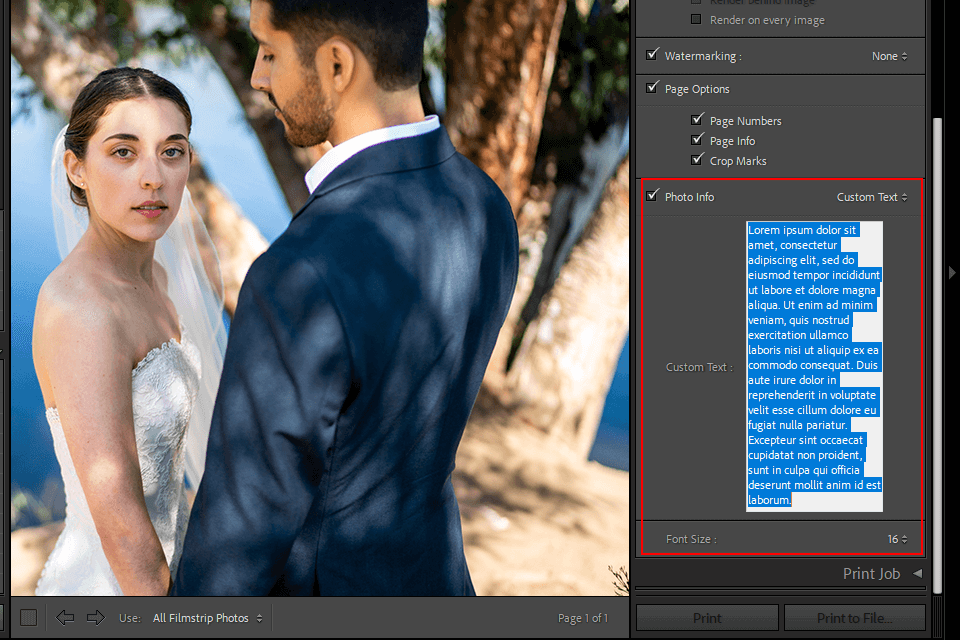
In the Custom Text checkbox, you can type any content. If you would like to customize the text, then we recommend you choose the Identity Plate option.
First, check the Identity Plate box in the Page section located on the right panel of the Print module. The next step is to activate the Identity Plate preview under the checkbox and select the “Edit” tab from the pop-up window.
This process might be too difficult for beginners, but they can contact professionals who know how to add text in Lightroom and can do the job quickly for an affordable price.
You can insert a photography watermark in Lightroom when processing your pictures. After creating a watermark by using this Lightroom tutorial, you can customize it by adjusting the options on the column located on the right side. You can change color, opacity, orientation, and fonts.
You need to use the Print module once again. However, in this case, you will use Lightroom as a watermark software. Choose an image you want to add metadata to. Then, go to File > Export. You will see a dialogue box for exporting pictures.
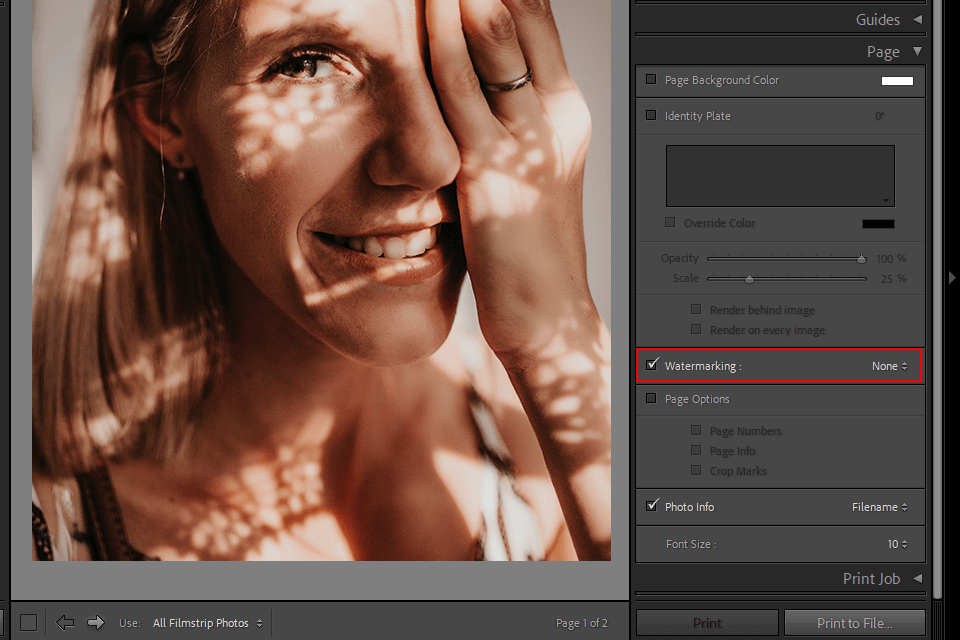
Here, you should check Watermarking. Then, you can select one of the available options. The default option is “no watermark”. After clicking on the button next to Watermarking, you will see a pull-down menu. You need to select the Edit Watermark option.
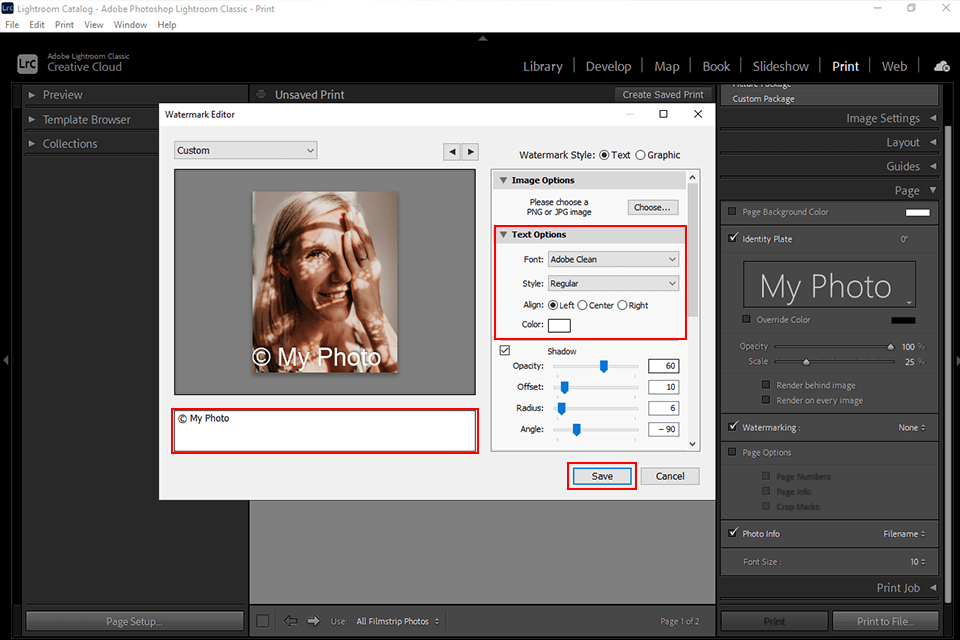
On the left side, you will see the Watermark Editor box that can be used for previewing a selected image. In the text box, type the text you want to add. Here, users often indicate the name of their blog, URL, image title, etc.
On the right side, you will see various options for customizing your inscription. You can change fonts, adjust alignment, color, opacity, drop shadow, etc.
Besides, you can use the batch-processing feature. This is really helpful when you need to add a watermark to multiple photos. To perform this task, use the fit or fill button above the Inset sliders. With the fit slider, you can resize text to fit the width of an image, whereas the fill option allows re-sizing text to fit the height and the width of the image.
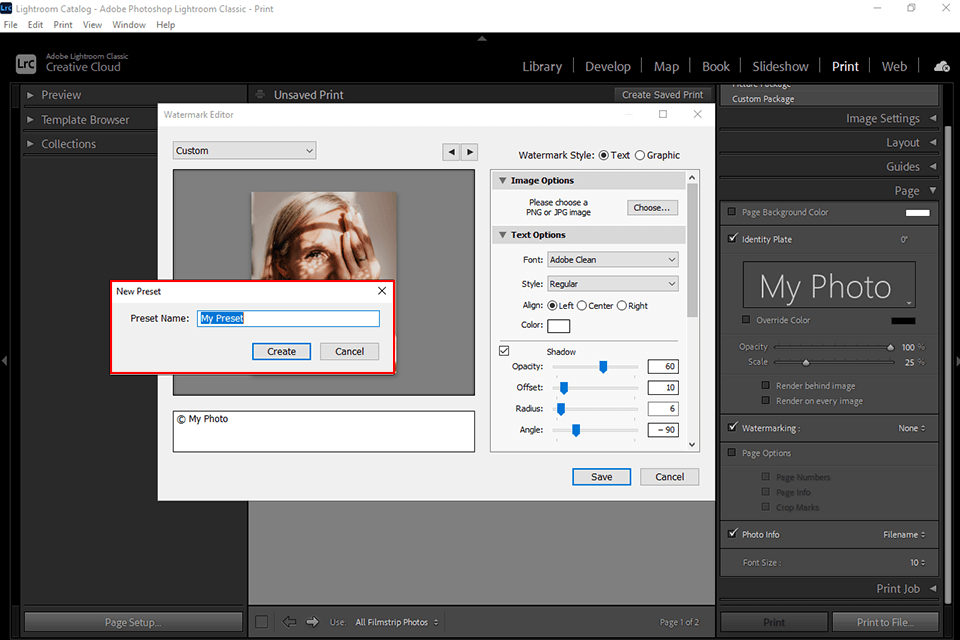
Press the Save button to save the watermark for future usage. Indicate the name of the watermark and download the file.
The methods described in our review will help you add text in Lightroom and master this well-known photo editing software. However, before inserting text or watermark into an image, you need to fix the photo defects and adjust its color scheme.
It might be difficult for inexperienced users to do it, however, they can apply these presets. To do it, you will need to add presets to Lightroom first. Click on the link above to save a collection of FixThePhoto presets and edit your photos in a few clicks.


