Video editors often apply LUTs for color grading in their routine. But if you are editing pictures, not videos, you can still apply LUTs in Lightroom to transform the images.
The process is similar to applying Photoshop actions and Lightroom presets for quick edits. LUTs will come in handy whenever you need to enhance the shot and add gorgeous effects.
Photographers apply LUTs in order to bring a particular look into their shots. For instance, if you are after a cinematic effect, simply use corresponding LUTs Lightroom for this purpose, which will be faster than tweaking color settings manually.
In Adobe Lightroom version 7.3, LUTs can be added via the Profile Browser option in the Develop tab. Now let me guide you through the process of how to use LUTs in Lightroom 7.5 and later.
STEP 1. Upload the picture to be edited in Lightroom. Then navigate to the Develop tab.
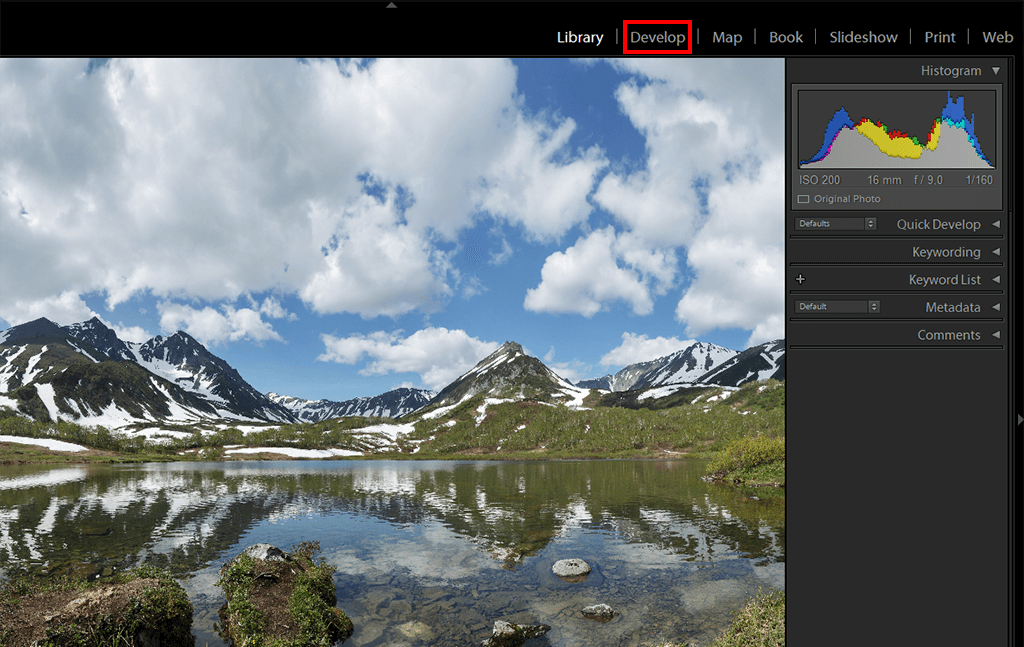
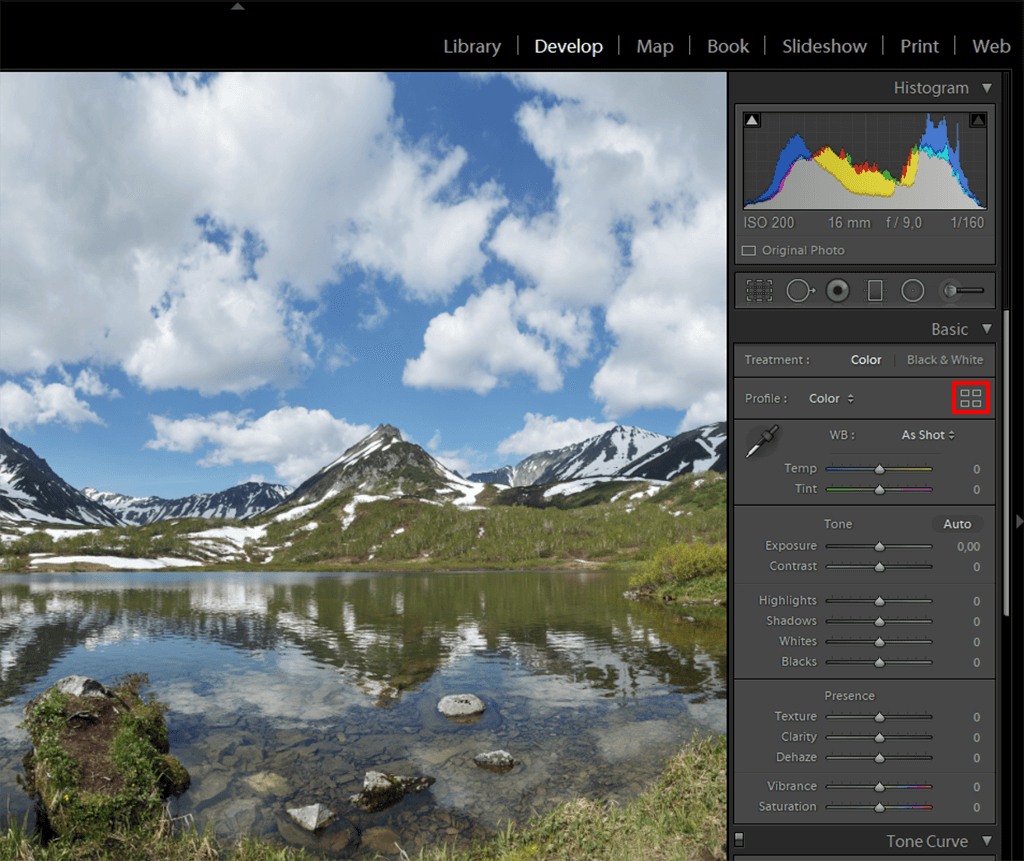
STEP 2. Click the Profile browser button.
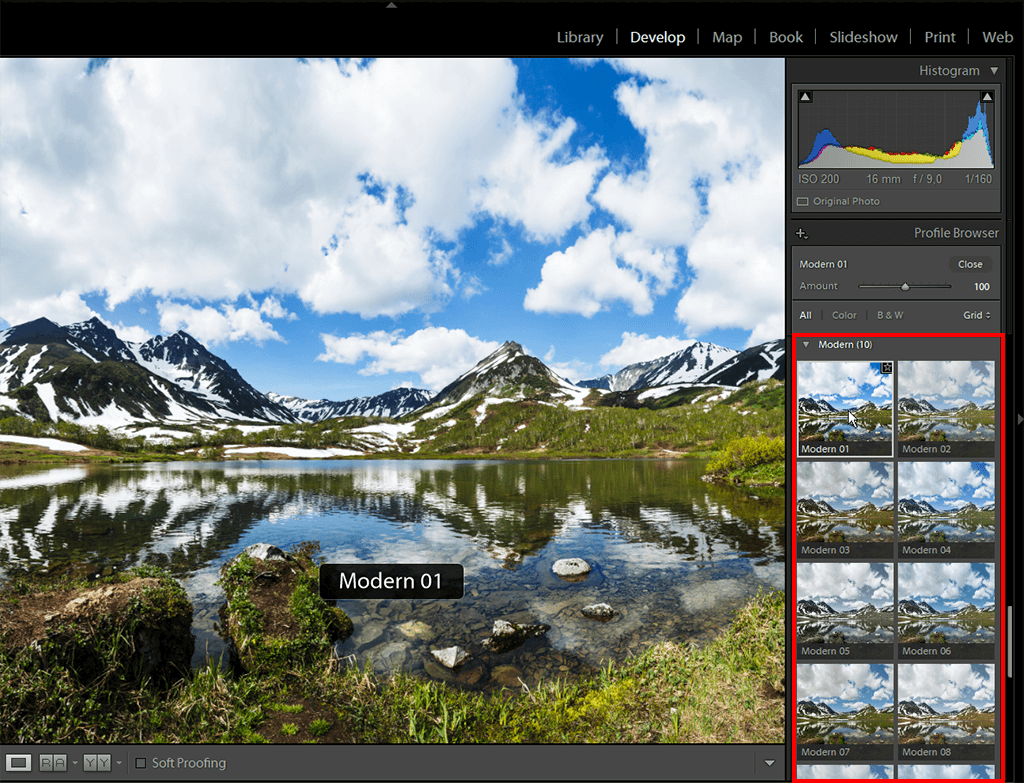
STEP 3. The added LUTs will show up in the Profile Browser. To apply the LUT, simply click on any preferred option.
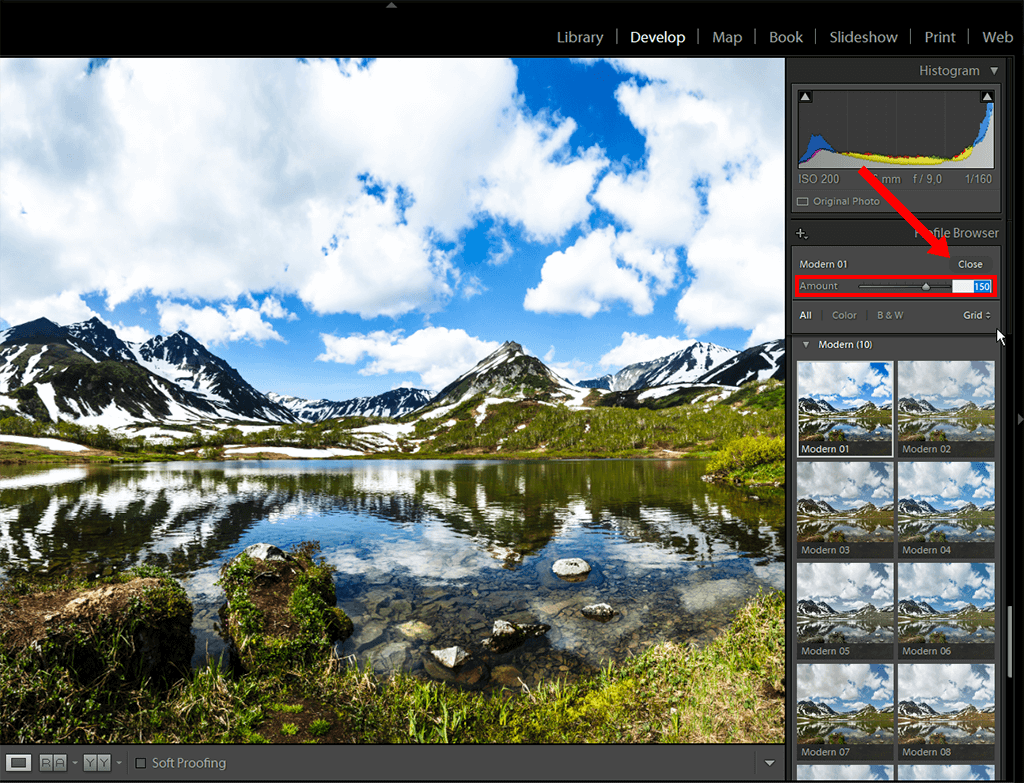
STEP 4. Use the Amount slider to tweak the transparency, specify the desired amount, and click Close. If you set the Amount slider to 50, you will lower the effect’s opacity by half. If you raise the value up to 200, the LUT’s effect will be doubled.
STEP 5. All done – here is the result.
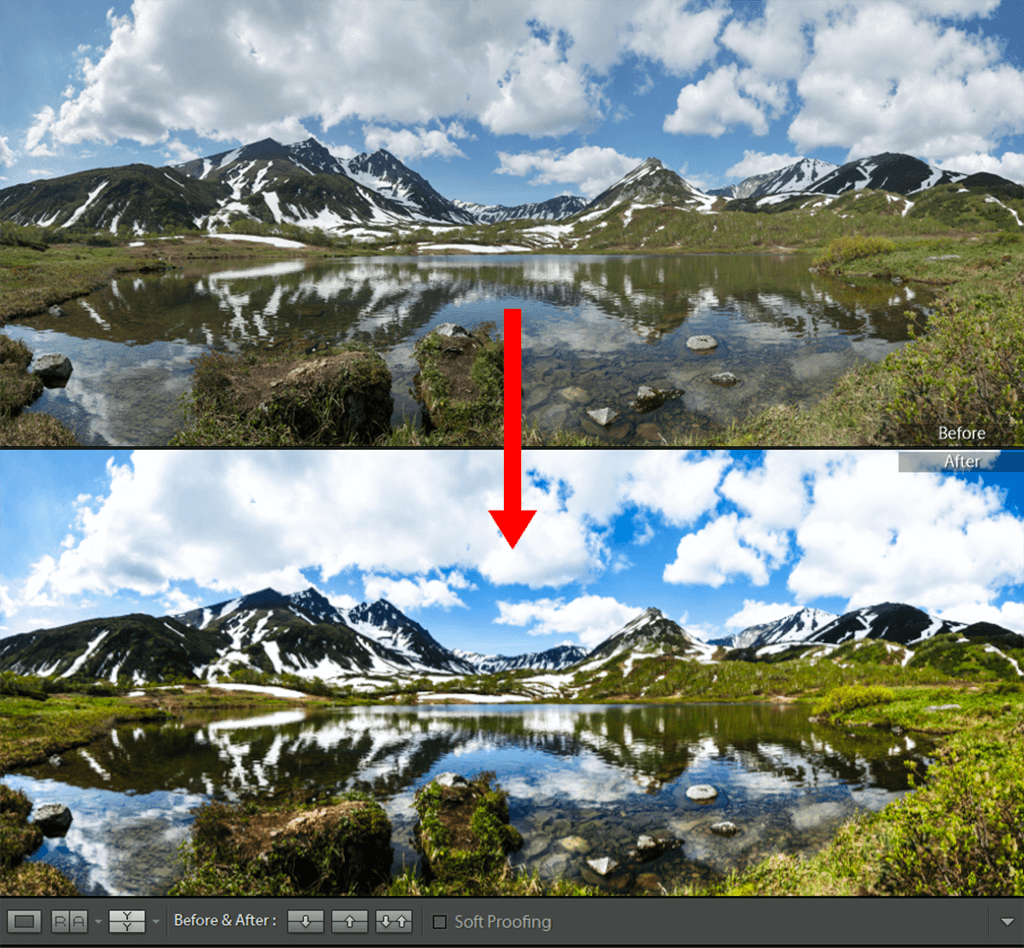
Important: If you have Adobe LR version 7.2 and earlier, mind that they are incompatible with new XMP profiles. Thus, if you are wondering how to add LUTs to Lightroom v.7.2 and earlier, use the ICC profiles integration from your package. This integration has a somewhat stripped feature-set because of how ICC profiles are incorporated into Lightroom.
If possible, upgrade to the newer LR versions and take advantage of the updated XMP profiles integration, which is now more user-friendly.
If you neither have the time nor the inclination to figure out how the LUTs are applied in this batch photo editor and what results to expect, approach the FixThePhoto color correction and editing service instead. The experts will perform all the necessary manipulations for you, tweaking shadows, tones, white balance and other color settings per your request.
With these LUTs, you are bound to get a quick and qualitative edit in a couple of minutes – no time-consuming manual tweaks required. Any LUT from this collection will be a lifesaver in case you have to deal with hundreds of shots from the wedding or a themed photoshoot.