The question of how to stack images in Lightroom comes to the mind of every user who stores a huge number of photos on their hard drive. Stacks represent an efficient method of managing a big photography folder that contains plenty of similar pictures.
By stacking photographs, you don’t make any changes to them, but rather introduce a better-optimized organization system. In this article, I’m going to tell you how to stack photos in Lightroom in manual and automatic modes and work with created stacks.
Stacking images in Lightroom is something that you can widely use for portrait photography or interior photography. It’s very useful for organizing your photographs that look similar or were taken within a single time frame.
When using the standard method in Lightroom, you remain in full control of the process and choose the photos you need, while in automatic mode, Lightroom stacks photos taken at a specific time by itself.

Pick the images you need to stack either in the Grid or Filmstrip sections of the Library tab. To do so, press and hold the SHIFT key and choose several adjoining photos or hold the Ctrl key and choose different pictures that aren’t next to each other.
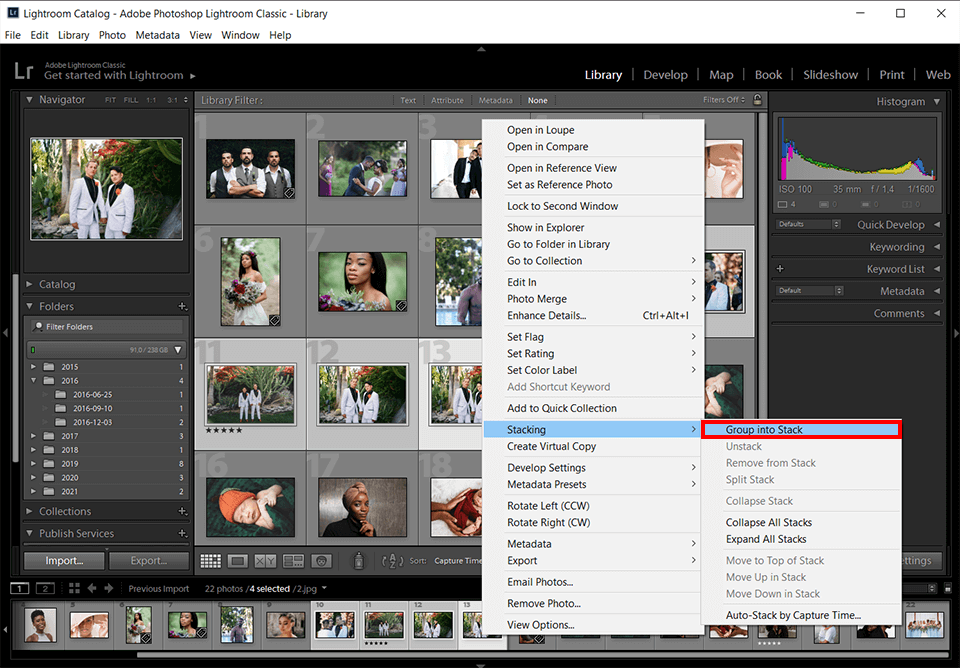
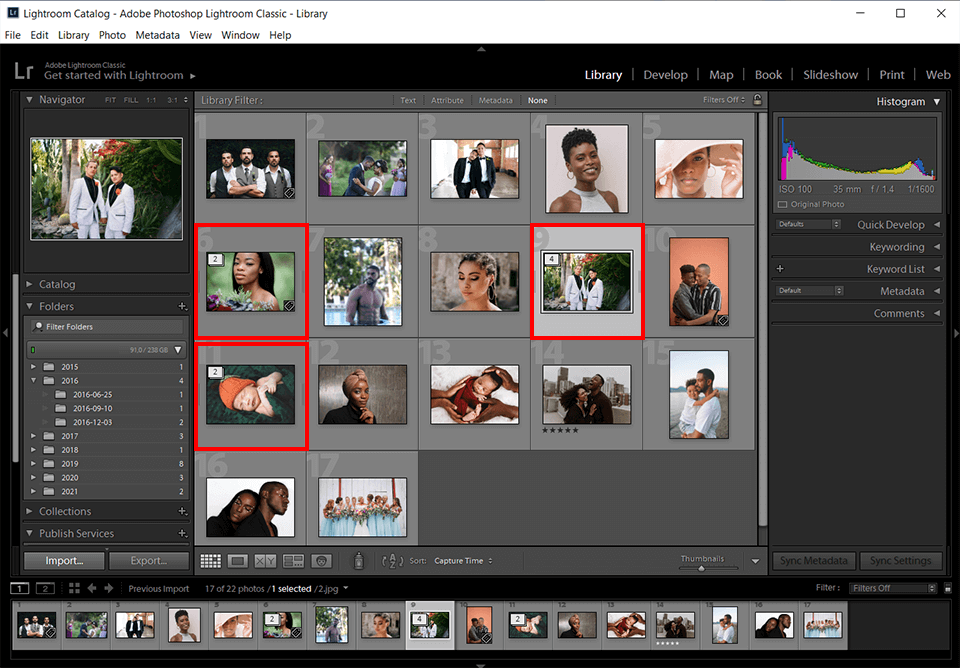
The newly stacked images will be sorted contiguously and show their order number in the thumbnail’s upper edge. The top image is marked “1,” the second image “2,” etc. Congratulations, now you know how to stack images in Lightroom!
When in Grid or Filmstrip view of the Library tab, click on a collapsed stack or choose any image of an expanded stack.
There’s no need to choose all the images contained within the stack.

Go to the Grid or Filmstrip section of Lightroom’s Library tab. Choose the needed stack and the images you want to be added to it.
Afterward, simply drag the new stack into the required album.
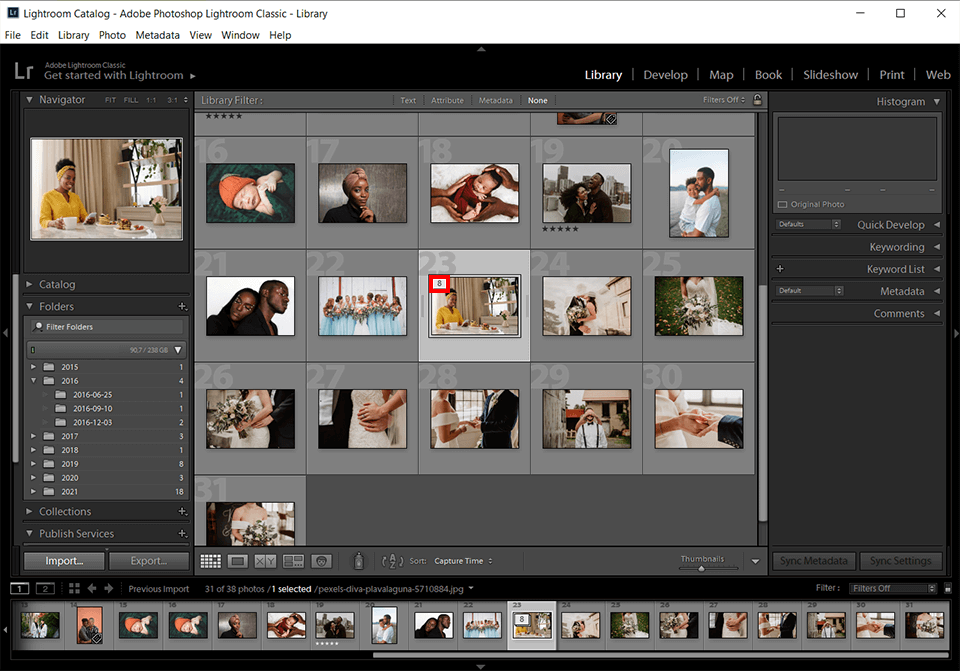
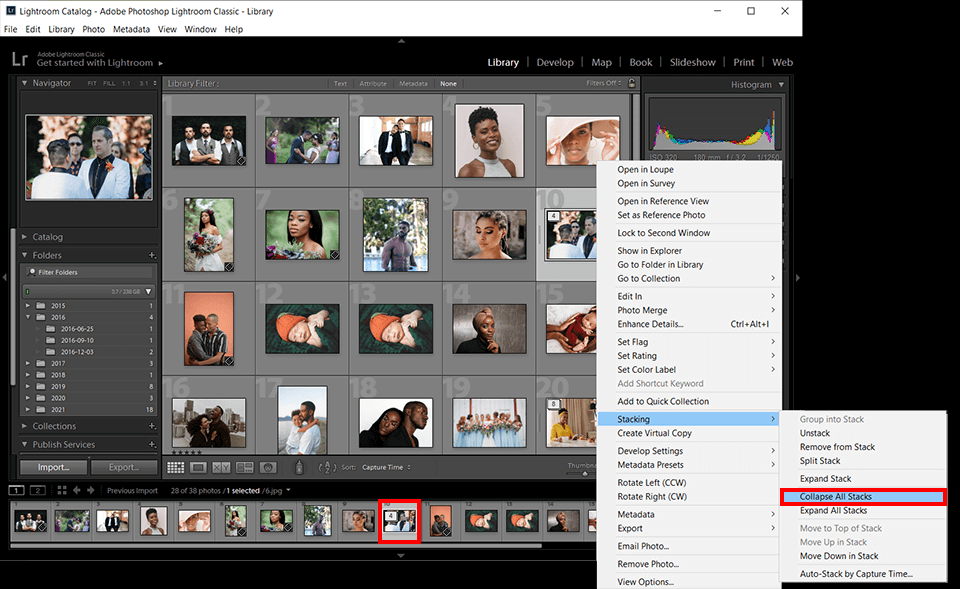
You can expand a stack to see all the images it contains. On the flipside, collapsing a stack hides all the other photos behind the thumbnail of the top image. You can check the overall number of pictures contained in a stack by looking at the upper-left part of the thumbnail image.
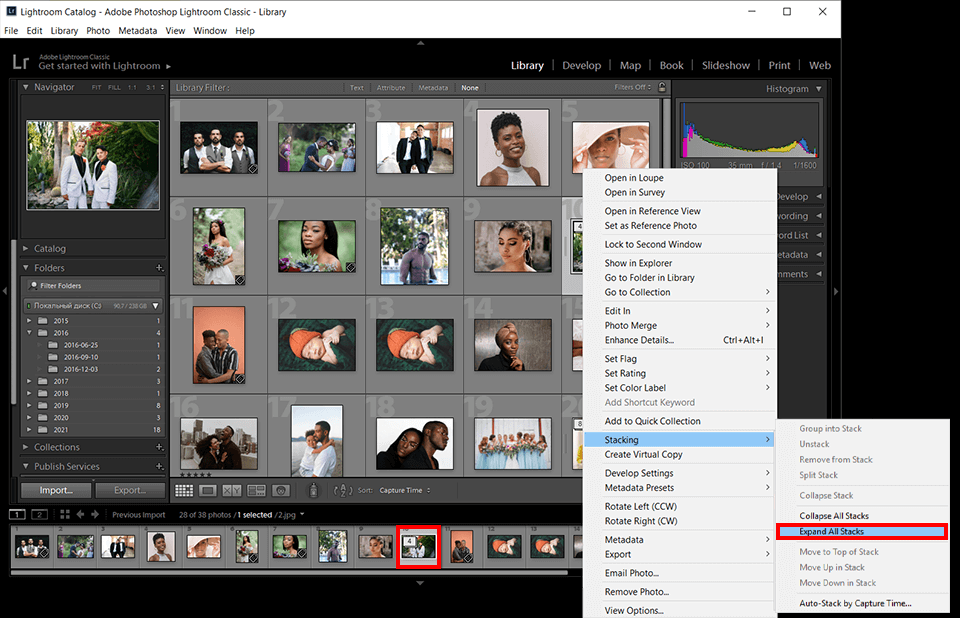
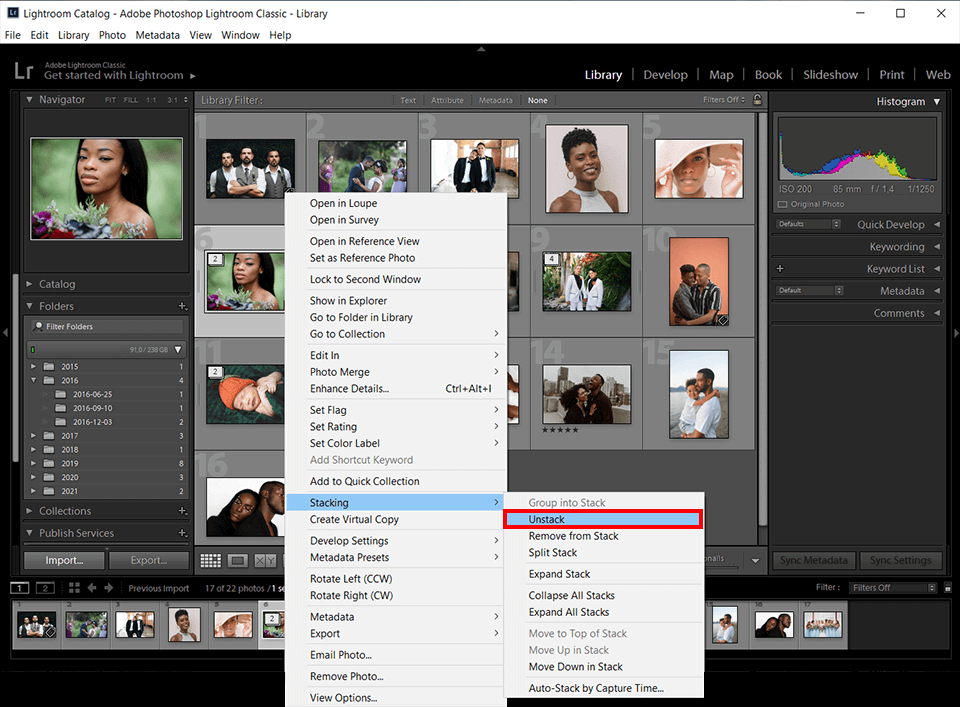
Go to the Grid or Filmstrip part of the Library module and perform one of the photo stacking Lightroom actions listed below:
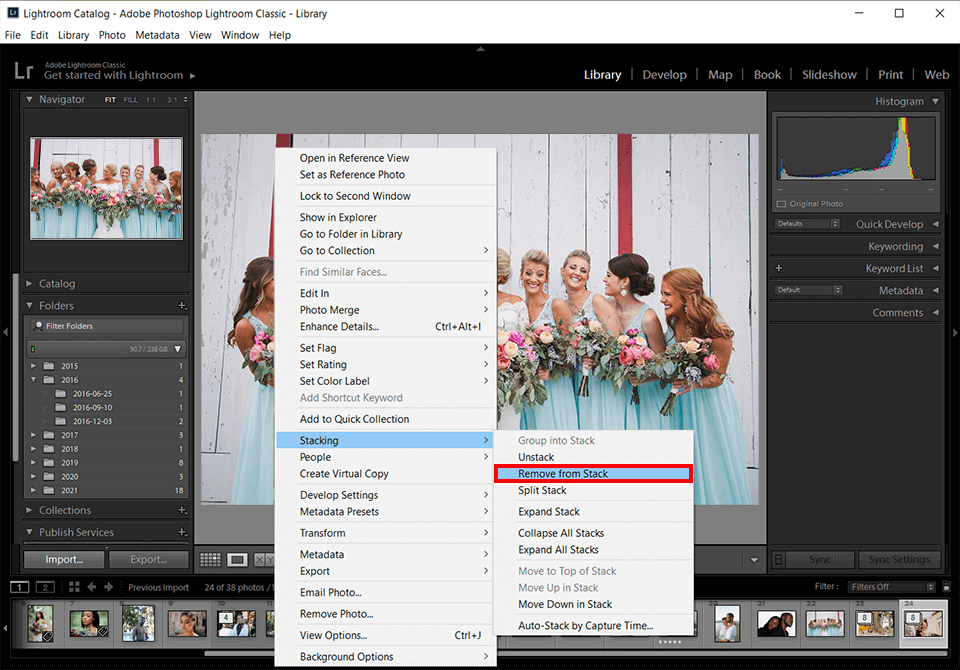
If you simply remove an image from the stack, it will still be stored in the Lightroom Classic library. Meanwhile, deleting the image allows you to make it disappear from both the stack and the library.
When selecting the “Delete Photos” function, the software also gives you the option to remove the image from your HDD completely.
When in Grid or Filmstrip view, expand the needed stack.
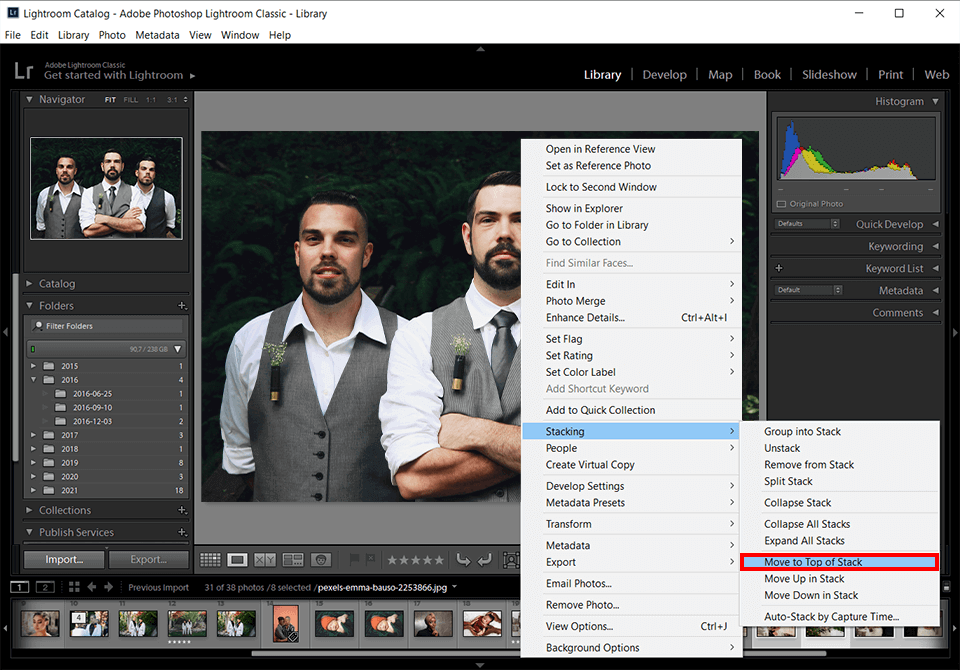
Go to the Grid of Filmstrip section of the Library, select an image from an expanded stack and perform one of these Lightroom stacking actions:
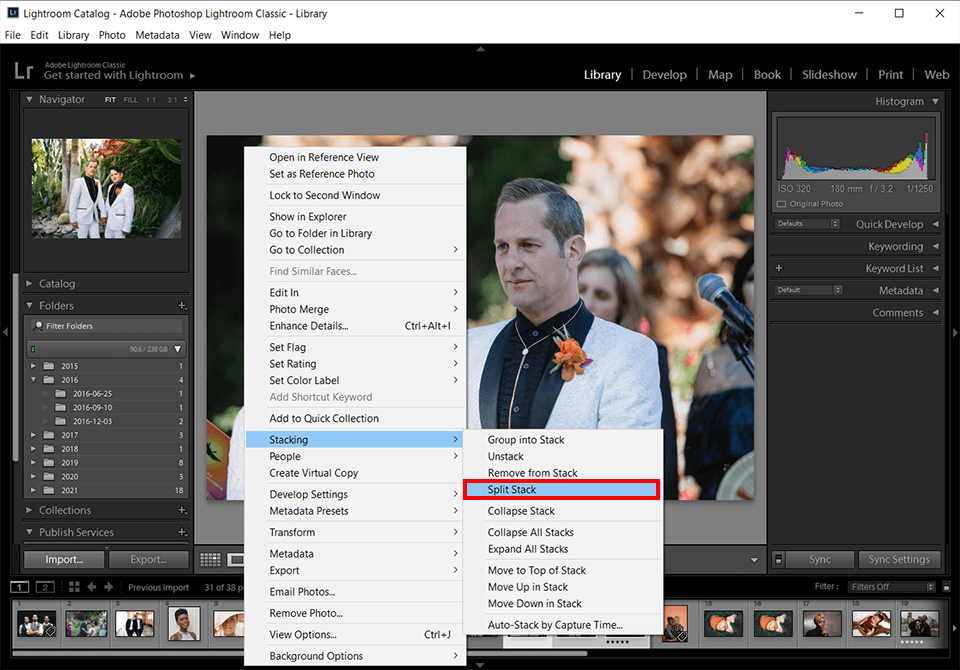
You can group images contained in a stack into a new stack thanks to the Split Stack feature. Once split, the old stack is left with the remaining images that were grouped into the created stack.
Other than that, you can stack photos in Lightroom based on the time of the shoot automatically. All photos taken within a specified timeframe (from 1 second to 1 hour) are divided into separate groups.
For instance, if you’re traveling and taking photos of various landmarks and it takes about 30 minutes to walk from one place to another, you can set the duration in Lightroom to 20 minutes and receive separate stacks for each location.
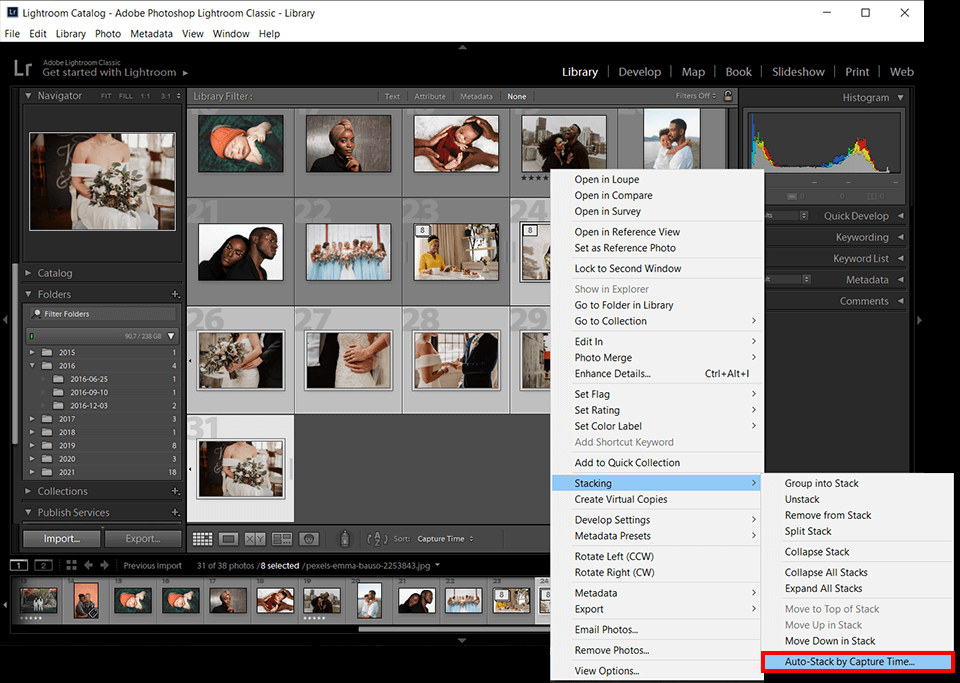
The shorter the capture duration you set, the more stacks you will create as a result. Conversely, the longer the duration, the smaller the number of stacks you’ll have to deal with.
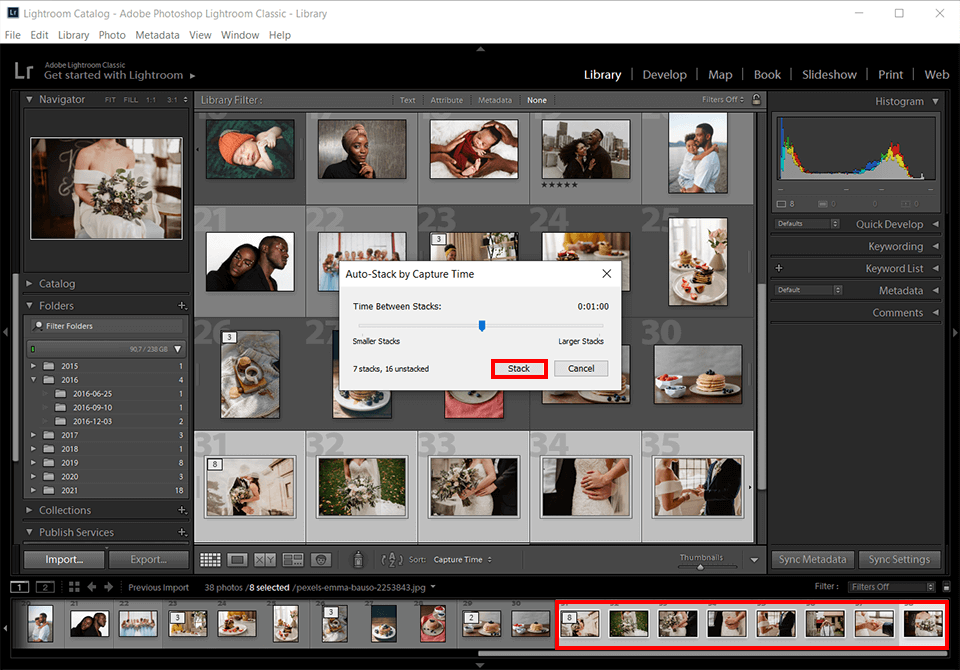
Lightroom Classic automatically stacks all images from a folder or collection without looking at which pictures are chosen in the content section or the Filmstrip.