Knowing which tool to use and where to find them will help you streamline your Lightroom editing process and achieve professional results. I’ve put together this detailed tutorial to explain how you can use mobile and desktop versions of the program.
Once you’ve imported RAW files into Lightroom, you can start editing. The most important part of learning how to edit photos in Lightroom is to know your way around the Develop module.
You won’t be able to follow free Lightroom tutorials without learning how to use its panels. Whether you are using the full version of the program, or Lightroom trial, the panels will be the same.


If you made the decision to learn to edit photos yourself, you can begin by finding the Basic tab below the Histogram at the top-right corner. The tab’s sliders are quite accessible and let you perform the most basic modifications. I highly recommend you to figure out how to read the histogram to ensure that your actions are correct.
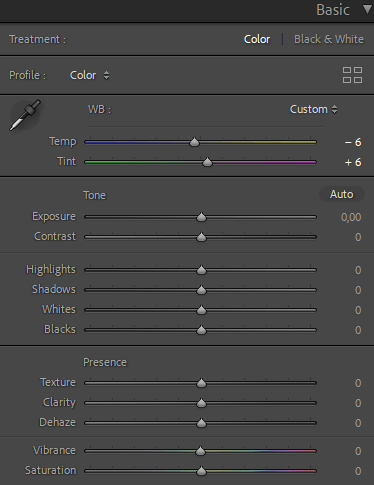
This can help you fix overexposed photos in Lightroom. In the majority of cases, the right and left ends of the graph aren’t supposed to touch the histogram ends. Otherwise, the relevant detail would be lost and the tones would be ‘clipped’. This panel allows you to perform the following changes:
Pro tip
By holding down Alt (on Windows) or Option (on Mac), while left-clicking the top of any Panel, you can switch Lightroom to Solo Panel mode and have just one Panel open at a given time.

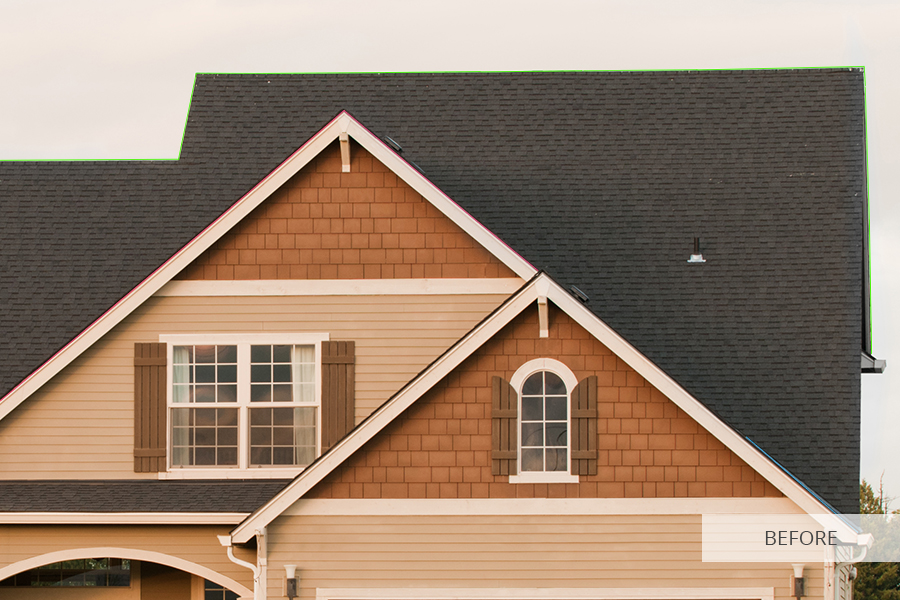
All images should be straightened and cropped. If there are some problems with composition or the picture features unnecessary areas, it can be instantly fixed with the Crop Tool, which is actually the first tool under the Histogram. Alternatively, press “R” to activate the tool.
In Lightroom, you can crop your photo quickly and easily.
Just drag the guidelines where you need them. You can move corners, sides, top or bottom. If you want to crop to a standard aspect ratio, e.g. 1 x 1 for a square format, go to the Aspect menu and select this aspect ratio there.
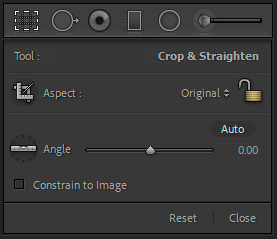
Another handy Lightroom tool allows you to straighten your images. Find the Straighten slider and click on Auto above it. The software will rotate the image in the crop box automatically, straightening it horizontally and vertically.
You can also straighten the image yourself or correct what came out after auto straightening. To do this, move the Straighten slider left or right. Pay attention to the grid lines, they will serve as guidelines in this case.

.jpg)
Next step is learning how to remove noise in Lightroom. Noise reduction, clarity and sharpening are closely connected with each other, so they are conveniently located side by side in the Detail and Effects Panel. By modifying these parameters, you may effectively increase or decrease their intensity.
Move the Dehaze slider to the right to get over hazy areas of a picture to bring out the intensity of colors and details. Move the Noise Reduction slider to the right to reduce spots of grayscale noise. Regulate Clarity to increase midtone contrast in your Lightroom edit.
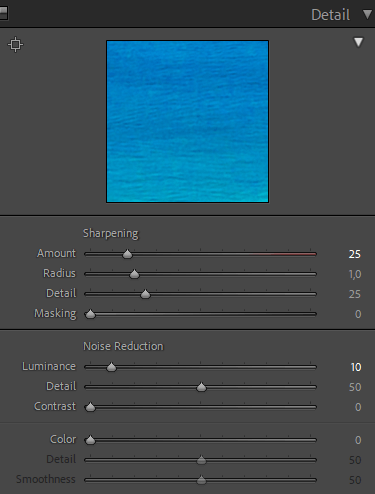
Regulate the Sharpening sliders to raise the sharpness of the whole picture. This is an especially useful tool, if you didn’t use any tripod, when taking photos. By using this panel you can increase the amount, radius, detail, as well as masking.
Pro tip
Before making any sharpening adjustments, you should view a photo at full size (100%). Do so by right-clicking your picture and selecting “View at 100%”.

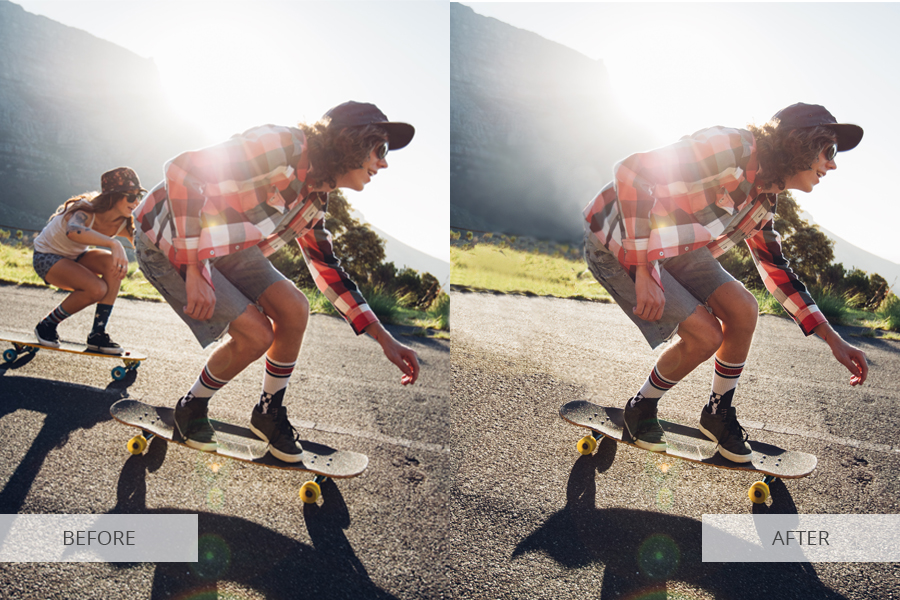
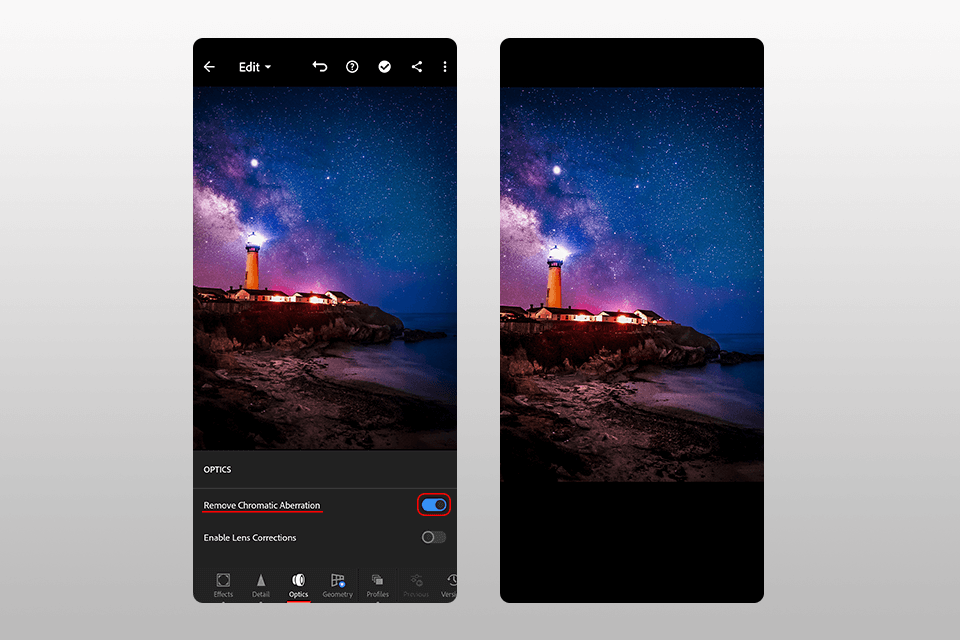
When editing photos in Lightroom, you shouldn’t forget about fixing lens distortions. Deal with the distortions caused by your lens, namely 'converging verticals', vignetting and chromatic aberration through the Lens Corrections panel.
You need to check the Enable Profile Correction box if you want your lens to be included in Lightroom's lens database. Generally, Lightroom is capable of reading EXIF data and recognizes the lens correctly.
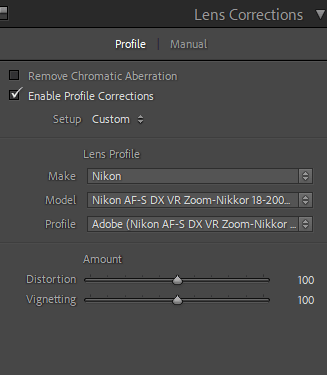
In case you are unable to see your lens in the database, you may effortlessly perform manual corrections. With the profile checked, tweaking, vignetting and distortion processed are easily fixed with sliders.
Lr also offers a range of tools to apply local adjustments. They can be found below the Histogram, right next to the Crop Tool.
Use a Graduated Filter in Lightroom to alter the pictures with a linear gradient, for instance, to imitate the effect of an ND grad lens filter.
The Radial Filter has almost identical function along with letting you generate elliptical or circular gradients.
Spot Removal Tool allows you to remove objects in Lightroom, if you have any distracting elements.

The Adjustment Brush is commonly used for wedding photo retouching, and is designed for painting modifications into particular areas of a picture. Press O on the keyboard and the masks for these modifications will become visible. Also, the brush for Radial and Gradual Filters will be enabled, so you can tweak the mask.
Pro tip
The Radial and Graduated Filters also Mask Overlay. You can easily alter the color of this overlay by holding down Shift +O, or completely hide it, pressing O on the keyboard.
The tonal range in the shots is represented by the tone curve. The top right corner is responsible for highlights, the bottom left – for shadows, the middle – for midtones. The midtones are additionally separated into dark and light parts.
To change the tone curve, you need to find and play around with the diagonal line located between the left corner and the top right corner. Using this panel, you can also add fade effect in Lightroom.
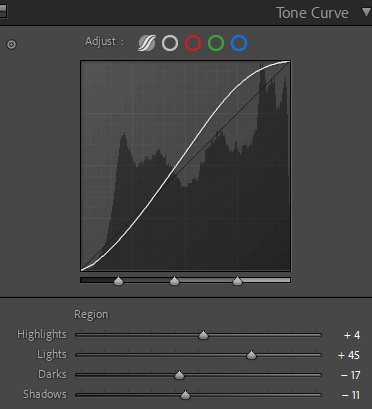
At first glance, all these manipulations seem quite complicated, but after trying, you will understand how easy it is. First, select the tones that you need to change. For instance, you need to darken the mid-tones. To do this, simply click on the middle part of the Tone Curve and slowly move it down.
Your photo will begin to darken as the curve moves. This is similar to the process of decreasing the Exposure on the Basic Panel. If you need to make shadows brighter, just click on the left third of the Tone Curve and slowly move it up. The shadows in the picture will become brighter.
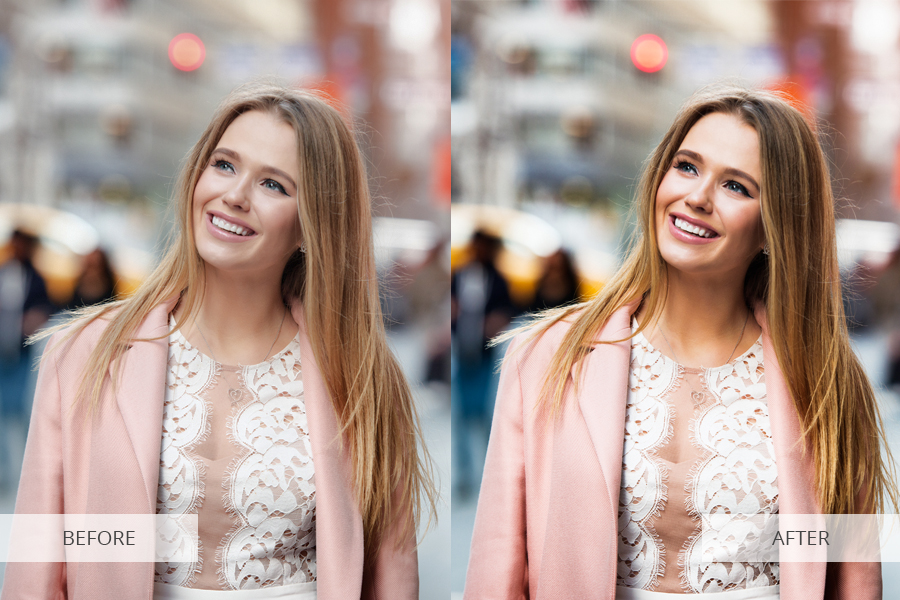
Any color that exists in the world is a combination of different values of hue, saturation, and luminance. The Lightroom developers allow you to adjust these values separately. Try to create or adjust any color and enjoy complete creative control over the color gamut of your photo.
Hue is used for adjusting the tonal range of a color. This works by replacing a color with a neighboring tone on the color wheel. For example, the blue hue slider can be used to shift all the blue tones towards aqua (Hue -100) or towards purple (Hue +100).
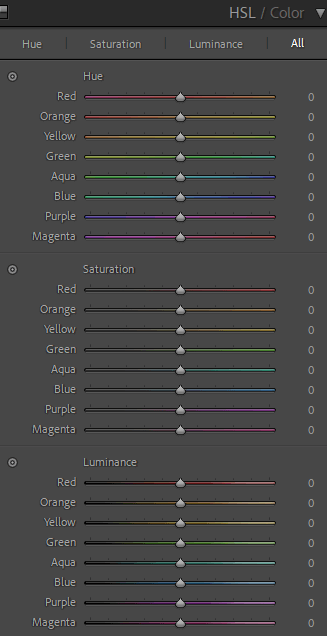
Saturation, in other words, can be called the intensity of a color. For example, if you set the Orange Saturation to -100, this will remove all the orange tones from your image. A value of +100 for the same parameter will maximize the orange color.
Luminance intensifies the colors turning them into more vibrant or muted.
Pro tip
There is a Color Picker next to Hue, Saturation, and Luminance sliders. By selecting this tool and hovering it over a specific color, you can saturate/desaturate it in your photos.

To contribute to a more singular and unique look of the image, you have to learn how to use split toning in Lightroom. Thus, you’ll tweak the colors in highlights and shadows separately.
Often, when you edit photo in Lightroom, you notice that yellow color is over the limit in highlights because of street lamps. Another variant is too much blues in the shadows due to the puddles. That’s where split toning, with its ability to modify these areas separately, comes in handy.
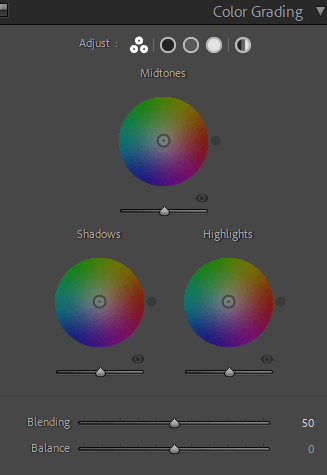
Furthermore, Lightroom developers added a balance slider to this tool. It ensures that you achieve a proper and accurate shift from shadows to highlights. The great advantage of split toning is that it doesn’t have any rules. You may experiment with colors in whichever way you like which will help you edit portraits in Lightroom faster and turn average shots into stunning photos.
The Camera Calibration Panel is frequently underestimated when learning how to edit photos in Lightroom. It is connected with the fact that these effects aren’t fully clarified and the panel doesn’t occupy primary places in the list of panels. Nevertheless, it may assist you in bringing the color grading of your imagery to the next level.
Altering these parameters is different from those in the HSL panel since they influence the look of blue, red or green colors on the whole. Once you alter blues in the HSL panel, the blue parts of the picture will be affected. But when you alter blues in the Camera Calibration panel, all blue pixels are affected as a unit. The result of the alterations depends on the picture itself.
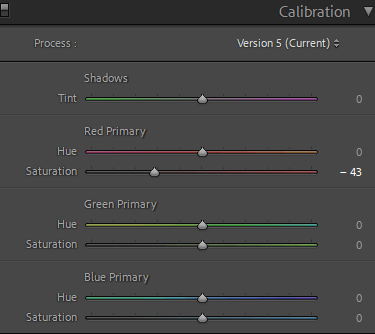
As for the Shadow Tint, its effect is more direct. It alters the shadows’ color cast while green and magenta neutralize each other.
To spice up your photos, try increasing the Saturation with the Blue Primary slider. If you want to edit landscape photos, adjust the Hue and Saturation settings with Green Primary. In case you need something special for photos of people or mesmerizing sunsets, play around with the Red Primary settings.
Pro tip
Besides playing with Saturation sliders, you may also try to switch the profile from the default “Adobe Standard” to Camera Vivid. Doing so, you will not raise saturation but also make shadows darker. In most cases, you have to make additional changes by increasing shadows and/or blacks. Such compensation is done in the Basic panel.
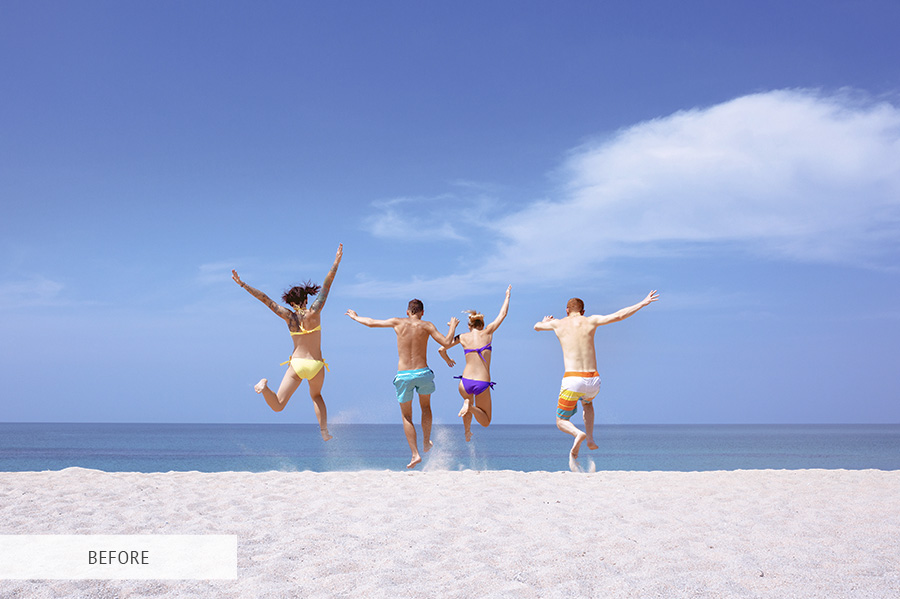
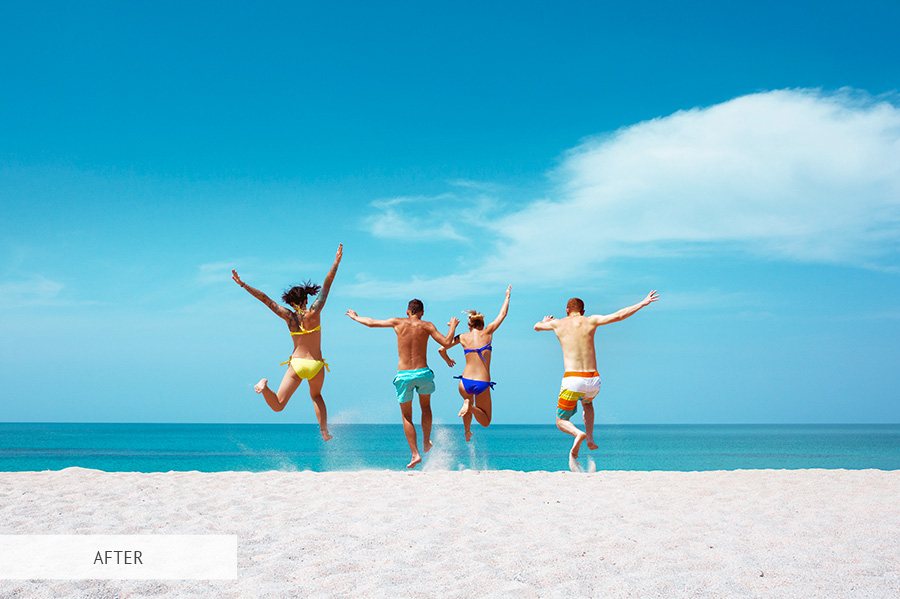
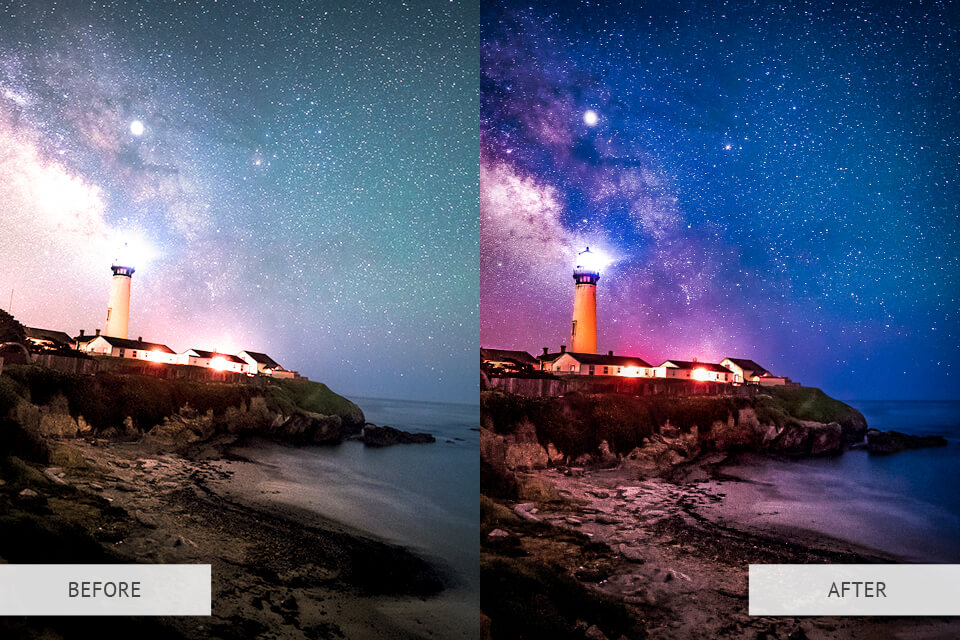
Congratulations, you have finished! Check twice whether there are areas which need to be enhanced. Slightly tweak some parameters if you see that something is wrong. Still, I believe that it’s important for beginners not to go overboard and stick to the original version of a picture as much as possible.
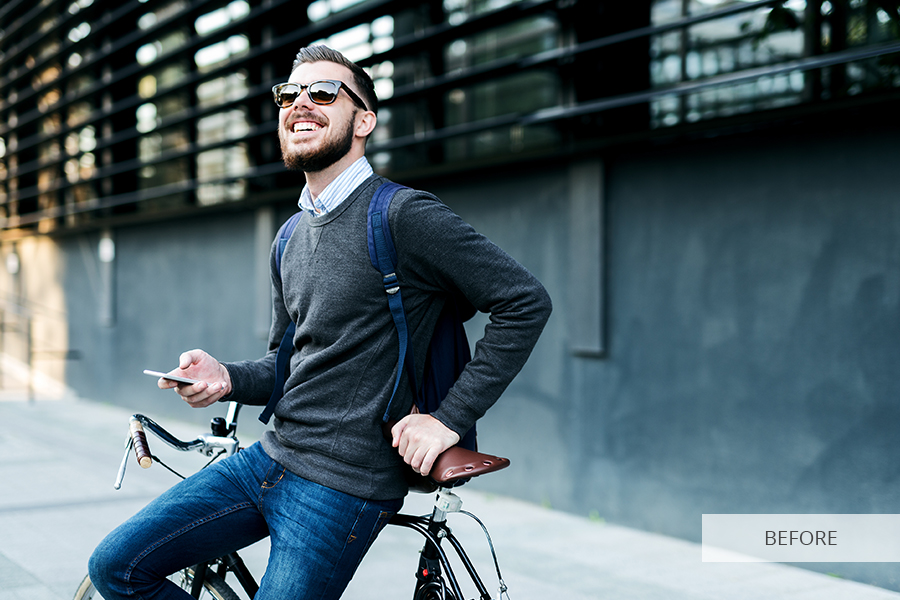
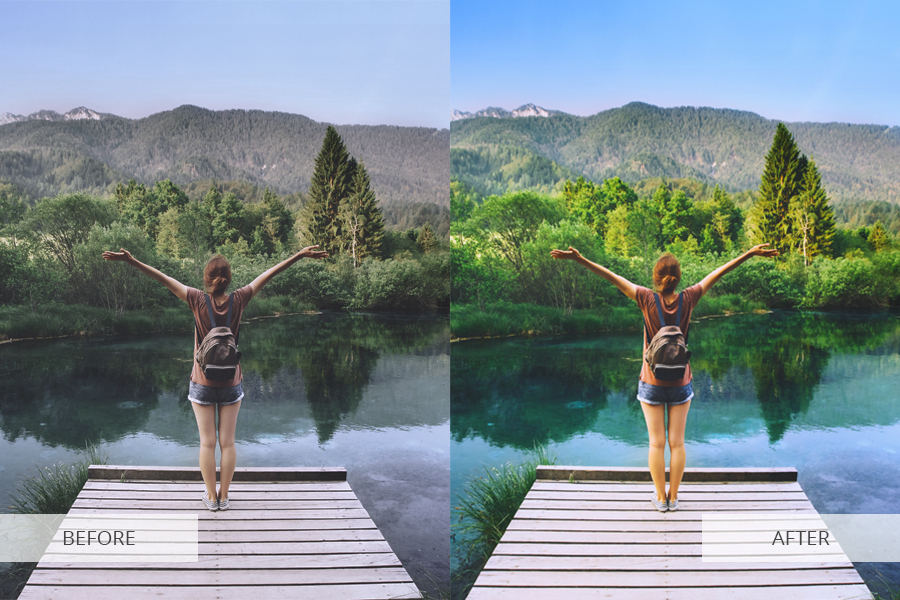
To compare before and after pictures, press the backslash key () once. As a result, the “Before” picture would appear. Press the same key again to view the “After” picture.
You can also use Lightroom plugins to extend the functionality of the program.
Lightroom mobile app is a full-featured tool that stands out among other free photo editing apps.
You can download and install it for Android, iPhone, and iPad. It supports RAW and JPEG formats. If you have a Creative Cloud subscription, you will have access to extra editing features for performing local adjustments, spot healing, and many more.
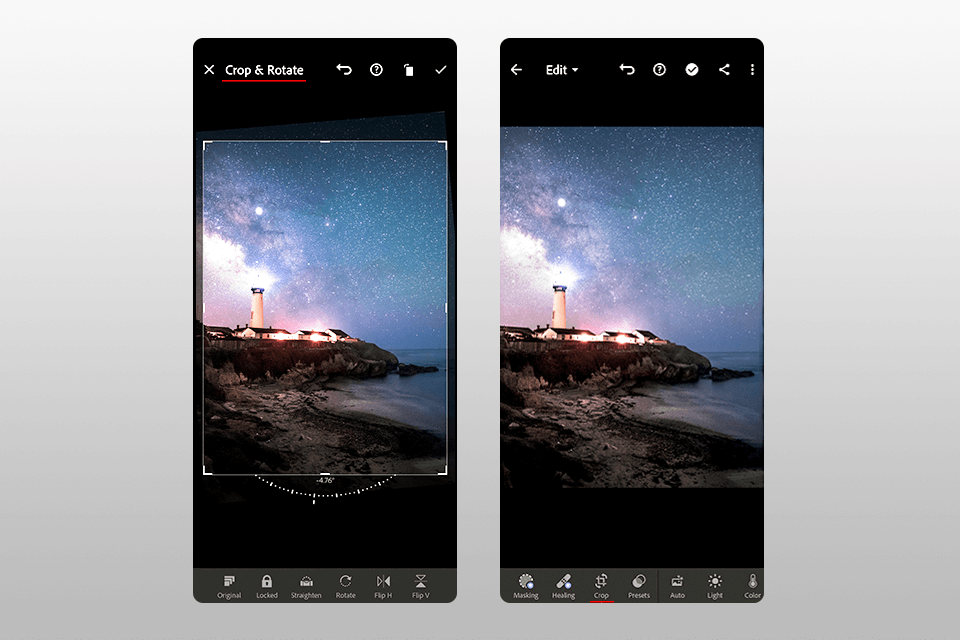
If the composition of your photos is distorted, you can apply straightening and cropping. Using the Crop tool, select the required aspect ratio from the menu. You can also do this by dragging check markers. Use the rotary dial to make your photo straight. After this, save your Lightroom edit result by clicking on the check mark.
Pro tip
You can get terrific RAW images, using Lightroom’s camera function.
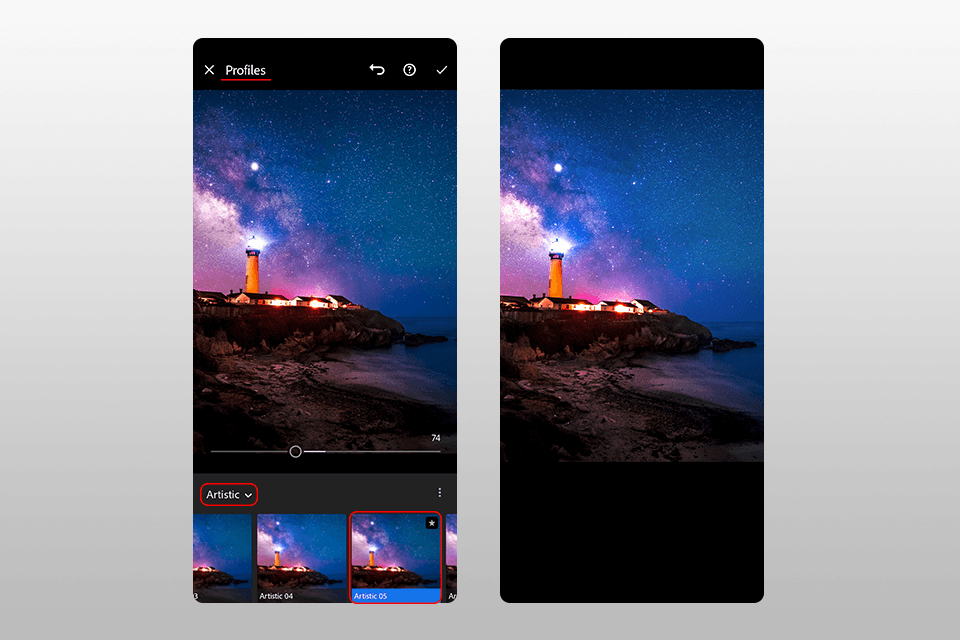
Presets are a cool feature available in Lightroom Mobile. They will give your pictures a professional touch. To try them out, look for Profiles in the adjustment menu. Choose the category that suits you best, for example, Creative, Color, or B&W. Then, select the profile you like. Check the box to apply.
If you do not like the available presets, don’t worry, you can create your unique ones or download ready-made free Lightroom presets. You can either learn how to install Lightroom Mobile presets, or sync presets to your mobile device via the cloud. This will allow you to use your desktop presets in the mobile app.

When editing photos in Lightroom, you may need to fix the light. They are located under the Light button at the bottom of the screen. The exposure slider is especially useful. Experiment with it to achieve beautiful lighting. Drag the contrast, highlight, shadows, whites, and blacks sliders until you find your unique style.
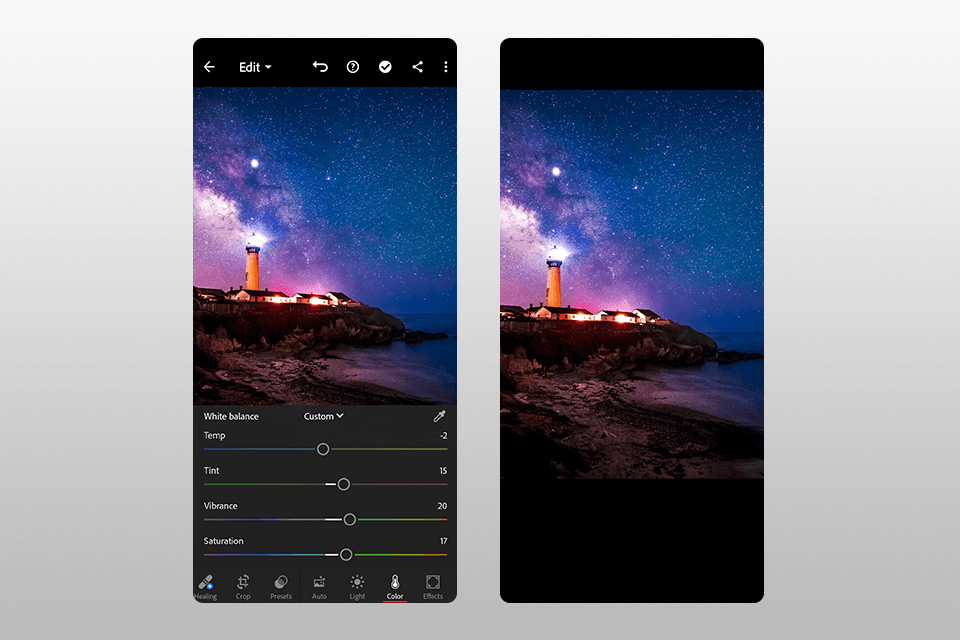
Sometimes the natural vividness is not visible in the picture. In this case, you must edit photo in Lightroom using the Color tab. Make the image colder or warmer by dragging the Temperature slider. The intensity is changed by the Saturation slider. If you need to adjust muted tones, use the Vibrance slider.
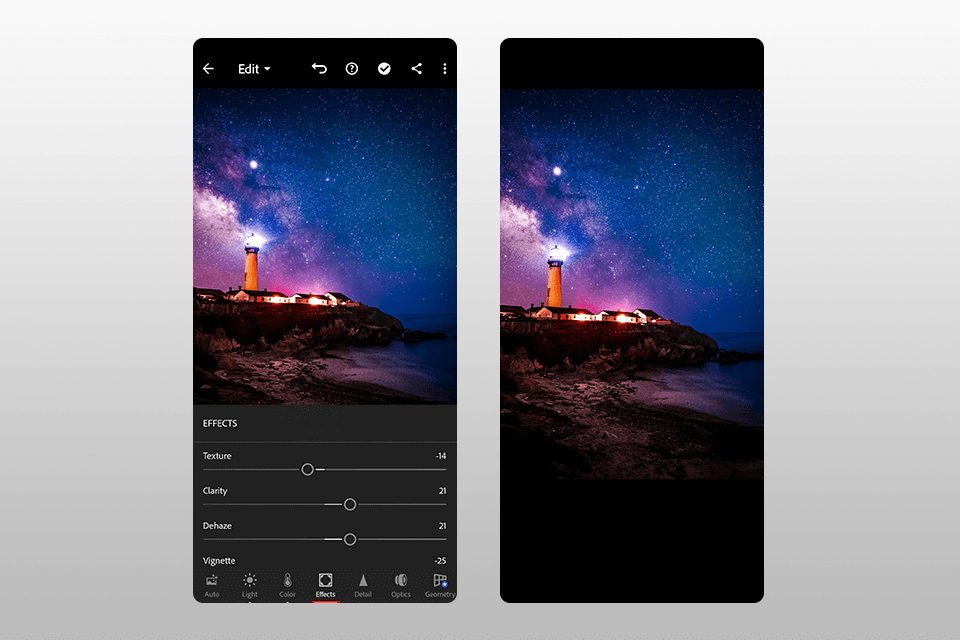
Photos contain a lot of details that are worth enhancing. Tap Effects, and then experiment with the Clarity slider to add (or remove) contrast to the midtones of your photo. Often this brings out detail in the textures of your image. The Vignette slider darkens or lightens the edges of your photo. Slide it to the left to darken the edges and put a subtle focus on the subject in the center of the photo.
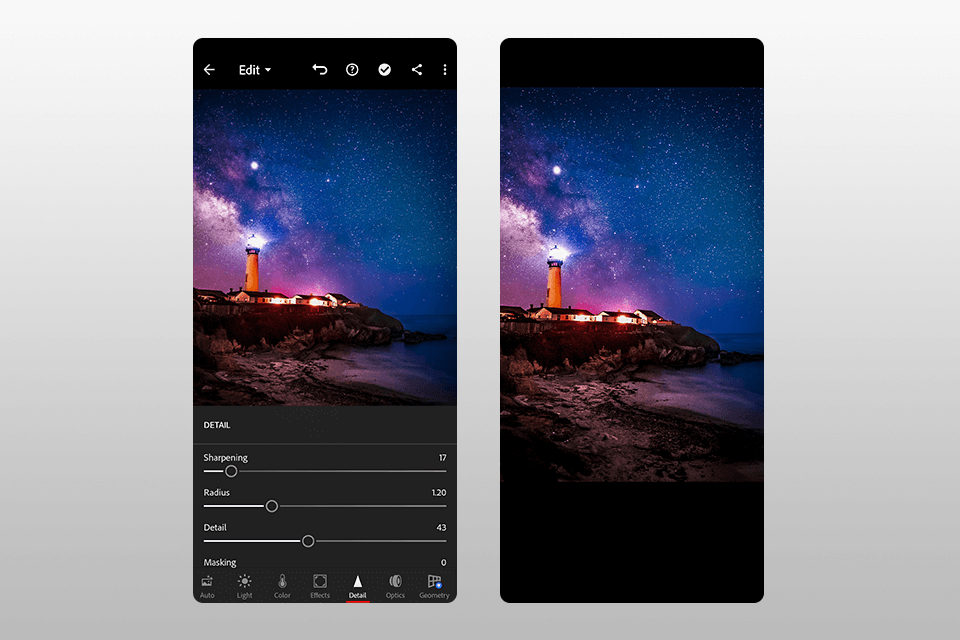
It often happens that pictures taken at night are too grainy. You can fix this nuisance in Lightroom too. To enhance your image, find the Detail section, and the noise reduction slider in it. However, do not overdo it when using it. This tool can soften the image too much by reducing detail, making a photo look overly edited.
Unlike other photo sharpening software Lr Mobile makes it easy to increase sharpness by simply dragging the slider.
If you are dissatisfied with the results you got, you can redo an operation, by taping the redo sign. If you want to completely cancel the entire editing process, use the Reset button.
You can also compare the results with the original image by holding the Before icon. Once you are done, export the images. Participate in photography challenges to test your editing skills more.
If you need to edit a lot of photos, using Lr tools is a much smarter decision. They will help you cope with the tasks quickly and efficiently. These filters are ready-made settings that you can apply to multiple images.
They will suit all genres, from landscape to wedding photography. You can use already developed presets (both paid and free), or create your own. Learning how to install Lightroom presets on Mac & Windows will only take you several seconds.


