Sometimes, there are unnecessary people or objects in the frame, and we have to somehow remove them. Such people or objects can distract from the main subject or spoil the composition. In the post below, you will learn how to remove objects in Lightroom with minimum effort. Read on to know how to get rid of tiny spots, figures, and fix blemishes by using the Spot Removal Tool in Lightroom.
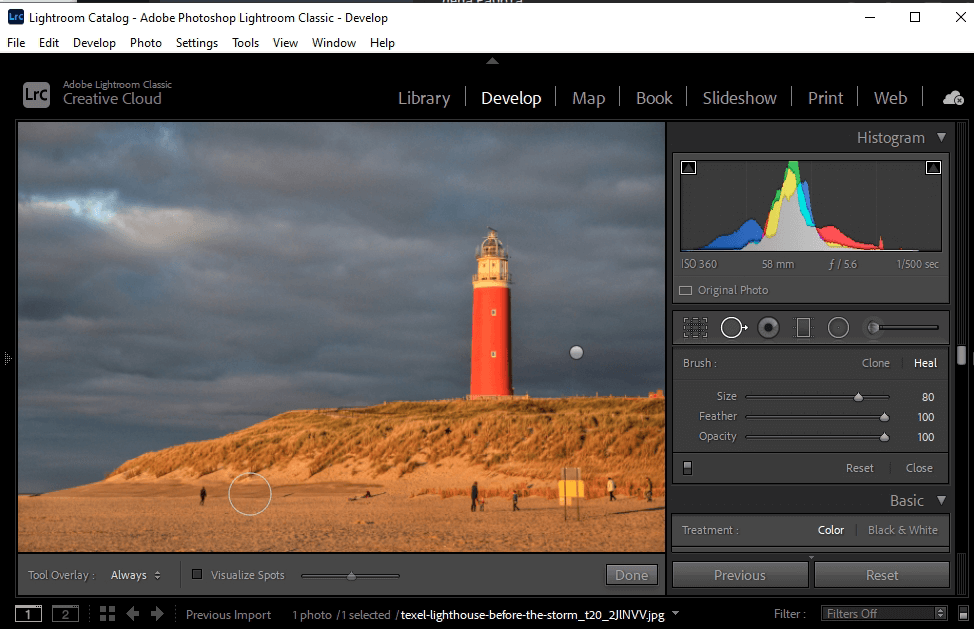
First off, launch Lightroom and import RAW files into Lr. Next, click on the Develop module near the Crop tool on the editor’s toolbar.
When removing objects in Lightroom, you need to use the Spot Removal tool. You will find it in the Develop module along with other tools that allow you to edit photos in Lightroom. Click on the Spot Removal tool on the right panel. You can also use the Q shortcut. To make the most out of it, you have to learn how to use its adjustment sliders.
Size. Defines the size of the area that you are going to replace. To change the brush size (make it bigger or smaller), you can use the slider or press [ or ] keys on the keyboard. Plus, you can do it with the help of the scroll wheel.
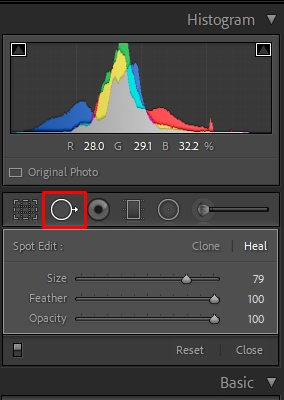
Feather. Defines whether your brush has sharp edges or blends with the picture. In general, users choose the feather between 50 and 100.
Opacity. Determines whether the area you are going to replace is partially visible. The opacity is always set to 100.
When you remove objects in Lightroom, zoom in on the chosen area to better see and control the pixels you are going to copy. It will help you notice any mistakes made at previous stages.
After adjusting the settings with the help of the sliders, you need to select the area around the object. You can do it by forming a circular selection or using a brush.
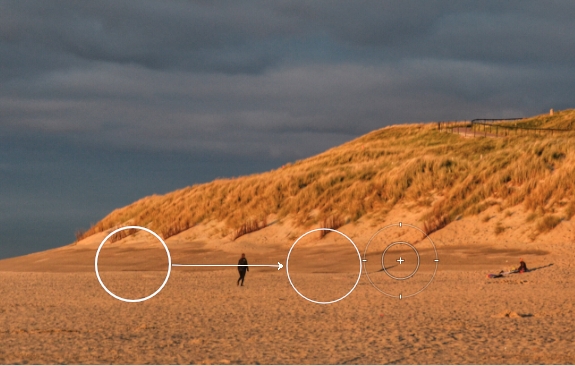
Hover a cursor over the top of the area you need to edit, click and drag. The white border you’ll see is your selection. The white marquee with an arrow pointing from it is the sampled zone you are going to clone.
After you’ve selected the object by using the brush, the program will automatically fill the area with the adjacent pixels. In most cases, Lightroom can cope with this task well, but you can always choose any other area manually.
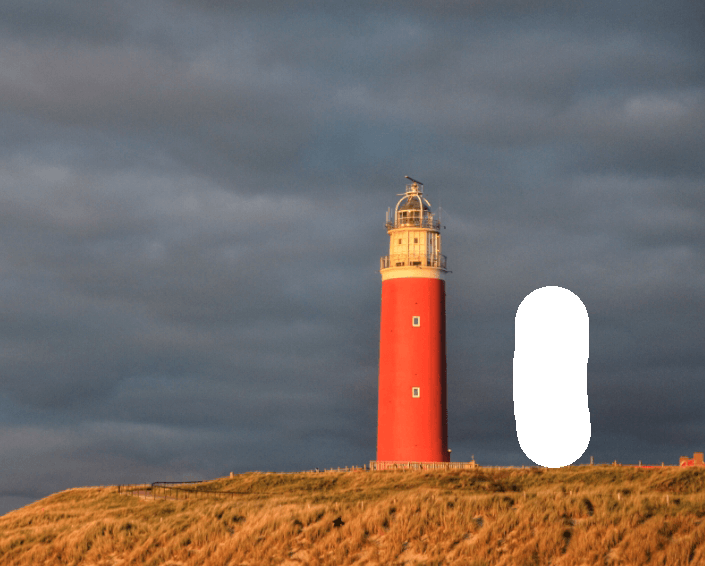
When removing objects in Lightroom, you can cope with the task more successfully if you know how to do it in Photoshop. The Spot Removal tool in Lightroom is like the Clone Stamp and Healing Brush tools in Photoshop. Spot Removal includes both options, cloning and healing.
Clone ‒ Choose “clone” if you want to copy a specific area of your picture to the area that you want to enhance.
Heal ‒ Use “heal” if the texture, lighting, and shading of the sampled area match the area you want to edit.
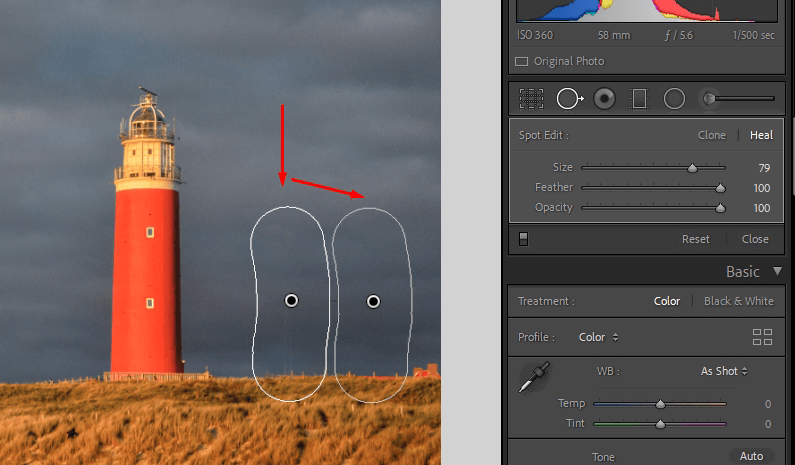
Whether you use a clone or heal tool, you will see a pin on the edited area. You can hide or show the pins by pressing H on the keyboard. Plus, you may reset the tool and start again by creating a new selection.
As you see on the before/after sample, there are no unnecessary objects in the shot. Now, you know how to remove objects in Lightroom and can proceed with more complicated tasks. You may find out how to remove glare from glasses in Lr.
Use the optimal Lightroom export settings for Instagram and save the image on your PC. If you fail to get realistic results, contact us. We will quickly edit your pics at an affordable price and remove objects of any size.

Instead of wasting your valuable time enhancing photos, download ready-made presets and save your time. They will help you perform high-quality color correction in a matter of seconds and enable you to batch edit in Lightroom. It will allow you to process hundreds of shots at a time.