If you want to learn how to resize an image in Lightroom, we’ve prepared several tips that may come in handy. This universal method is suitable for all software versions. The only differences you may notice are the names of the options and button location.
Photo resizing is especially helpful if you want to publish one image on different platforms or need to have it in a printed format.
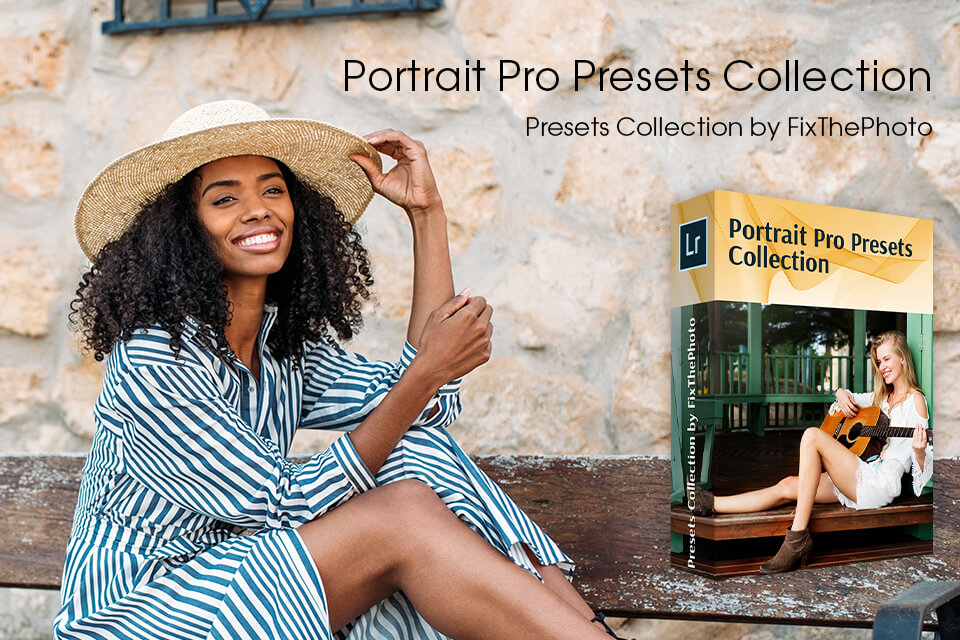
If you are an active blogger or enjoy sharing photos on social media, I recommend checking out the tutorial on how to resize images in Lightroom.
This option also works if you need to enlarge the image for printing. Read this article to learn how to quickly resize photos in Lightroom Classic CC. Alternatively, you can use apps to make pictures smaller or take advantage of an online image cropper.
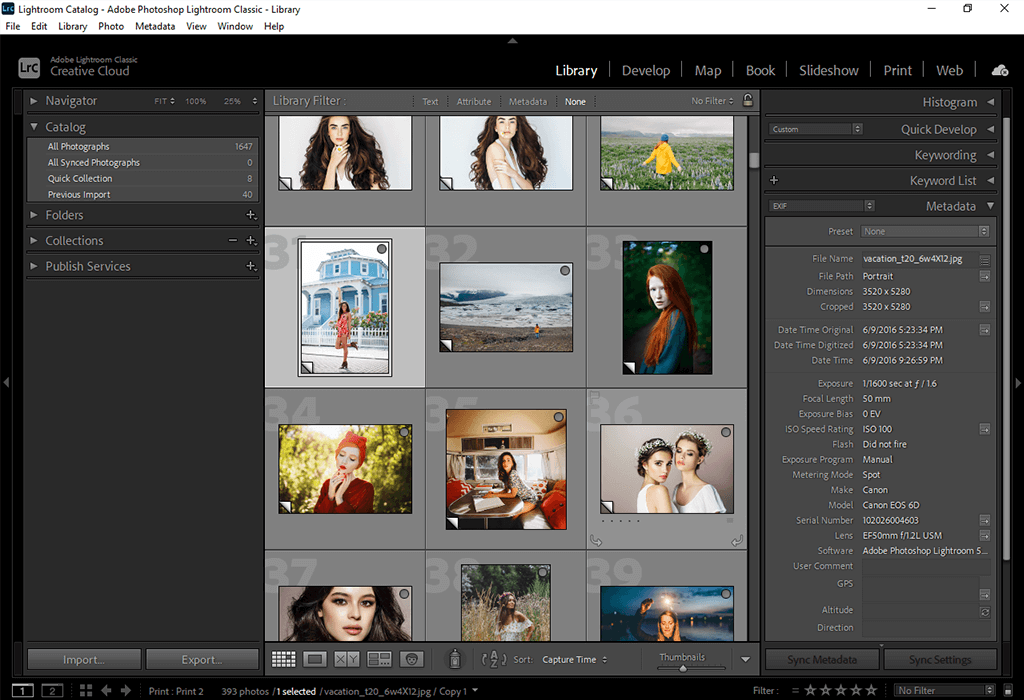
Lightroom allows you to resize photos during export. Press "G" to switch to the grid mode of the Library module. Then you need to select the desired images by clicking on their thumbnail, holding Ctrl (Cmd for Mac users).
To select multiple images side by side, you can hold down Shift + Ctrl + Click for Windows or Shift + Cmd + Click for Mac.
This method is suitable for recently edited photos in Lightroom.

Once you've selected the images you want, you should go to the Lightroom Export dialog box. You can either use the Export button or the Ctrl + Shift + E keyboard shortcut.
I recommend creating a folder, where you will store images in advance. Choose the location that is fast to access. To keep your files well organized, you can use photo organizing software.
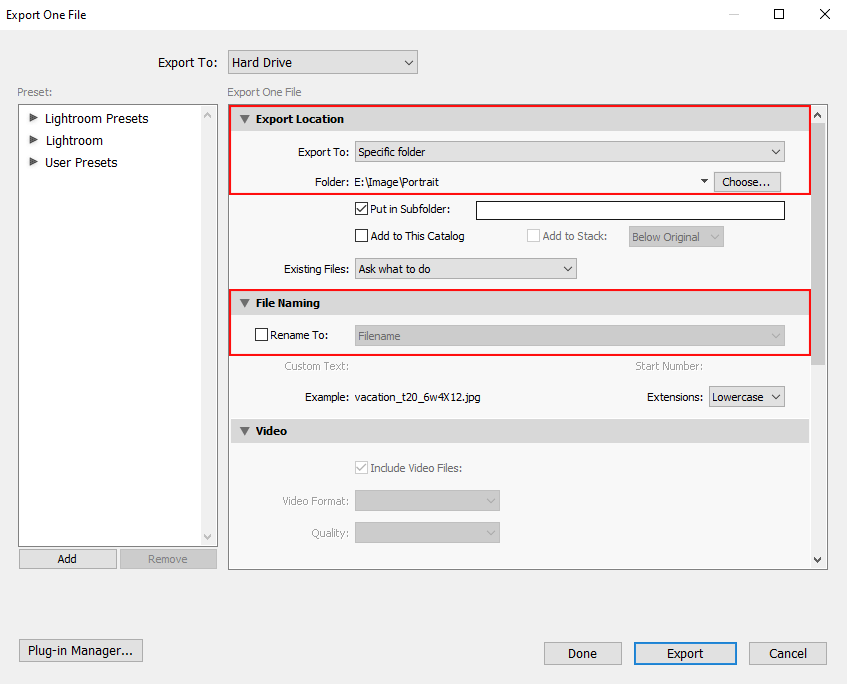
You can configure the main export settings in a new window. You should choose the created folder at the top bar to keep files there. Alternatively, users can save files on the desktop, and then check “Put in Subfolder” to enter a new name during export. For those files that are already in the export folder, you can set the "Ask what to do" option so that the system doesn’t make changes automatically.
Under the “File Naming” section, you can use the “Rename To” option to change the names of exported files. Alternatively, you can rename files during import, and therefore this option is not relevant. This approach helps keep both system files and export files with the same name.
If you want to re-extract a photo, you will know exactly which file you need. The “Extension” option doesn't play a great role, I recommend setting it to the “Lowercase”.
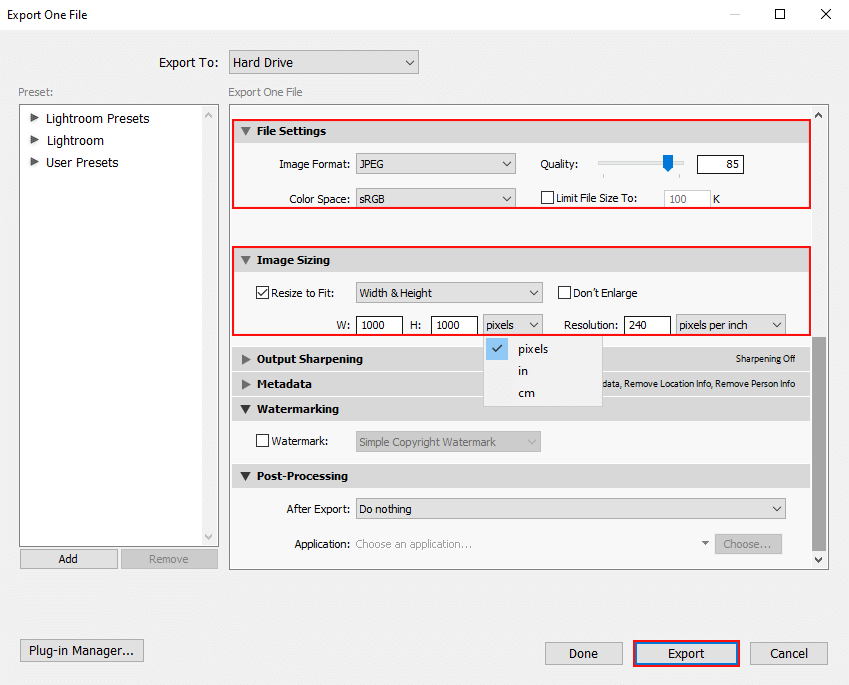
You shouldn’t ignore this option as it helps in managing file quality and setting important parameters. If you are exporting files for posting on the net, I recommend choosing the JPEG format. You will see the “Quality” indicator, which should be set between 65 and 90. In the “Color Space” settings, choose sRGB. It works great for most devices on the web. Leave the “Limit File Size To” box unchecked.
The “Image Sizing” section refers to the final picture size. You can set whatever values you need. Don't use big numbers because they affect file weight. If you edit on your phone, you can use cropping pictures apps.
The most challenging option for users is “Resolution”. If you are exporting files for the digital environment, this setting is irrelevant to you. You can set any value. Lightroom will save this value as a print reference.
Keep in mind, you can still change DPI while printing. If you resize image in Lightroom for both printing and posting on the web and want to get a satisfying result, I recommend referring to a professional service.
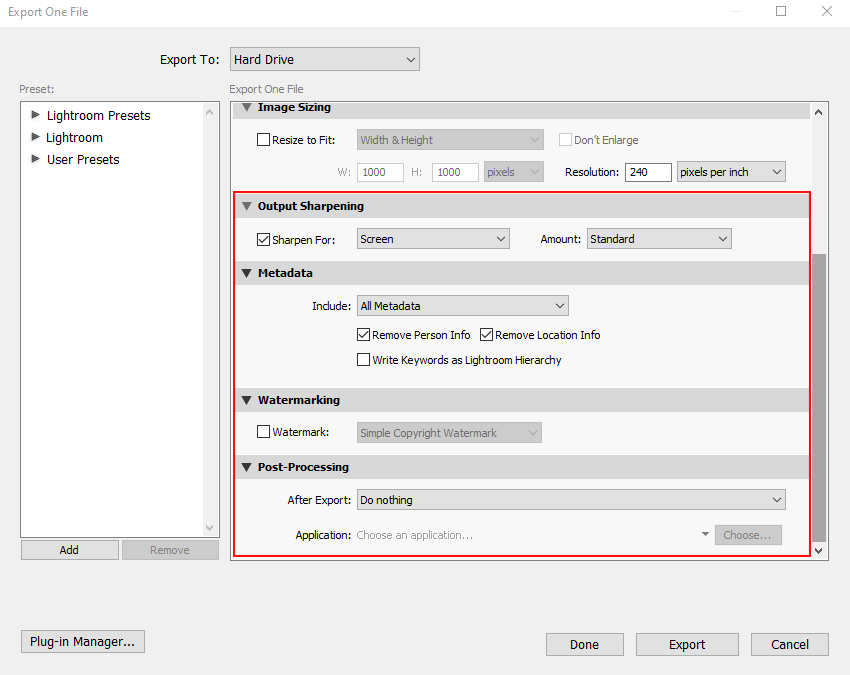
Go to the “Output Sharpening” section, where you can define the sharpness level. The next sections named “Metadata”, “Watermarking” and “Post-Processing” are the final steps.
I recommend minimizing the number of photo metadata that is extracted along with your image when exporting files on the web. This will help protect your privacy, including the camera settings, Lightroom settings, and your GPS location. I think it is worth indicating only copyright information and contact data.
You can also add the created watermark to make pictures unique and protect your files from stealing by third parties.
To help you make pictures more eye-pleasing, I recommend using the collection of universal presets. They improve color balance, increase the contrast, allow you to highlight the main picture elements, and get rid of color distortions in automatic mode.
Just refresh your knowledge of how to install Lightroom presets and get down to work.


