The Graduated Filter in Lightroom is a multifunctional tool that allows making minor adjustments to an image. It can be used for adding all sorts of effects to specific image parts while gradually applying them. The most common purposes of this filter include making the skies in a photo darker/bluer, or darkening/brightening its edges.
The guide below will teach you how to use graduated filter in Lightroom as well as give some handy tips that will help you maximize the usefulness of this tool.
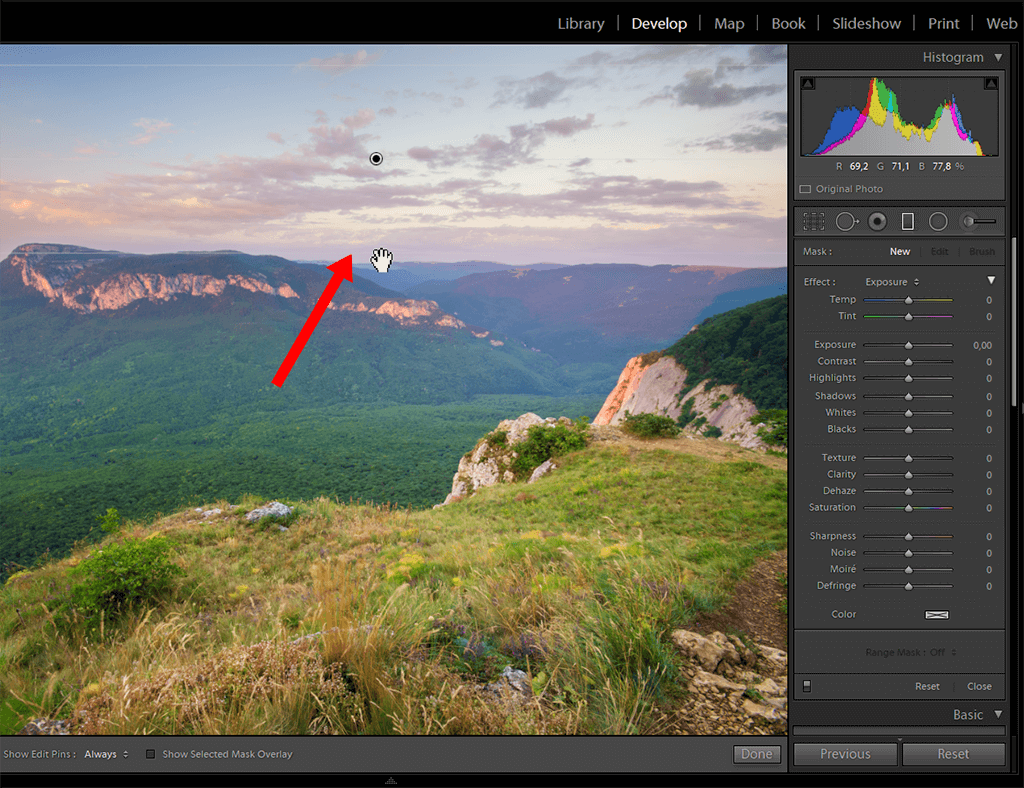
Start Lightroom, and pick the image you want to enhance. I’ll employ the Lightroom Graduated Filter to darken the skies in my landscape photo.
After importing the image, go to the Develop menu. Press the Graduated filter icon that is located under the Histogram.
After clicking the icon, you’ll be greeted by a menu that looks like the “Basic” panel, as it also has sliders for adjusting the color temperature, exposure, etc. Move the cursor to the image and you’ll notice that it has changed to the “+” sign.
Tip: Employ keyboard hotkeys to access the Graduated Filter by pressing the “M” key.

Press and hold the left mouse button while moving the cursor across the photo to apply the filter. The distance from the spot you initially clicked to the release spot will be affected by the Graduated Filter transition, while its angle is determined by the direction in which you’ve moved the mouse.
The tool allows applying the gradient filter from top to bottom, left to right, and vice versa, as well as at any angle you want. Once you're done drawing the path for the effect, simply release the mouse button.
Lightroom allows changing the filter’s location even after you’re done drawing. Merely drag one of the lines to change its placement. Moreover, if you want to tilt the filter, then place the cursor on the circle inside the effect to bring up two arrows, then click and move the mouse around to tilt the gradient.
Graduated filters in Lightroom can also be conveniently rotated by placing the mouse on the central line to make the rotation handle pop up. You can press it to spin the effect around as you see fit.
After placing the Graduated Filter, return to the menu on the right and move around the sliders to achieve the exact effect you need. Most settings here mimic the ones you’re used to working with on the Basic panel.
If you want to create a neutral density Graduated Filter Lightroom effect, lower the exposure. Meanwhile, the sharpness setting allows blurring out a section of the photo. This step is recommended if you’d like to achieve a shallow depth-of-field look or a tilt-shift effect.
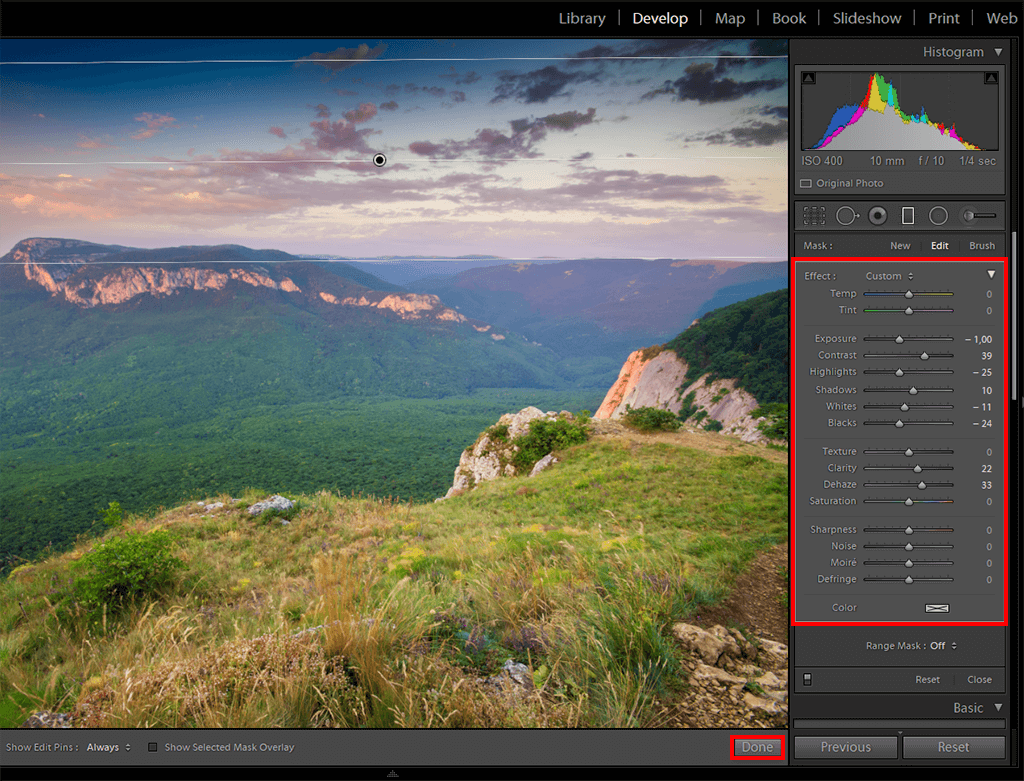
Lightroom also lets you alter the filter’s color. To do so, press the color box on the bottom of the filter panel, then select a hue from the chart. Drag around the cursor until you stumble upon a color you want and that fits the photo’s palette.
Once you like the tone, you can set the intensity of the color by moving around the saturation slider under the color chart.
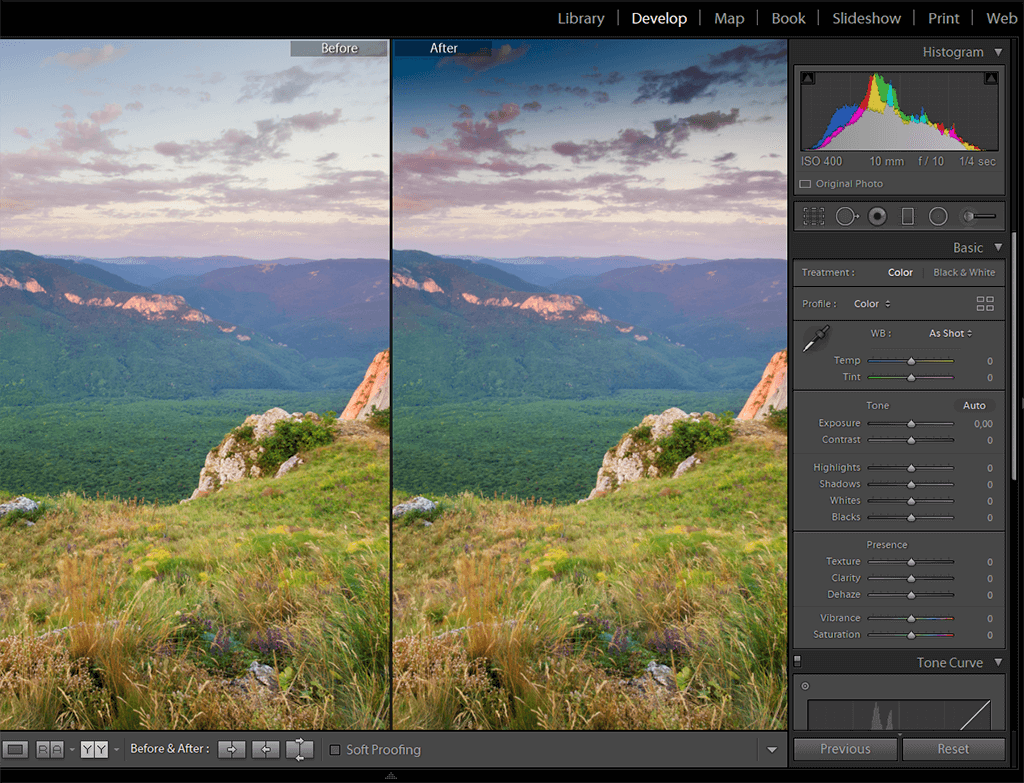
Congratulations on successfully applying the filter and increasing your proficiency related to how to edit photos in Lightroom. Next, it’s time to compare the before/after images.
If you’ll notice that you tend to set the same parameters time after time, it’s advised to save them as a preset so that you don’t have to constantly repeat the adjustment process while also learning how to batch edit in Lightroom. Later on, you’ll be able to access the saved preset when you apply a Graduated Filter or you pick the Brush tool.
Want to make your Lr workflow faster and smoother? Download these Lr presets created by professionals to cut down your editing time, and achieve attractive results much quicker.


