Many users want to know the best Lightroom export settings for Instagram because very often photos published in their news feed look blurry and their quality seems to be worse than the original one. The matter is that this social media network uses an image compression algorithm that alters the resolution of a picture, making it smaller.
Fortunately, you can preserve the quality of your shots by editing them in Lightroom before posting them on Instagram. The main task is to prevent Instagram from influencing the quality of a picture by resizing, cropping, and compressing.
Although the reduction algorithm used by Instagram was created for good, Instagram photographers have to resort to specific Lightroom export settings for Instagram to preserve image quality.
Using such settings, you can make sure your images will look awesome when you post them on Instagram. Besides, all these settings can be used directly in the Lightroom Mobile app.
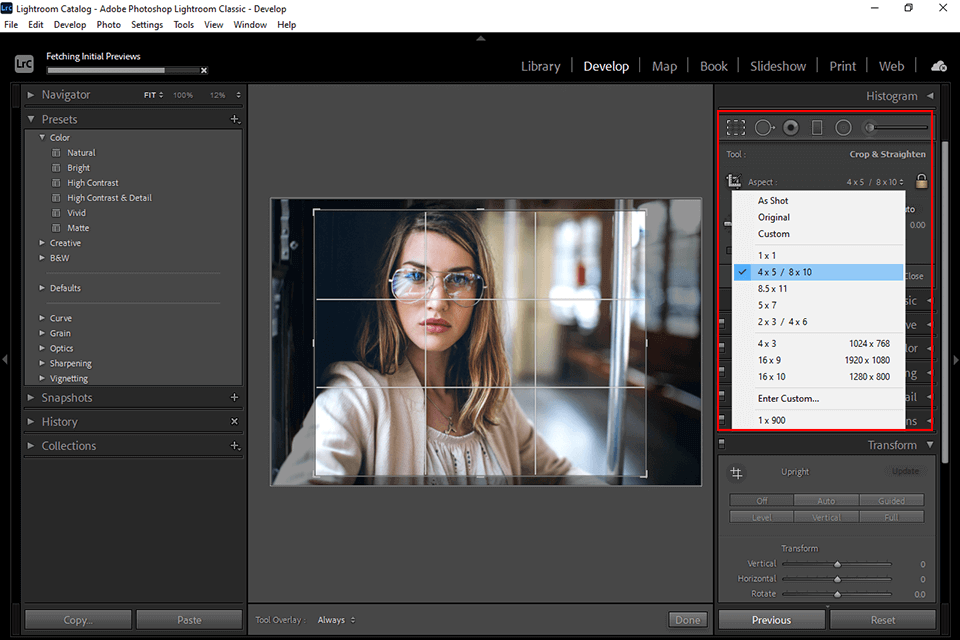
The first step is to crop a photo so that it fits the formats used by Instagram. You need to be very attentive to the ratio between the side lengths of an image. Instagram accepts a ratio between 1.91:1 and 4:5, but actually, for better results, you should opt for 4:5.
4:5 is the largest pixel size supported by Instagram. Not only enjoys it great popularity among Insta users, but also provides many image editing possibilities.
Due to the nature of the mobile phone’s vertical display aspect ratio, landscape images look relatively small when they appear in the feed, that’s why they look uninteresting.
The file format is one of the most important Lightroom export settings for Instagram. You should shoot RAW to get more info about your file while editing it. You need to import RAW files into Lightroom and proceed with editing, which is usually very intuitive.
But importing a RAW file to any social media isn’t a good idea, not only because its size is quite large, but also for a range of other reasons.
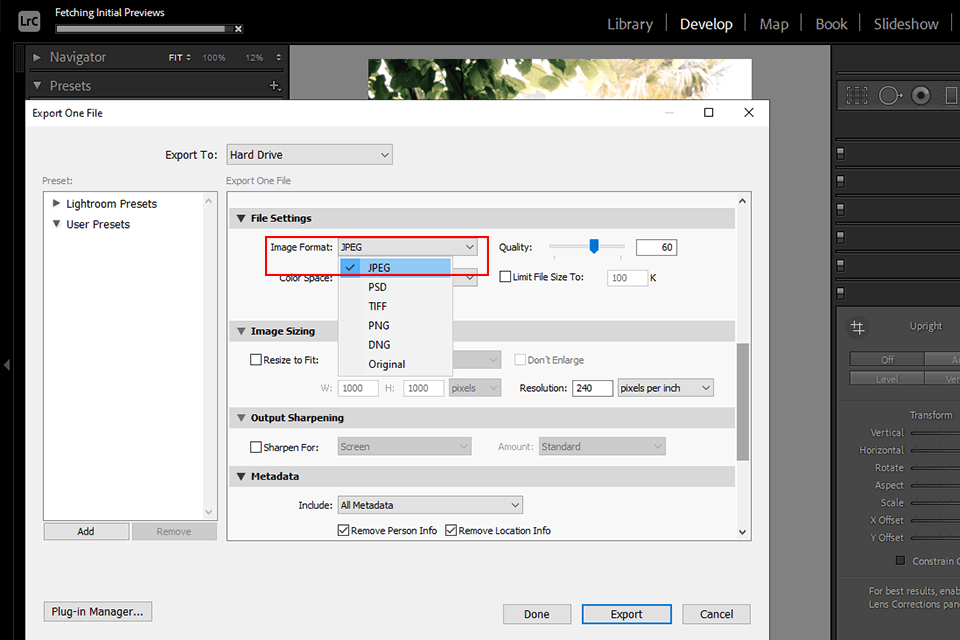
As soon as you’ve edited an image, you can save the resulted file in either JPEG or PNG formats. As Instagram doesn’t preserve background transparency, we recommend choosing JPEG. But in the case of using a PNG format, the quality of a picture won’t deteriorate.

sRGB color spaces have a huge influence on a successful Lightroom export to Instagram. If you neglect this setting, images uploaded to your profile may look blurry and desaturated.
When exporting pictures in Lightroom, you need to choose among different color spaces. But you also should know that the majority of social media networks for publishing images, including Instagram, use standard color spaces of sRGB for displaying pictures.
The difference in colors represented by a laptop and a phone screen is explained by calibration rather than by a specific color space. The only way to control the situation is to use sRGB color space when exporting pictures.
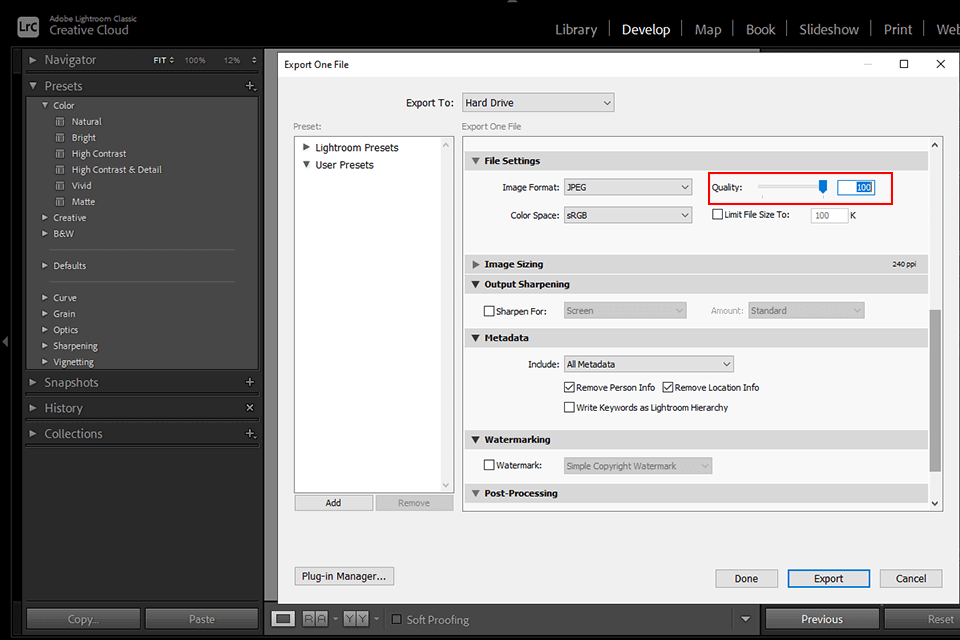
By uploading your picture in a TIFF format, you can achieve complete control over compression. If you use JPEG format, which is the most suitable for Instagram, you can select the image quality.
Note that high-resolution files are quite weighty. However, such images are less subject to compression imposed by Instagram.
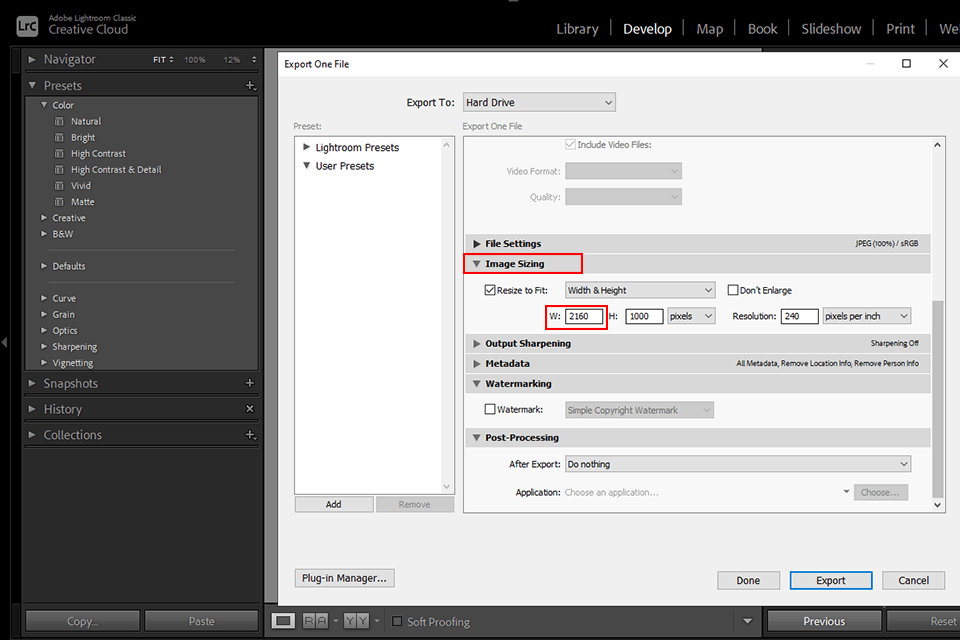
Photos on Instagram are usually displayed at 1080px. The developers claim that the resizing process is skipped if you upload images equal to or less than 1080px.
We recommend you to export at double 1080px wide as Instagram is going to enlarge the size of the displayed pictures in the nearest time. The application preserves a 2x version of the image so you can easily restore the source file.
However, the main reason is that reducing the size 2 or 4 times is always safe for any resizing work performed in the background. Sometimes, you even get a sharper picture.
While selecting the best Lightroom export settings for Instagram, pay special attention to the resolution of a picture when saving it for further sharing. If you import an image with a resolution higher than 1080p, Instagram changes its size automatically. Thus, images will be displayed in worse quality.
If the photo you are going to upload has a lower resolution, then Instagram will stretch it to make it at least 320 pixels wide. Usually, the result of such a resizing is a blurry and unattractive picture. Take these guidelines into consideration, to keep the quality of your photos unaltered.
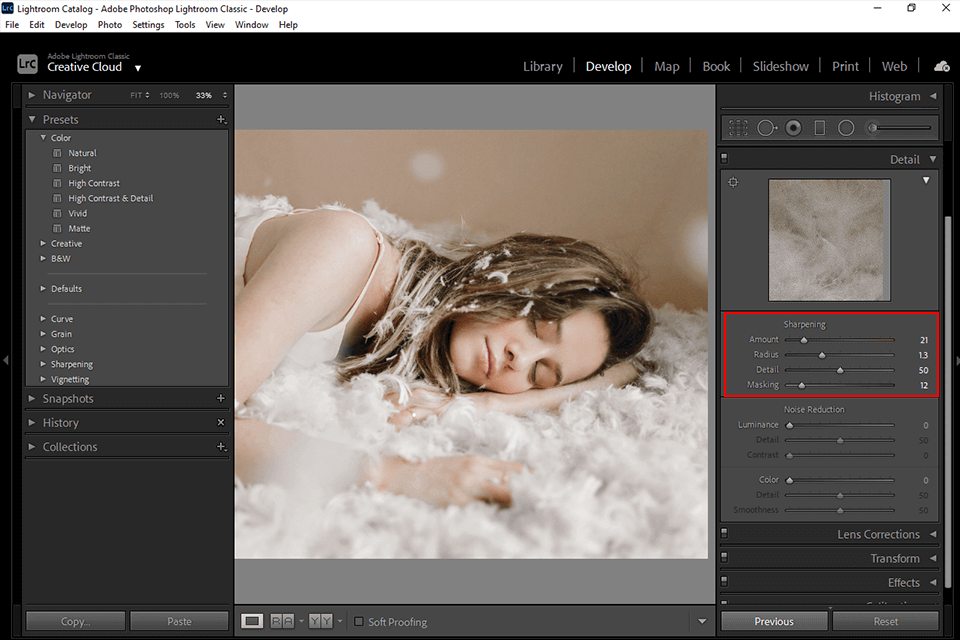
Sharpness is one of the most important criteria to consider if you want to get a high-quality picture. Detailed images look more captivating. Either you want to print your images or keep them digital, you should improve their sharpness.
Usually, the sharpening levels are different if you are going to print the picture or have it displayed on the screen of a smartphone. Pay attention to the fact that a device you are going to use for viewing a photo influences its quality greatly.
Before applying Lightroom export settings for Instagram, you need to adjust brightness, contrast, and light balance. But if you are new to photo editing or just want to save time, we recommend using ready-made presets. You only need to find out how to install presets to Lightroom.
This collection of presets help fix basic defects and create a coherent style for your feed to have a successful Instagram account.


