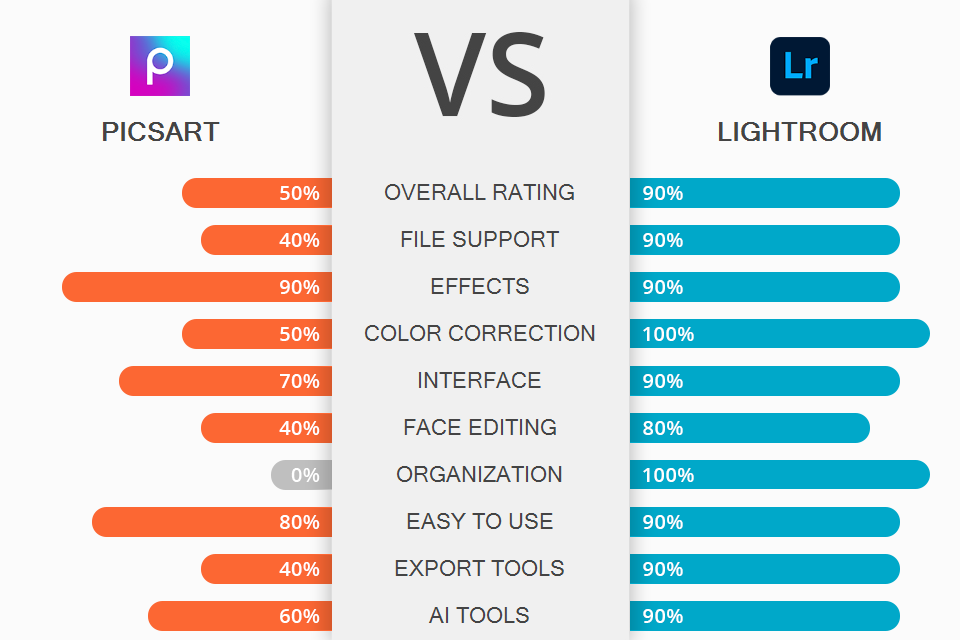
Comparing PicsArt vs Lightroom in terms of functionality, you will see some similarities, but basic features are different, as they are aimed at different tasks.
PicsArt is a great choice if you want to add a unique effect or apply a sticker to your photos, embellish images with thematic frames/natural glare, or even create a collage and edit portraits with the help of automatic tools.
Lightroom has many tools for deep and precise color correction, including detailed HSL, curves, and brush spot adjustments. In addition, the editor supports batch photo processing and allows applying presets to speed up your workflow. Another notable trait is RAW support.

The interface of PicsArt is very convenient with all the tools being within easy reach, so beginners won’t have problems navigating the program. There are more than 15 tools, among which you will find effects, face correction tools, stickers and more.
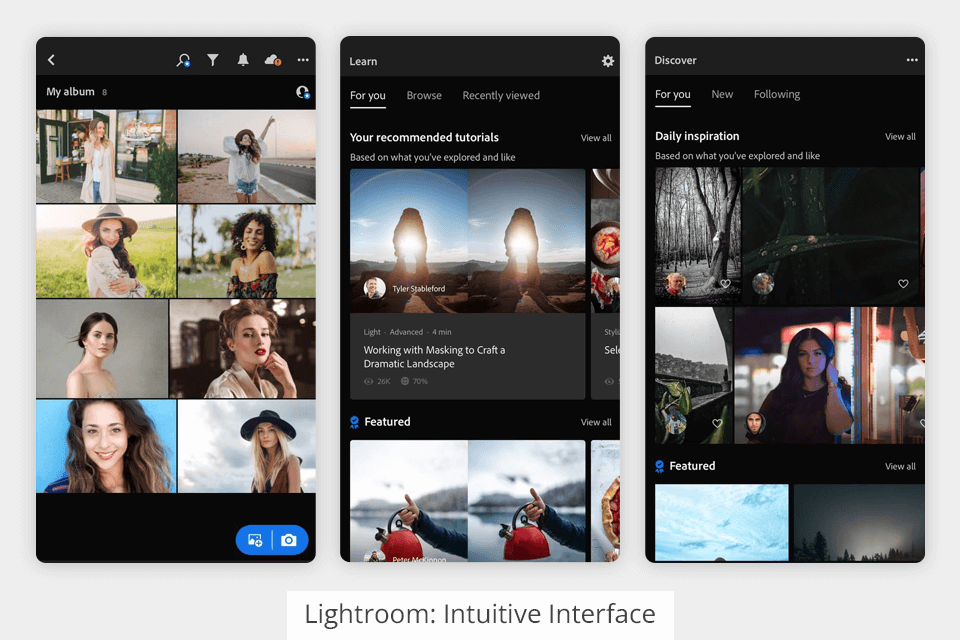
Lightroom was created with a different approach in mind and its interface consists of a dozen modules each for a separate task. Every module comes with its own set of tools.
For example, in the “light” module, you will find all the basic settings for photos, such as white balance, brightness, shadows, etc. The “color” section contains professional, automated and manual tools for color corrections, including curves, HSL and more.
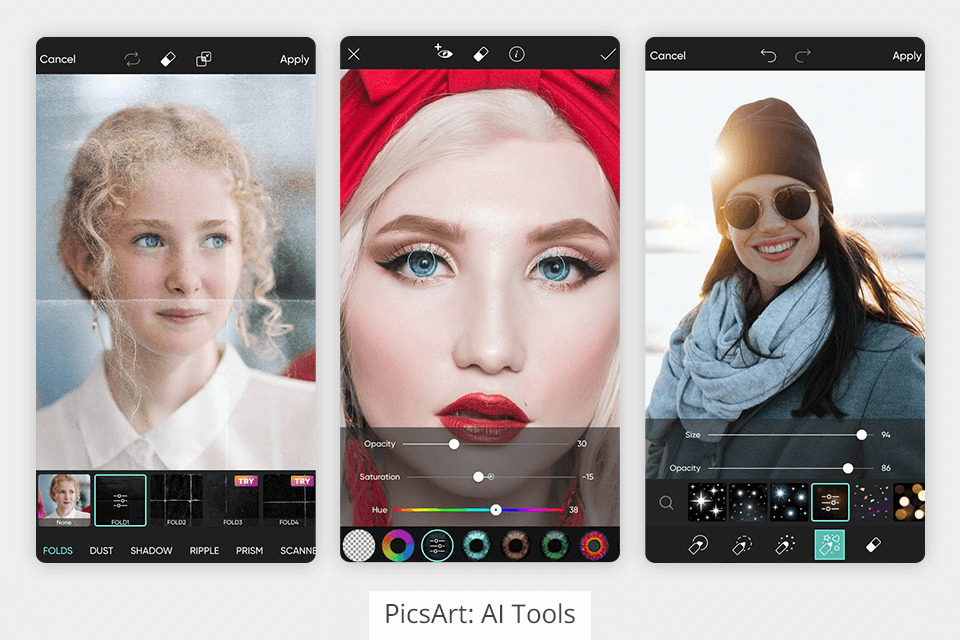
Unfortunately, PicsArt has only several automatic tools. Such instruments allow users to remove a red-eye effect, add a mask and smooth skin (the latter works incorrectly). For all other adjustments, you need to move sliders to achieve a particular effect. However, novice users will definitely like a great variety of effects, which can be applied to a photo with a single click.
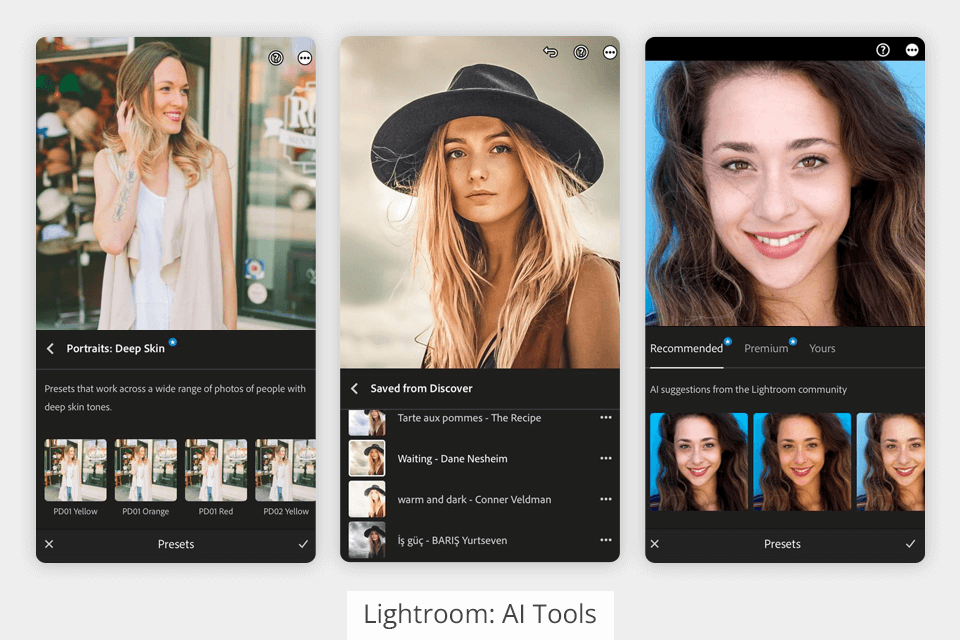
Unlike PicsArt, Lightroom has more automatic tools for removing spots and unnecessary objects, eliminating a red-eye effect. There are also curves and all basic sliders for adjusting color based on AI technologies. This is a serious point to keep in mind if you are comparing PicsArt vs Lightroom to find a program for photo editing on the go.
Moreover, unlike third-party free photo editing apps, Lightroom supports presets. So, you can save particular settings and apply them to other images while editing them. The process takes very little time and effort.
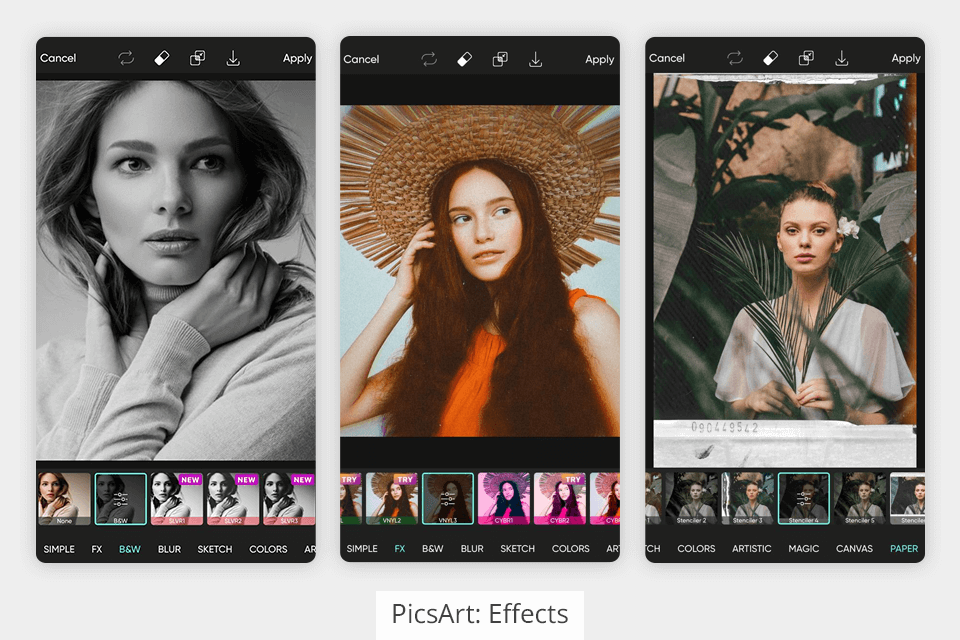
PicsArt contains an abundance of interesting and unusual widget effects. Most of all, I like such effects as blur, decoration, pop art, paper, distortion, and splash. I described these effects in more detail in my Pixlr vs PicsArt overview. You will hardly find similar effects on social networks. In addition, you can use various stickers, photo frames, free backgrounds, highlights, brushes and other useful tools. Moreover, it is possible to create collages and posters in a matter of minutes.
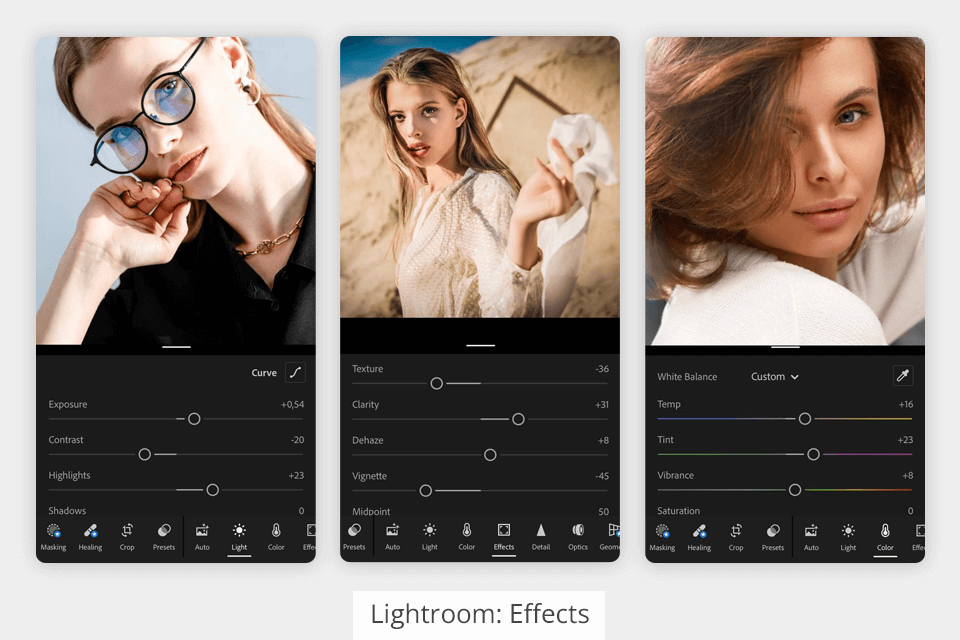
If you just like adding stickers to images to improve them, you will be taken aback by creative features available in Lightroom. Using this program, you can perform both automatic and advanced manual photo editing, apply presets and remove unnecessary objects in photos.
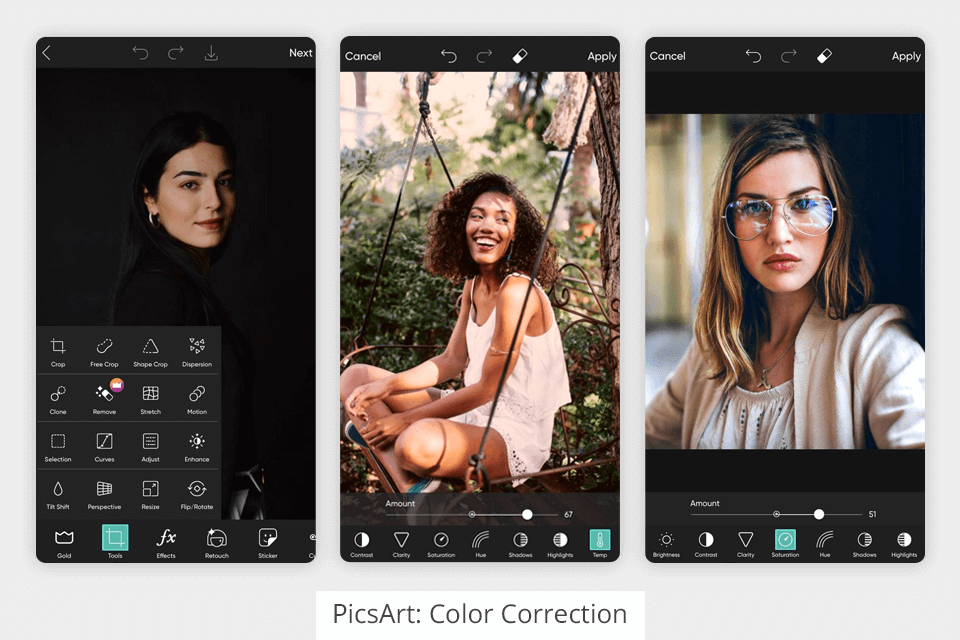
PicsArt offers the HDR feature to make dark areas brighter and raise contrast in bright areas. You can also use “Curves” in the tools section for advanced correction of color and shading. With the help of the "setting", you can alter brightness, contrast, clarity, color, tone, temperature, and shadows.
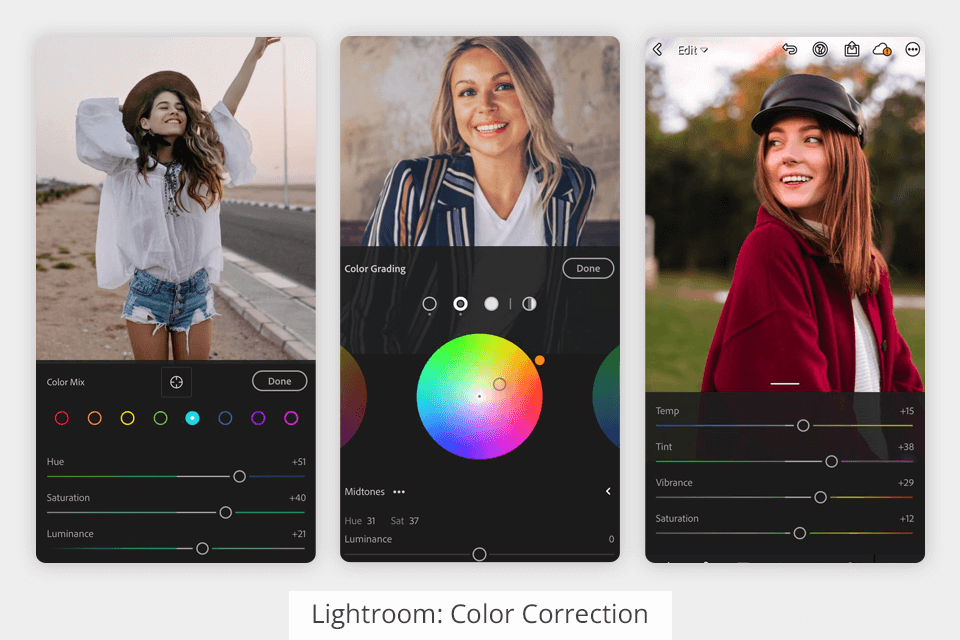
Lightroom keeps ahead of its rival in the PicsArt vs Lightroom battle when it comes to color correction. It has such tools as HSL, curves for three colors, selective tone correction, and allows changing white balance, shadows, highlights, contrast, brightness, clarity, and sharpness.
All instruments can be customized in auto mode. The developer worked hard to integrate advanced algorithms, so the result is always on point. After you’re done with settings, you only need to apply a particular effect.
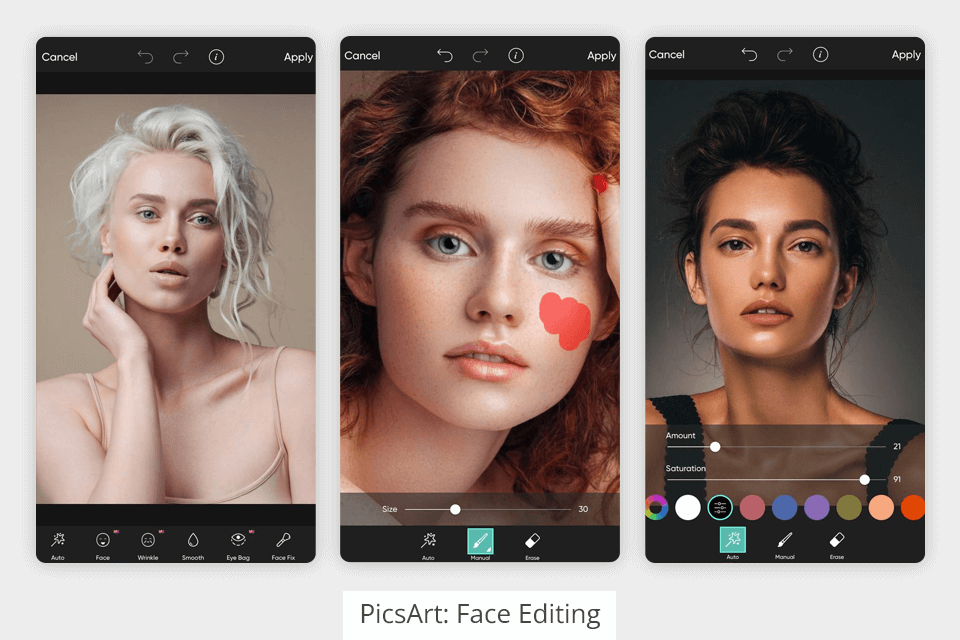
There is a special “Retouch” tab in PicsArt for detailed skin enhancement. There you will find lots of tools for facial skin retouching – wrinkle removal, skin smoothing, bag under eyes removal, skin tone correction, hair & eye color changing, teeth whitening, and more.
If you don’t want to study these settings, you can use an automatic skin retouching function. However, in most cases, this tool doesn’t work accurately especially if you took images in poor lighting or if there are lots of different elements in the frame.
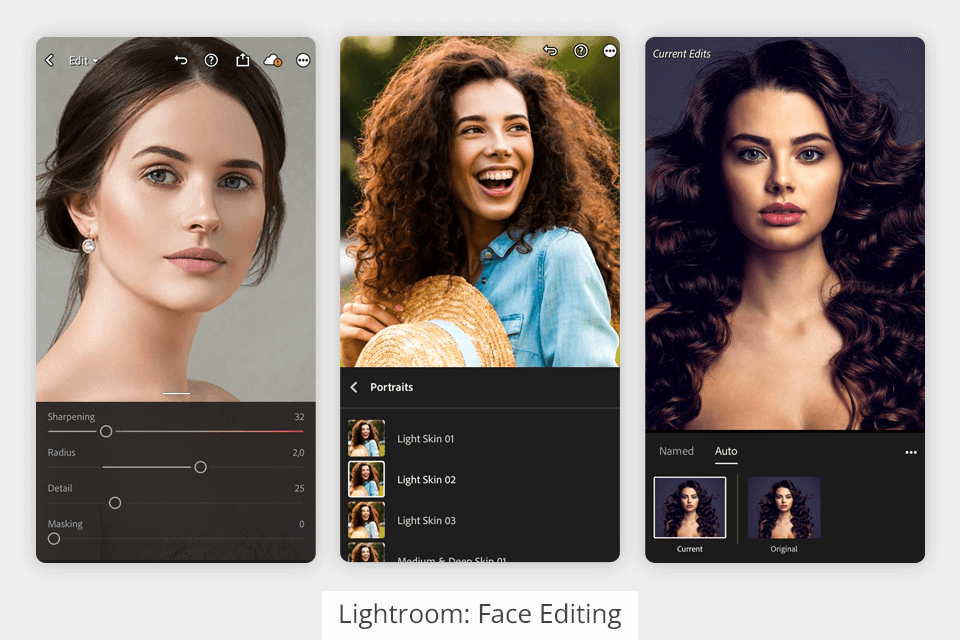
Lightroom offers users several accurate and related tools for skin improvement in a quick and efficient manner. The most popular instruments are “Mask” and “Spot Removal”, using which, you can get rid of acne, redness, scars and other imperfections.
You can also take advantage of semi-automatic tools such as "Red Eye Correction" and "Graduated Filter" that help brighten the model’s face. There is also an "Adjustment Brush" for correcting exposure, contrast, and shadows. The best part is that you can edit a specific area instead of the whole face.
PicsArt or Lightroom – what program supports more file formats? PicsArt will surely disappoint you in this regard. Here you can work only with JPG and PNG files.
Unlike its competitor, Lightroom pleases users with extensive export format support. You can output edited images in PSD, JPEG, TIFF, RAW, HEIF / HEIC, DNG, CMYK, PNG, and more.
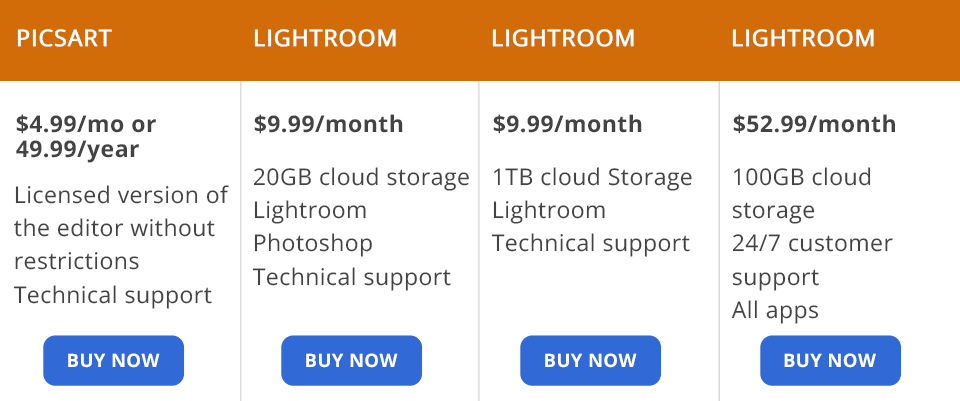
While using PicsArt, you can choose from several subscription options –$4.99/month or $49.99/year. By purchasing a paid version of the program, you get a wider range of settings for editing photos and videos. For example, you can perform advanced portrait editing and apply different effects.
Although Lightroom is a professional image editor, you can download and use Lightroom for free. However, if the available functionality and tools aren’t enough for you, and you want to get access to spot editing, remove needless objects, etc., you can subscribe to a paid subscription. The minimum "Photography" plan costs $9.99 or $19.99 per month (depending on the size of cloud storage –100GB or 1TB).