Photographers like adding a starburst effect also known as sun flare to their images in order to achieve that catchy look without much effort. Even if you are a beginner user, you can achieve the desired result by taking advantage of the features available in Adobe Lightroom. Following the steps described below, you can quickly embellish your images with stunning effects.
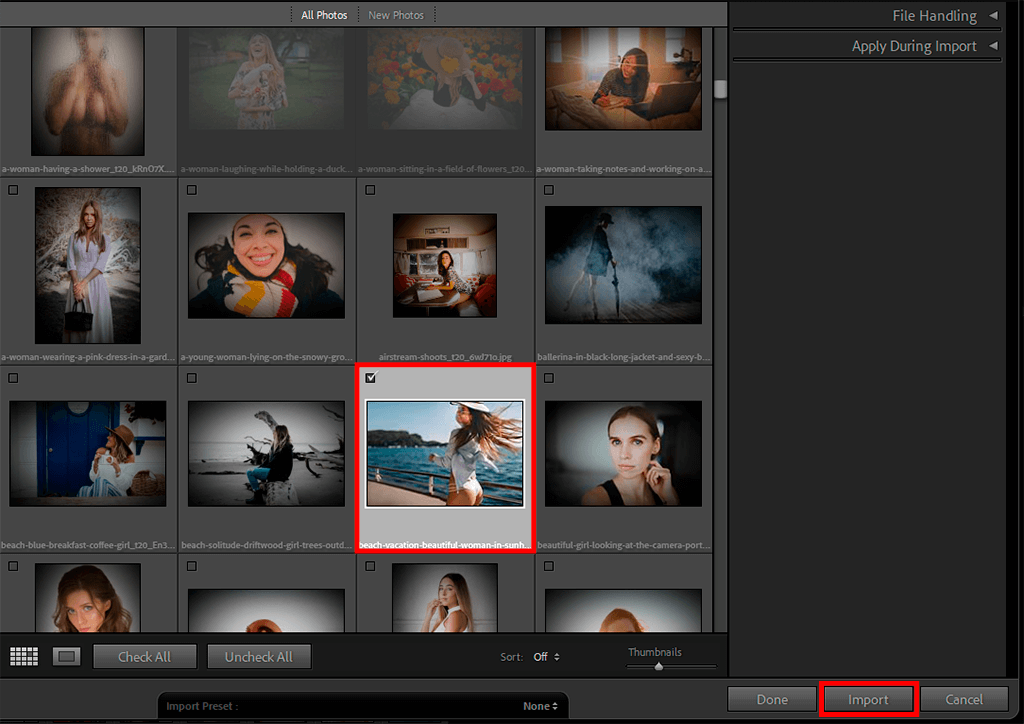
Open the photo that you want to modify. Choose the image and click on Import button.
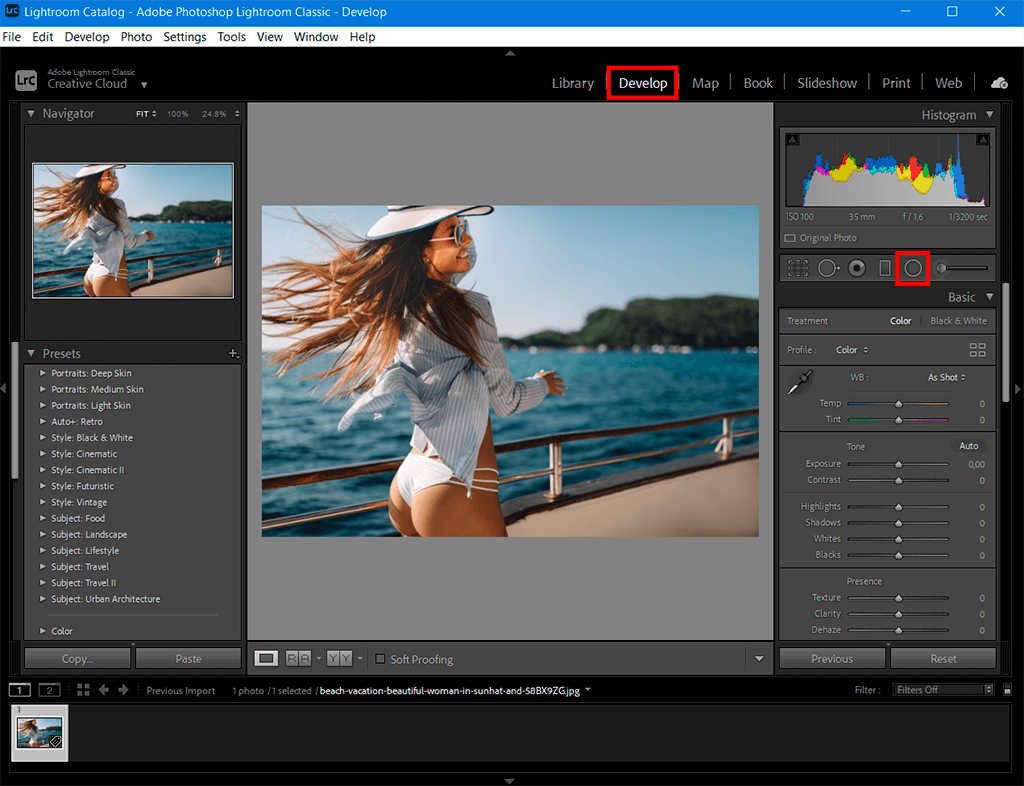
Go to the Develop tab and select Radial Filter.
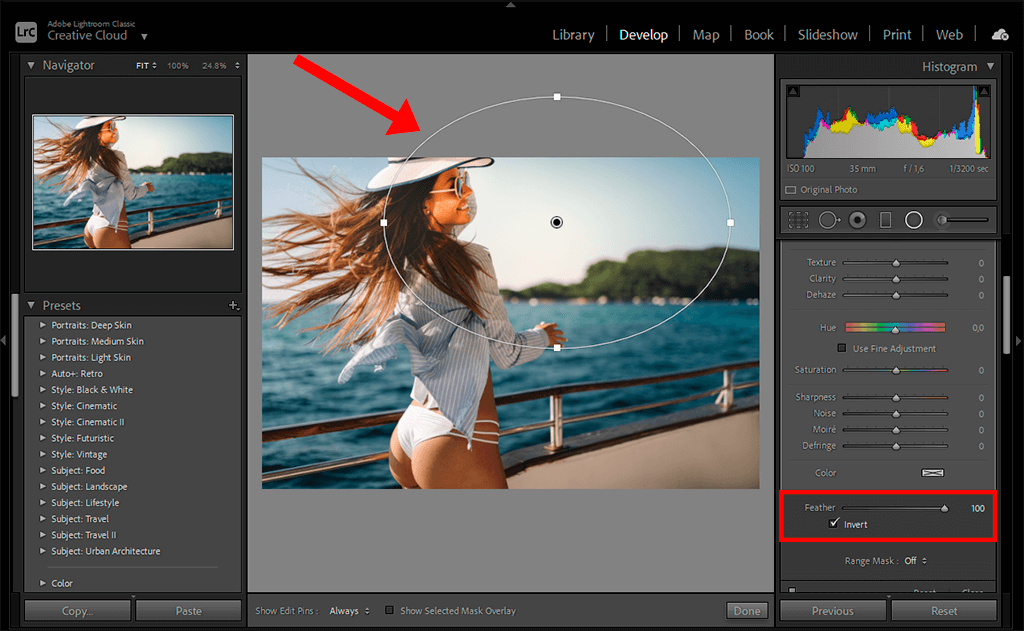
Place the circle in the needed area (where you want to add starburst) and drag the Feather slider to 100.
If you lack time to perform such manipulations yourself, delegate the task to experts from FixThePhoto. They will study your ideas in detail and do all possible to bring them to life. The cost for such services is reasonable. Besides, professional retouchers can fix sharpness and contrast defects, adjust shadows, tones, WB, and other settings.
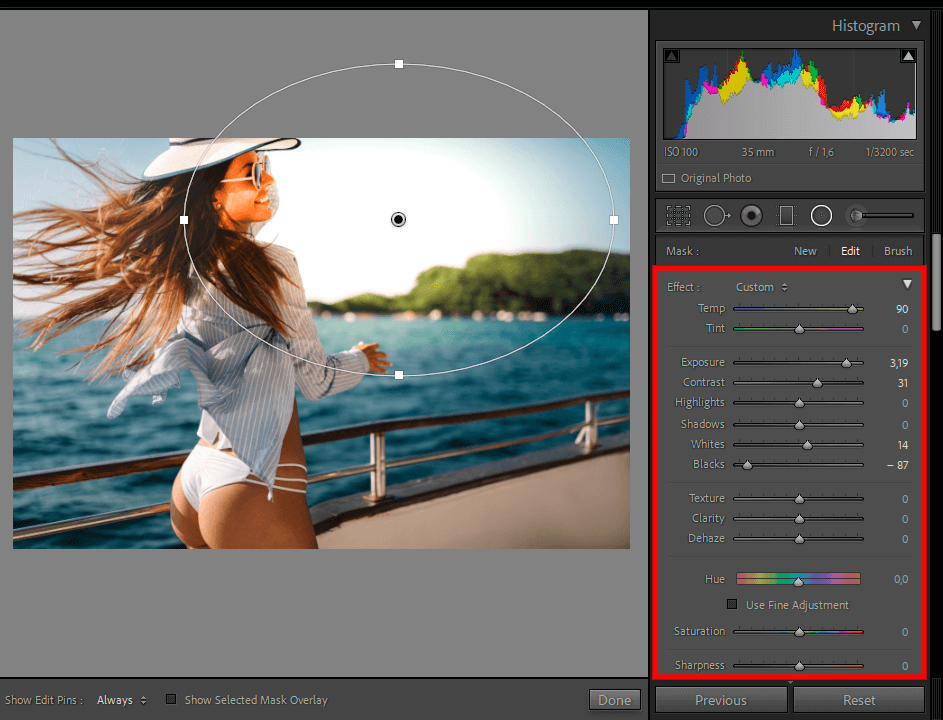
Take your time to adjust settings when you add starburst in Lightroom. Of course, you can use the settings from the screenshot, but you’d better alter them based on your particular photo.
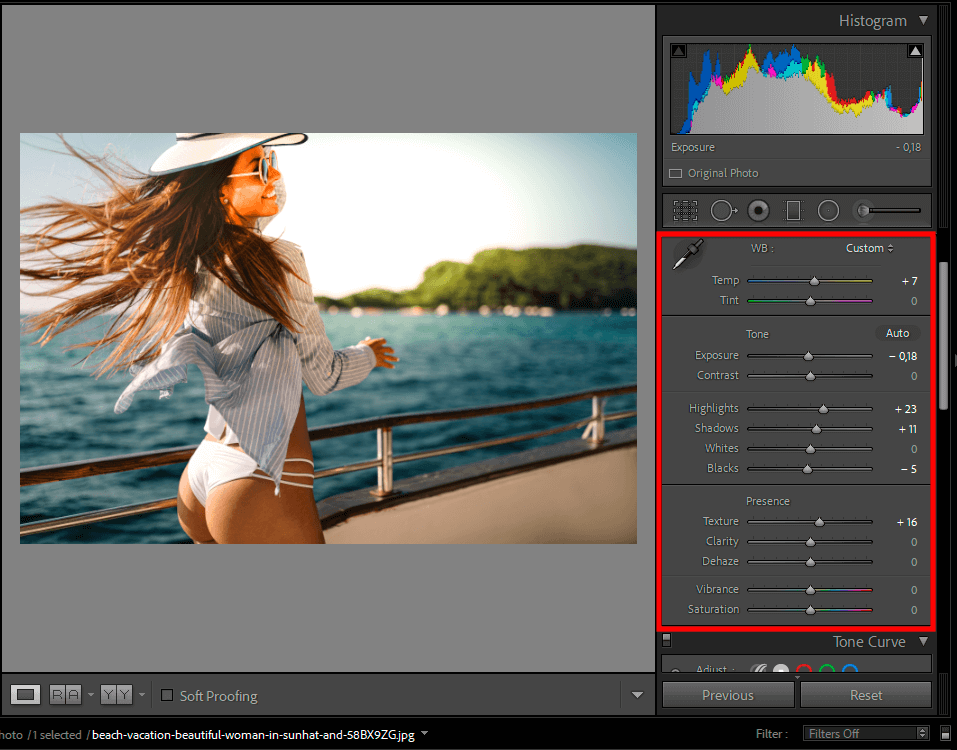
Remove the Radial Filter selection and start correcting colors.
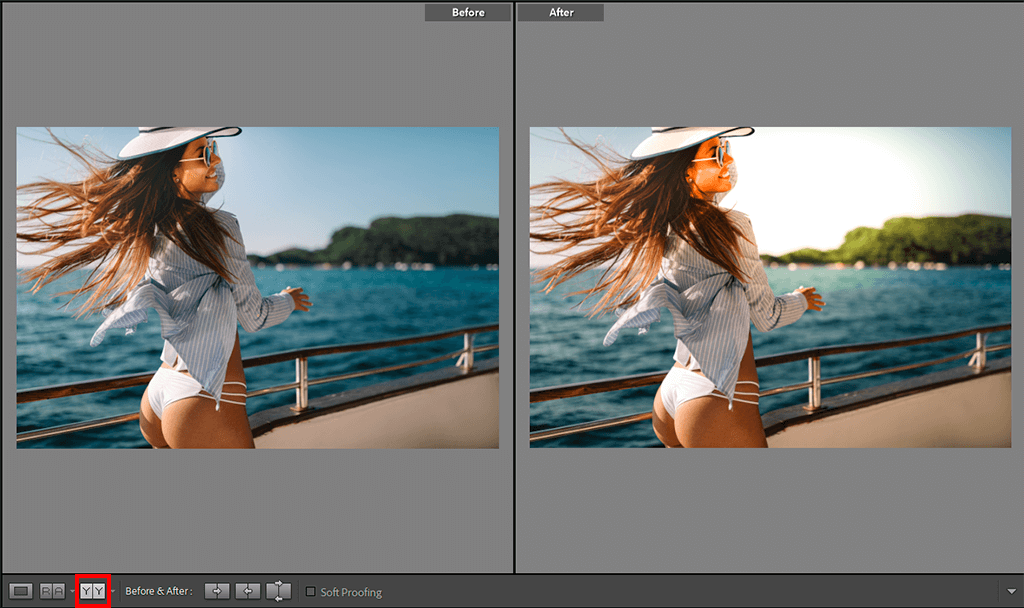
Compare the edited photo with the original one.
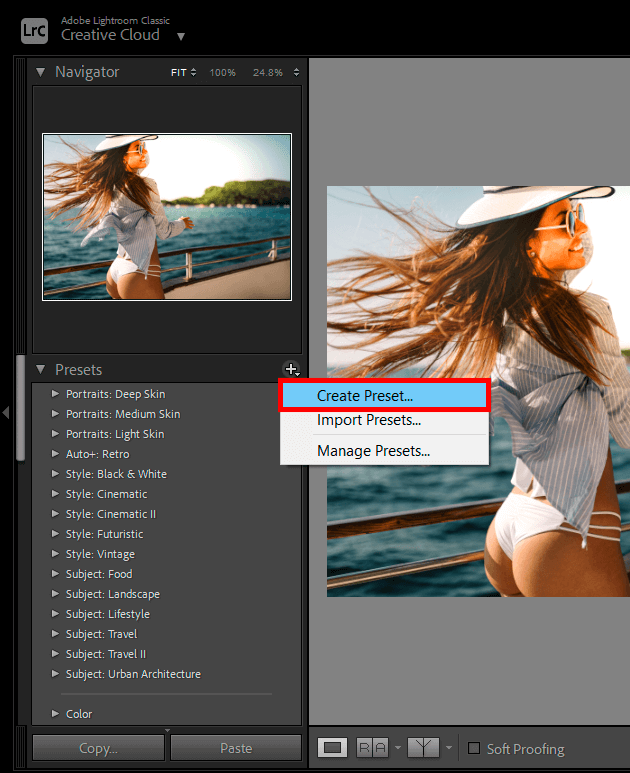
Go to the Presets tab on the left side of the interface, click on the + and choose “Create Preset”.
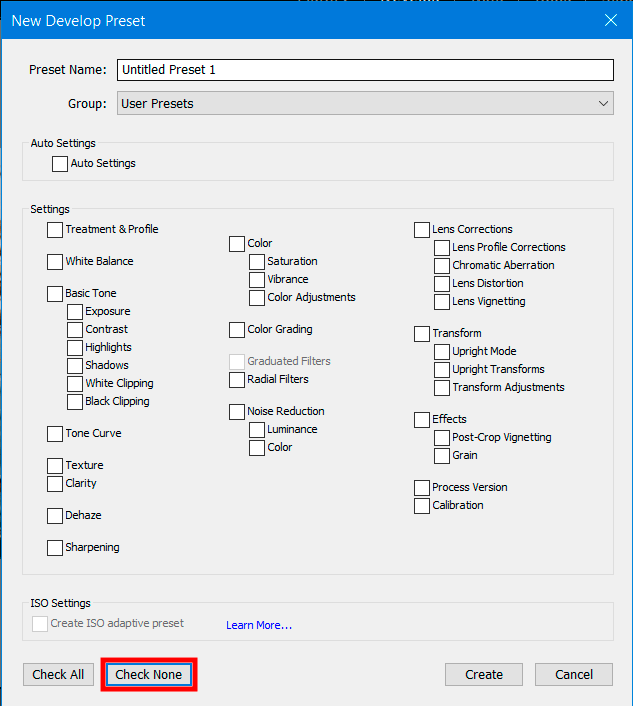
You will see a new window – click Check None there.
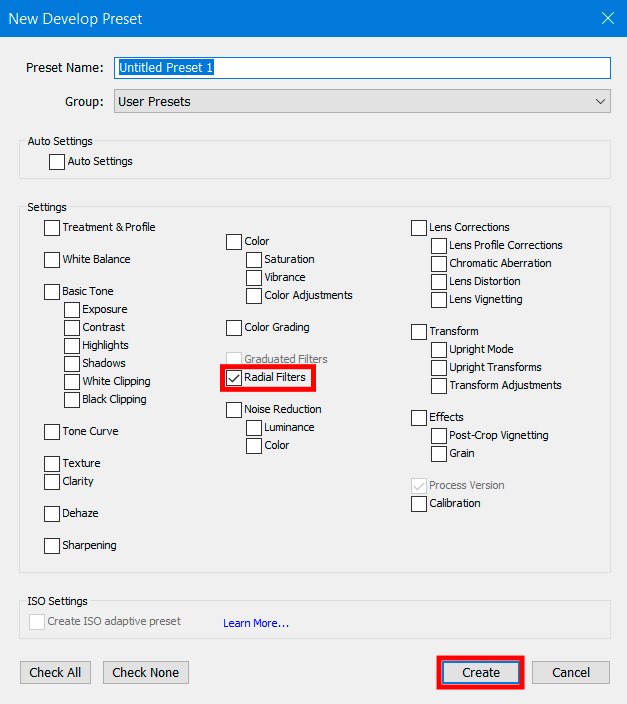
Then check the Radial Filter box and click Create.
You will get such a result after adding a lens flare effect to your image. This effect is best suited for portrait photography and landscape photography.

To make the process of adding starburst in Adobe Lightroom quicker, download and use these tools. Some presets complement photos with saturated and lush colors, while others add peachy tones to the skin. Moreover, you can find filters that imbue shots with appealing natural light. The collection of presets is rather large, but you can further subdivide it into smaller packages for faster navigation.
Lens flare is a common phenomenon you face while taking images in bright light. However, this effect may differ depending on the position of a light source. When it is too intense, e.g., the sun, rays reach the front of the lens and cause a lens flare.
To capture this magnificent effect, you need to keep the aperture smaller. A range from f/11 to f/2 is an ideal option. When light goes through this tiny opening, there appears slight diffraction. In other words, the light bends. Such starburst originates from the source of light.
Typically, they are available in .xmp or lrtemplate formats.
If you have imported too many presets, you can easily delete needless files. Right-click on the filter > there will appear a drop-down window – choose “Delete” there. Press Ctrl + Z to cancel the action.
There is a special Light panel with 6 sliders, which you can use to manually adjust brightness. Besides, there is the Auto button for automatic adjustments. These sliders control various tonal ranges but work identically. If you drag the slider to the left, the light will be reduced and the other way round.


