The range of people providing photography services keeps growing very quickly, so if you want to stand out from the crowd, you need to interest clients with additional offers. For instance, you can edit their photos and then arrange them in a thematic collage.
Before you start making a collage in Lightroom, you need to devote time to the preparation stages.
Lightroom wasn’t specifically created for this task, so you need to make some tweaks and switch from one menu to the other to get down to work. However, following the steps described below, you won’t experience difficulties.
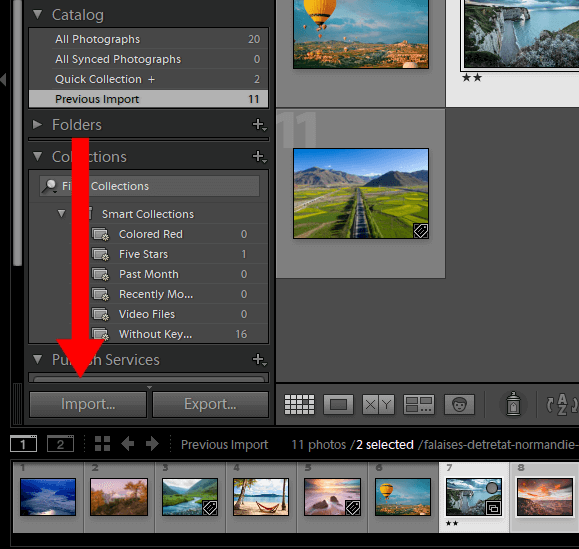
First of all, select images that you want to add to a collage and import them to Lightroom. The process is very straightforward and fast. Make sure to enter the settings you want to use.
If you treat photography seriously and want to expand your knowledge, you should also learn how to import RAW files into Lightroom.
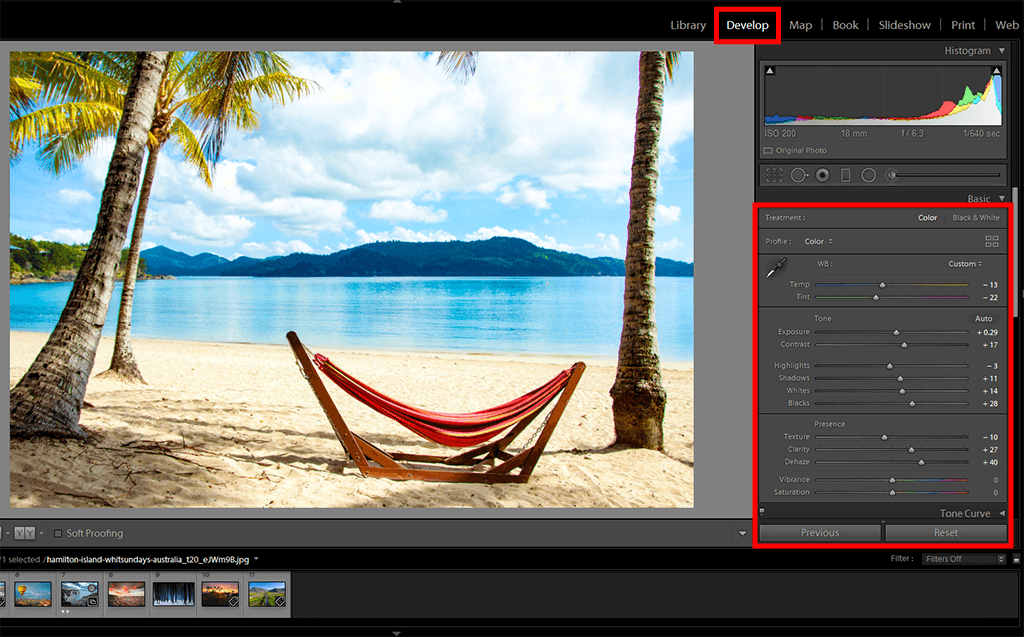
Your Lightroom photo collage must consist of high-quality images, which means, you need to edit your shots. Fortunately, this software has a special batch processing mode, so you can improve multiple images in one go.
If you don’t want to perform photo editing on your own, you can delegate the task to experienced FixThePhoto retouchers. They will polish your pictures and send them back in less than a day.

The Print module in Adobe Lightroom isn’t very popular, but it contains all the needed tools for collage creation. If you start the program but can’t locate it, go to the “Boo” and “Web” tabs – it is placed between them. Alternatively, you can press Cmd+P (Mac) or Ctrl+P (Win) for instant access.
I recommend choosing a template for a specific purpose, so that you can set dimensions in advance. If you don’t know the exact size of a future collage in Lightroom, you’d better choose a bigger JPEG format, which can be further downsized without affecting the quality. In case you do it the opposite way, you will end up with a collage of disappointing quality.
When you start arranging cells, you can always return to a window with dimensions and make the needed changes.
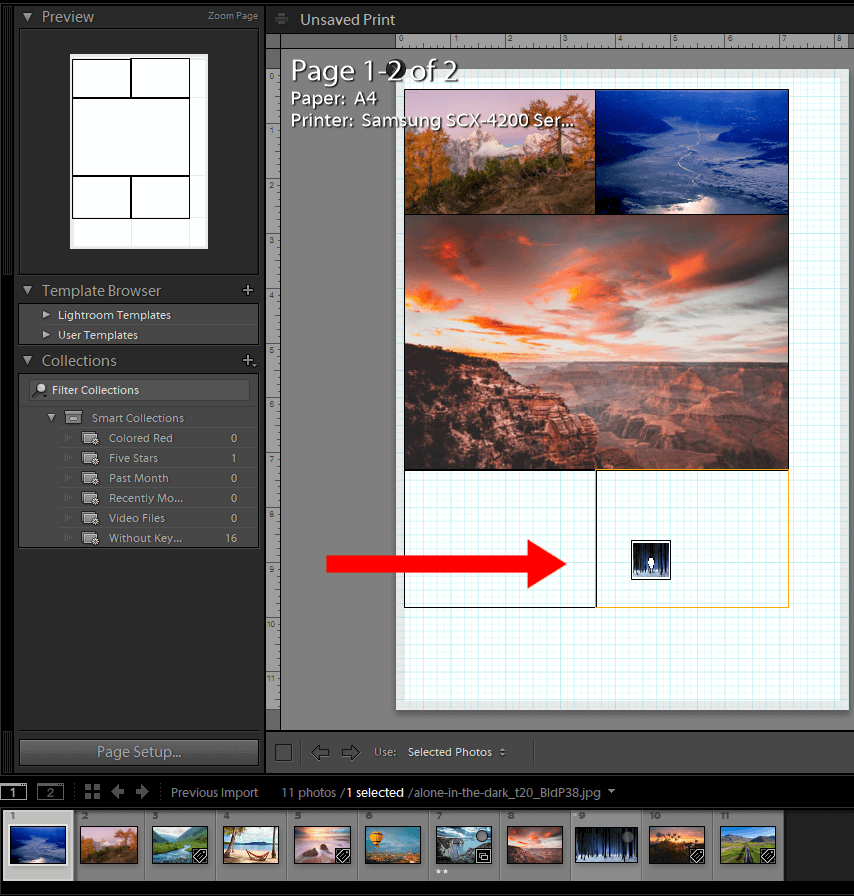
When the layout is ready, you can start filling empty spaces with imported photos. The program allows doing it in a very quick manner, using the drag-and-drop approach. You just need to insert pictures in the boxes and rearrange them as many times as you want to get an eye-pleasing composition.

Repositioning within a cell is necessary for accurate cropping. You can do it by holding Cmd (Mac) or Ctrl (Win) while dragging a file.
If the result of the cropping doesn’t coincide with your expectations, you need to re-make the entire layout. That is an annoying nuance, but the whole process of making a collage in Lightroom involves settling for compromises.
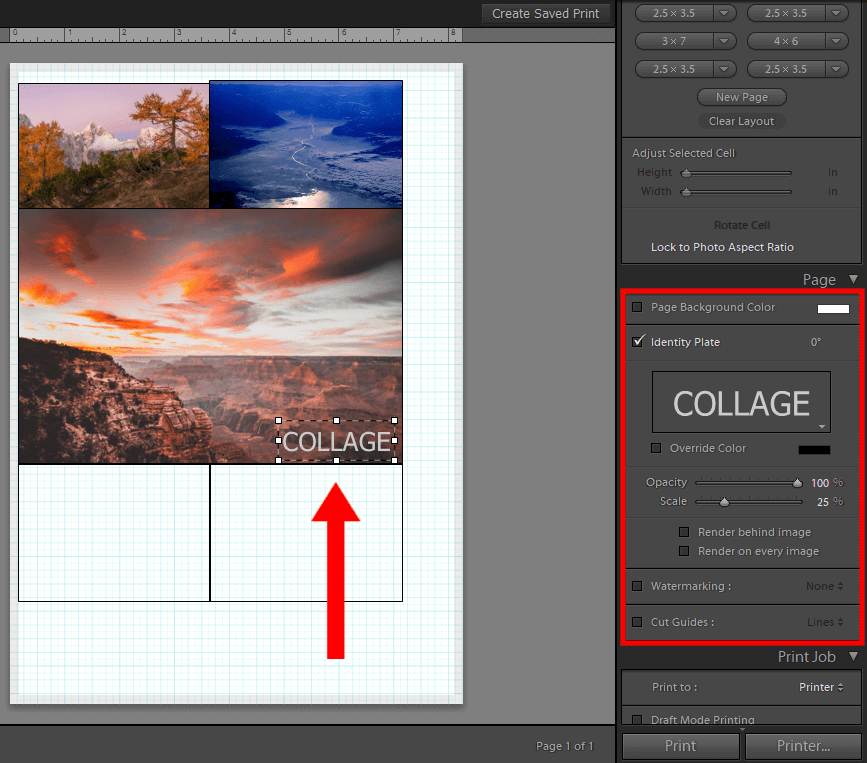
You can complement a photo with a related text via the Identity plate menu.

To make your collage easy to perceive, you should separate images with a white border. This method is widely used by popular Instagram bloggers. Besides, using a border, you can visually divide groups of photos into thematic cores.
To add a border, open the Image Settings panel on the right and check the Photo Border box. It is also possible to add an Inner Stroke, but it will hide a part of a picture. If that doesn’t spoil your collage, click “OK”. Keep in mind that the color of a Photo Border is set by default and can’t be further adjusted. However, things are different with Inner Stroke and you can recolor it the way you like.
To remove distractions and preview your collage, switch off Image Cells and Dimensions in the Rulers, Grids & Guides panel.

If you have taken all the above-mentioned steps and you like the result you go, you can save it as a template and use for other projects. Go to the Template Browser panel and click on the “+” sign next to Template Browser. Though templates are an inherent feature of Adobe Photoshop, many experts also use Lightroom templates to speed up their work.
There will appear a dialog box where you need to indicate the name of your Template and choose the folder for storing. For quicker access, save it to the User Templates folder, which is generated by Lightroom automatically. Of course, you can make a new folder, just make sure you remember its name and location.
If you want to change your template and want to save the alterations, right-click on the file’s name in the User Templates folder (or your custom folder) and choose “Update with Current Settings”.
If you make a collage in Lightroom using one and the same template, you are unlikely to attract a broad audience. People like to see original designs with personal touches and there are several criteria to consider to cause a wow effect. The most important parameters, in this case, are balance, alignment, proximity, and theme. You should also experiment with photo collage ideas to provide clients with stunning collages.
Talking about balance, we actually mean the arrangement of elements within one design. When it comes to a Lightroom photo collage, you need to place images in such a way that the finished layout is nice to look at and easy to understand. A collage that is properly balanced is bound to bring smiles to viewers’ faces.
You can opt for a symmetrical balance, which implies locating similar elements in all directions from the center. For instance, you can insert images of identical sizes or with similar color gamut on each side of the composition. It makes sense to study more photography composition tips to create truly mind-blowing collages.
Sometimes, arranging photos slightly off-center can also cause a beautiful effect. This type of balance is called asymmetrical. You can use images with varied sizes or of different shapes and place them near each other.
This is another crucial principle to pay attention to while making a collage in Lightroom. Alignment refers to the way different elements of a design (pictures if we talk about a collage) line up with each other. Edge alignment shows how far elements are located from the outer edge of the composition. Central alignment specifies the distance between elements and a horizontal or vertical center line. You can choose any variant based on your current project.
It is impossible to create a high-quality and arresting collage if you neglect this principle. Proximity refers to the distance between the components of the design. If you make borders between photos wider, the images in a collage become smaller and vice versa. The way you play with the empty space between pictures really affects how viewers will comprehend the idea you try to reveal. Increasing the width of a border rarely brings a positive outcome.
While other three parameters are more tangible and you can immediately understand how they influence the visual appeal of your photo collage, a theme is also very important though less measurable. Some people refer to a theme as a tone or style of a design. In the case of a collage, a theme is an identical/similar style or treatment present in all your photos.
For instance, if a collage consists of B&W images and colorful photos chaotically scattered across the cells, it will be very difficult for our eyes to enjoy such a composition. It would be better to combine black and white photos in one collage and leave color pictures for another one. While selecting pictures for a collage, pay attention to lighting, color balance, and mood to get a harmonious whole.
The concept of a theme may be confusing if you are just learning how to make a collage in Lightroom. There are several basic principles to use for your work, but it takes much time and practice to bring them to perfection. For starters, you can download collage templates, fill the empty spaces, and then make custom tweaks. Once you learn the process inside out, you can create collages from the ground up.
I hope this guide has dispelled your worries about creating collages in Adobe Lightroom. Though you need to spend some time to get a really one-of-a-kind collage, the gratitude of your clients and possible business prospects is worth the effort.
If there are still some nuances you want to clarify or if you have questions about how to create a collage in Lightroom, check the info below.
Photographers like making before and after photos in order to show how they improved an original shot. Fortunately, Lightroom has a special tool for this task.
After you grasped how to make a collage in Lr, preparing before & after images will be a breeze. You just need a template with 2 cells – place an original photo in one of them, and leave the second cell for a modified picture.
Usually, people like making a collage in Lightroom because the process is straightforward and fast. However, the program doesn’t have many customization features, which may be frustrating for pro users. For example, you can’t recolor a border. Photoshop is more generous in this regard and many experienced photographers opt for the software for collage-making work.
Alternatively, you can take advantage of online services, e.g. Canva. This website can integrate with Facebook and contains many free collage templates for streamlined work.
Anyway, if you plan to develop your business, you definitely need to know how to make a collage in Lightroom. The program allows making quick edits, preserves image quality, and offers many saving options. Moreover, you can even convert TIFF into a collage to achieve a professional result.

Improve your portrait, newborn, travel, landscape, and wedding photos with the help of these presets before adding them to a collage. You can even adjust them based on the outcome you expect to get.


