Darktable Review
When you purchase through affiliate links on our site, we may earn a commission. Here’s how it works.
Darktable 2026
- Platforms: Windows, Mac OS, Linux, Ubuntu
- Price: Free
- FixThePhoto Editors' Rating
(3.5/5)
Read my complete Darktable review about everything you should know about this free open source raw editor. Can it replace Adobe LR and help you make photo editing professional and free? Is it possible to install it on Linux laptop? Find out below.
What Is Darktable?
Platforms: Windows, Mac, Linux, Debian, Fedora, RHEL, Solaris, FreeBSD
Price: FREE
VERDICT: Darktable software is a free open source raw editor for non-destructible image enhancement. It allows beginners make basic photo editing, apply filters, and do color correction.
The image editor has quite good guides for studying the program faster. It is perfect for newbies who want to learn how to edit photos for Instagram. But if you are a professional photographer, choose another photo editing software like Lightroom or Affinity Photo.
You may use Darktable for advanced color correction and some basic picture editing. The photo editor has a module for removing stains, creating different irregularly shaped areas, as well as a possibility of cloning.
- Read more about Darktable vs Lightroom.
Darktable Review
The main distinctive feature of this program is that it positions itself as a free Apple Aperture and Adobe LR alternative, having the open source code. This means that anyone can add new features and capabilities to the program.
Familiar Interface
The interface of Darktable is simple, it is designed in such a way that even a beginner would be comfortable using it. There is nothing excessive in it.
Darktable is divided into 5 modules: Lighttable, Darkroom, Map, Slideshow, and Tethering. This is done in order to conveniently group the functions.
In general, the Darktable and Lightroom’s interfaces are almost identical, so you should not have problems when switching to Darktable.
Convenient Way to Manage Your Photos
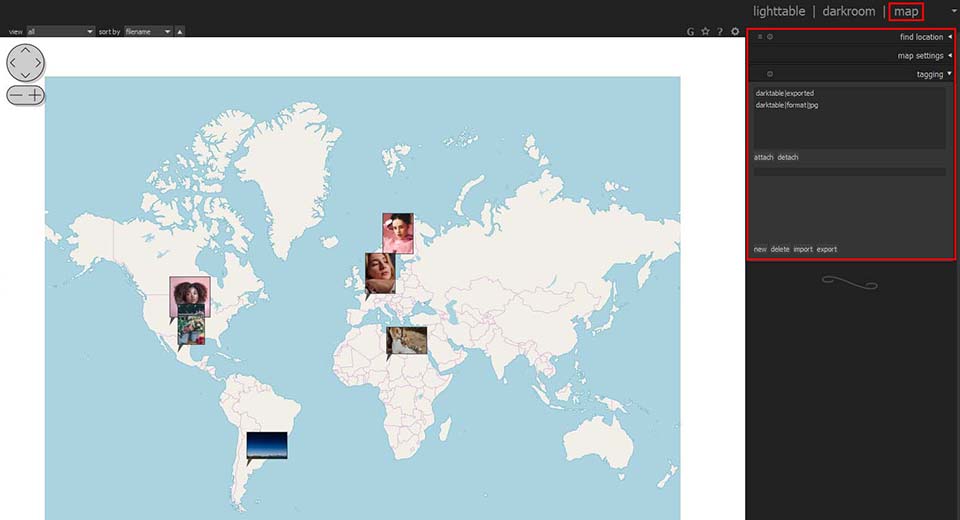
This module was created in order to simplify the binding of photos to geotags. If your image already has data on where it was taken, it will immediately be displayed on the map.
However, if your camera does not apply GPS data to photos, or anything else prevents you from having geotags, you can manually enter your location data. In order to do this, simply choose a shot and transfer it to the location of the related photoshoot.
You may select maps and search for locations. There is also more than one map available for usage, such as Google Maps, Virtual Earth, OpenStreetMap, OpenCycleMap, etc.
Alternatively, you can use a location search that allows looking for precise addresses up to the house number, and then attach the photo to it.
Useful Color Correction Tools - Shadows & Highlights
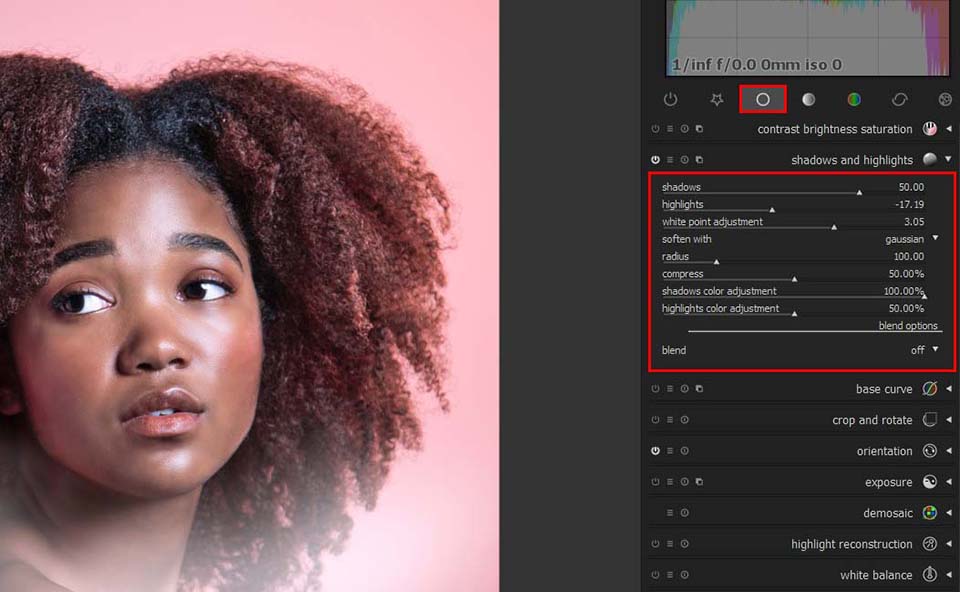
This instrument is suitable for making adjustments to dark and light segments of your image moving the several provided sliders. The shadows and highlights slider darkens or brightens shadows. Using the shadows color adjustment slider, you can increase or decrease the saturation of colors in shadowed areas.
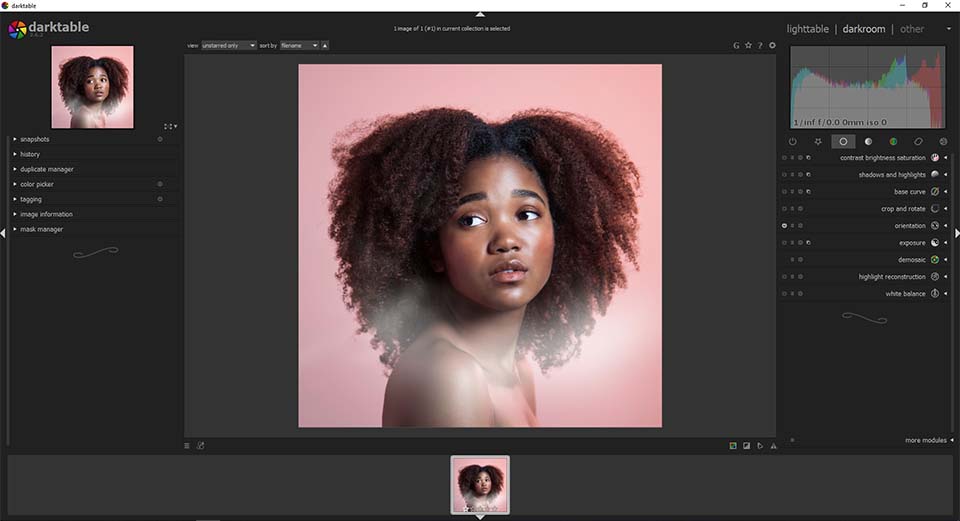
Main Module - The Darkroom
Selecting an image you want to enhance, you find yourself in the main working module of the program – The Darkroom.
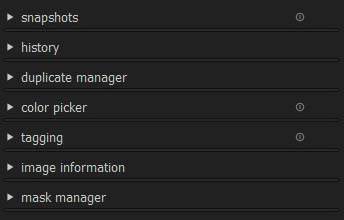
First on the left side goes the history panel. You can make snapshots and duplicate images there.
Also, you can view the entire history of your adjustments and return to earlier versions. The Manage Masks tab serves to add various so-called masks over images. This is how various geometric shapes, brushes and gradients are called.
In the middle, there is the central panel occupied by the photo. To zoom in, you can choose between two methods: rolling the mouse wheel away from you or by clicking on it.

Right-sided is the selection of various tools for editing photos. A bar graph displayed above represents the exposure of the specific image, followed by a row of buttons on the picture post-processing modules. Those were separated into groups by properties:
Basic group – The main group of instruments, which includes contrast, shadow and highlights, base curve, crop and rotate, exposure, demosaic, white balance and many others.
Tone group – Includes such tools as levels, tone curve, filmic.
Color group – Various color manipulations, such as color correction or the ability to make a monochrome photo.
Correction group – Includes sharpen, lens correction.
Effects group – A group of tools thanks to which you can make a vignette, add grain or graduated density.
Deep Color Enhancement
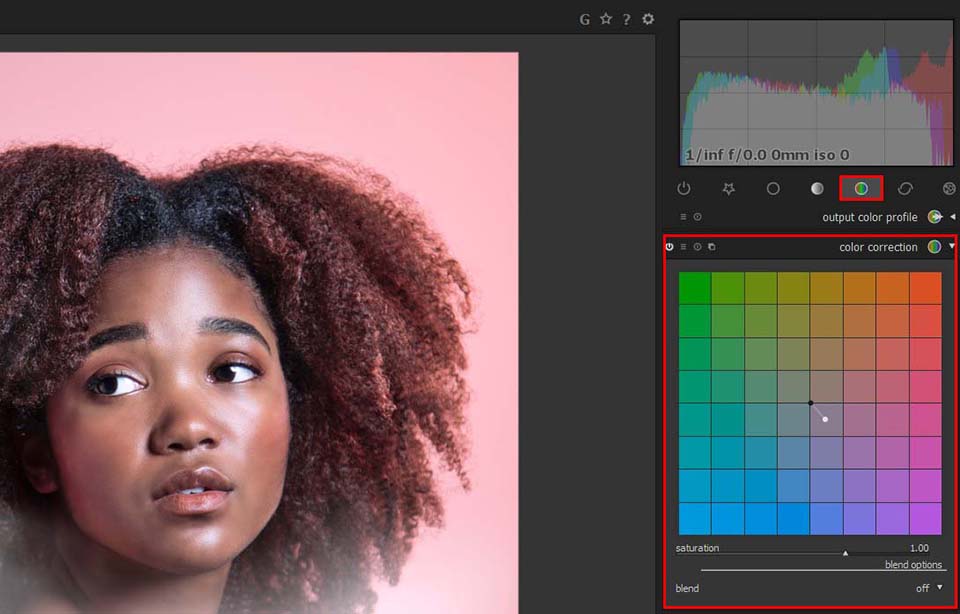
Another basic instrument can be found in the color group. Work with it to give a different hue or add some other colors to a photo. The tool resembles the result that RGB curves give, only it is achieved by moving two points.
The light and dark dots are responsible for the lights and shadows of the shot and each can be given a different tint.
- Check out more open source photo editors.
Contrast, Brightness, Saturation Like in Adobe LR
The biggest advantage of this block is simplicity, represented by three sliders affecting each their own feature. Thanks to these tools, it is quite possible to make your low-contrast photos pop.
Make Photos Monochrome

Darktable can easily turn color photos into monochrome ones and you have control over the color saturation. Also, on the color bar, you can select which colors will prevail in the image.
Add Dramatic Grain

The Grain instrument is located in the Effects group and serves for giving your images an effect of film photography. Three sliders are responsible for image conversion.
Coarseness regulates the size of grains. Strength alters the intensity. With midtones blas, the more shift, the more visible the grain fading becomes in shadows and highlights.
Work over Graduated Density
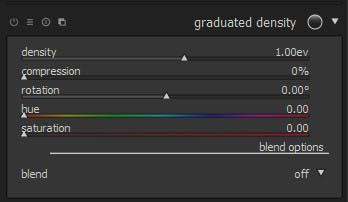
Applying this tool, you can smoothly shift tones of separate image parts. It is capable of returning the color to the overexposed part of the sky.
The varying density and smoothness of the transition can be controlled via the instrument and the color chosen, introducing some non-standard colors into the image.
Convenient Organizer - The Lighttable
With the help of the Lighttable module, you can turn Darktable into convenient free photo organizing software. Conventionally, the module is divided into three parts.
Import Panel. You may find the panel located on the left side of the window that provides you with various options for uploading photos. You can import individual files, folders, or navigate through connected devices. It can be a search by various parameters, for example, by keywords, ISO, by the used camera or lens.
Preview Panel. It is the central part of the window, which allows you to view photos in the selected folder. In addition, there is a convenient sorting in this panel, thanks to which you can give photos a rating, mark them with different colors, and also sort by name, rating, groups, color, time and so on.
Settings Panel. It contains features that make the digital photo editing workflow easier. You can select images, invert selections, copy or delete selected images with a single click.
In addition, the panel has a “Styles” tab, which allows you to manage saved presets. With the help of metadata editor, tagging and geotagging, you can edit the title and description of the photo, add or remove tags and add geolocation.
There are also export settings in which you can choose the path where to save the file, select the format, quality, size and so on.
Darktable Price
As I mentioned above, the Darktable setup is cost-free. There are no premium subscriptions or pro-versions. If you’ve already decided to install the program, follow the official website, then go to the “Install” tab, find your OS and click “Download”.
3 Darktable Alternatives
Check out these three free Darktable alternative that have almost the same photo management and color correction features.
1. digiKam
digiKam is among the most sought-after free open source applications for editing digital images. It is equally well-fitting for performing such actions as importing images, organizing them, editing and then sharing.
Managing images with digiKam is especially convenient, you have access to such organizing assistants as tags, ratings and labels, assigning which you will effortlessly find needed photos in the program.
Further improvement of the image is available in the editing section where you can correct colors, sharpen and resize the image, and even perform more advanced actions, such as adjusting curves or compiling shots into a panorama and so on.
Upon Darktable vs Digikam comparison, you will find the latter having a larger library of décor instruments that can be used to make photos more interesting. digiKam also benefits from a well-organized working area where you can view, download and remove images.
A fun possibility of organizing your photos into a calendar is nice.
- View more about the best free photo editors.
2. RawTherapee
RawTherapee is free photo catalog software and a powerful program for working with RAW files. You can use it to improve photos by adjusting such parameters as white balance, exposure compensation, brightness, contrast, image temperature and so on. Apart from that, you can also cut or resize a shot and rotate it.
Rawtherapee boasts of a large color correction toolkit: brushes, custom curves, noise reduction and more.
- View more about Darktable vs RawTherapee.
3. Polarr
Polarr is another alternative that gives you a large number of features for a small monthly subscription. Of course, working in it for free is also possible but in such case, you will be unable to access certain advanced instruments.
Polarr is equipped with most necessary instruments with the help of which you can alter the photo’s temperature and tint, saturation, contrast and brightness, plus apply a vignette effect. HSL profiles with the separate setting of each shade of the palette are worth mentioning. If you are a beginner, specifically for you there is a separate module, with a large number of pre-made filters that work like “Styles” mentioned above.
Despite the fact that Polarr is filled with numerous professional instruments, the image editing software remains easy to understand and work with.
- Read my Polarr review.


