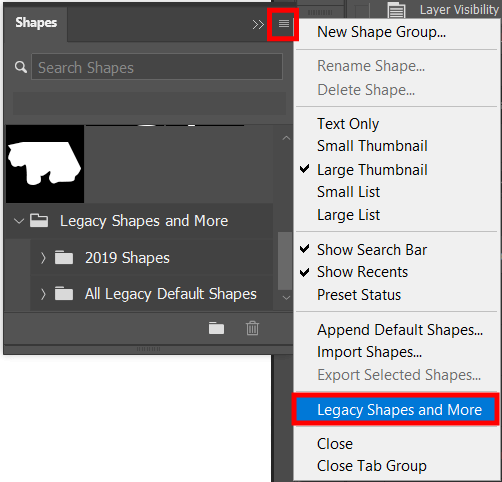
If you haven't uploaded legacy shapes yet, you should start with this step. Open the Shapes panel (Window > Shapes), hit the menu button in the upper side of the panel, and choose Legacy Shapes and More.
You'll find the Legacy Shapes and More folder at the bottom of the list in the Shapes panel. But keep in mind that this feature is only accessible if you're using the most recent version of Photoshop.
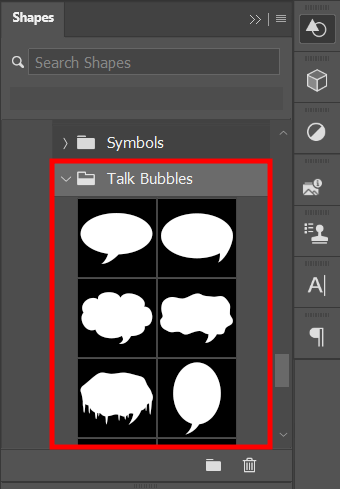
Click on the Custom Shape Tool (or hit U for instant access) in the toolbar on the left, and pick "Path" from the dropdown in the Options bar. After that, go for a speech bubble shape by navigating to the Options bar or the Shapes panel (Window > Shapes) under Legacy Shapes and More > All Legacy Default Shapes > Talk Bubbles.
Select the shape style that suits your picture content, depending on whether you want to create memes, make designs, or draw manga in Photoshop.
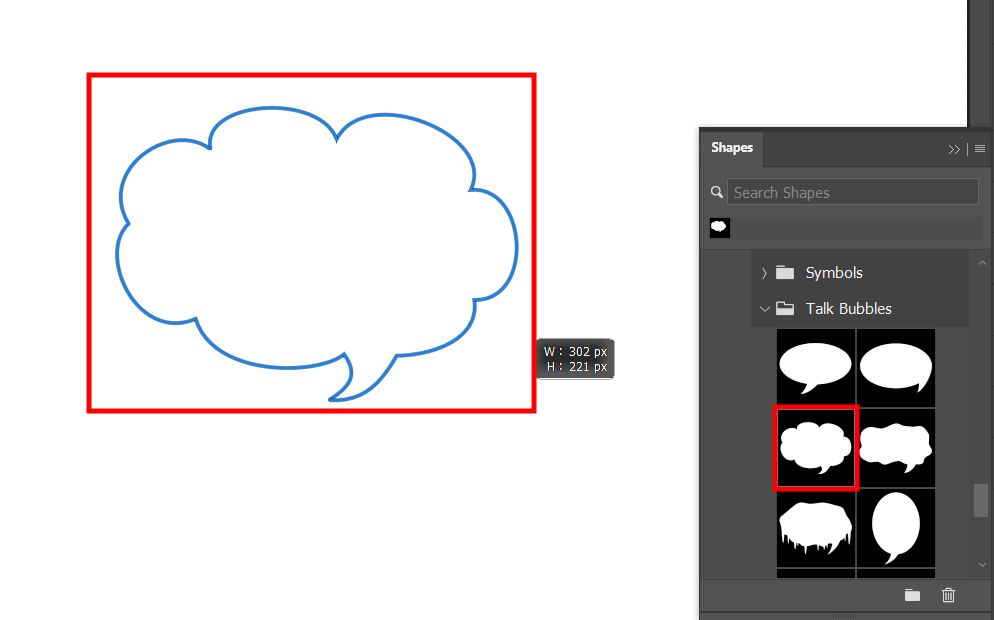
After choosing your speech bubble shape, click and drag on the canvas to form the path for your speech bubble.
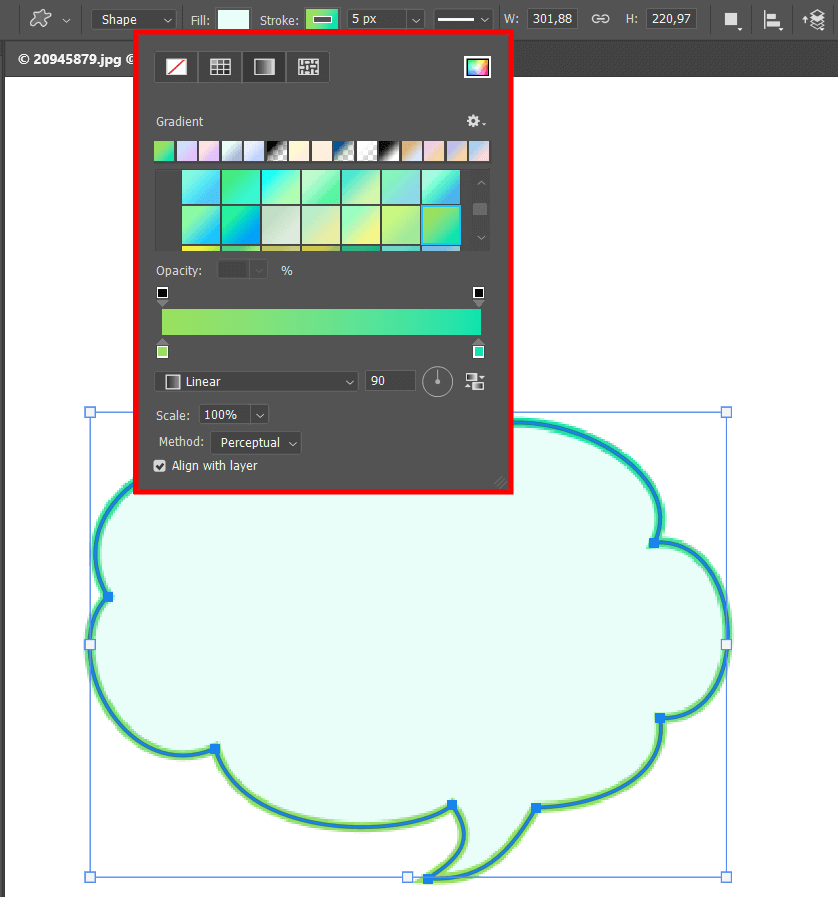
When you add speech bubble to image, you first need to click the Create a New Layer icon at the bottom of the Layers panel. After that, double-click on the layer name and switch it up to Fill. Following that, choose either the Path Selection Tool (A) or the Direct Selection Tool (A), right-click on the canvas, and choose the Fill Path option.
While in the Fill Path dialog, choose Foreground Color. The color doesn’t matter much right now. We’ll guide you on how to modify it later. At this point, your speech bubble should be filled with the Foreground color.
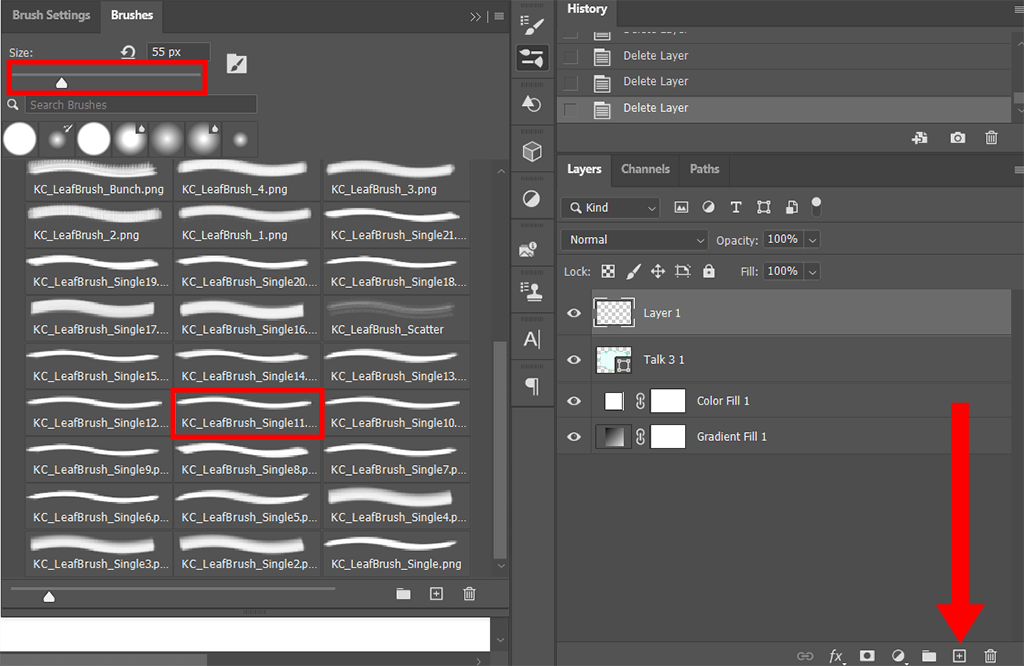
Create a new layer and name it Outline. Open the Brushes panel (Window > Brushes) and choose the brush you want to use for outlining your speech bubble. If you're after something unique when you make a speech bubble in Photoshop, you can look for more brushes on the web. Once you find something suitable, you can install brushes in Photoshop.
If you want to tweak the brush size, head to the Brushes panel. It is possible to change even advanced brush settings within the Brush Settings panel.
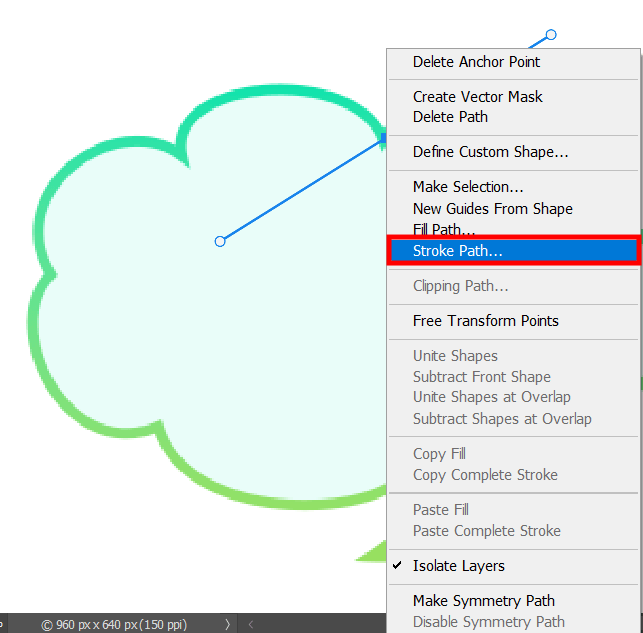
Choose either the Path Selection Tool (A) or the Direct Selection Tool (A). Next, right-click on the canvas and select Stroke Path.

Make sure you've picked the Brush tool in the Stroke Path dialog. If everything is done properly, your speech bubble will have an outline.
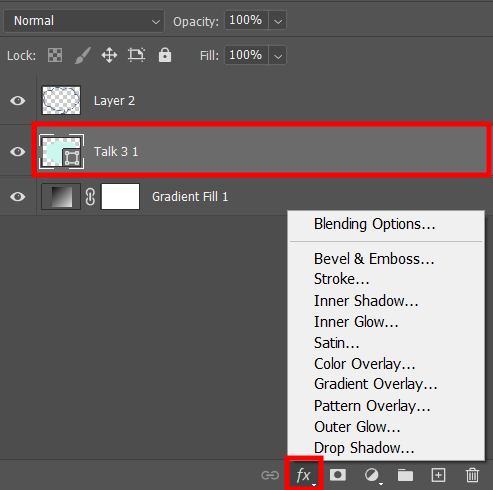
Now, apply styles to our layers. This way, we can easily switch up their looks whenever we want. Just double-click on the Fill layer for that.
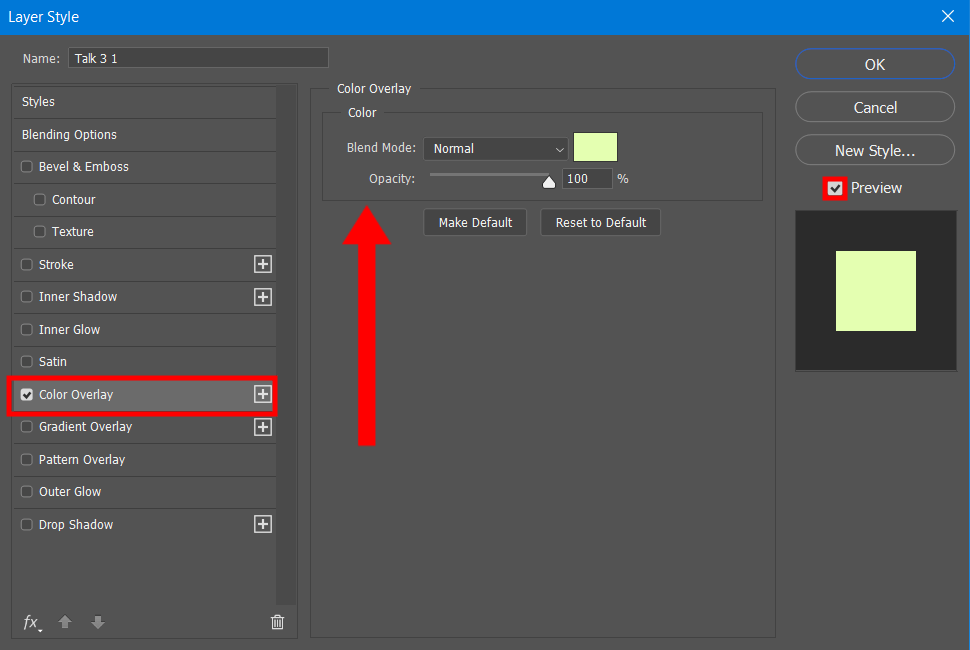
Make sure you've turned on Preview in the Layer Style dialog, and then select Color Overlay. Click on the color icon to choose a new color, and you'll see the fill color of the speech bubble change right at that moment.
When making word bubbles in Photoshop, it is also possible to add Color Overlay for the Outline layer to alter the color of the speech bubble's outline. Once the layer styles are applied, you can easily tweak them by double-clicking on a layer style in the Layers panel.
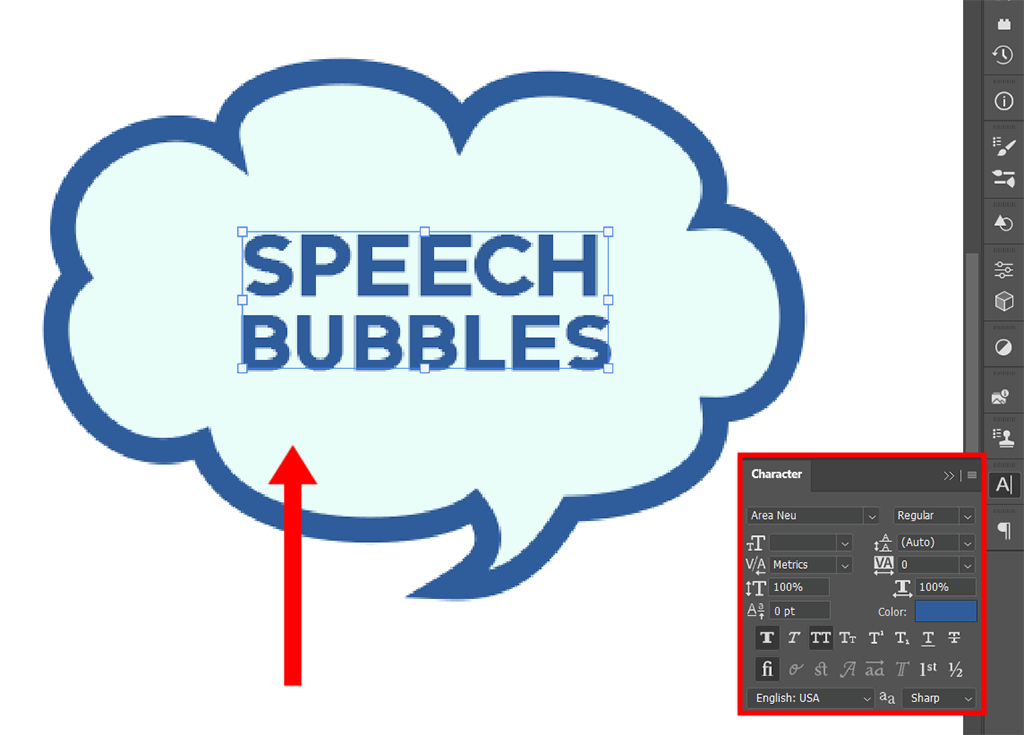
Choose the Horizontal Type Tool (T), click outside the speech bubble shape, and type in your text. Turn on Free Transform (Ctrl/Cmd + T) to adjust the text size using the handles on the bounding box and move the text around by clicking and dragging. Hit Enter to accept the changes.
Feel free to customize the text further by making adjustments in the Character and Paragraph panels. You can also experiment with applying various Photoshop text effects.