You can select brushes with various patterns and outlines. If you are wondering how to install Photoshop brushes quickly, make sure to read this step-by-step tutorial. You can use these tips regardless of the version of Photoshop installed on your PC.
Brushes are widely used by aspiring photo editors, artists, and famous graphic designers who want to make their images stand out.

There are several ways to install third-party brushes in Ps. Everything depends on the version of the software that you are using. If you have Photoshop 2020 or a newer version, you can quickly load new tools in the Brushes menu.
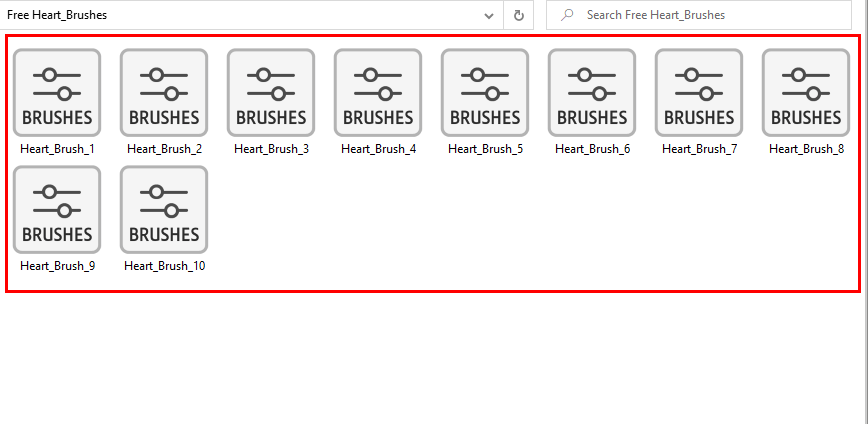
First, you need to find a set of Ps brushes created by other professionals. While there are plenty of free options available, you can also purchase some brushes. Usually, such sets are saved in .zip files. You need to unpack them to access a folder with brushes.
After selecting a suitable option, download it to your PC. Check whether there is an .abr file in your folder. If you can’t find it, delete the folder and find another set of brushes on the Internet.
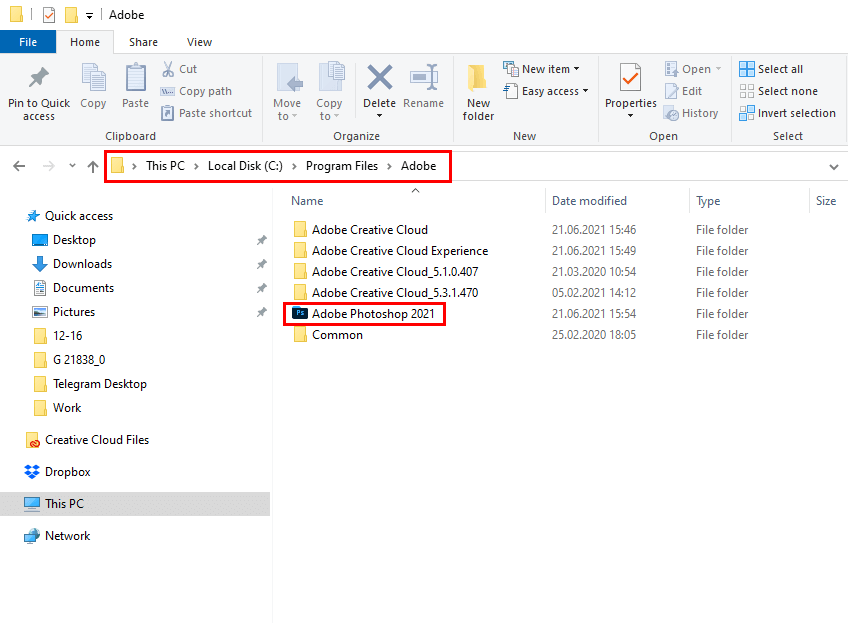
Windows: C:/Program Files/Adobe/Photoshop/
Mac: /Users/{Your username}/Library/Application Support/Adobe/Adobe Photoshop ___/
Then, you need to copy the downloaded brushes to the Ps folder. You can find it here:
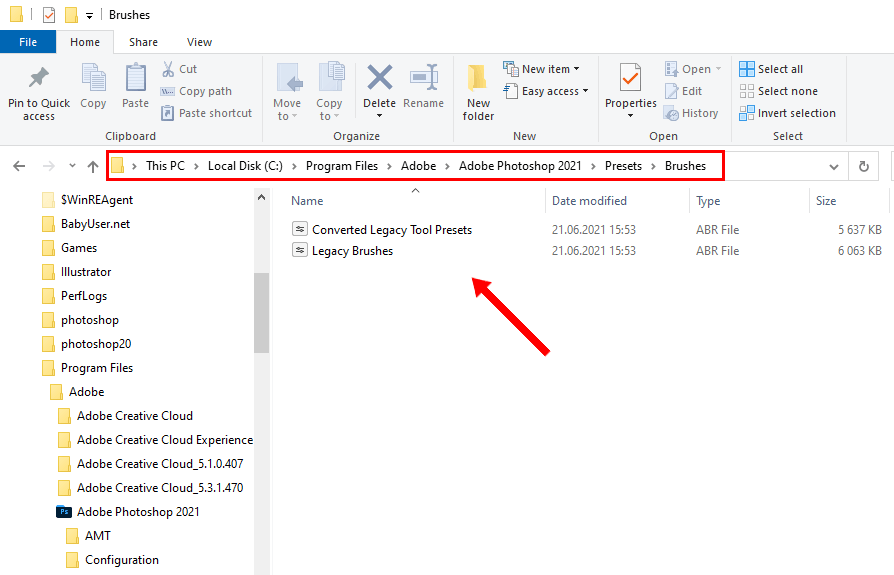
Open the Presets folder, then, select Brushes to see all the available options. In this folder, Abobe products store all the available brushes. Photoshop will look for them here so you need to copy your brushes to this folder.
You will see some default brushes, but you don’t need to do anything with them, since you just need to copy new brushes here. Some users prefer creating a new folder for custom brushes, however, it’s more convenient to leave them in the default one, since the program will load them automatically.
Create a new Photoshop file. You can do it from the Home Screen. Just find the Create New... button on the left and click on it. You can also find the File menu in the Menu Bar and select New.
To solve this task even more quickly, use handy Photoshop keyboard shortcuts. For instance, you just need to press Ctrl+N/Command+N to create a new document.
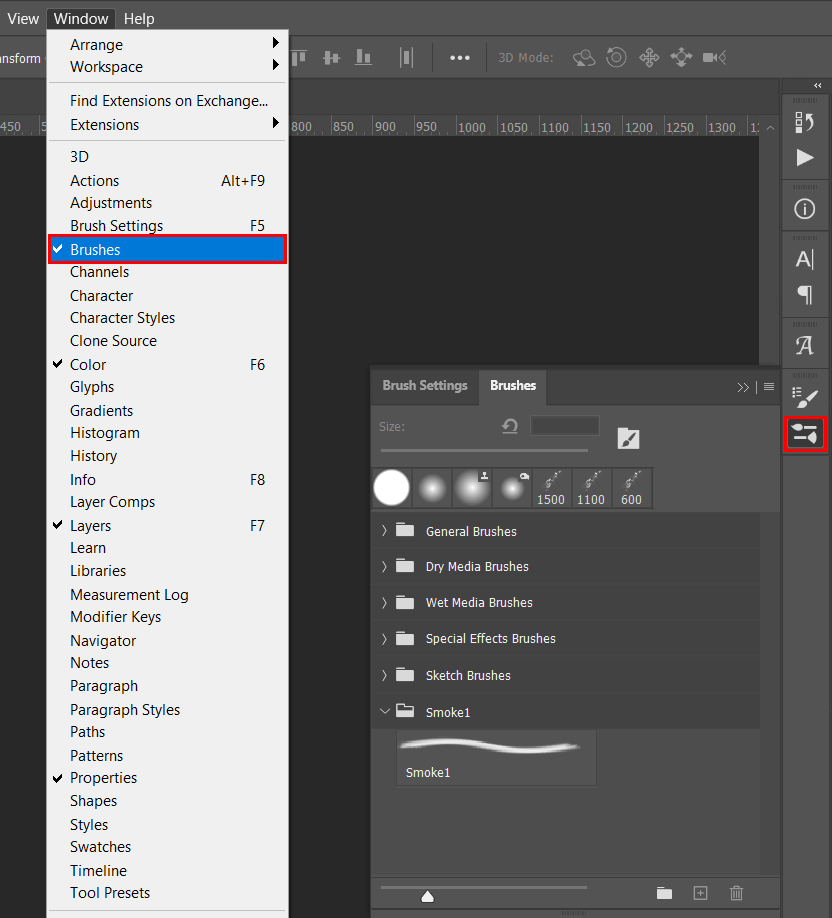
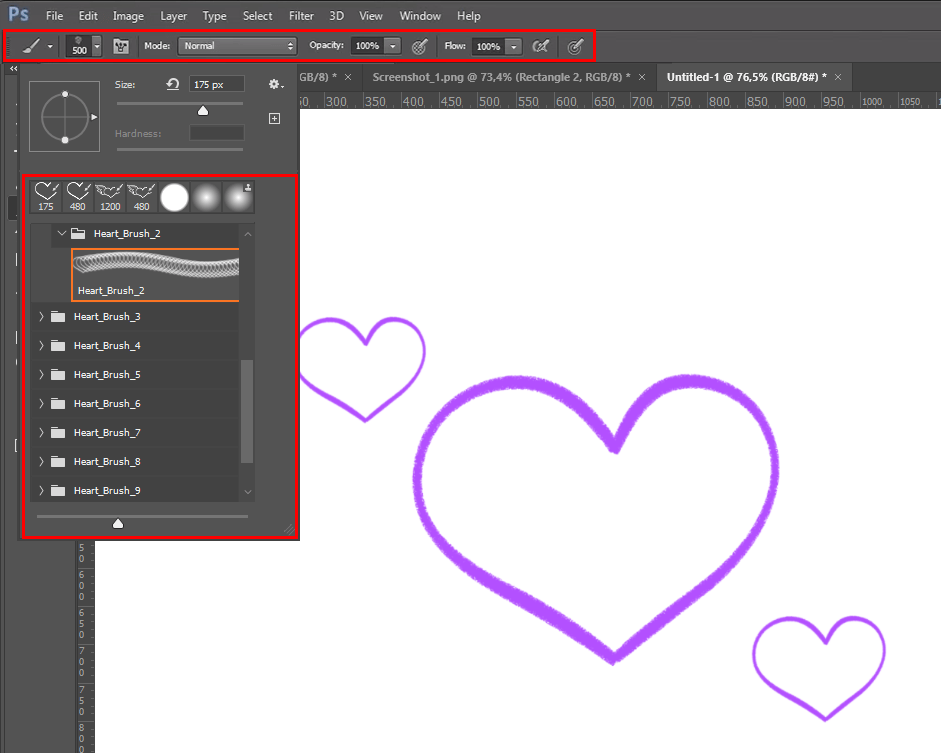
Then, you need to open a new window and customize your brushes. Go to Window > Brushes and click on the corresponding option to see the menu. You can add it to the toolbar on the right or put it wherever you want to.
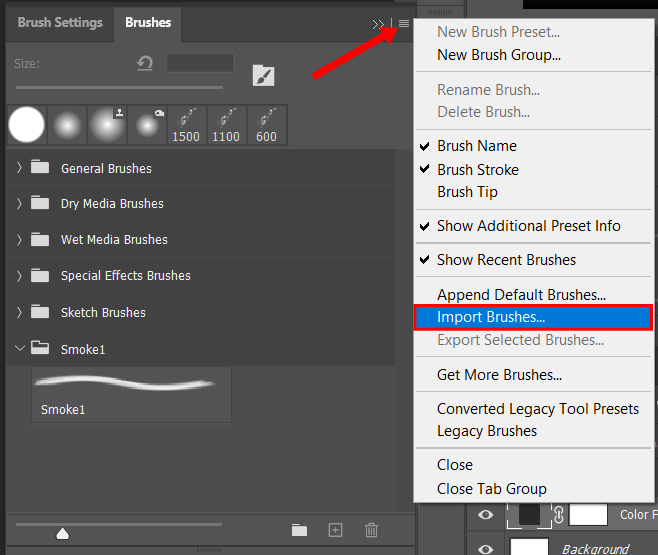
In a new window, you need to click on the Settings icon and select the Import Brushes option at the bottom of the list.
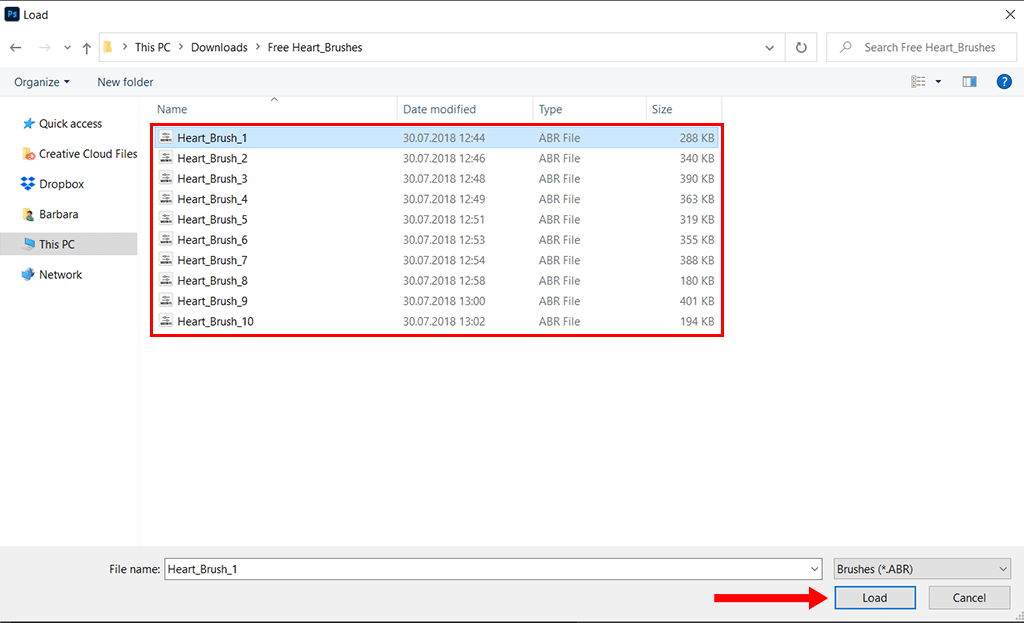
Select the brushes that you want to import and click on Load.
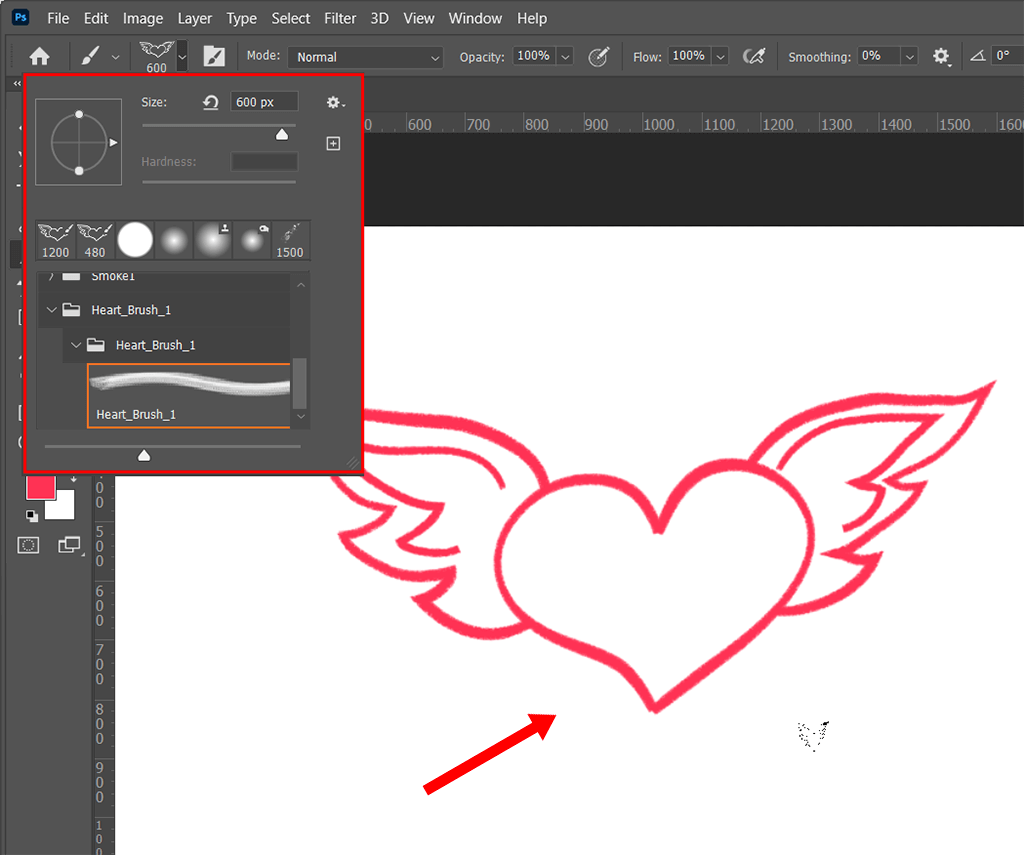
After installing Photoshop brushes, you can start using them when editing your documents. You will find them in the Brush Group folder. Click on it and select a brush that is the most suitable for your task.
After selecting a brush in the Brushes panel, you will notice that it has a bluish outline.
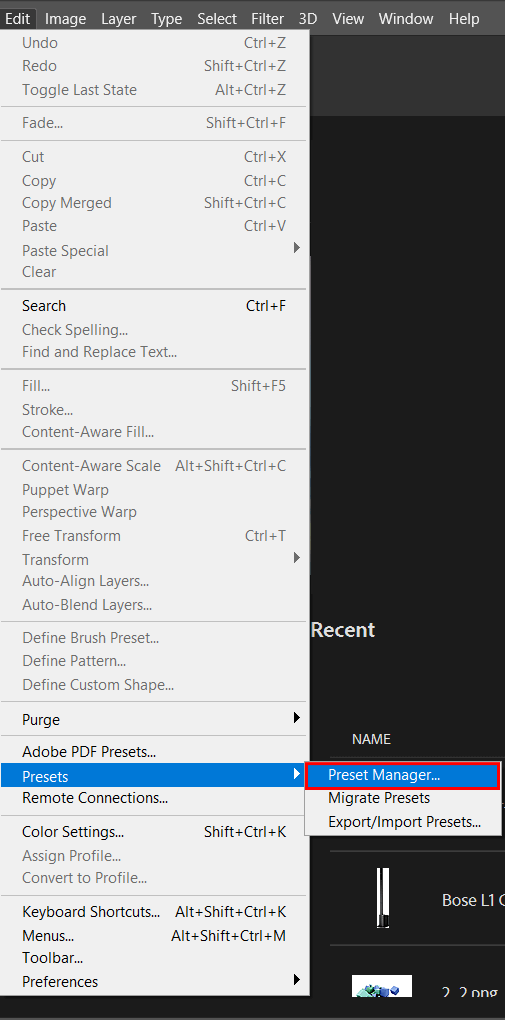
Keep in mind that you can add brushes to Photoshop even if you use an older version of the software. For instance, if you work in Photoshop CC 2019, you can upload brushes with the help of the Preset manager. You can expand your toolset in a few clicks.
Start by running Photoshop on your computer. Then, click Edit, select Presets, and click on the Preset Manager.
In a new window, select the Preset Type and click on Brushes. Then, click on the “Load” button to add a brush of your choice.
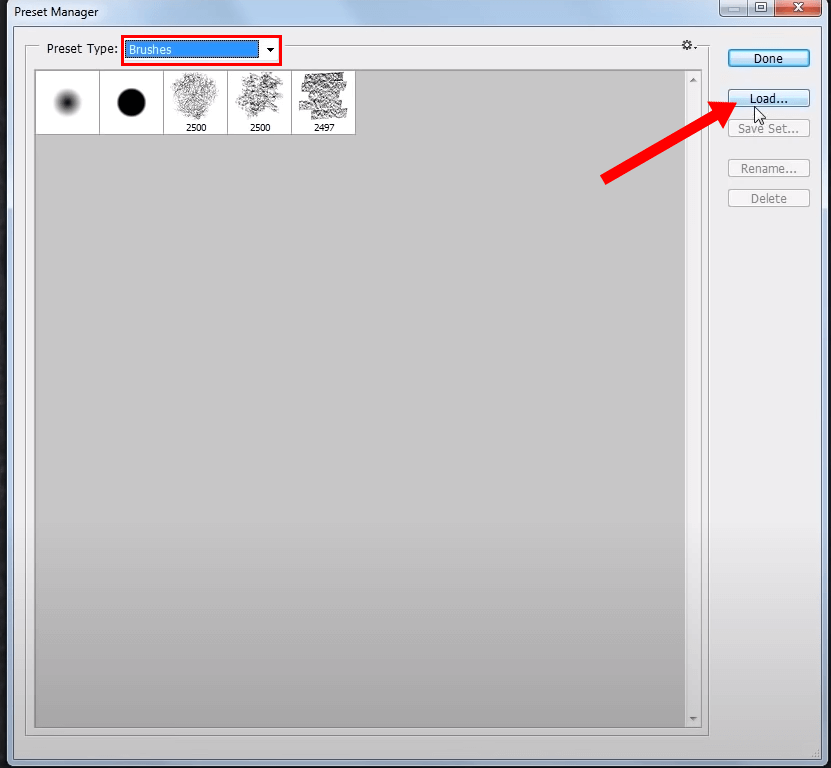
Whenever you need to add a new brush, just click on Load and import the file to the program.
If you can’t find the right option for selecting a new preset, click on the Brushes (*.ABR) on the drop-down list. You will see this menu near the File name box.
With the help of the Brush Tool (B), you can draw any images you want and enhance your designs. Similarly to other Ps tools, every brush can be further customized.
You can adjust several parameters in the options bar at the top of your workspace. Besides selecting a custom size, you can adjust opacity and other settings depending on the type of the tool.
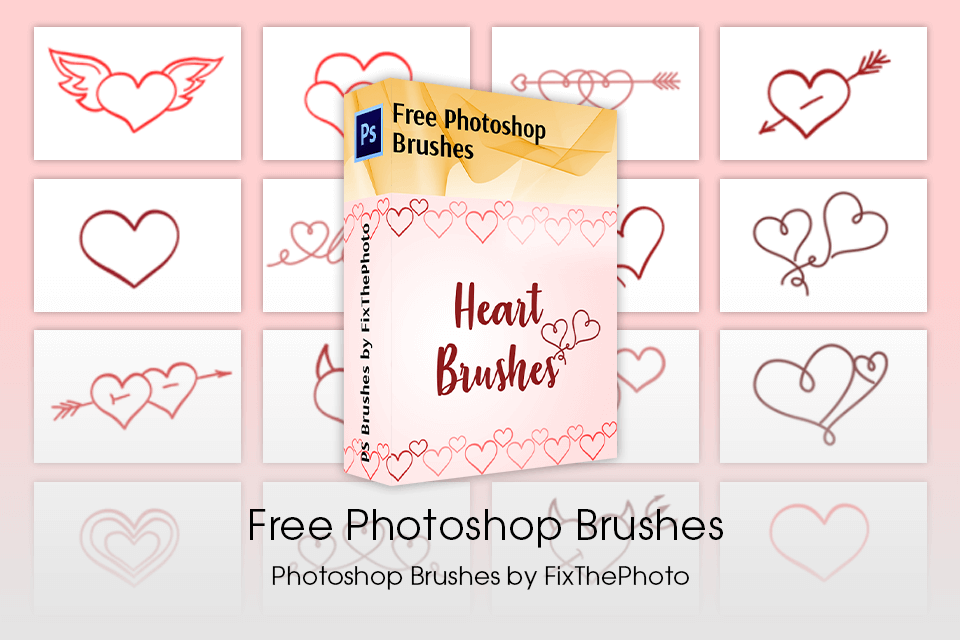
While you can use default Ps brushes, they are hardly suitable for advanced tasks. By adding brushes to Photoshop, you can expand your toolset and create various effects to enhance your photos with little to no effort. Here, you will find a collection of high-quality third-party brushes that will come in handy for any photo editor and designer.
This collection includes heart and grass brushes, snow brushes, clouds brushes, and flowers brushes.


