Grain is a popular effect that can be applied to photos in various genres. In this article, I will tell you about three simple methods that will help you quickly add grain in Photoshop and make your photo look even more stunning.
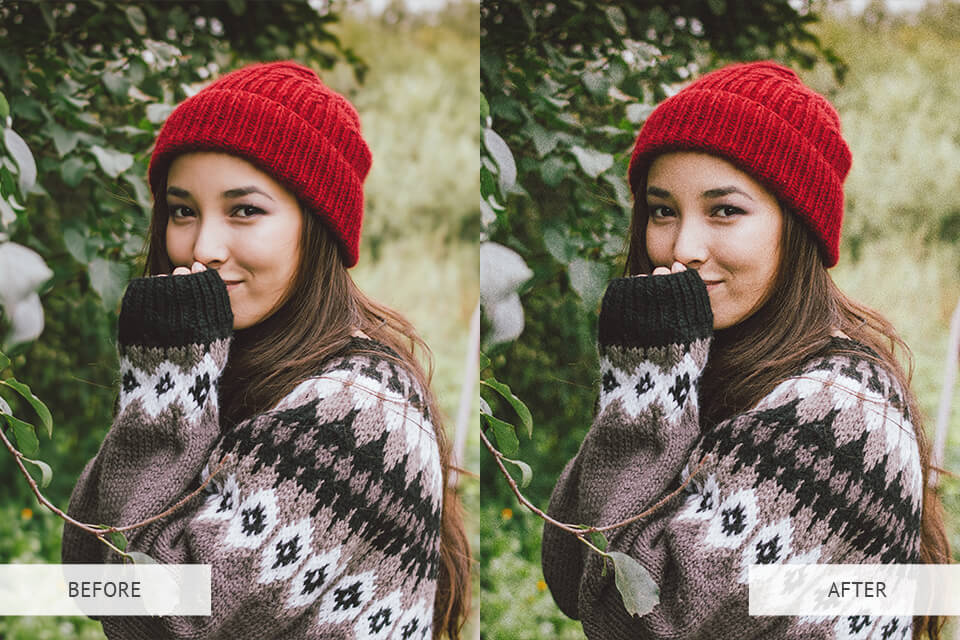
In this Photoshop tutorial, we will study how to add grain in a quick and easy way. Every version of Photoshop will do, but if you use Photoshop CS3 or newer versions, you will also learn how to save this effect for further editing with the help of Smart Filters.
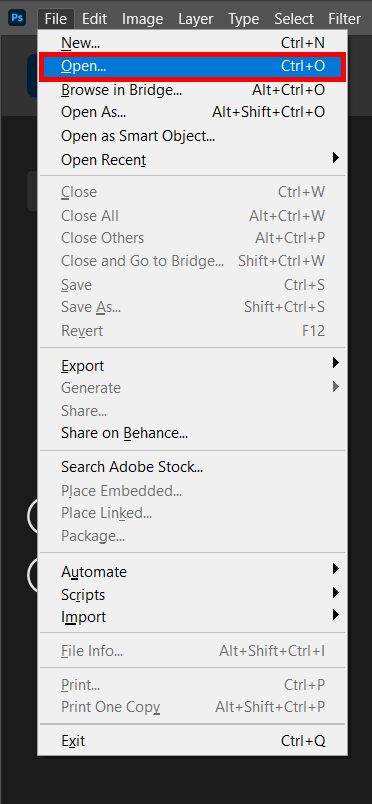
First, you need to open a picture that you want to edit in Photoshop (File > Open or Control-O). Go to the folder where your image is stored and click on the Open button.
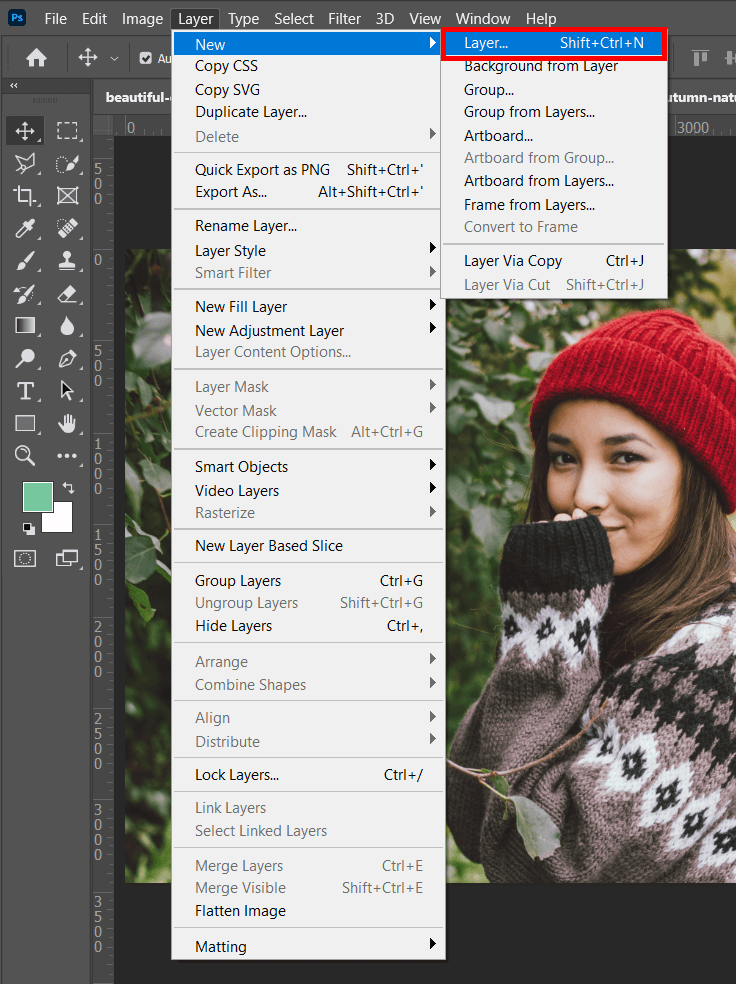
To add grain in Photoshop, start by creating a new layer. It will allow you to edit your image without affecting the source photo.
You can add a new layer in two ways. Open the New Layer dialog window by selecting Layer > New Layer. You can also use the Photoshop keyboard shortcut Shift-Control-N.
Besides, you can press the Alt key and click on the New Layer icon in the bottom part of the Layers panel. It will allow you to adjust the layer settings. You might also need to learn how to unlock a layer in Photoshop.
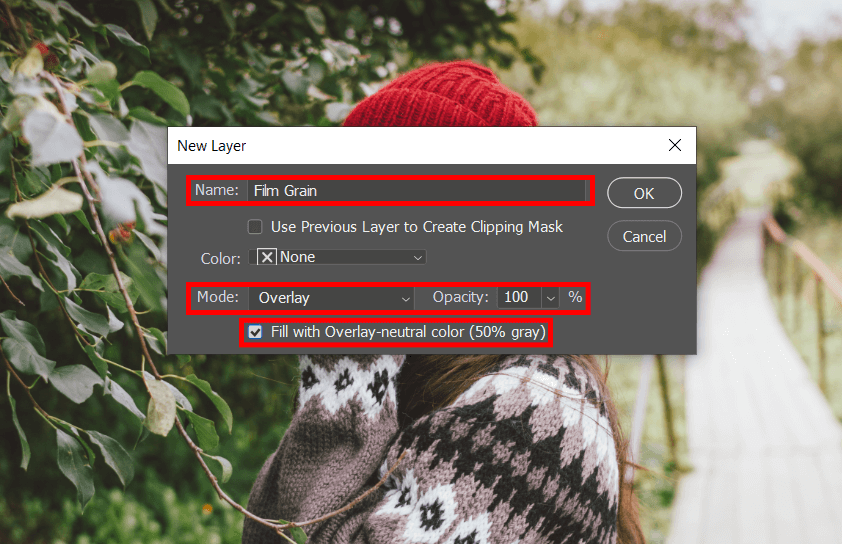
Type a new name for your layer. For instance, you can name it Film Grain. Then, you need to adjust its settings:
Click OK to confirm new settings and close the dialog window. You will see the layer that you have created in the Layers panel above your image. Now, you need to convert it into a Smart Object to be able to edit it in the future.
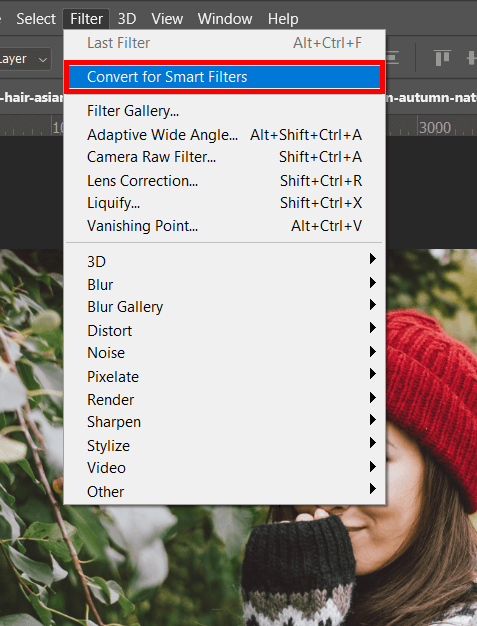
After taking the first steps, you need to convert a created layer into a Smart Object. Follow this simple guide:
Once everything is ready, you will see a small icon in the bottom right corner when you look at the preview thumbnail of your Film Grain Filter. It means that you have successfully converted your layer into a Smart Object. After it is done, you can further edit this filter at any time.
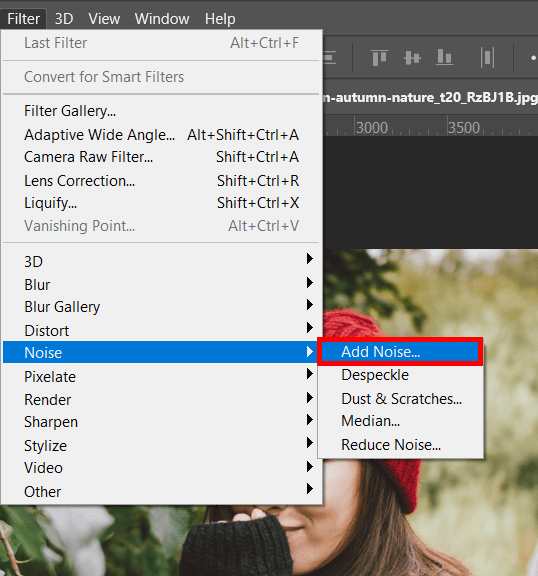
To make your image more unique, apply the Noise filter to the layer with the Photoshop grain texture. Go to Filter > Noise > Add Noise in the top menu and save your edits.
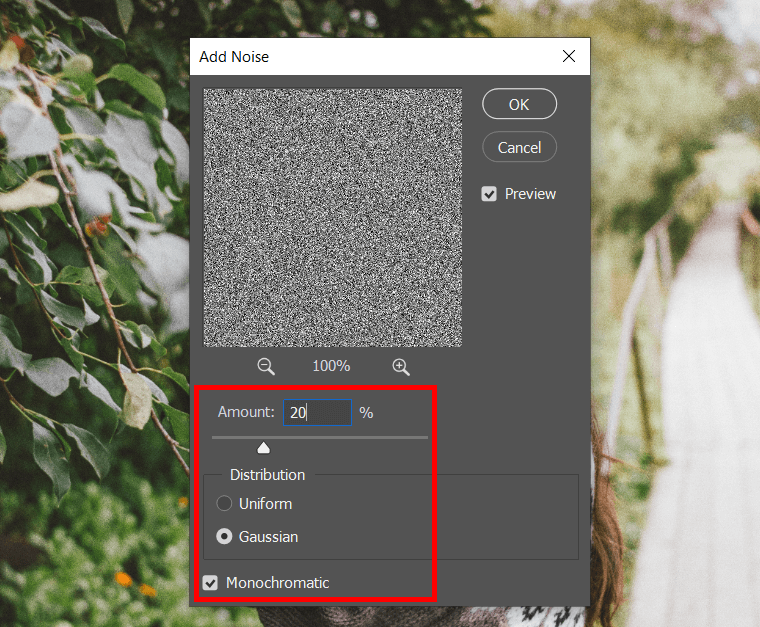
You will see the Add Noise dialog box. Select these film grain effect settings:
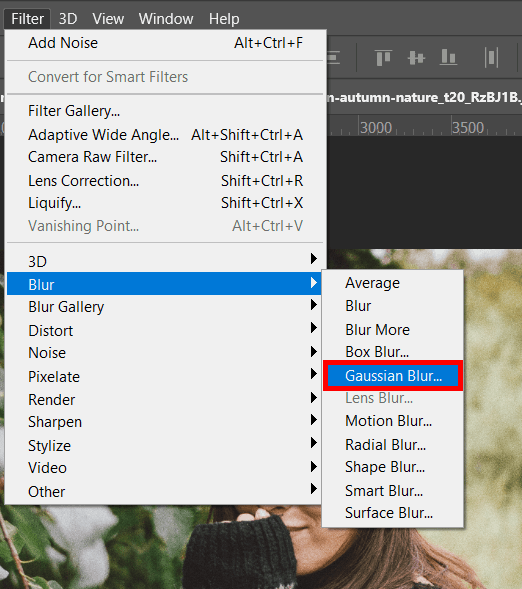
While the Film Grain layer is selected, go to Filter > Blur > Gaussian Blur. You will find this option in the top menu.
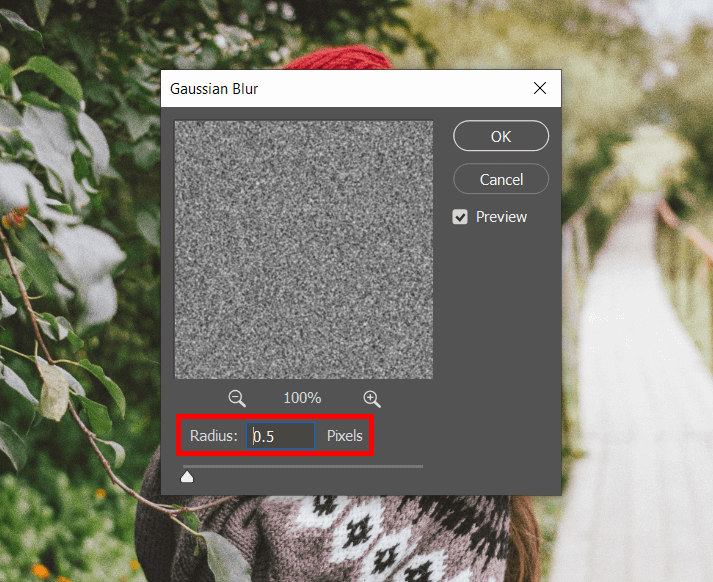
In a new dialog box, adjust the Gaussian Blur settings. To soften the noise effect, use these settings:
To confirm the new settings and apply the Gaussian Blur, click OK. Now, you have applied a subtle film grain overlay effect to your picture.
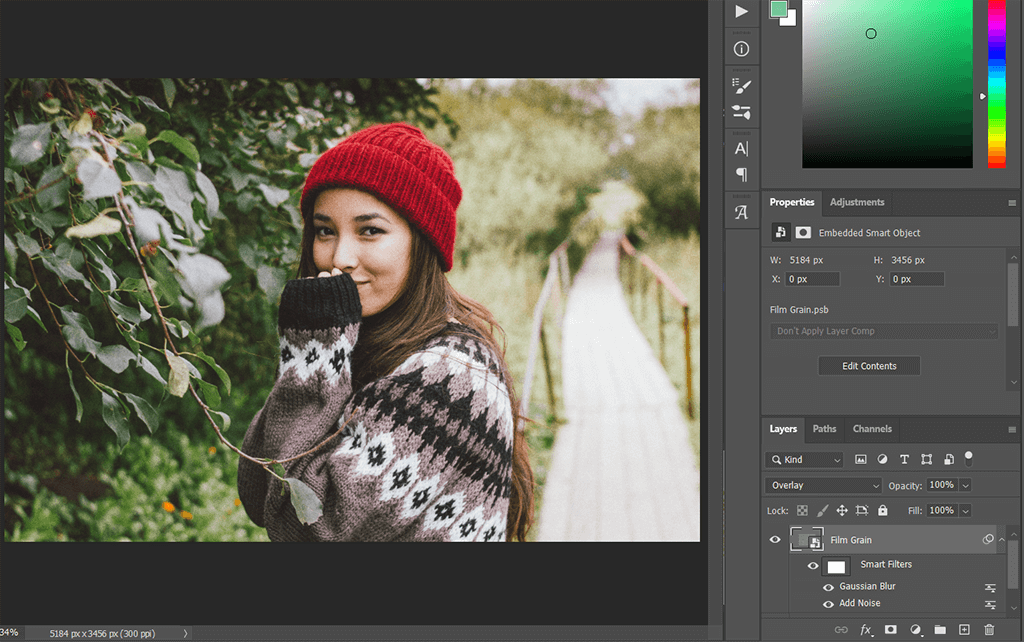
Since we have used the Smart Object and Smart Filters, we can edit the filters again by double-clicking on them. This way, you can further customize the Photoshop grain effect even after the filter has been applied. You will see a list of filters underneath the Smart Object layer.
After clicking on the Smart Filter twice, you can select any settings that you like. To make your photo even more visually pleasing, address professional photo retouching services that will help you select a suitable effect for each photo and make it look more natural.
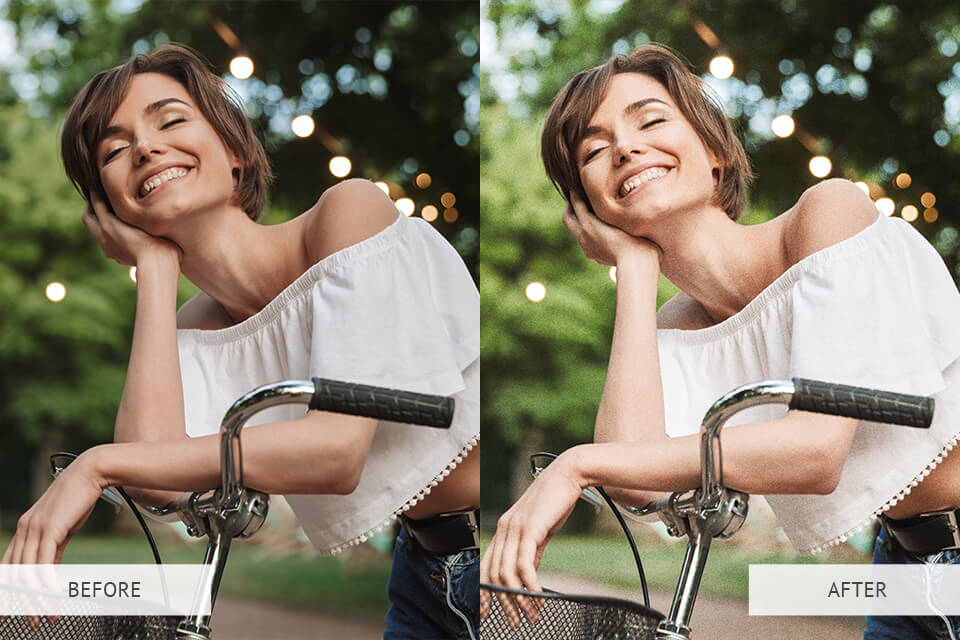
To make the grain effect even more unique, you can use film grain overlays created by professional designers and enhance each photo with a new effect.

Once again, you need to open a picture that you want to enhance in Photoshop (File > Open or Control-O). Go to the folder where you keep your photos, select an image and click on the Open button.
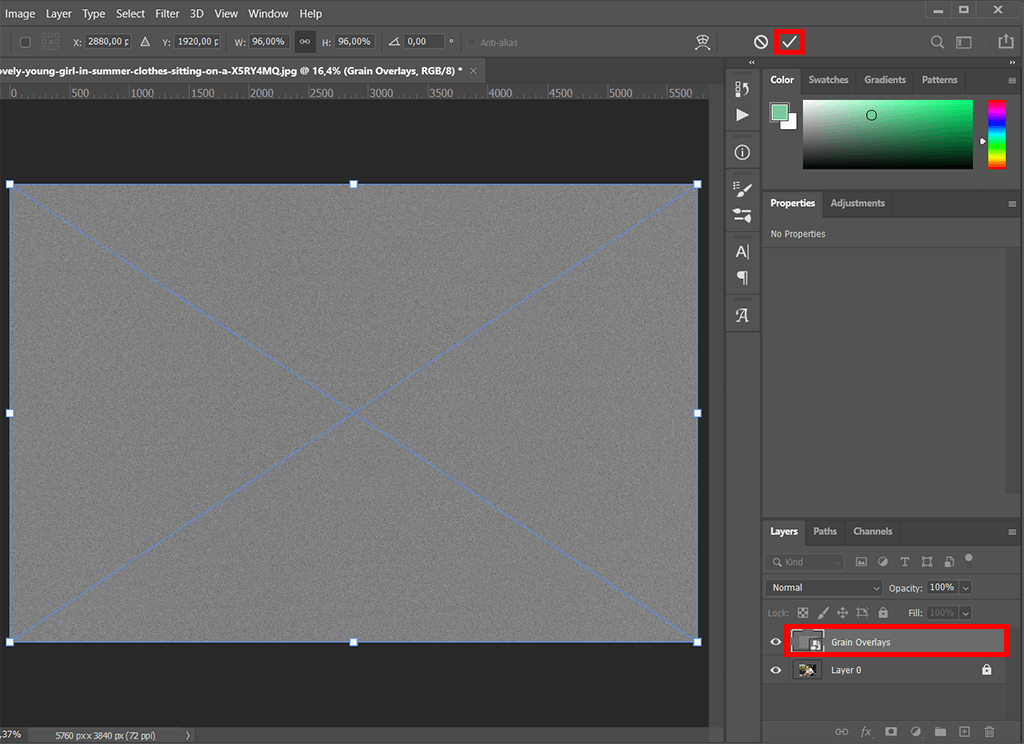
Once you have imported an overlay, drag it to your work area and re-size it so that it matches the size of the source image. It should cover 100% of your photo.
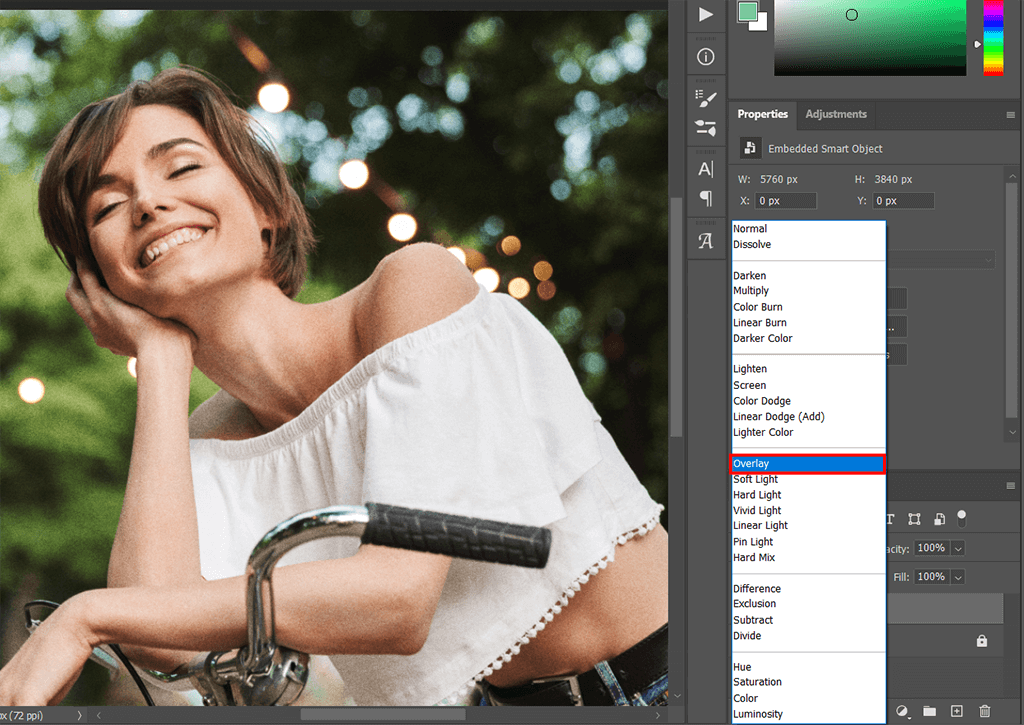
Then, turn on the Overlay mode.
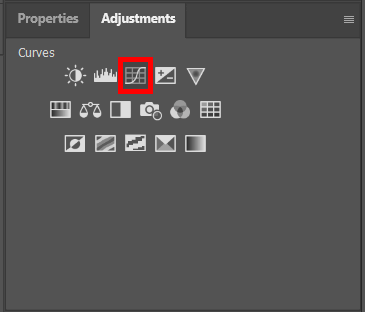
Go to the Layers menu and select New Fill or Adjustment Layer option. You will recognize it by the circle icon. Here, you need to select Curves and click on this option.
Then, you need to use one of the standard templates or adjust the curves manually to create the effect that you want to achieve.
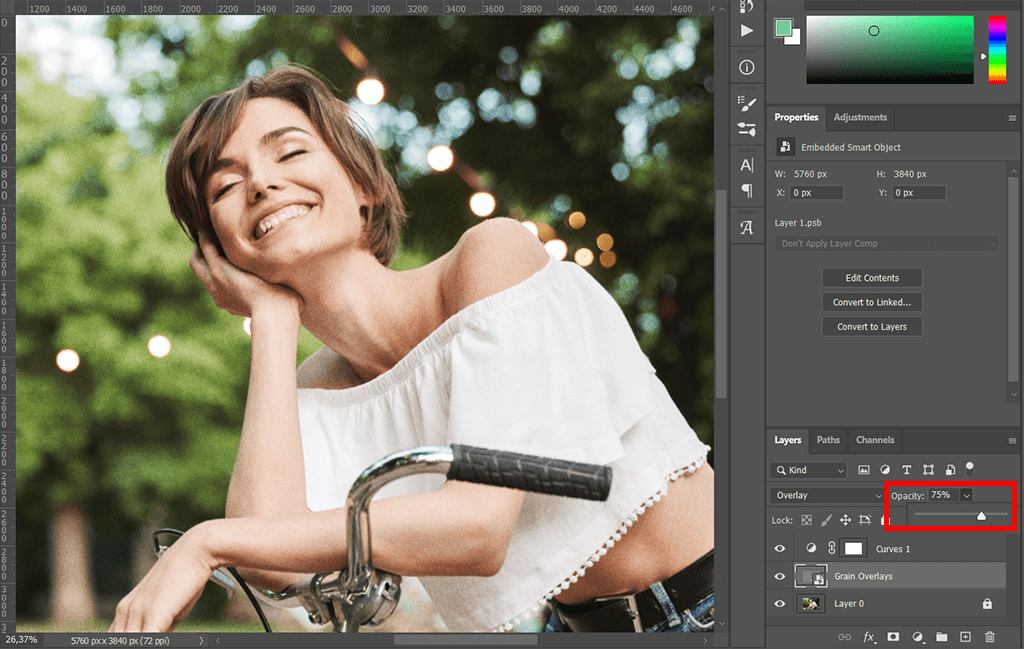
After adjusting the settings, make sure to change the layer transparency as well. Sometimes, overlays are too noticeable, which might make your photo look overly edited.
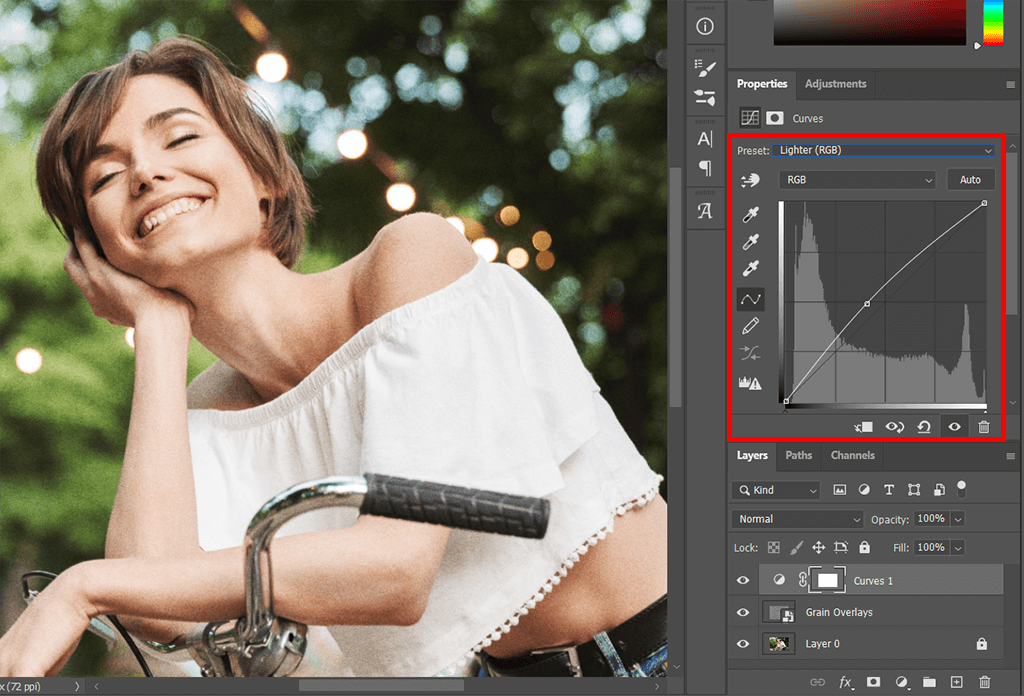
Besides adjusting the transparency of an overlay, you can change curves as well until you are fully satisfied with the result.
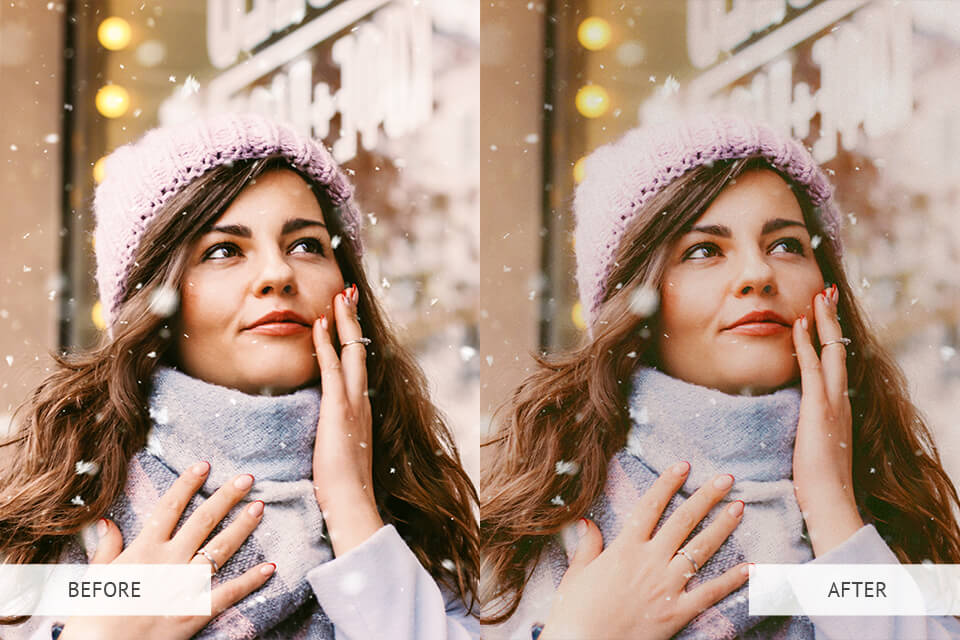
This is the simplest method of adding grain in Photoshop, but it might seem quite challenging for beginners since they will need to spend much time adjusting settings to get the desired result.
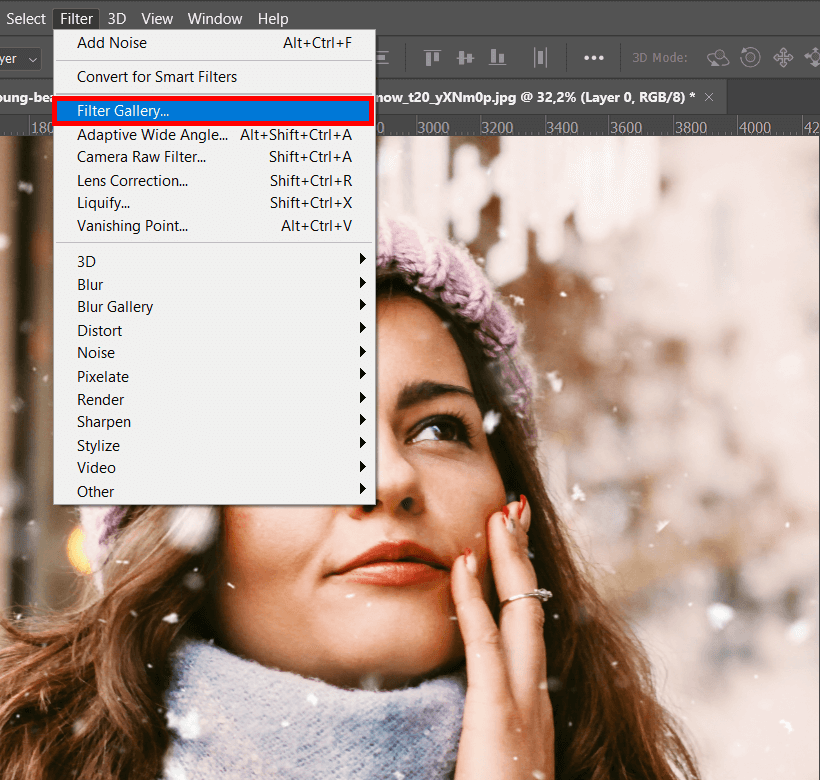
You need to open your picture in Adobe Photoshop (File > Open or Control-O). Go to the folder with your photos and click on the Open button.
After opening the image that you want to edit, go to Filters > Filter Gallery. You will see a new window with a list of all the filters available in Photoshop.
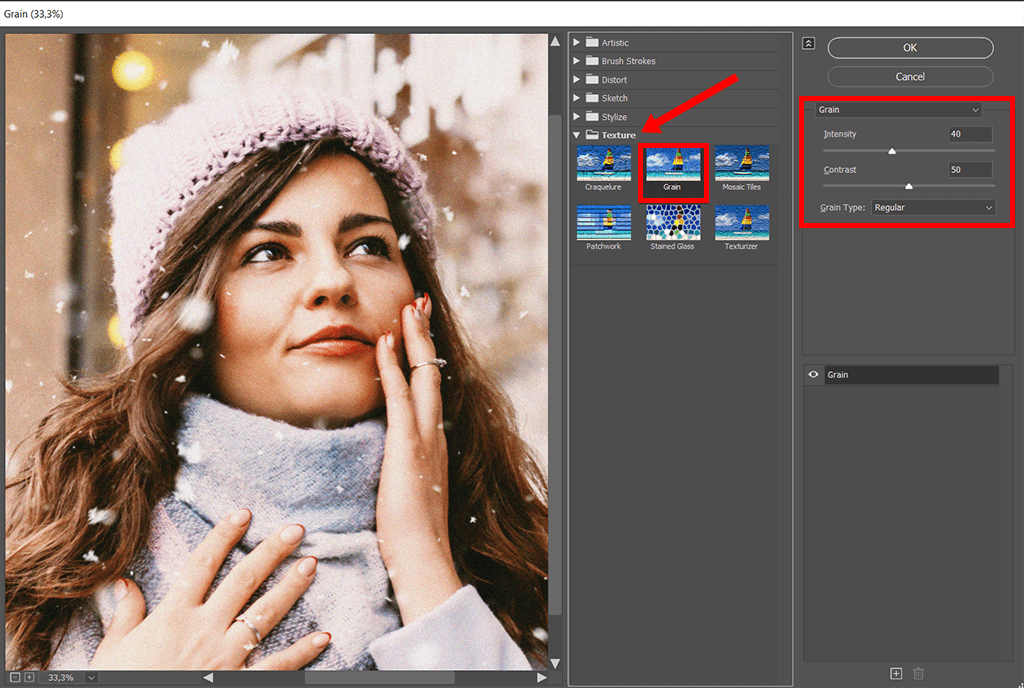
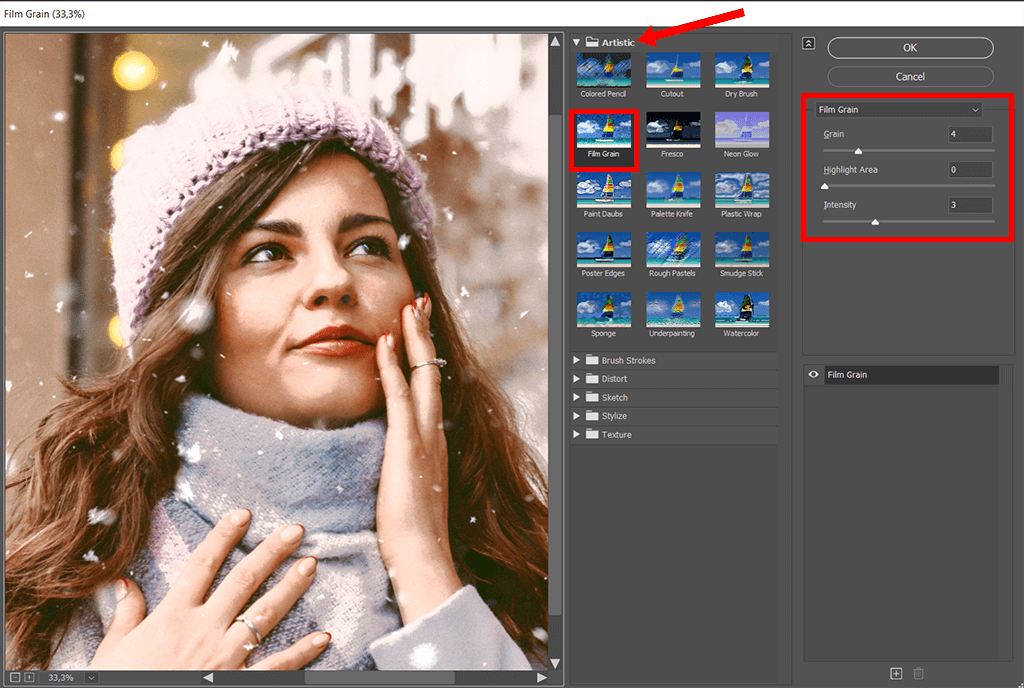
In a new window, select the Artistic filters. Grain filters will be on the top of the list. You can adjust the effect in the panel on the right.
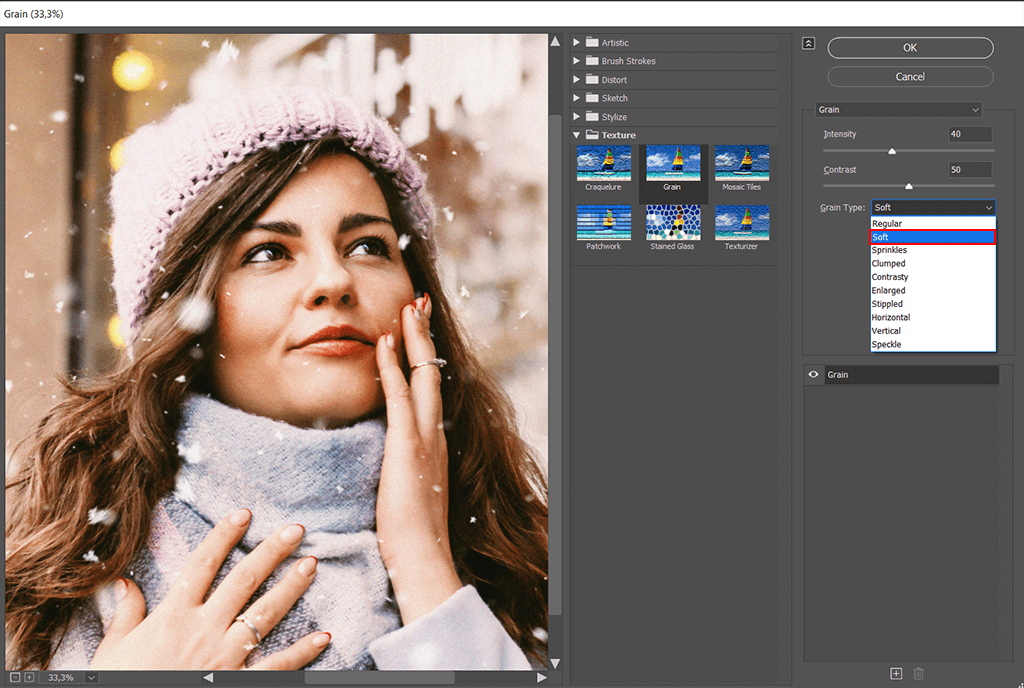
There are two versions of this effect, grain or film grain and you can use any of them.
There, you can also adjust additional settings, such as size, intensity and the area the effect will be applied to. When you select the necessary settings, just click OK to save the file in any format you need. For instance, you can save your photo in the most popular formats, such as JPEG and PNG.

If you want not only to add grain in Photoshop but also to enhance your photos in other ways, in this collection, you will find 252 unique overlays for every taste. Besides a grain effect, you can use Dust, Smoke, Grunge, Distressed, Dirty, Red Smoke, White Smoke, Scratches collections.
They are also perfect for those who follow recent trends and want to learn how to edit Instagram photos. To apply them, make sure to read a simple tutorial that will help you understand how to use overlays in Photoshop. You will learn how to add and edit overlays to make your photos more attention-grabbing.