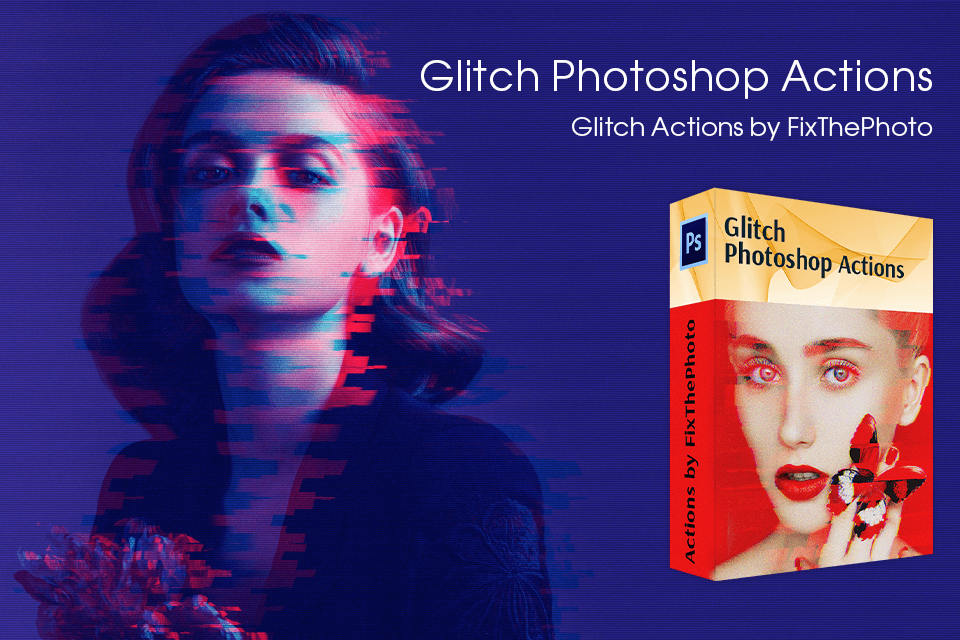
Curious about how to make a glitch effect in Photoshop? Then this step-by-step guide will come in handy. We’ve described some useful yet simple tips on how to apply a glitch effect and make your photos more attractive.
You can see a glitch effect while watching TV or playing video games. However, this effect is present in any technology area. A glitch is a temporary digital or analog error. Initially, this error appeared in a picture with broken data. The effect consists of multi-colored pixels, lines of different sizes, frozen images, and distorted colors. Nowadays, you can create this effect in Photoshop in order to catch viewers’ attention.
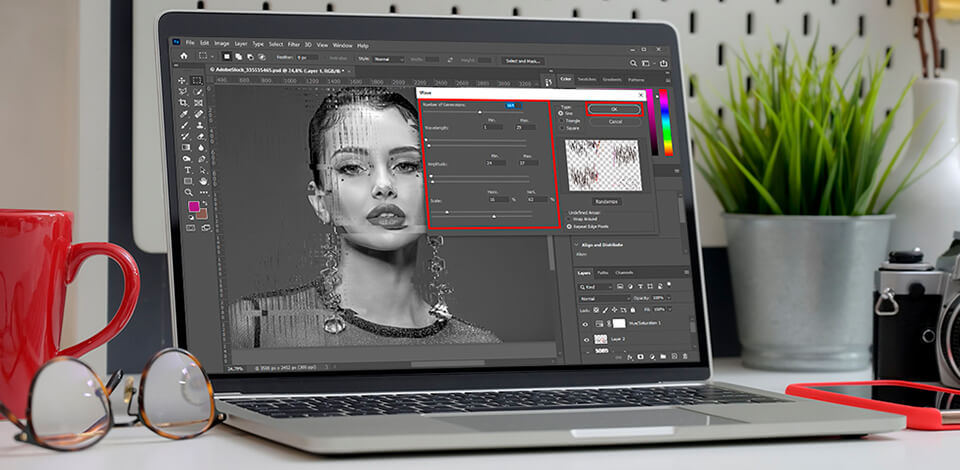
To get a simple Photoshop glitch effect, you can use the Wave Filter. This automated tool allows you to mimic an aesthetic image distortion in a few clicks.
First, select the Quick Selection Tool in the left sidebar. If you cannot locate it, right-click the Object Selection Tool and you can see a list of instruments to choose from.
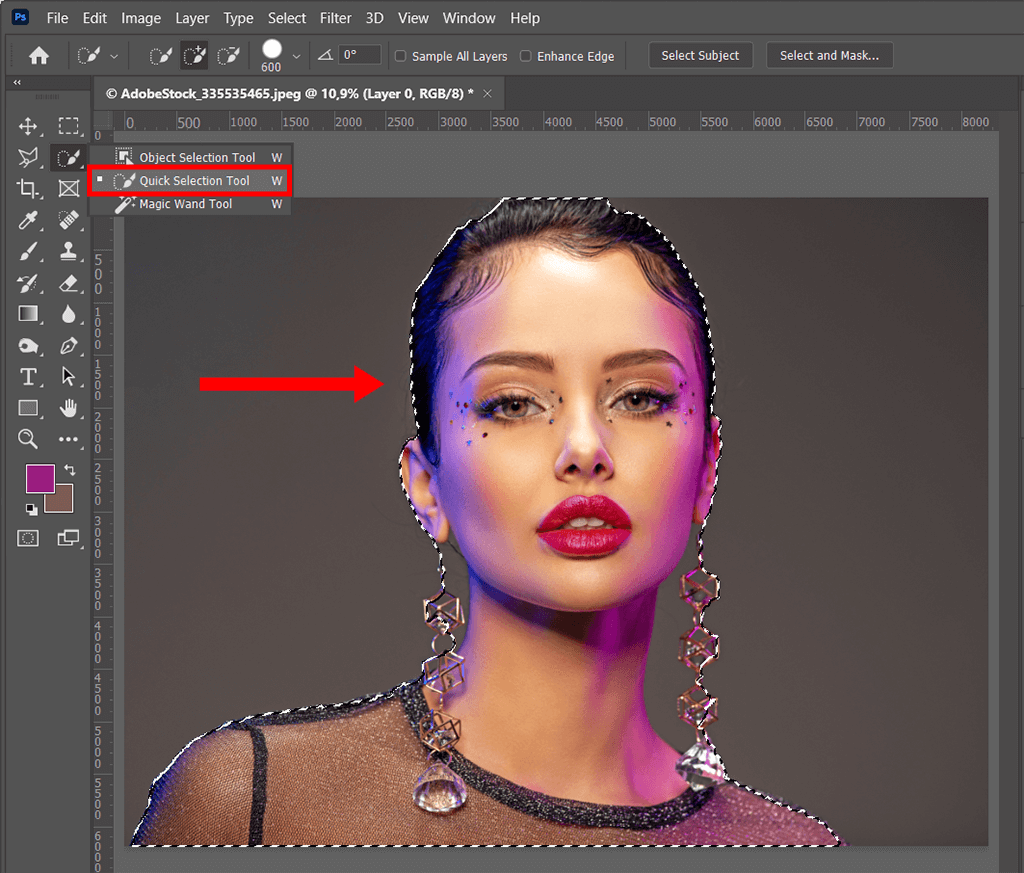
Quick Selection helps you choose the desired subject. It might be any subject, e.g. a human, an animal, etc. Refine all edges to get a smoother selection.
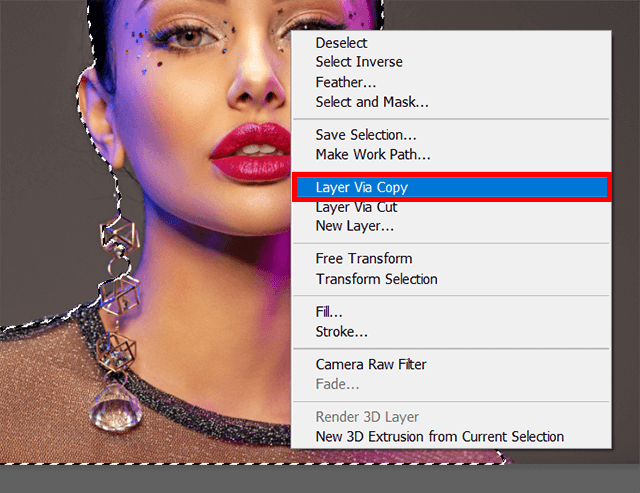
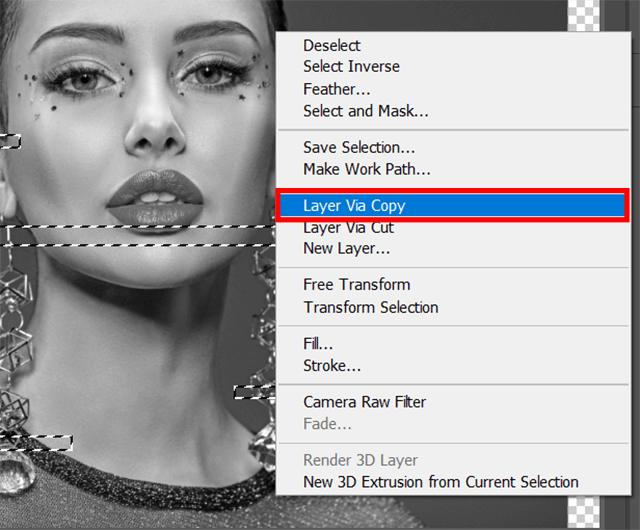
You can choose ‘Layer Via Copy’ by right-clicking the selection. The option is necessary because you need to alter the selected subject.
Select the Crop Tool on the left. Pull both sides a bit out so that there appear two stripes of the white background. They are needed for making a glitch Photoshop.
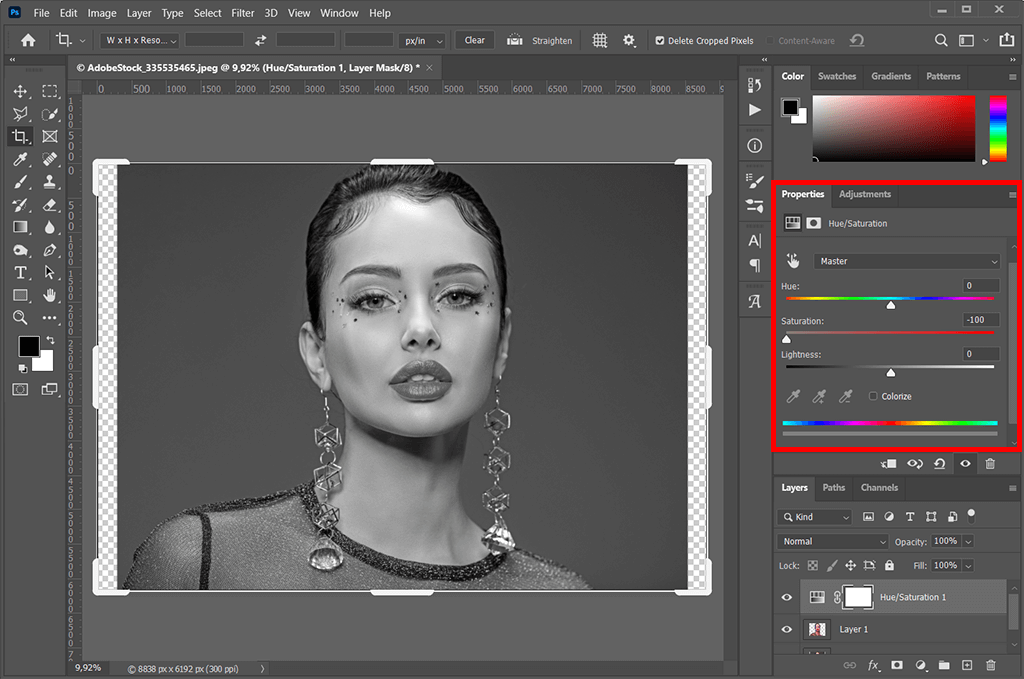
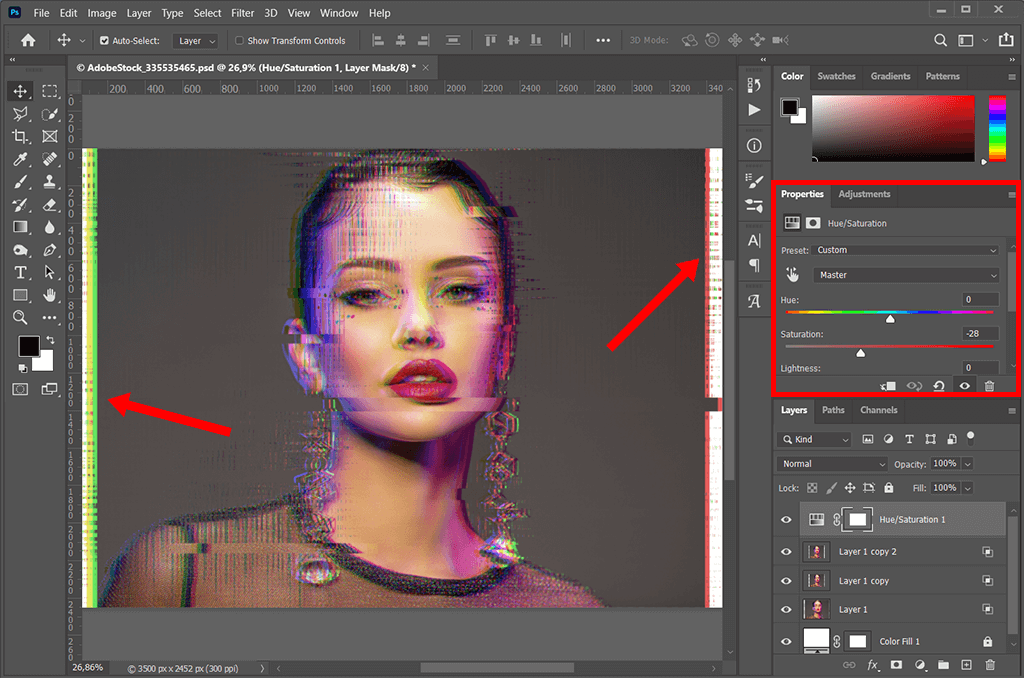
To get a monochromatic look, customize saturation. You can find the “Create new fill or adjustment layer” option in the right corner, under the layers panel. Click Hue/Saturation.
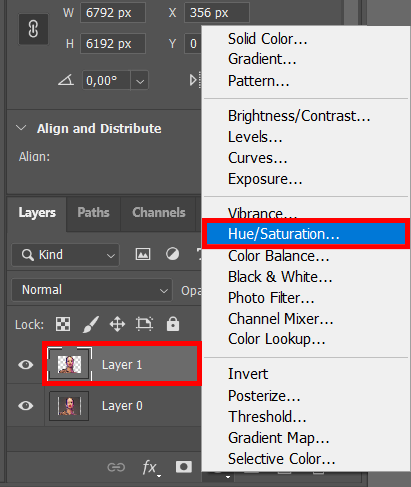
There will appear a new layer above the others. Use the Saturation slider and push it to the left until most colors disappear from the photo.
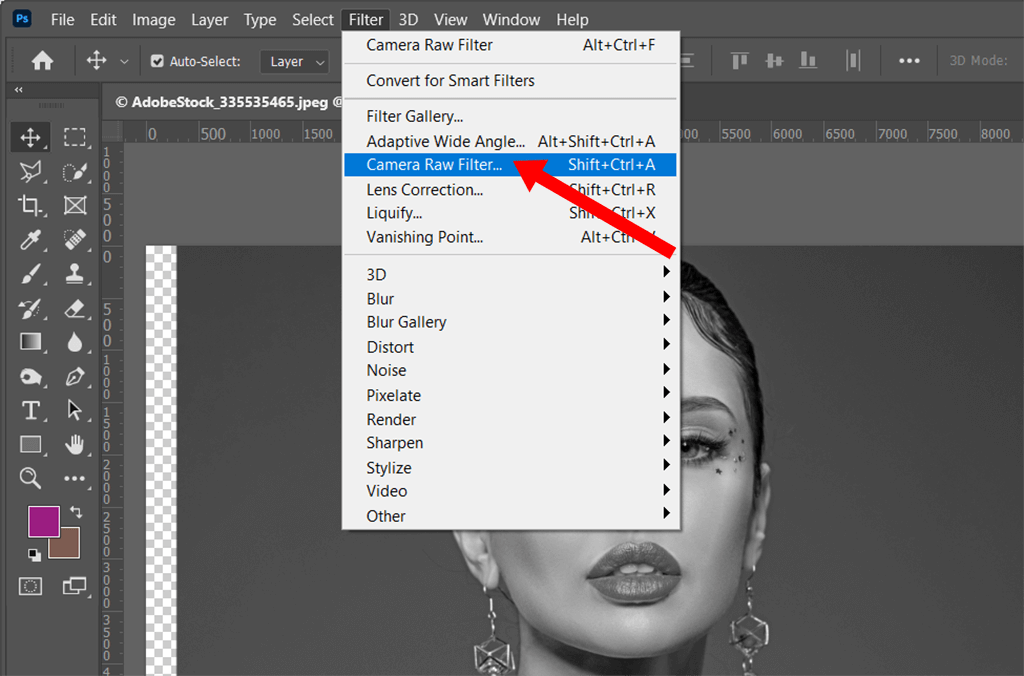
To get the desired effect, you need to increase contrast. Click on the layer with the selected object, go to Filter> Camera Raw Filter and drag the sliders to adjust contrast.
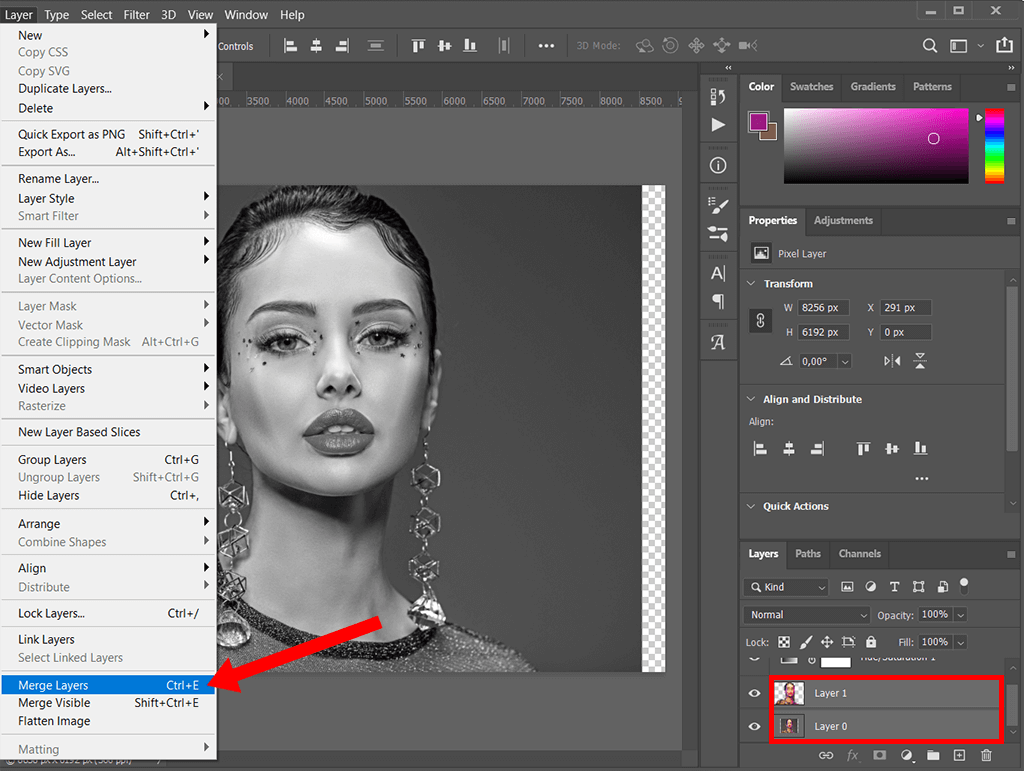
Once manipulations with the subject over, you can merge it with the background layer. To select both layers, click on them while holding down Ctrl on your keyboard. Right-clicking both pictures and choose ‘Merge Layers’.
On the left side panel, you need to click on the Rectangular Marquee Tool, which will help you create two thin selections at the top and bottom of the photo.

Make the first selection and hold Shift to make the second selection in one go. Right-click the selection and choose “Layer Via Copy”.
To adjust the selection, press Ctrl + T. Using arrows on the keyboard, you can move the stripes. Parts of the white background will be exposed.

Repeat the manipulation several times, experimenting with the size of the selection. When the process is complete, merge the new layers with a background one.
Duplicate the background layer to reduce the amount of open space. Therefore, you can move the selection stripes on the layer, without affecting the background.
Be attentive not to distort the subject. Your main aim is to keep an original photo recognizable.
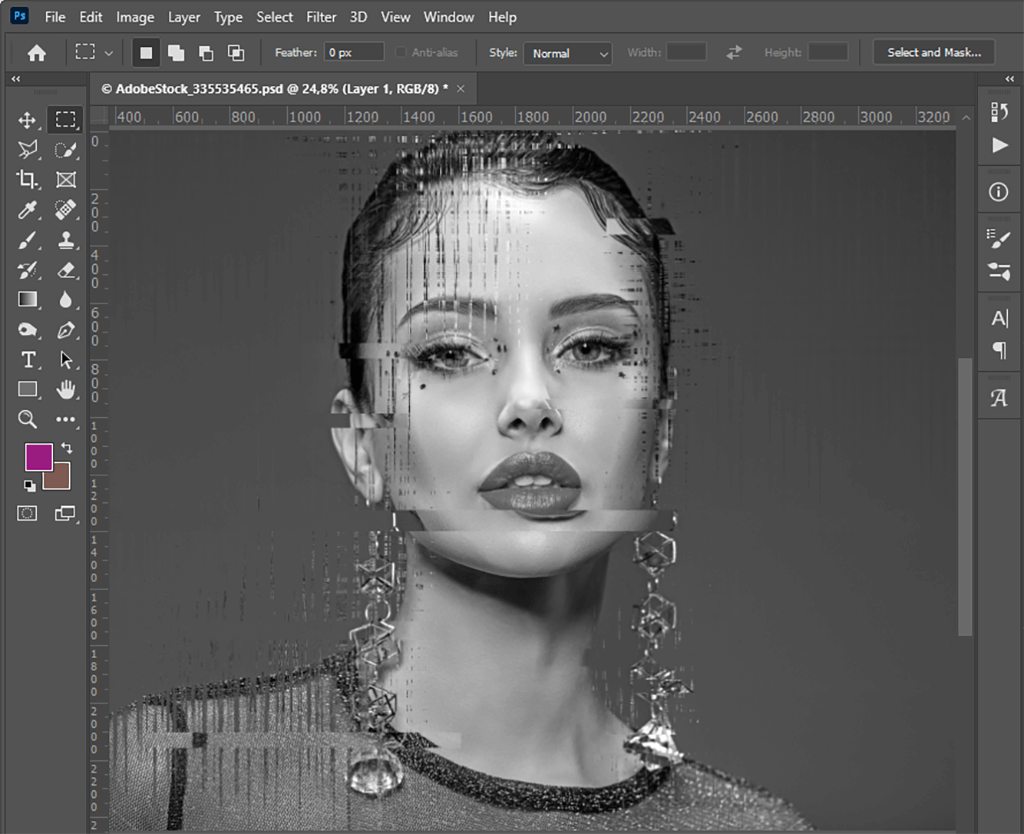
Use keyboard shortcuts to merge layers in Photoshop easier. When you're done, duplicate the background layer. Use the Rectangular Marquee Tool as in the step above. Create a wavy effect on several large areas, choosing Filter> Distort> Wave tools.

You may need to use a trial-and-error approach to get the desired result. Don’t be to use and adjust the Wave Filter; the result is totally worth your effort.
The final step of this Photoshop manipulation tutorial is to work on the top and bottom of the picture. Make selections in those areas and apply a bit stronger Wave filter.
Now the only thing that remains is to distort colors to get a lifelike glitch effect in Photoshop.
Another way to create an interesting glitch Photoshop effect is to use color channels with different settings. You can use the RGB (red, green, blue) channels to adjust those colors separately. Thus, you can create a 3D effect and make a photo look professional.
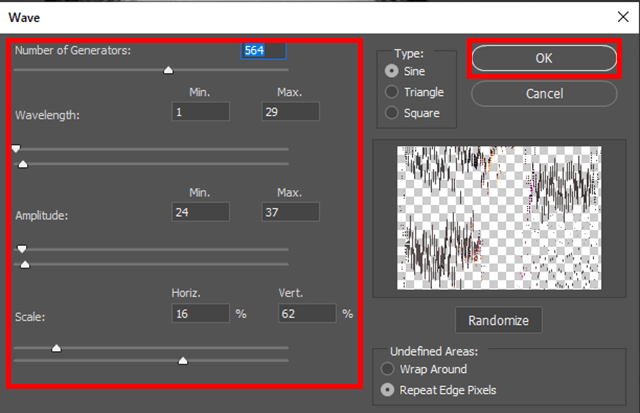
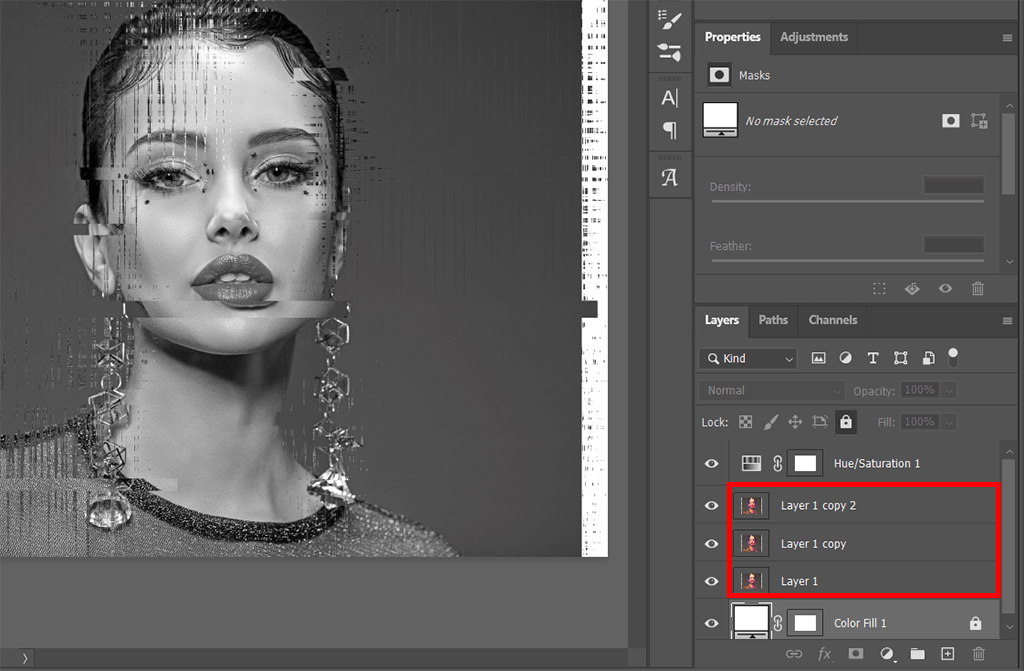
Make three copies of the layer with all settings available. Right-click to select the “Duplicate Layer” option. Repeat the process several times until you get three layers along with the background.
When using the Wave effect, you can apply color distortion to one layer. The number of waves is demonstrated by the number of generators, while the waveform directly depends on its length and amplitude.
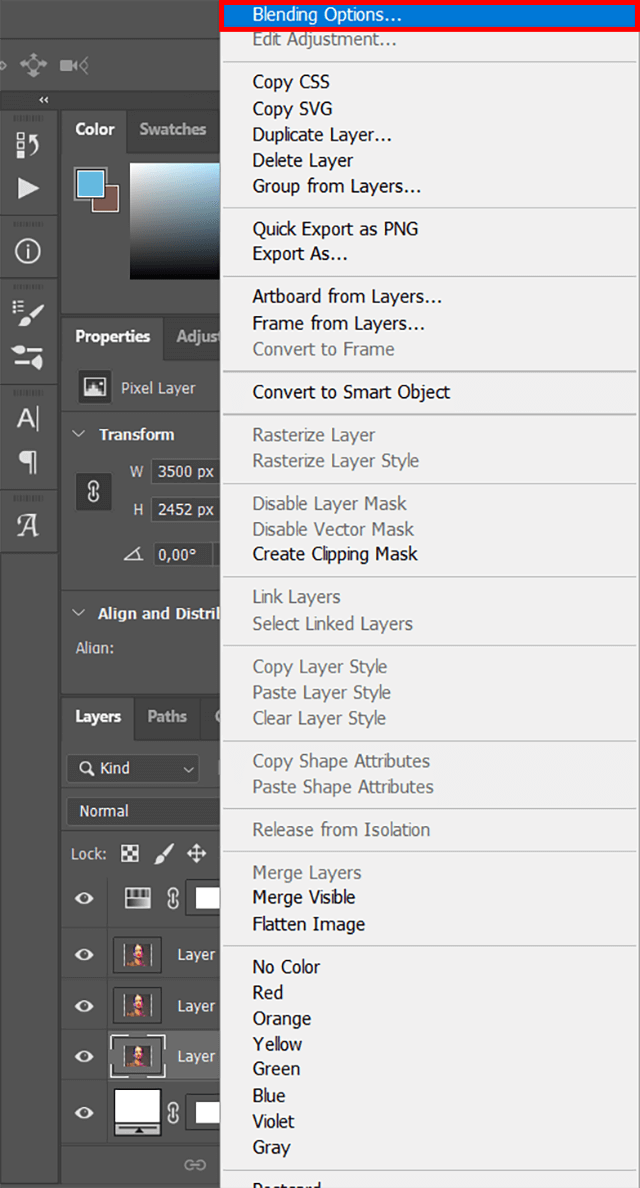
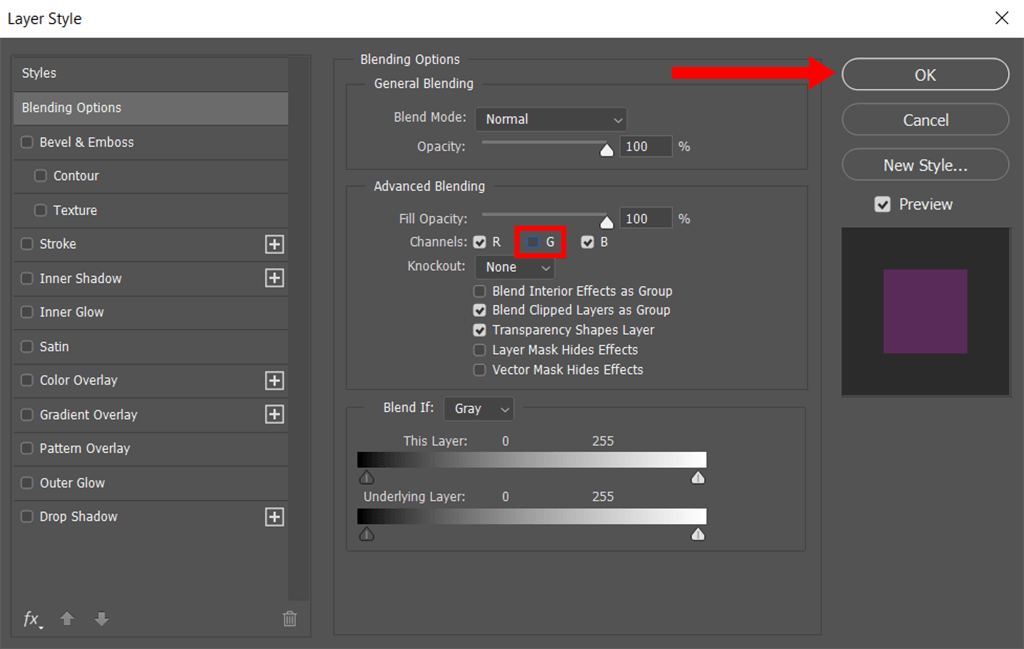
Click on the first layer, right-click and select "Blending Options".
Uncheck Green (g) in the Advanced Blending panel’s ‘Channels‘ bar.
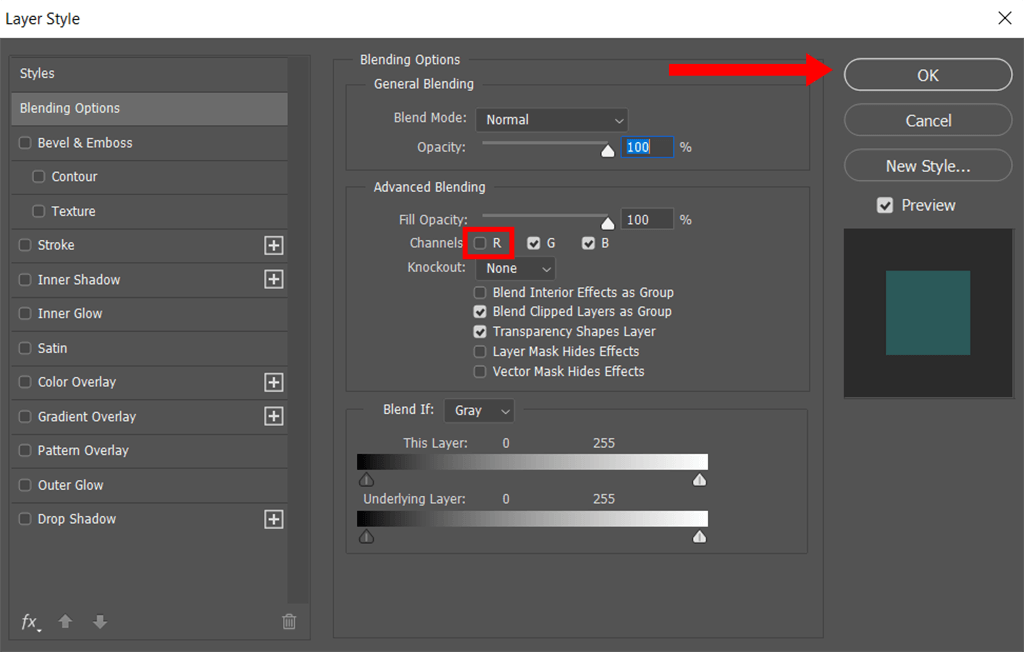
Select a Layer copy > uncheck Red (R).
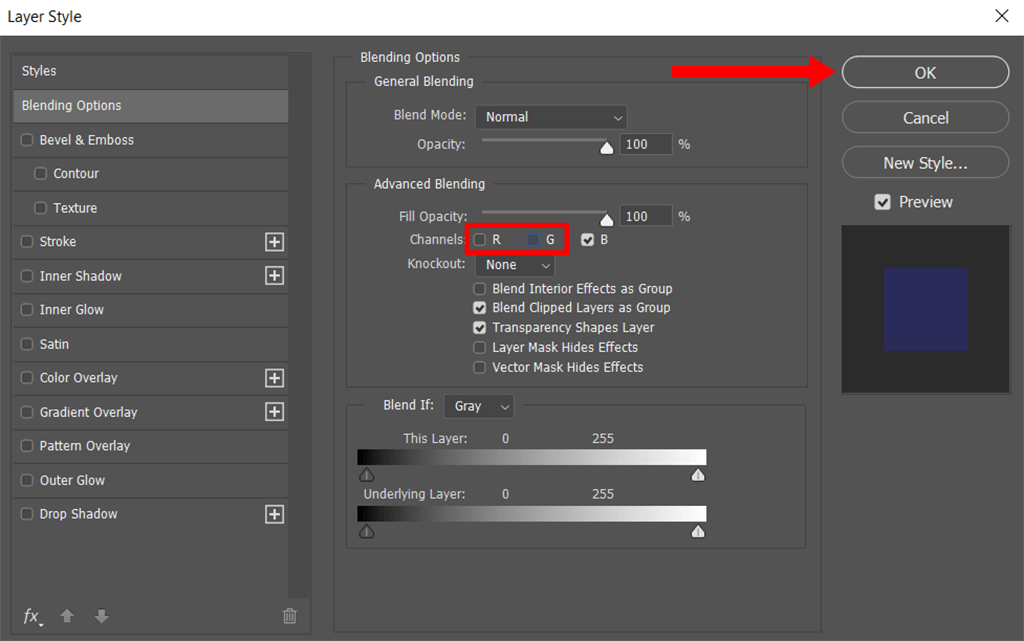
Click on Layer copy 2 and uncheck both R and G.
When creating a glitch Photoshop effect, you can identify which color among three is more prominent. Besides, you can shift a less visible color channel. For instance, if blue predominates in the image, separate a blue channel to get a dramatic effect.
Move each layer individually to get a realistic glitch Photoshop effect. Select the top layer and hold down Ctrl + T to transform the layer. Use arrow keys on the keyboard for quick navigation.
Do the same to the second layer, moving it in a different direction. You can move layers up and down but do it carefully not to distort the recognizability of a subject. Thus, you can make colors vivid and boost saturation a bit.
If you want to give your photo a little robotic, techno feel, ready-made collections of image editing tools will come in handy. By combining different effects and blending methods from these Photoshop tutorials, you can create eye-pleasing mechanical and edgy distortion.
Nowadays, adding analog or digital distortion is a popular way to make a photo stylish and convey a special atmosphere.


