
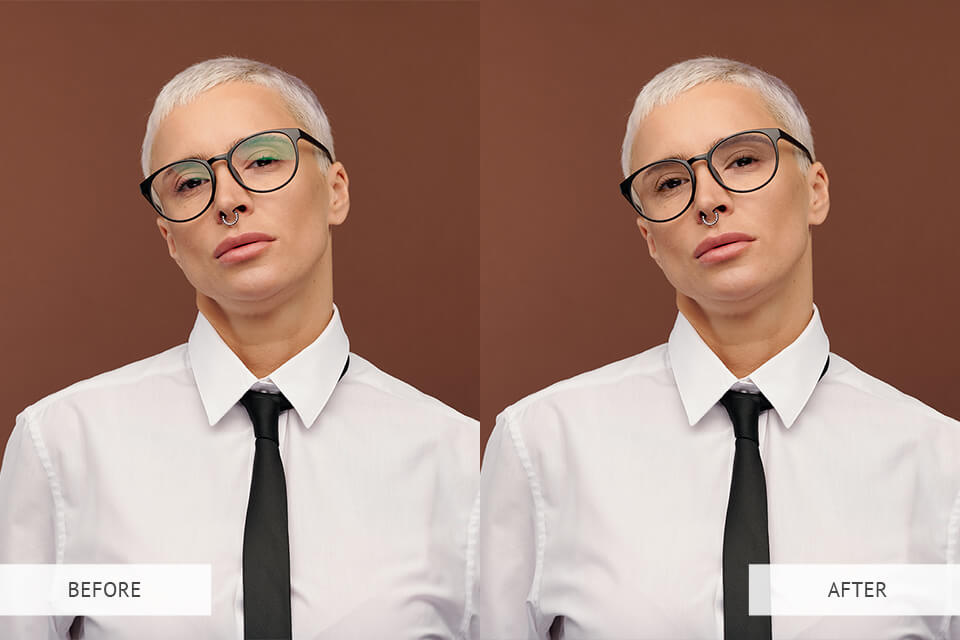
If you specialize in portraits or headshots, you know how problematic it is when a model’s glasses reflect a camera flash or lighting. For beginners, it might be quite difficult to fix it. To save your time and effort, you can turn to a professional service such as FixThePhoto or learn how to remove glare from glasses in Photoshop by yourself.
When shooting portrait photography, you might work with a model who wears glasses. Consider taking a few shots both with and without glasses. This way, you will be able to combine two images during post-processing without having to correct anything.
However, if you want to remove glare from your portrait in Photoshop by yourself, make sure to read this guide.
Before starting removing glare from glasses, make sure to create a duplicate layer. Portrait photographers never edit the original photos as they want to always keep them as they are.
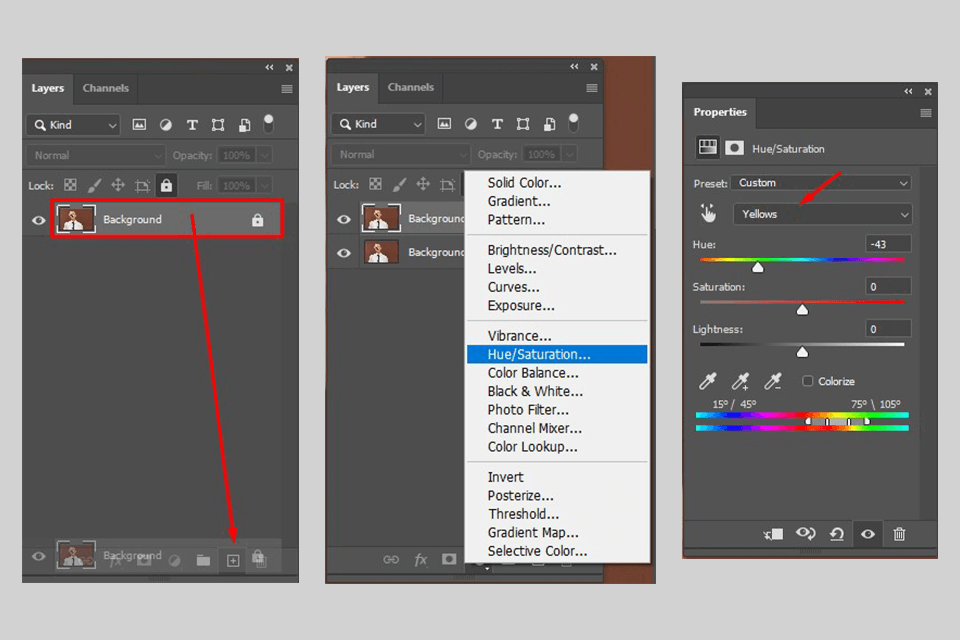
Press Ctrl+J for Windows and Cmd+J for macOS. All edits should be done in this layer. Also, you can do it by selecting the New Adjustment layer option.
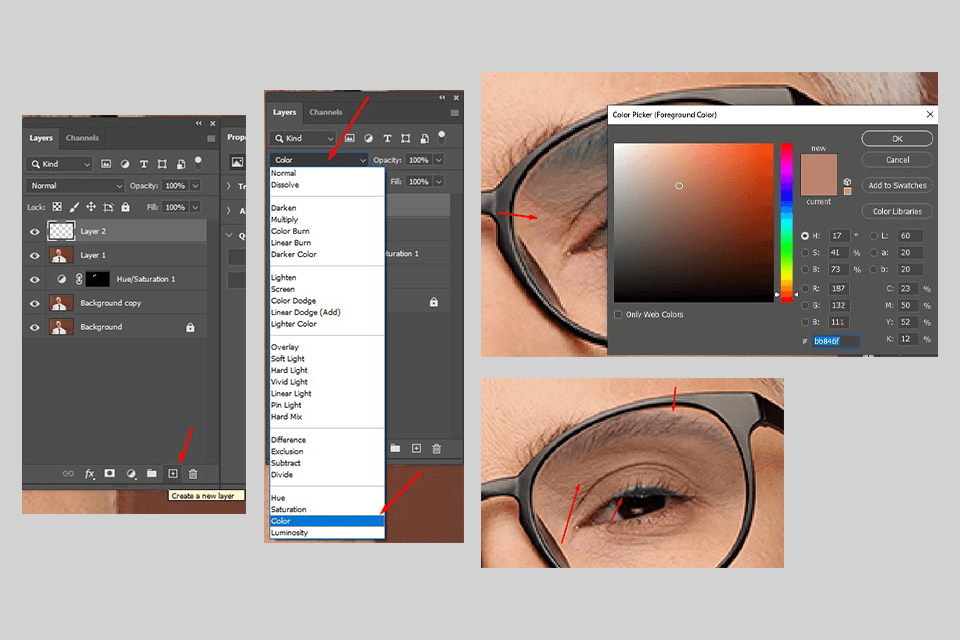
Press “Hue Saturation” and choose the color of glare that you have in your photo. Then, match it to the skin tone by adjusting saturation.
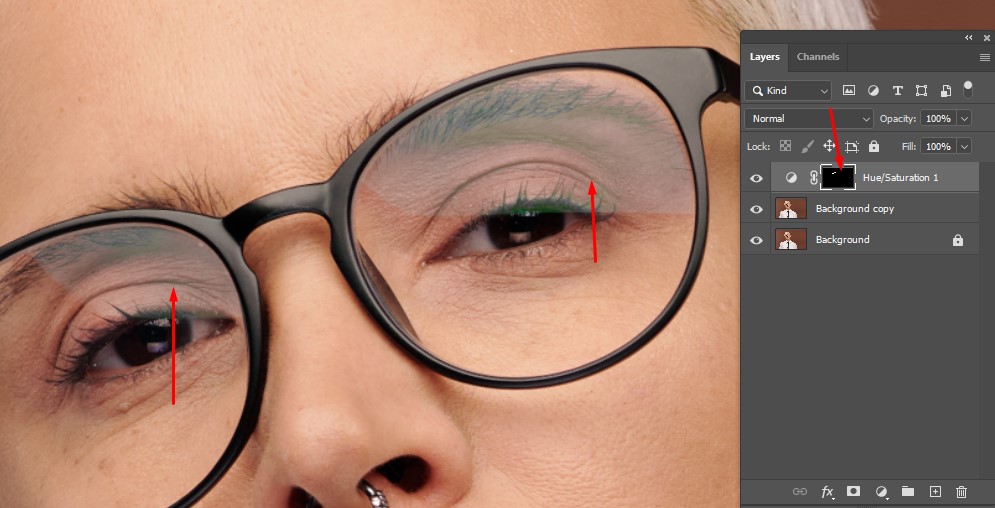
The next step of removing glare from glasses is to invert the mask and paint over the glare with a white brush.
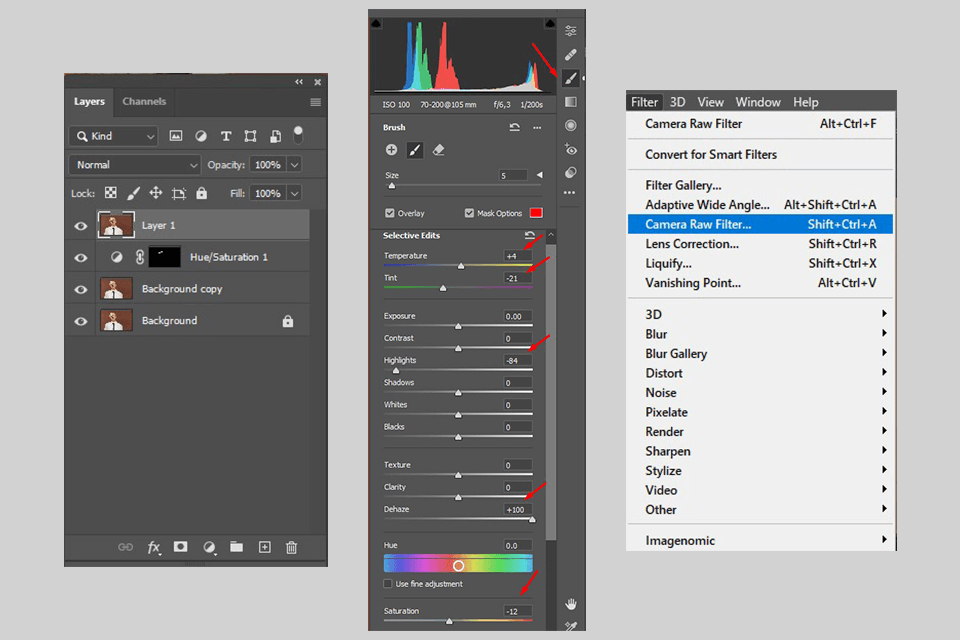
Choose Filter > Camera RAW Filter and zoom your image to 100% so that you can see the details and skin texture. Click on the Adjustment brush and go to settings on the right-side panel.
Then, switch off Mask, Overlay, and Auto Mask.
Set Flow, Density, and Feather to 100%.
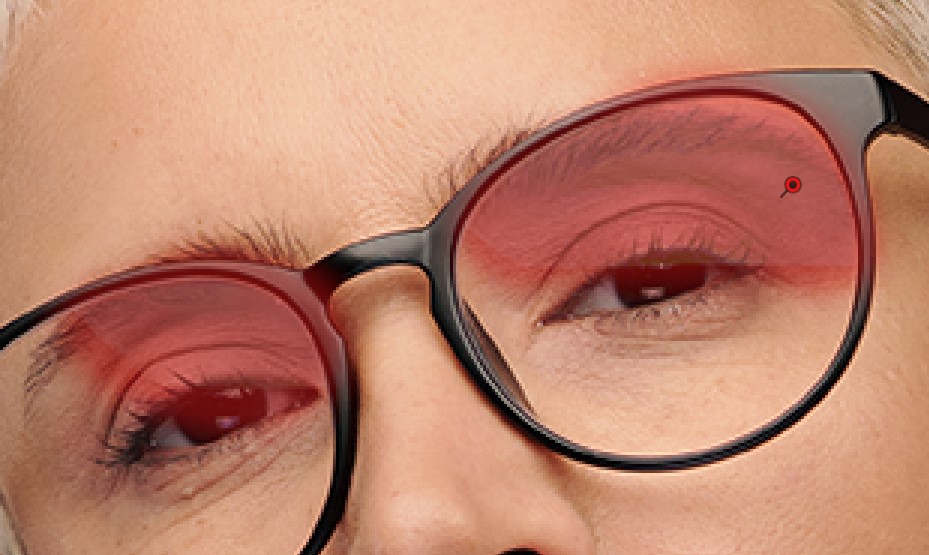
Go to the Adjustment brush parameters, then select Color Picker, and choose the color. Set brightness to the maximum value, and set the opacity to the minimum. Chose a small brush.
Select the glare by painting over it. It’s okay if you are not very accurate at the edges, it can be fixed later. After that, the selection is done and you can switch off Overlay and Mask.
Right-click on the parameters panel and go to Reset Local Correction Settings.
The glare will disappear, but the area where it used to be might turn too dark. Adjust the skin tone so that the areas behind and over the glasses are of the same color.
Set Dehaze to 100%, which will even out the area and make it more natural. Adjust the temperature, highlights, and saturation by using the sliders. Also, remember to remove the white areas for a better look.
Click OK when you’re done.
The next stage of removing glare from glasses is to fix uneven edges. For this, choose the Spot Healing Brush and choose the brush size.
Zoom in to the maximum and carefully paint over the edges of the glasses without affecting their original shape.
If there are still some highlights under the eyebrow, use the Clone Stamp Tool to remove them. Select All Layers and edit a separate layer to save your previous settings.
Use a small brush and paint over the reflection line. If there is a top contour, delete it using the Quick Selection option.
Press Alt+Ctrl+Shift+E for Windows and Option+Cmd+Shift+E for macOS to create a new layer.
Use the Quick Selection tool to select the area around the glasses. Then press Ctrl/Cmd+J to copy this area to a new layer. Hide the underlying layers.
Press Ctrl/Cmd+T. Drag the top corners to zoom on the lens and cover the seam. You can reduce the layer opacity to 50% for some time to see the area better.
Choose a black mask and adjust the opacity to 100%. Enlarge the necessary part and paint over the edge with the white brush.
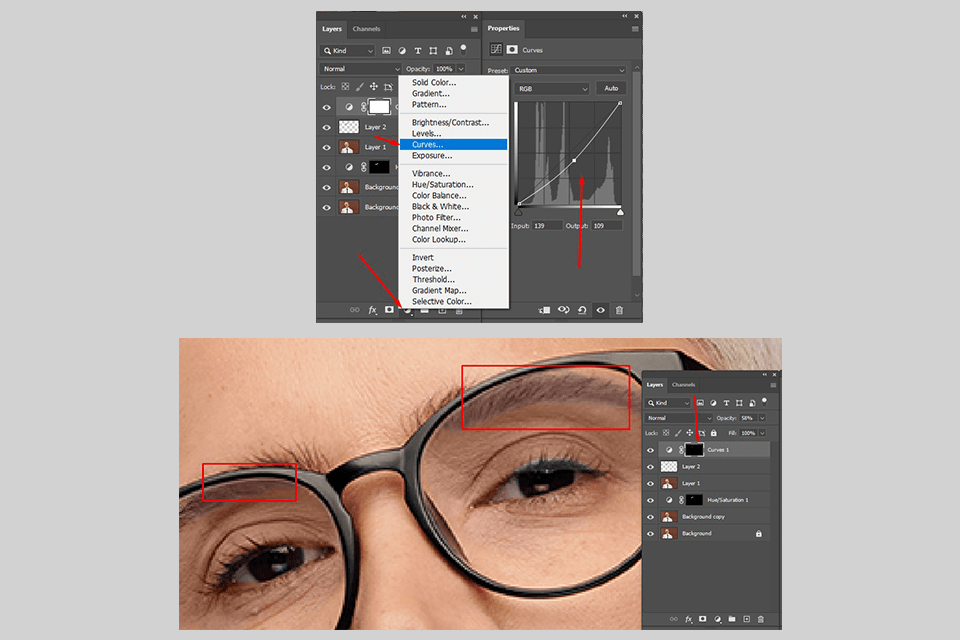
If you want to make eyebrows and eyelashes darker, go to Create New Adjustment Layer > Curves. Then inverse the mask and draw the desired part.
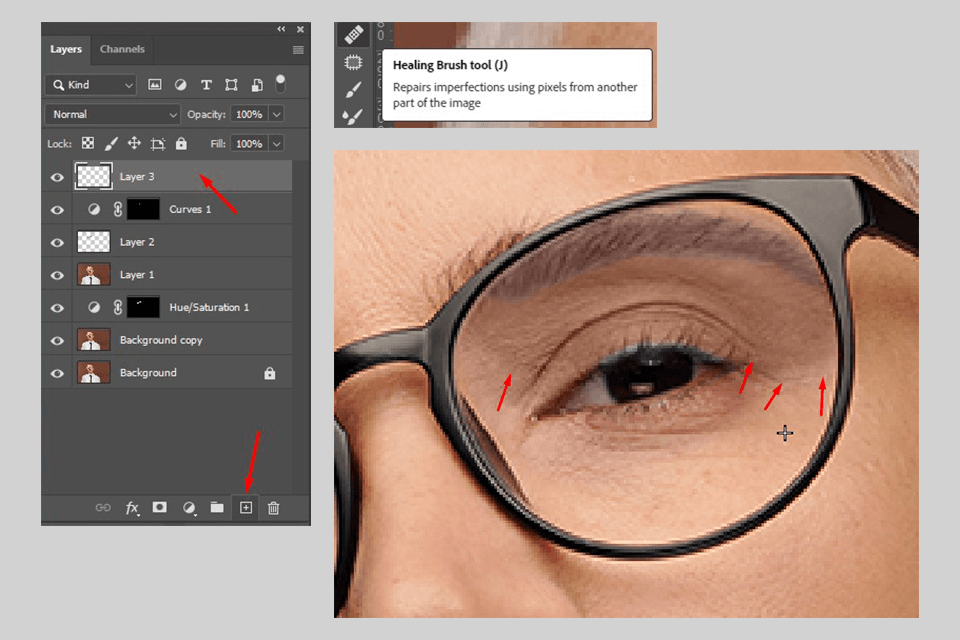
The next step is to fix the edge of the glare. For this, create a new layer. Use the Healing Brush Tool, Spot, or Clone Stamp Tool (you can see it in the example). Even out the edge of the glare and you’re done!
Find out how to remove the background of a picture, how to remove shadows, how to remove tattoos, and how to remove stray hairs to enhance your photo even further.

When photoshopping portraits, you can use ready-to-use actions. They will help you process your photo faster and achieve great results. With these actions, you can edit the skin tone, eyes, hair, and various details in a few seconds.


