How to Remove Stray Hairs in Photoshop
When you purchase through affiliate links on our site, we may earn a commission. Here’s how it works.
If you can’t understand how to remove stray hair in Photoshop easily, quickly, and naturally without damaging background or skin texture, this step-by-step photo retouching tutorial will be very helpful.
Concentrating on the model’s face or other elements of the image, photographers often forget to get rid of flyaway hair. It is almost impossible to avoid this problem during the outdoor photo session, but it can be solved while beauty image editing.
Method #1 Classical Removing Hair in Photoshop Technique

Want to get rid of stray hairs Photoshop, but every time you try, you get an undesired contour appearing around the hair in the image? In this tutorial, I would like to show you how to prevent that from happening and remove flyaway hair quickly and professionally with the Healing Brush tool.
Step 1: Duplicate the Layer
Begin with creating a copy of the layer. Just choose the “Background” layer and press Ctrl + J (Cmd + J) on the keyboard. Ensure that you will modify the Copy, not the Background layer.

Step 2: Select the Healing Brush Tool
Look for this tool on the left side of the program’s toolbox – click "J". Change the settings of the brush at the top of the workspace. In some cases, the image looks nice with opacity set to 100%. You may lower it if you don’t like the way the hair is blended.

Step 3: Paint Over the Stray Hairs
Now, we’ll make the hair outlines look ideally sleek and flat. Zoom in on the picture and begin processing the hair. Don't be afraid to increase the hardness of the brush if necessary.

A more detailed process is shown here:
Step 4. Done! Evaluate the Result
3 easy steps – and you know how to remove stray hair in Photoshop! The result is evident at first glance. This method produced a clearer picture without unnecessary hair.
There are several ways to remove stray hairs in Photoshop. I will describe the 4 simplest and most effective ones. With their help, you won’t get any strange-looking outlines near the hairline.
- Read more about hairstyles photography.
Method #2 Removing Hair in Photoshop Through Brush Tool


There is one more effective way how to erase hair in Photoshop. All you will need is the Brush Tool.
Step 1: Сreate a New Layer
Start with creating a new layer in order not to ruin the original picture. Below on the Layers panel, find the New Layer icon and click on it. Another way to do it is to press Shift+Ctrl+N (Windows) or Shift+Command+N (Mac) on the keyboard. Having a new layer, if something goes wrong, you will be able to return to and change any step.

Step 2: Select the Brush Tool
Pick the Brush tool (B) in the toolbox on the right and adjust its hardness and opacity. Hold “Alt” to source the area next to the hairs you will be covering up. Keep in mind that even if your background is solid, it will still have multiple shades. So, see to it that the area you are sampling is as close to the flyaway hairs as possible.

Step 3: Paint Over the Hairs
The next step is carefully painting away excessive hair. Once the subject’s hair looks perfect, save the picture as you would usually do it.

Check out the entire process in more detail below:
Step 4. Done! Evaluate the Result
No complicated manipulations and you managed to remove stray hairs Photoshop. Good job!
- Check out my frequency separation tutorial to learn how to edit skin in Photoshop.
Method #3 Removing Hair in Photoshop through Liquify

The next way of how to remove stray hairs in Photoshop won’t only help you deal with flyaway hairs but will also help you modify the hairstyle and give it more volume.
Step 1: Duplicate the Layer
Begin with creating a copy of the layer. Just choose the “Background” layer and press Ctrl + J (Cmd + J) on the keyboard. Ensure that you will modify the Copy, not the Background layer.

Step 2: Open Liquify
Go to “Filter” and choose “Liquify” in the drop-down menu. You can also use the shortcut “Shift+Ctrl+X” or "Command+Shift+X".

Step 3: Forward Warp Tool to Fix the Hair
Select the Forward Warp Tool at the top of the screen and enter the needed settings. I’m going to be using a medium-sized brush for more precision. Don’t forget to check the box next to “Pin Edges.”

Take a closer look at the whole process below:
Step 4. Done! Compare Results
From now on, it won’t be a problem for you to remove flyaway hair Photoshop quickly and efficiently.
Method #4 How to Remove Flyaway Hair in Photoshop
You may be overwhelmed with different tutorials on how to remove stray hairs on face in Photoshop, but never get a hustle on applying all the tips at once. In fact, there are several useful techniques, using which you will be able to do everything properly. With this tutorial, you will find the possible answers to “How to remove stray hairs in Photoshop?” question.
Aside from hair retouching, you will find out how to make beauty photo retouching, namely studio photo color correction, apply a fashionable Dodge & Burn effect, retouch skin, make it naturally smoothed and textured, remove a "pale" skin color effect, and add volume to the model's hair. If you are a beginning photo retoucher, you need about 40-50 minutes to do hair retouching, if you have already edited photos in Photoshop - for about 20-30 minutes.
- Read more about 4 legal ways to get free Photoshop software for professional photo editing.
How to Fix Hair in Photoshop Tutorial
Removing stray hair from the background and face is crucial while photoshopping portraits, especially for fashion magazines. Watch and read our photo retouching tutorial to make hair look great on the photo.
STEP 1. Open the photo and duplicate the layer.

STEP 2. Select one half of the face and copy it on the top layer.

STEP 3. Move the layer, so that the background part where you want to remove flyaway hair is clean.

STEP 4. At this stage of hair wisps Photoshop retouching you need to create a mask and invert it so that the layer cannot be seen.

STEP 5. Select a soft brush, set it to white, and set its opacity like it’s shown on the photo below. Start to go through the contour of the hair with light strokes to remove the unnecessary hair from the backdrop.

STEP 6. Continue doing this until all stray hairs from that side are totally removed.

STEP 7. Copy the other half of the girl’s face to a new layer.

STEP 8. Create a new adjustment layer to see background flaws, blemishes and whether there are any stray hairs left.

STEP 9. As you can see on the screenshot, there are some flaws on our photo that we need to correct.

STEP 10. Select the soft mix brush and set such values:
- Wet - 37%
- Load- 36%
- Mix - 30%
- Flow - 35%
- Samples all layers - checkmark

STEP 11. Fix the flaws with the brush.

STEP 12. Choose the Liquify filter. Use it to add volume and form the final look of the hair.

STEP 13. Choose a Clone Stamp tool and a soft brush.

STEP 14. Carefully select the face area next to the stray hairs, and paint them over.

STEP 15. Select the Healing Brush and reduce its radius. Start to remove the protruding hairs carefully.

And there you have it! A perfectly edited picture with no stray hairs in sight!
Comparing to other tricky portrait elements as makeup, props, lighting, hair is practically uncontrolled. Even if you use the best hairspray and hope to keep the hair fixed, you will need to know how to fix wind blown hair in Photoshop, especially if you perform outdoor shooting.
Each female portrait should have perfect hair, and it isn't only about removing stray hairs, you should add some volume to her hair. Make it look natural by using the Liquify Tool (check the background behind your model wherever you’re using this magical tool) and color though a Gradient Map (this Adjustment Layer will allow any retoucher to independently adjust the highlights, midtones, and shadows). It really helps add some shape, volume easy and fast. This creates a natural looking depth and texture.
Fortunately, the Healing Brush tool may be your lifesaver if you need to improve the state of the hair, without causing any weird, unnatural look. Though the changes may be minor, the whole picture will become more interesting and eye-catching.
The most common mistake is when a photographer gets carried away with this tool and makes the hair too perfect. People like natural shots and you need to perform editing, without making all the adjustments visible.
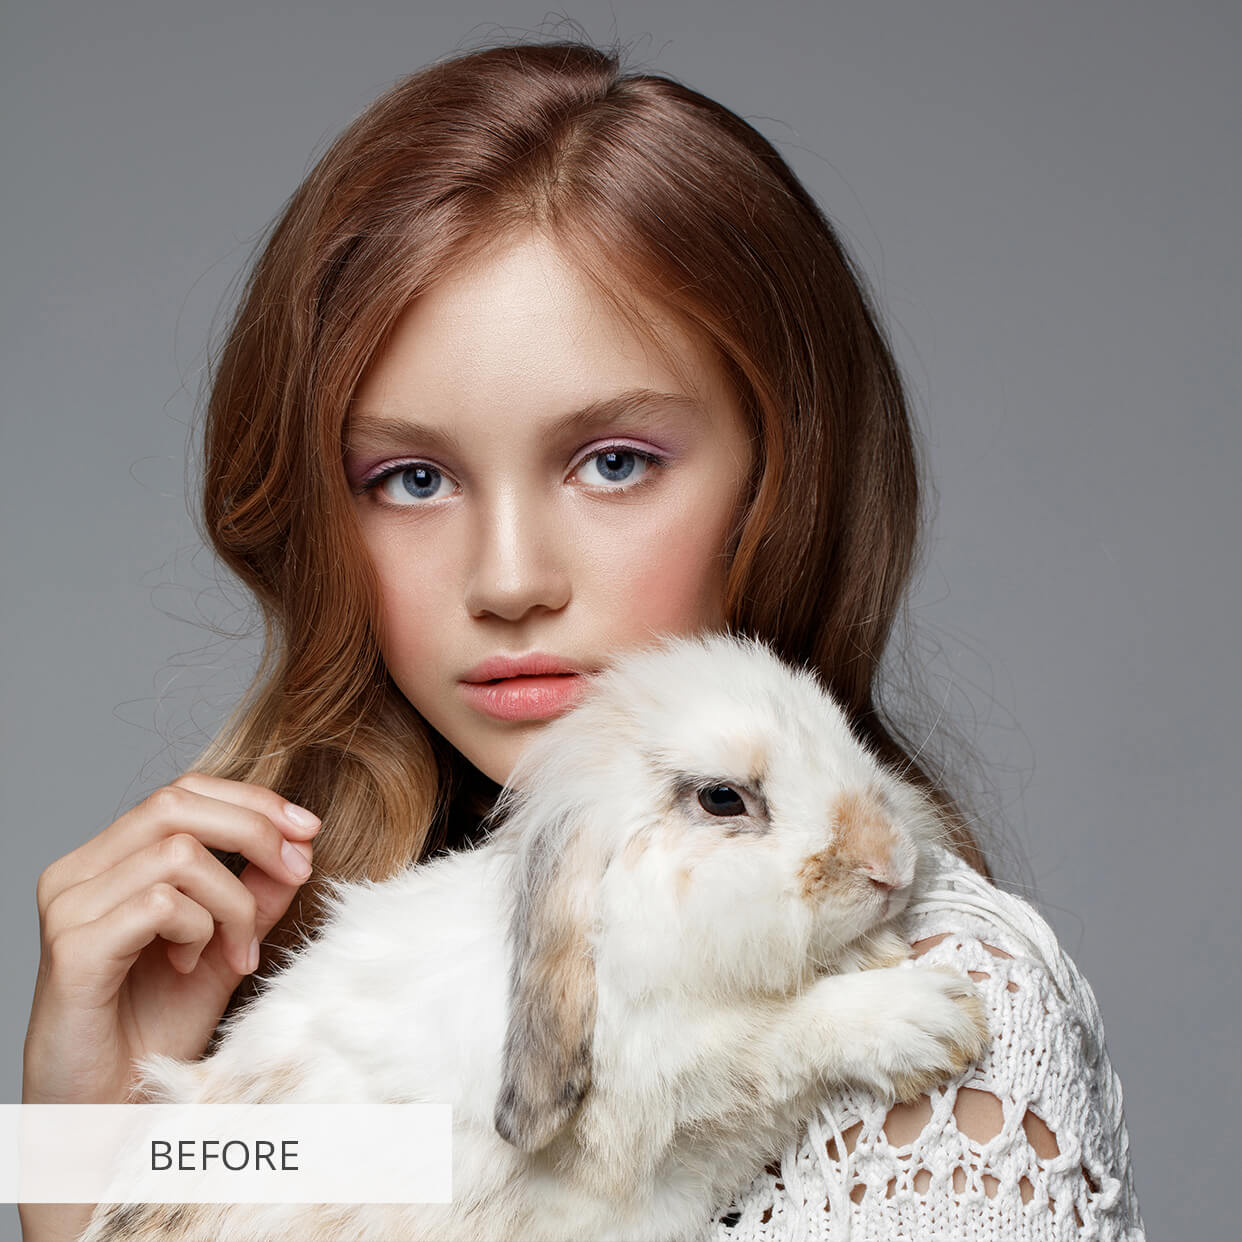
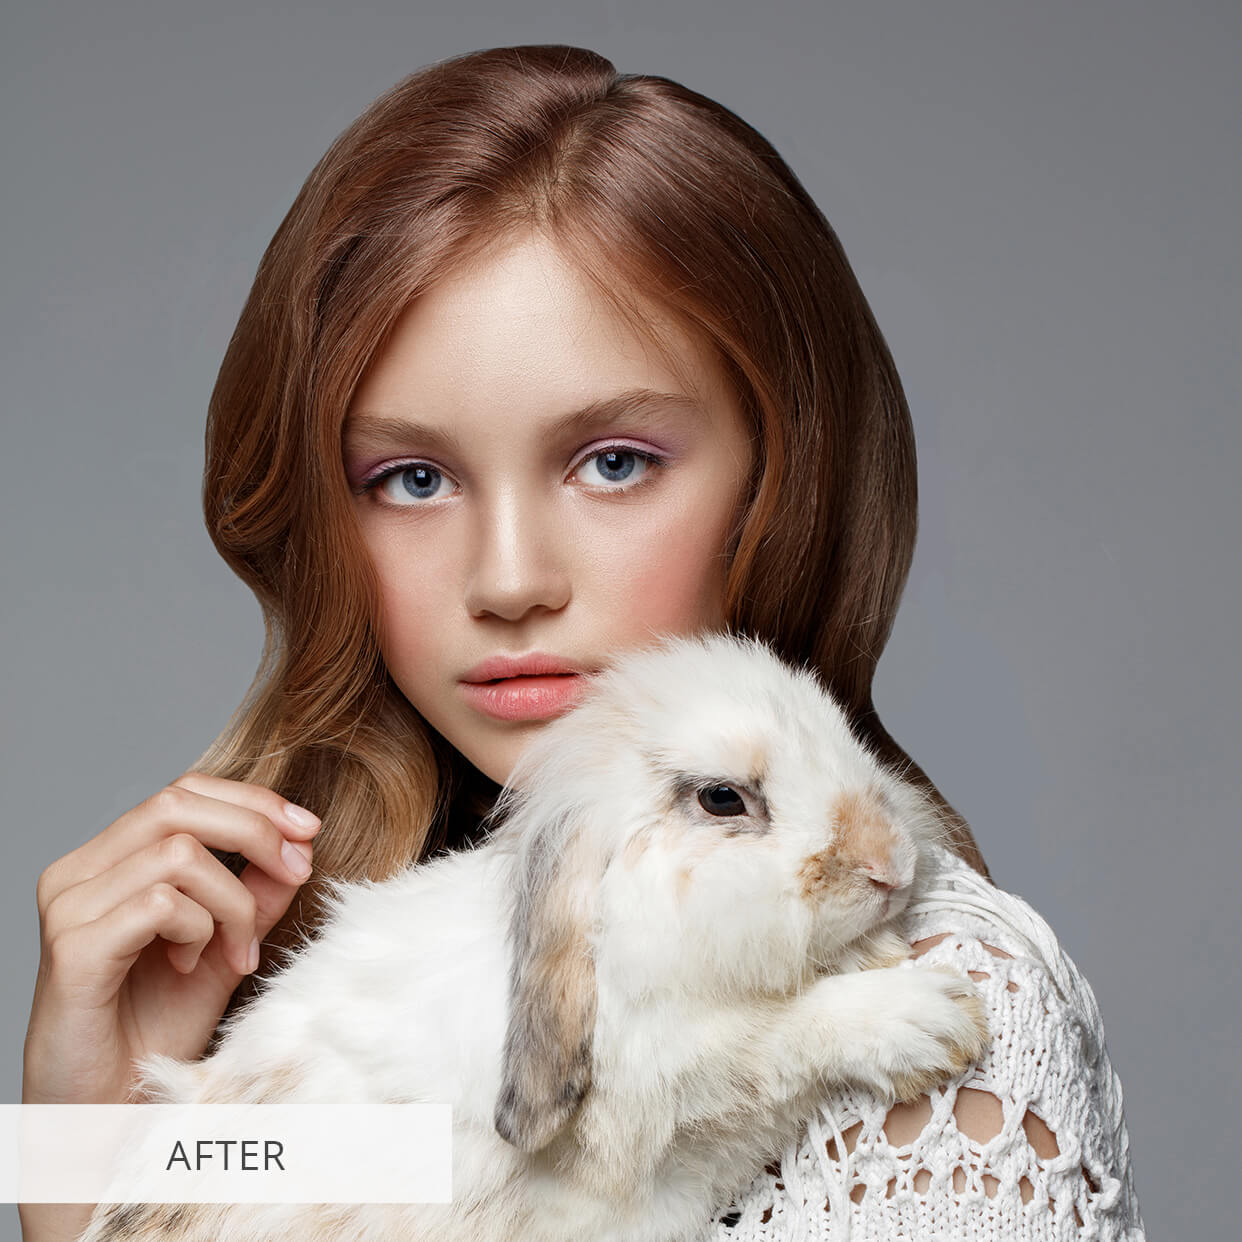
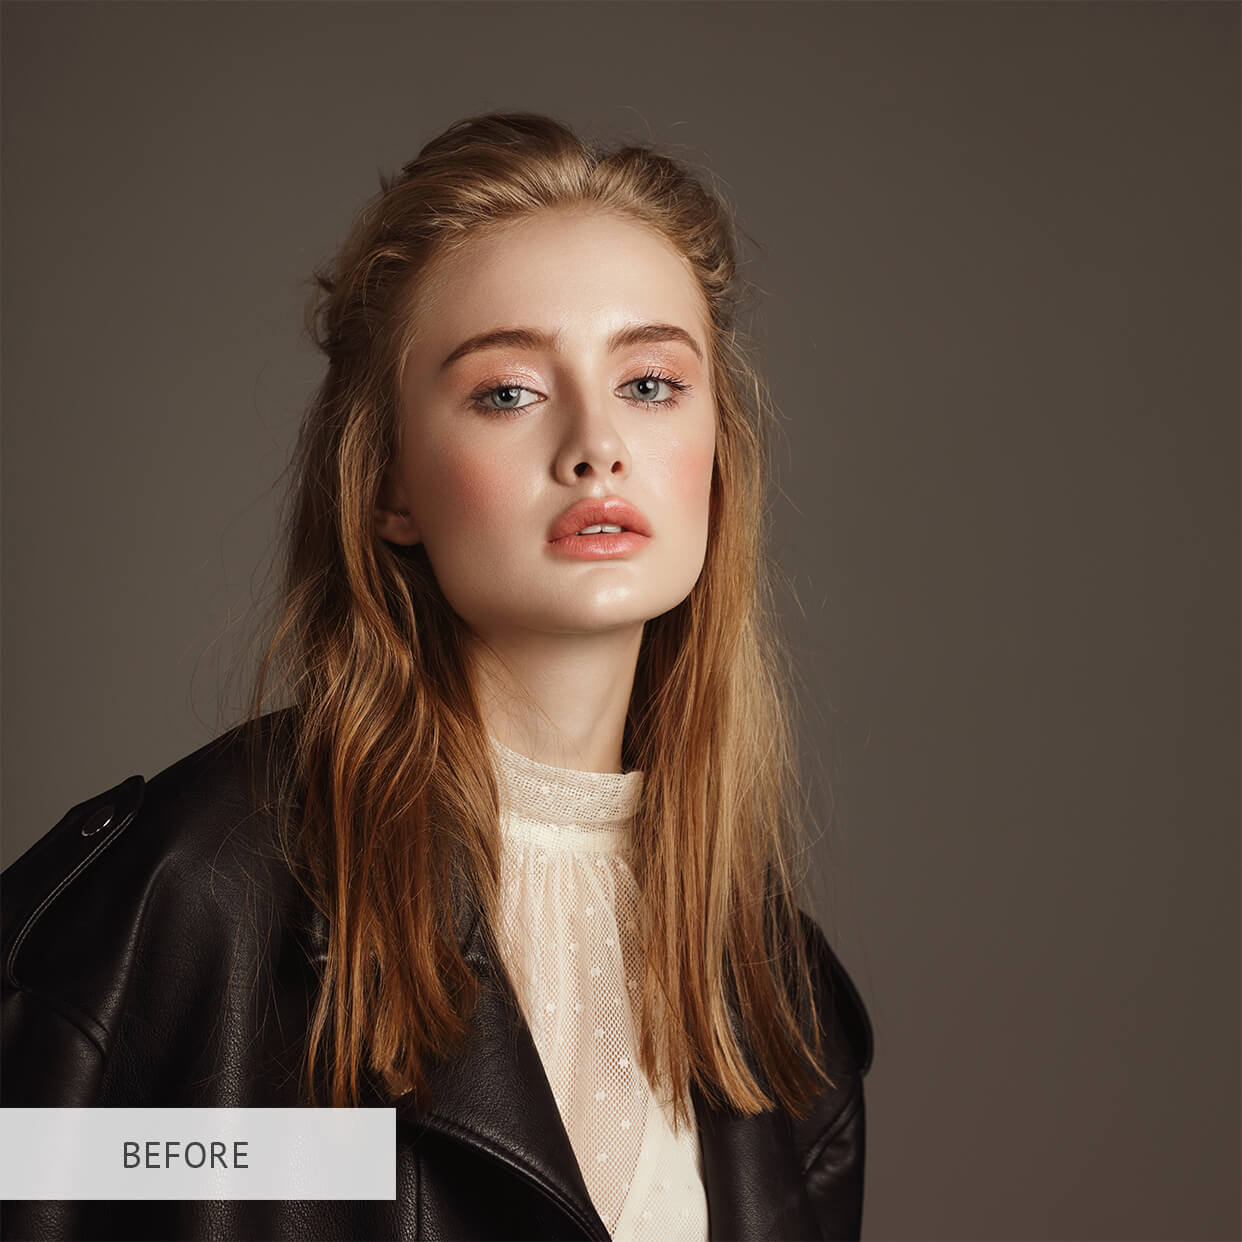
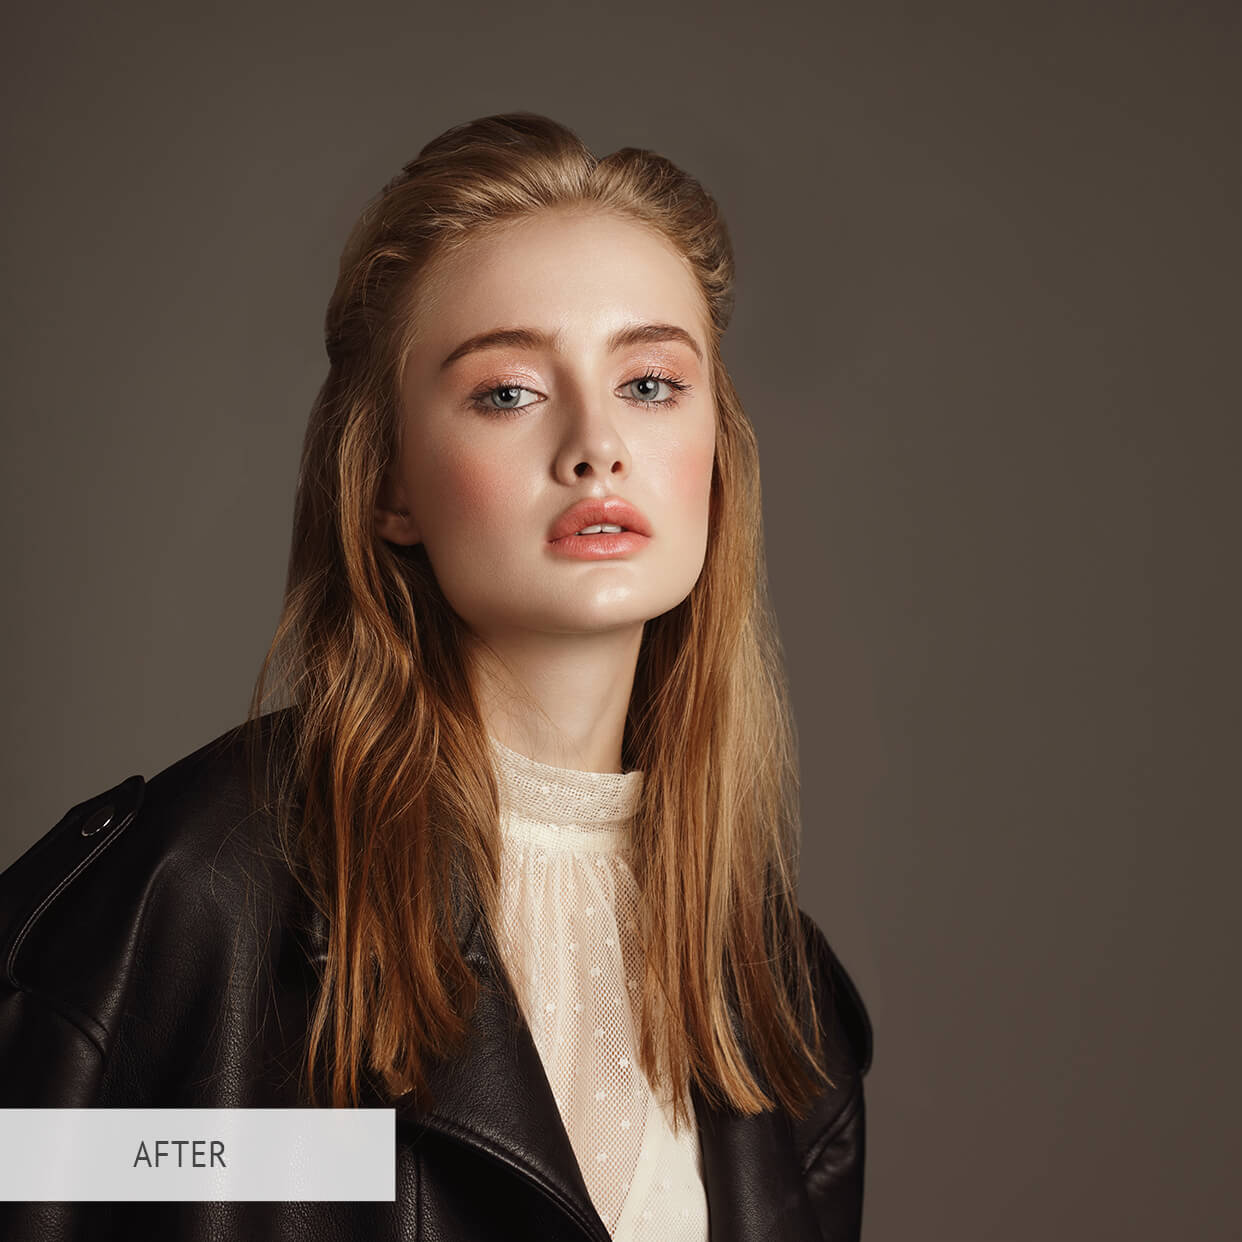
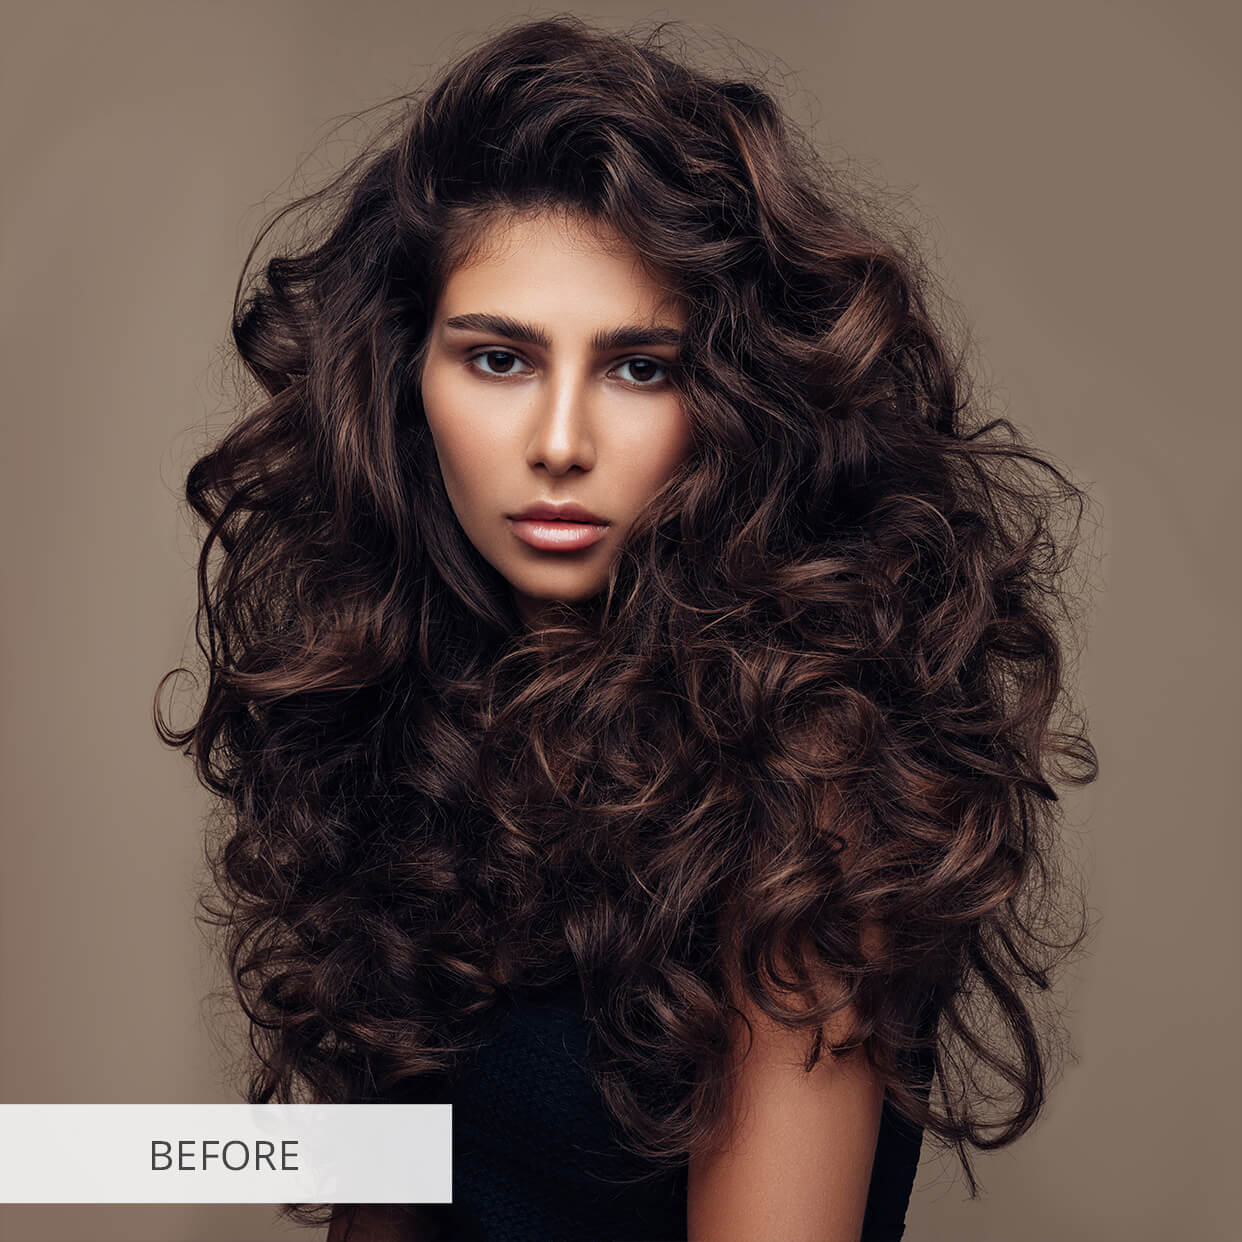
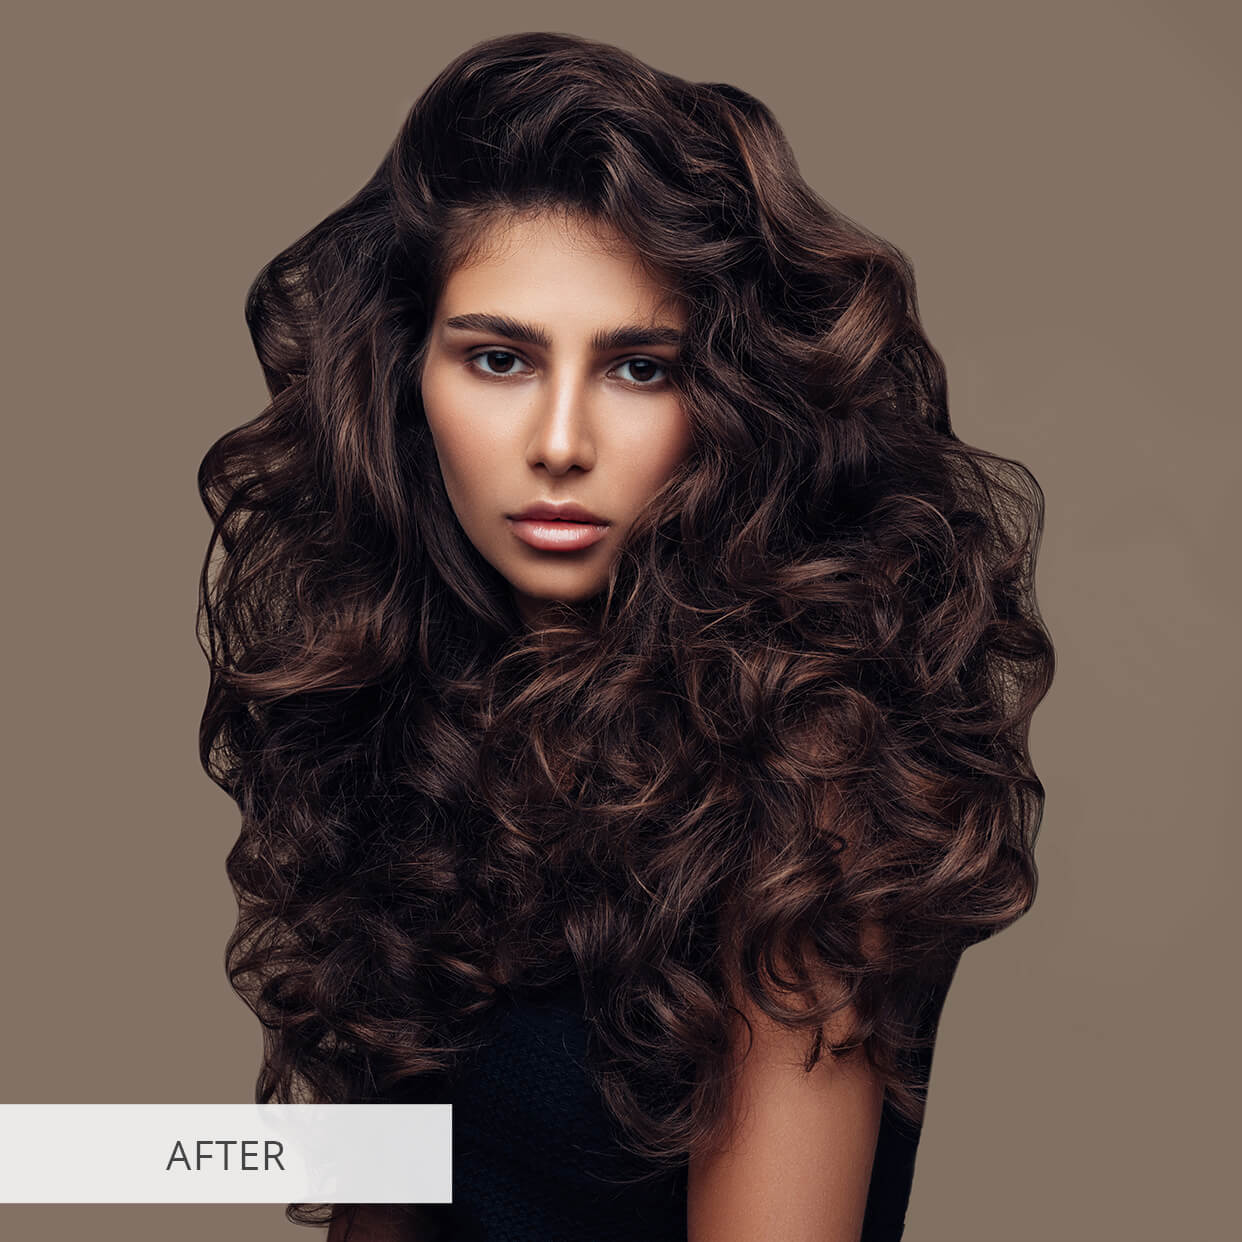
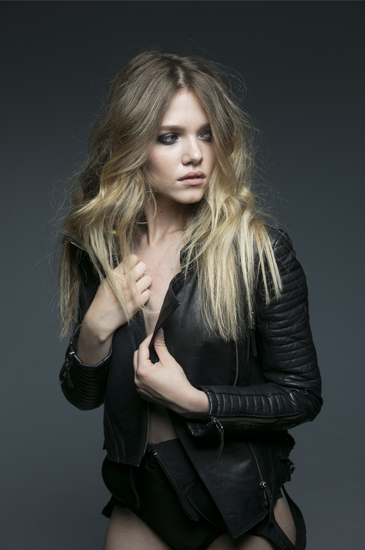
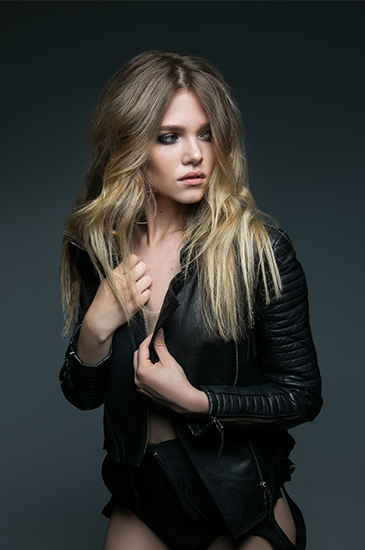
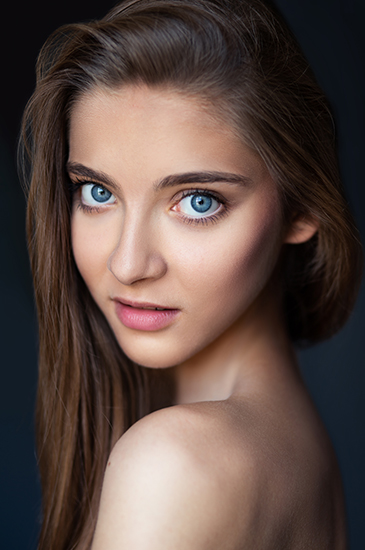
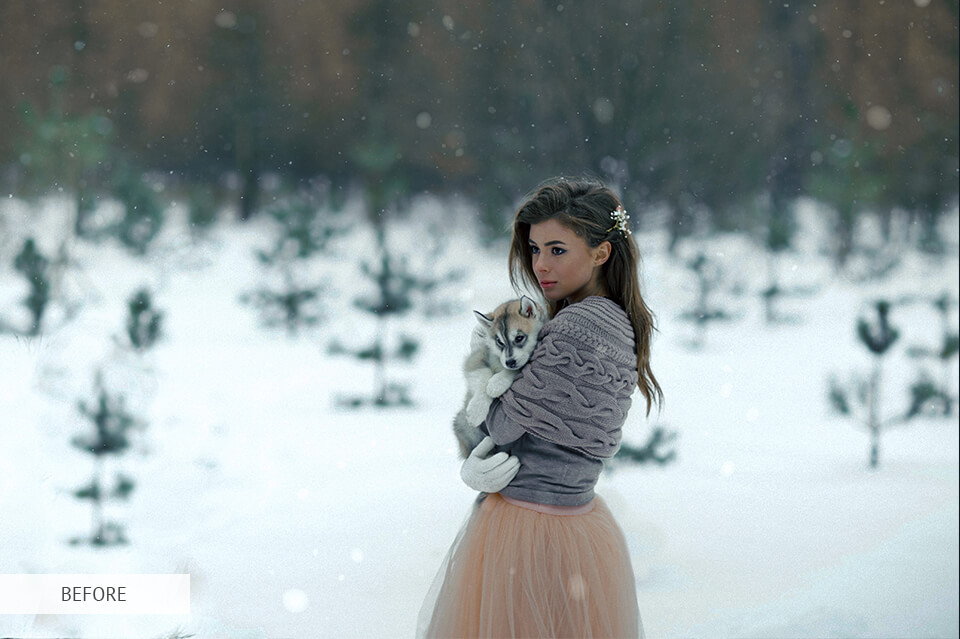
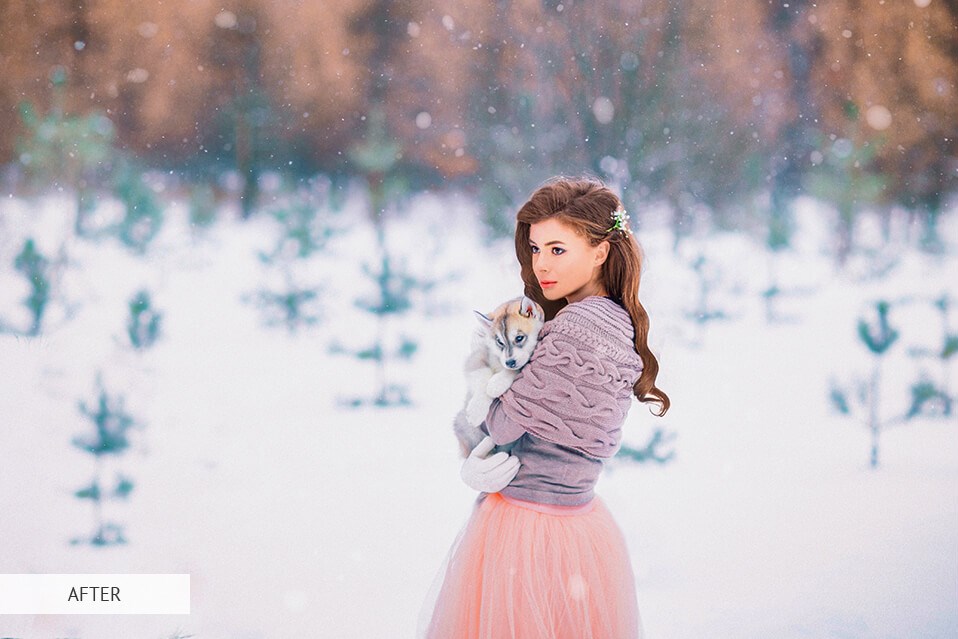
Having looked at the before and after portrait retouching example on the left, you see that a good beauty portrait isn't only a good looking skin and eyes, it is a deep color correction, hair retouching, photo stylization, natural body reshaping. etc. The only rule is to make photo retouching NATURAL and a little bit beautiful than in reality.

Free Photoshop Brushes for Hair Retouching
Use one or several Free Photoshop Brushes to edit hair realistically, giving it volume and style.
1. Hair Photoshop Brush “Long Hair”
This brush adds wavy, long hair to the shot. The hair instantly appears silky, like hair you want to touch.
- Find out how to install Photoshop Brushes.
2. Hair Photoshop Brush “Curves”
Natural-looking hair waves aren’t so easy to make in Photoshop. This brush works wonders with the hair, adding brown and beautiful wavy strands.
3. Hair Photoshop Brush “Volume”
With this brush, it is possible to give your hair an afro look, with the necessary details and texture. It is perfect for adding voluminous, tight curls.
- Read more about how to whiten teeth in Adobe Photoshop in 3 easy steps and don’t waste much time getting a natural look.
Additional Portrait Retouching Tips
Hair isn’t the only element that requires professional image editing. There are lots of other parts of the picture, which may spoil it if you don’t pay sufficient attention to them. Here’s the list of useful Lightroom and Photoshop portrait tutorials.
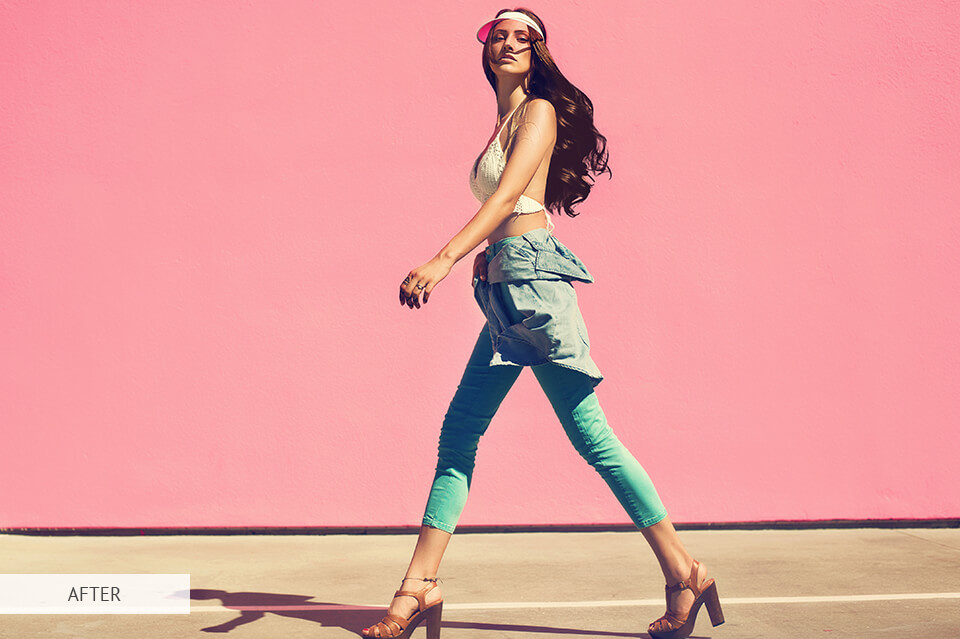
Make Color Correction
Adjust color tones, temperature, shadows, white balance on your photos to make them be full of bright colors or get a trendy and stylish color effect. For this purpose you can use Lightroom presets or free Photoshop actions.
How to Brighten Eyes in Photoshop
How to Smoothen Skin in Photoshop
How to Whiten Teeth in Lightroom
You may choose any app to fix teeth in pictures. But the best variant is to use Photoshop, Photoshop alternatives or Lightroom with lots of useful tools. Watch the video tutorial about how to whiten teeth in Lightroom easy and fast from the first time. But an average person usually has the teeth with a yellowish tint. Your task is to eliminate this yellowness and save the natural white color. Don’t make the teeth to bright or the image will be overdone and fake. You must represent a model in a favorable way, but there is a delicate balance between eye-catching and oddish.
How to Change Eye Color in Photoshop
Add Shine and Volume to Hair
Dealing with a portraiture genre, the majority of photographers and photo retouchers tend to concentrate on the face only. But this may play a low-down trick with them. A portrait isn’t only about the face as there are lots of other parts that need to be retouched. If you know how to retouch hair Photoshop, you will be able to entirely affect the picture. At the first glance, you may not notice crucial defects. But be very attentive, as the hair is a very tricky area to enhance. Try zooming in and you will definitely find something you want to fix. If you are not sure what to start with, watch this video and learn how to smooth hair in Photoshop, add shine and volume.
Improve Makeup
There is usually a makeup artist, who chooses the makeup in accordance with the style of a photo session. But after several hours of the ongoing shooting the colors of the lipstick, eyeliner, rouge, mascara become less bright. Not to waste time enhancing the makeup while shooting, you can perform all the improvements in Photoshop. Only several clicks and you get what you need.
Try Different Hair Color
Editing portraits, you will need to know not only how to remove stray hair in Photoshop, but how to change its color. It is much easier to turn fair hair into dark, as you will see each detail that must be changed. Doing the opposite conversion is almost impossible. Though editing hair is a challenging task, the results you will get may change the mood of the whole photo. So, it is always worth trying. Just do everything little by little not to get an unnatural look.
Photoshop Remove Facial Hair Tutorial
Lots of photographers are asked to “grow” hair during the image editing (a beard or mustache), but sometimes they need to remove female facial hair Photoshop. Besides, your income may depend on your knowledge of how to remove facial hair in Photoshop and it would be a pity to lose clients because you have no idea what to start with. In this video, you will find all the techniques which will be useful for such a task.
Armpit Retouching
If you know how to fix dark armpits Photoshop, you will be regarded as a really skillful shooter. This part of the human body needs a special attention while image editing. Do your best to make armpits as smooth as possible.
Remove Wrinkles and Puckers in Clothes
When we see a portrait, first of all, we pay attention to the appearance of a model. But then we notice the clothes which are used to accentuate the person’s beauty and peculiarities of the shooting theme. So, the outfit must be chosen appropriately. It is unforgivable if you leave the clothes without image editing. The final results must be perfect without wrinkles and creases in clothes. Your task as a pro photographer is to fix all the flaws that weren’t eliminated during the photo session. With the Photoshop magic, everything becomes possible.


