To make editing easier in Adobe Lightroom, you can try the Adjustment Brush Tool. With these brushes, you can easily work on certain parts of your image, apply the dodge and burn effect, improve exposure of skies and perform other edits.
When adding brushes to the program, you may encounter some difficulties, so I wrote this step-by-step guide to help you clarify how to install Lightroom Brushes.

Once you have purchased the software, you can download it to your PC in .zip format. The procedure is similar to installing Lightroom presets on Mac & Windows. Place a .zip file in a convenient location on your computer and then right-click to open it. Also, you can use any program you like to open .zip files.
If you don’t have the program already, you can get Lightroom for free. Otherwise, launch Lightroom, and do the following:
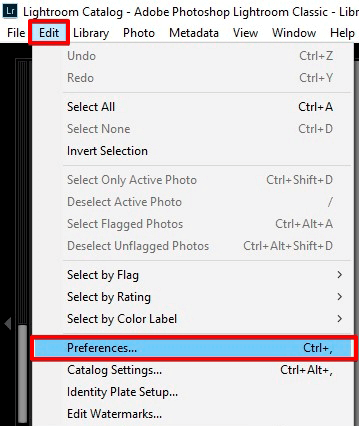
On PC: Find Edit at the top of the screen next to File and click. Then, in the drop-down menu, find Preferences and click.
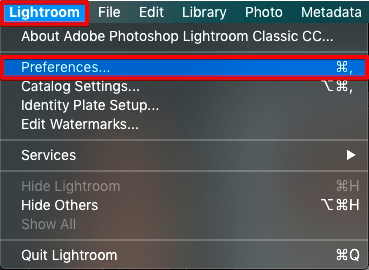
On Mac: Open Lightroom and click on Lightroom at the top of the screen to the left of File. Then, in the drop-down menu, find Preferences and click.
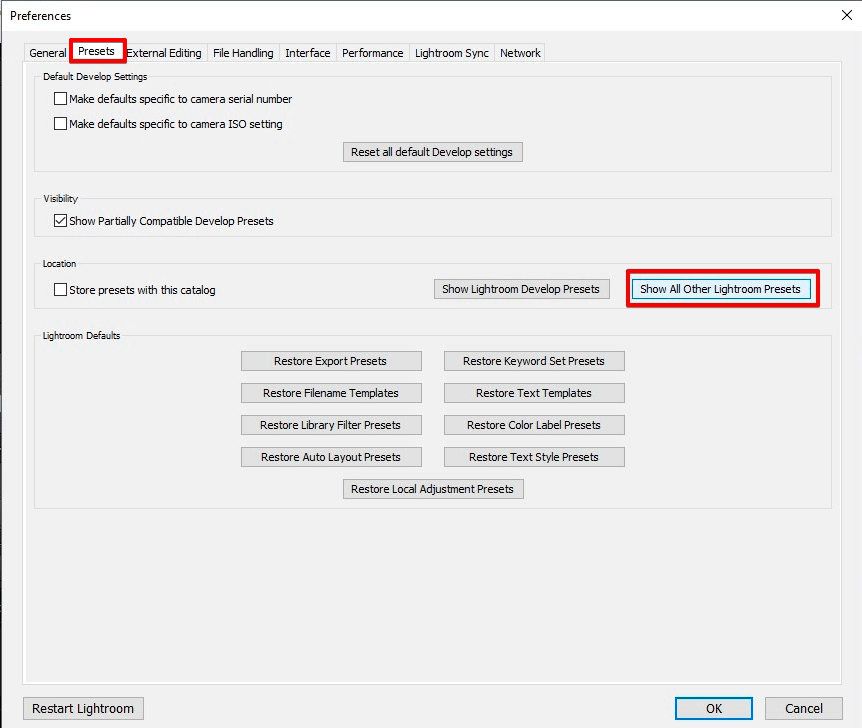
When the “Settings” window appears, make sure that you are on the “Presets” tab, it’s the second tab. If you are using one of the latest Lightroom versions, find “Show All Other Lightroom Presets” and click.

If you are using the Mac version of Lightroom, click “Show Lightroom Presets Folder”.
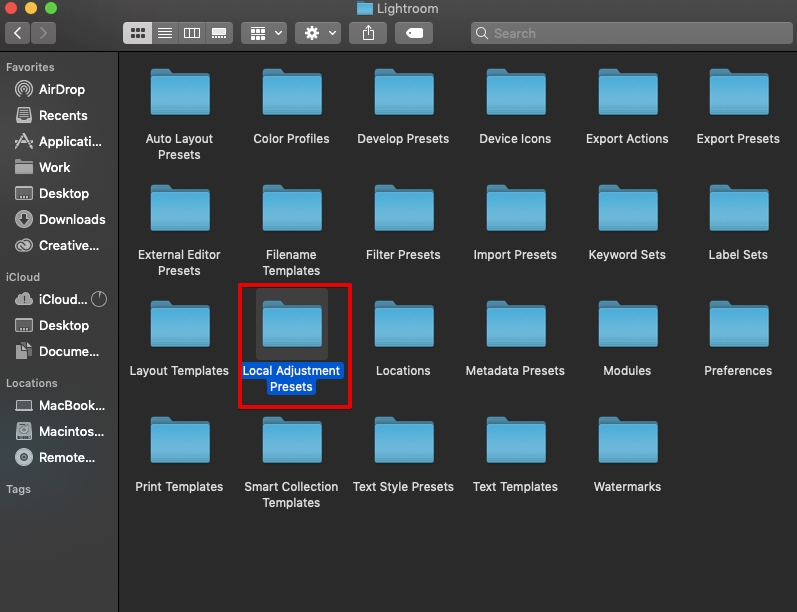
You will see a window in which you need to double-click on the “Lightroom” folder and choose the “Local Adjustment Presets” folder in it. If you haven’t installed any presets, then there will only be a “User Presets” folder. Otherwise, your previously installed presets will be displayed here.
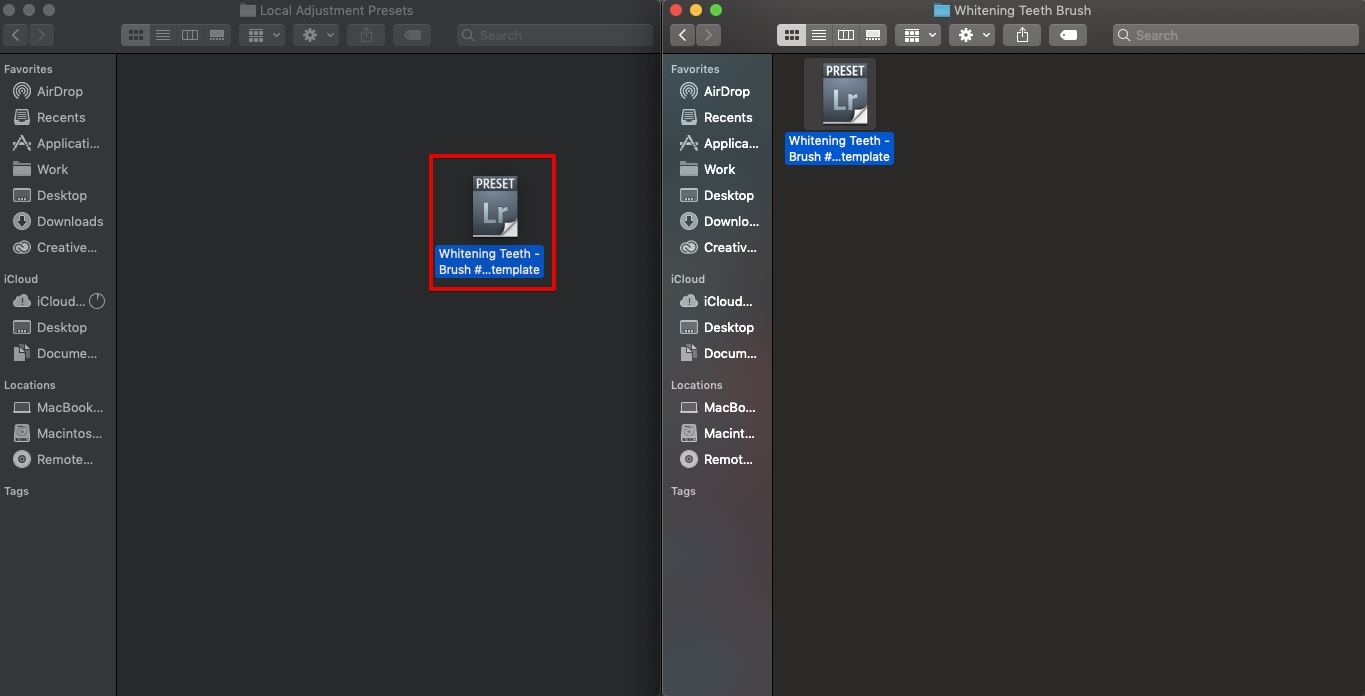
Leave the current window open. Go back to the place where you have saved the folder with the Lightroom brushes and copy (Cmd+C/Ctrl+C) all files with the specified tools (.lrtemplate) inside the folder. Click on the first preset file, hold down the Shift key and click on the last preset to select all files.
Insert (Cmd+V/Ctrl+V) .lrtemplate files in the folder called “Local Adjustment Presets”.
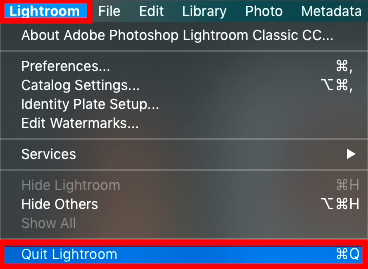
To see the brush settings in the brush palette, you need to restart Lightroom. On Mac: go to Lightroom > Quit Lightroom, or use the hotkeys Cmd+Q.
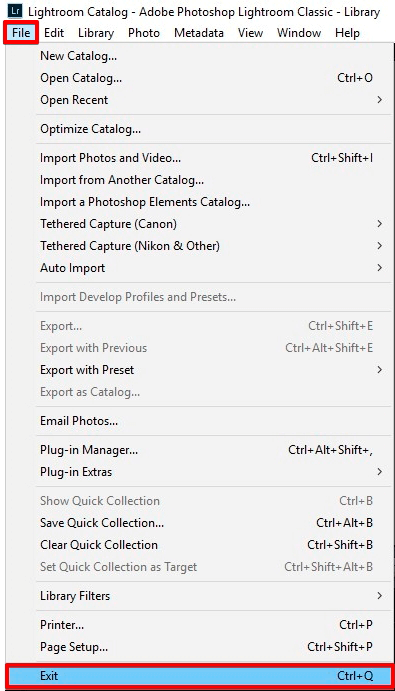
On PC: open the File menu and navigate to the “Exit” option. Alternatively, use the shortcut Ctrl+Q.
Pro tip
If you don’t need a certain brush anymore, open the brush library and delete the one you do not need by clicking on Delete preset. Adjust the size and stiffness of the effect and apply it to the photo. Done!

To try out the new brushes, you need to re-open the software and find Adjustment Brush, Radial Filter, or Graduated Filter. Select the brush you like from the drop-down menu next to “Effect”.
Then you need to set the size, density of the brush, and other parameters. Start to edit photos in Lightroom from the part where you need to apply the effect.
Everything is ready, the brushes are working, and the question of how to add brushes to Lightroom will no longer seem difficult to you. Done! In just a few short steps, you have successfully installed your Lightroom Brushes .
Often, beginners simply download brushes and place them in the Lightroom folder system instead of extracting the necessary files from them. This is especially common among those who don’t have a free RAR extractor installed. In this case, unsupported .rar files look like RAW images to users who don’t have special knowledge. Never forget that extracting files is a must before installing them.
Remember, that Adobe has introduced a lot of updates since the original Lightroom version. For example, Fill Light is no longer a slider, and the old brushes that worked in LR 2-3 - will not work in Lightroom CC. So keep up with Lightroom versions and make sure to download the latest Lightroom version with all updates.
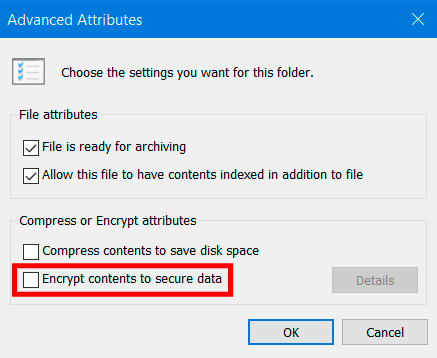
Some of the free Lightroom adjustment brushes you can download are encrypted, and as a result, you will not be able to use them even after correctly loading them into Lightroom. All you need to do to fix this is right-click on the brush file and select “Properties”. Go to the “Advanced” section and uncheck content encryption to protect data.
If you can’t download Lightroom brush presets, the first thing you should do is try another Internet browser.
Another way to fix this is not to open the file after downloading. Just click Save, then close the dialog window. Next, open the browser and find your ZIP file. It is often located in the Downloads folder. Extract the file according to the instructions.
If right-clicking on the file does not offer to extract files, then you may need to download the free Zip program. I recommend trying WinRAR.

If you can’t find brushes in Lr Develop menu, try to close Lightroom and restart it. Also, check twice to see if you’ve copied the contents of the folder you had downloaded to the “Local Adjustments” and not to the “Develop” folder.
Another way you can fix this, is making sure that the “Store Presets in the Catalog” option is unchecked. This option will appear to the left of “Show Lightroom Presets Folder” in the settings menu.
Make sure you have extracted a zip file. If you simply double-click on the folder (on PC), you will have access to the tools. However, they will not be automatically extracted, copied, pasted and displayed in Lightroom correctly.
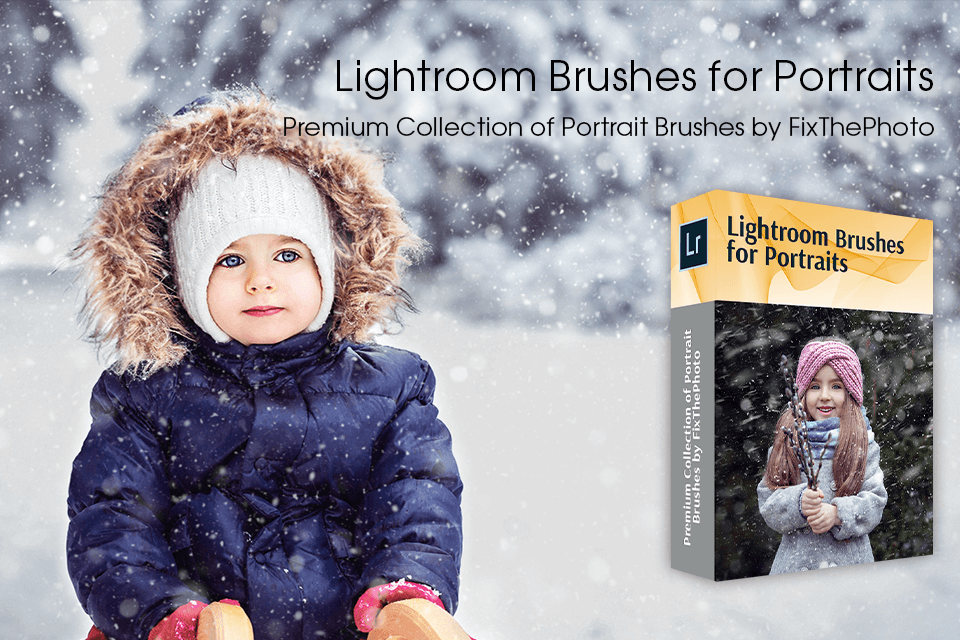
To find a set of high-quality tools for working with portraits at an affordable price on the net is a rarity. Our retouchers decided to save you time and money by arranging a unique and stunning collection of brushes for editing portraits in Lightroom. With them, you can easily smooth the skin, remove wrinkles, whiten teeth, and more. Whether you’re a beginner or a pro, these brushes will do the trick and become an indispensable element of your toolset.


