Learning how to mask in Photoshop is essential if you want to hide certain image or layer elements without deleting them. This technique can be useful for creating composite images, editing the backdrop of a photo, deleting certain objects, or ensuring the adjustments you make are only applied to user-selected areas.
If you’d like to follow these Photoshop masking tutorials, download Photoshop for free or update your software to the latest version.
Both types offer non-destructive editing, ensuring you can return to the original look of your images any time you want.
You can create a Photoshop mask by going to Layer > New > Layer from Background. Then select Add layer mask at the bottom of the Layers section to create a Layer Mask.
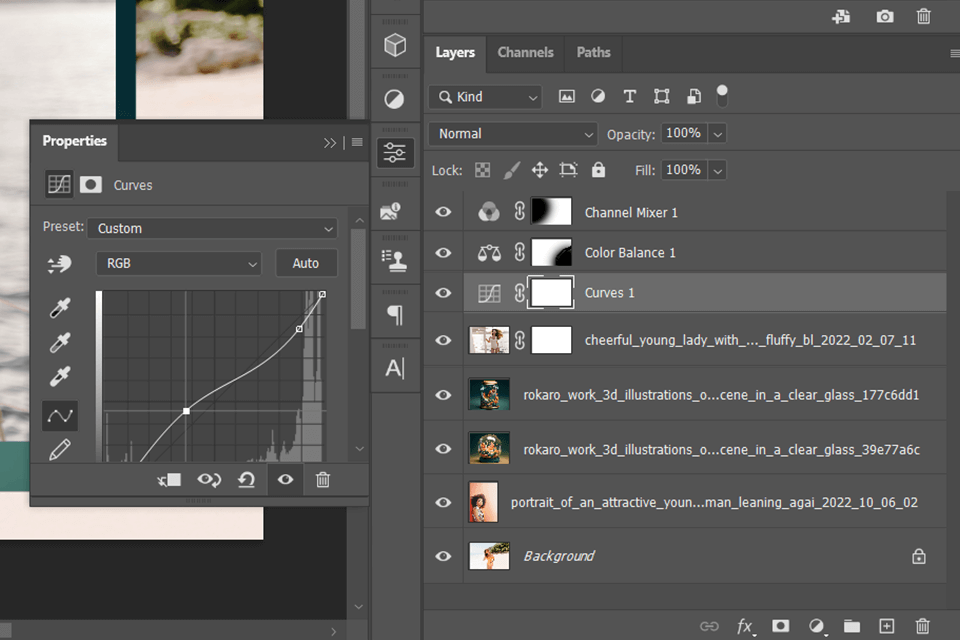
The Layers menu shows both layer and vector masks as an extra thumbnail to the right of the layer thumbnail. The layer mask’s thumbnail has a grayscale channel that is applied when you’re making a layer mask. The vector mask’s thumbnail is a path that cuts out the content of a layer.
The parts of the image you paint black will be hidden while the white parts remain visible. Meanwhile, the parts colored in different grey tones will have different levels of transparency. If you’re a beginner who has trouble using Photoshop, you can consider practicing with some simpler photo masking apps, before diving into such a complex editor.
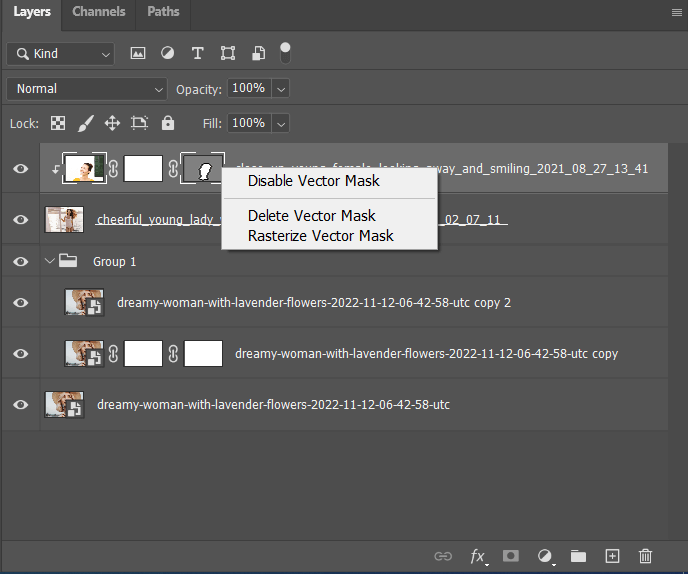
A vector mask adds a sharp-edged shape to a layer that can come in handy whenever you want to add a visual component with clear and well-defined edges. Once you add a layer with such a mask, it can be enhanced with a variety of layer styles, adjusted as you see fit, or become supplied with a usable button, panel, or another web-based element.
When following Photoshop masks tutorials on adding a layer mask, you have the option to hide or display the entire layer or apply the mask to a selection or transparency. You’ll also be able to draw in the mask so that it hides the exact layer parts you need, making the layers underneath visible. This way you can conveniently blend layers in Photoshop.
Check to ensure that no image areas are currently selected. To do so, go to Select > Deselect. Now navigate to the Layers menu, and pick the layer or group. To group layers in Photoshop, pick the corresponding option from the “Layers” panel.
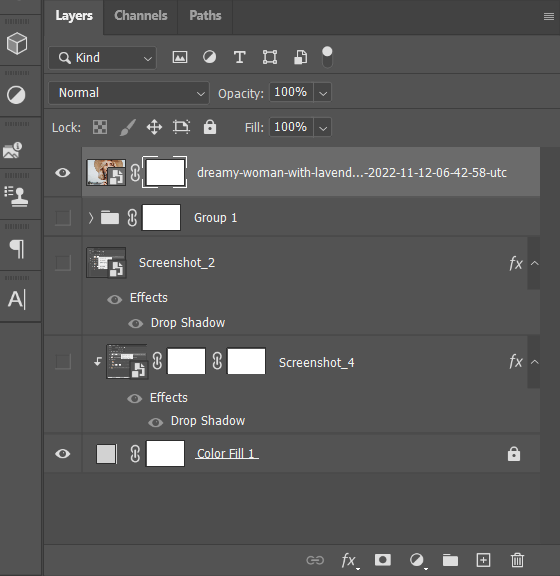
At this stage, you can add a mask that uncovers or hides an entire layer. To do the former, you need to select Add Layer Mask from the Layers menu, or pick Layer > Layer Mask > Reveal All.
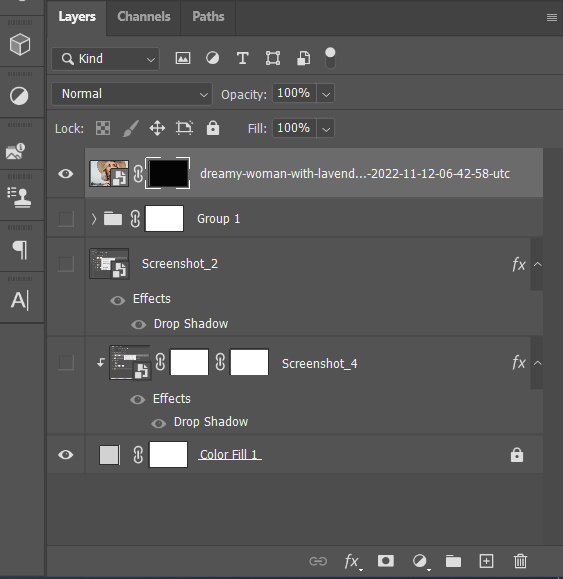
To accomplish the latter, Alt-click (Win) or Option-click (Mac) then press Add Layer Mask, or pick Layer > Layer Mask > Hide All.
If instead of adding a mask to the entire layer, you only want to cover a certain area, then be sure to select it before creating the mask.
The Properties menu offers an array of extra settings for customizing Photoshop masking. It allows you to tweak the mask’s transparency to control how much of the masked area shows through, invert the mask, or adjust its edges along with the selection area.
To change the layer transparency, go to the Layers menu, and choose the needed layer. Now, click on Layer > Layer Mask > From Transparency.
The software will transform transparency into an opaque color that is hidden by the newly applied mask. The opaque tone is determined by a variety of factors including the filters and other edits that were already applied to the layer. This method is particularly useful for video and 3D projects.
Mask All Objects is a fast and simple option for users who don’t know what is layer masking and want a simple method for masking all objects found in a layer. It automatically creates mask layer groups on individual layers for each object found on the chosen layer in just one click.
This feature is perfect for making selections from the automatically created masks, choosing the layer, and then using Generative Fill, making different adjustments, or applying Photoshop filters. For instance, if your photo features five people, each subject will be masked in their individual layer group, and Photoshop will create a separate mask that covers all the models as well.
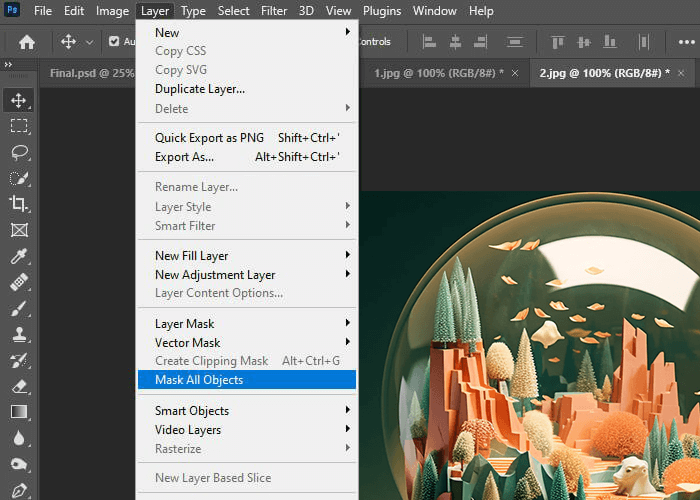
Pick the desired layer and then navigate to Layer > Mask All Objects, right-click the layer in the Layers menu, or open the pop-up menu in the Layers panel and pick Mask All Objects.
Once in the Layers menu, locate the mask that contains the object you’d like to edit.
Pick a layer mask group to apply any edit or filter you’d like to the masked element.
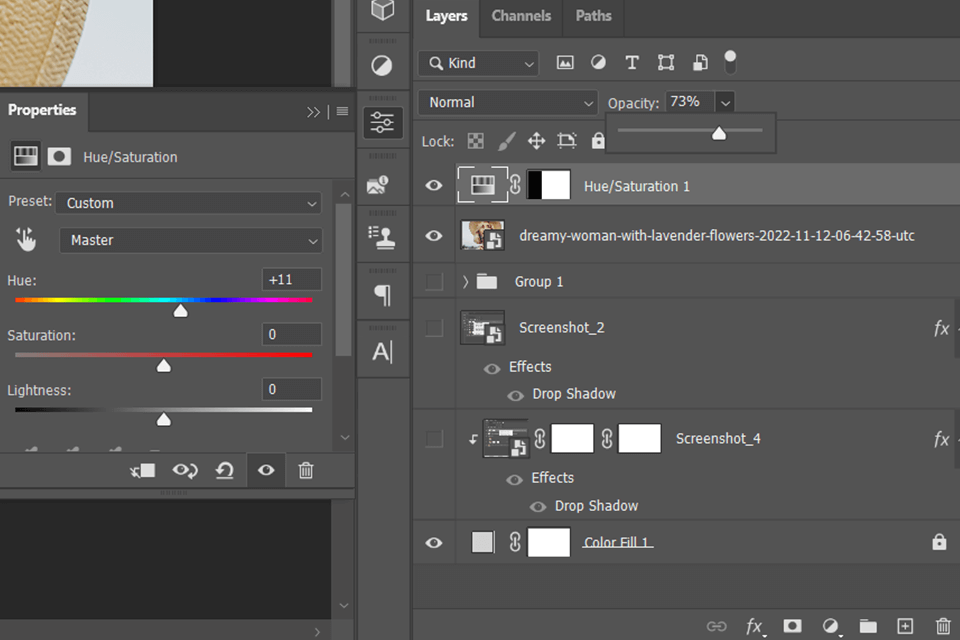
Choose Adjustment > Hue Saturation at the bottom of the Layers menu and drag the color slider until the selected area becomes green. The edit will be applied to the layer mask group.
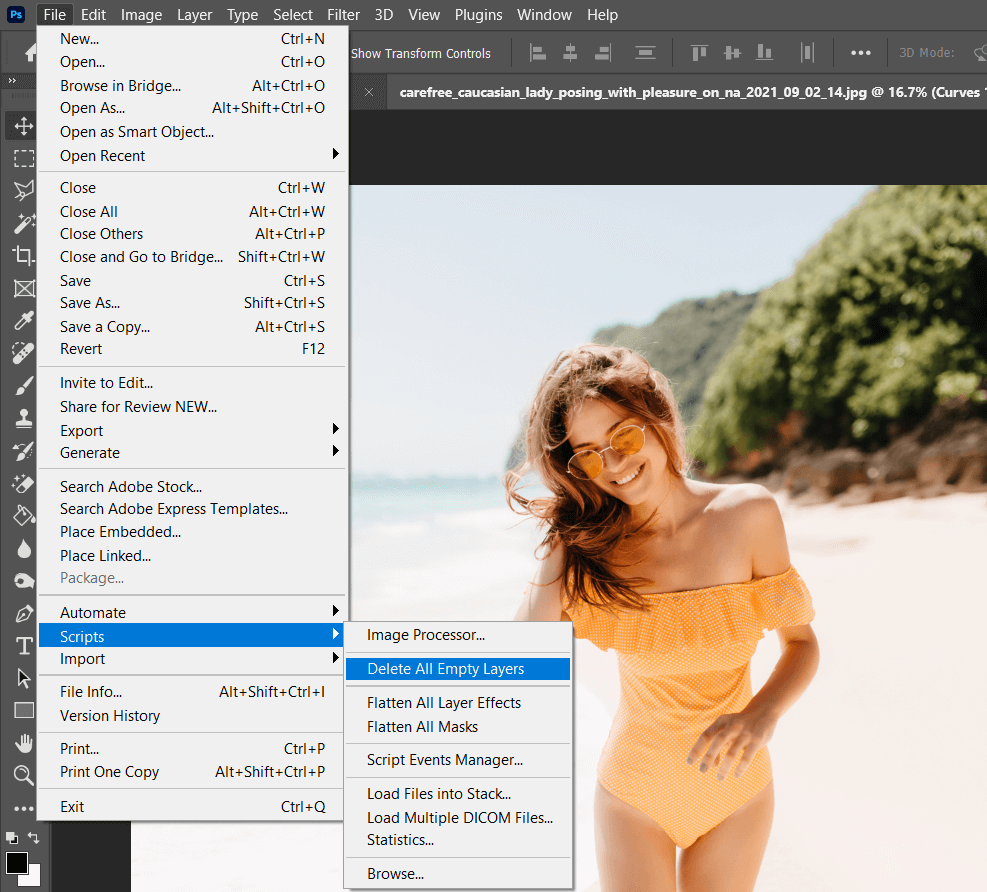
Once you’re done making all necessary masking Photoshop edits, navigate to File > Scripts > Delete All Empty Layers.

You can either: Transfer the mask to a different layer by dragging the mask onto it. Copy the mask by pressing Alt-drag (Win) or Option-drag (Mac) and release the mouse button on a different layer.
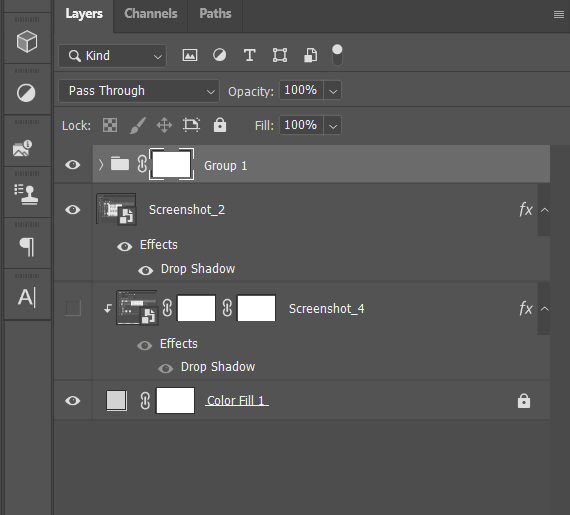
By default, a layer or group is linked to its layer or vector mask, which is evident thanks to the link icon shown near the thumbnail. As such, the layer and the associated mask are moved together whenever you employ the Move tool to adjust either of them. By removing the link, you’ll be able to relocate them individually and tweak the mask’s area separately from its layer. You can remove the link between the two elements by pressing the link icon in the Layers menu. To add the link again, simply click on the area between the layer and the mask thumbnail in the Layers menu.
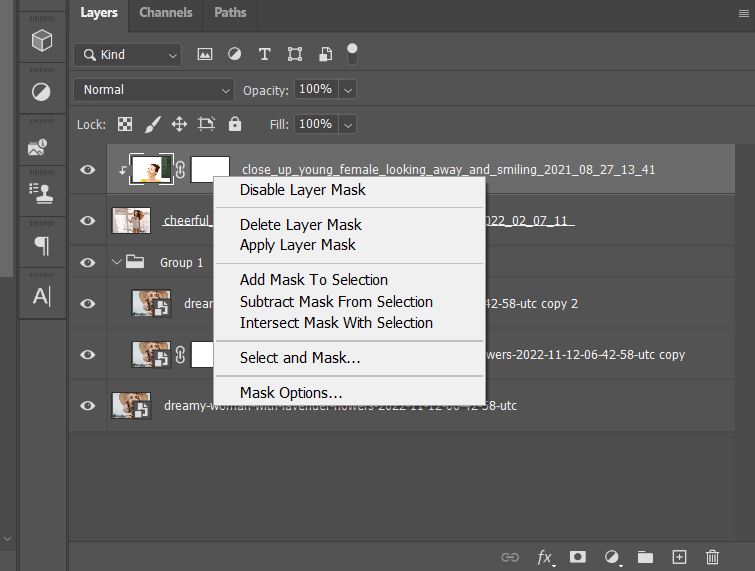
Use one of these methods: Choose the layer that has the mask you want to turn on or off and press the Disable/Enable Mask button found in the Properties menu. Shift-click the layer mask thumbnail in the Layers window. Pick the layer that includes the desired layer mask and click on Layer > Layer Mask > Disable/Enable. You’ll see a red X on top of the mask thumbnail in the Layers window once you turn off the mask, and your image will now be displayed without the applied Photoshop masking effects.
Make your image editing in Photoshop much easier with the following tools, which can be applied to all kinds of photos in a matter of seconds. FixThePhoto provides an enormous collection of image editing freebies, including actions and overlays that will streamline your workflow and help unleash your creativity.


