These four methods will be enough to match colors in Photoshop accurately both within the same picture and from different photos.
These step-by-step tutorials are amateur-friendly and show the proper order of applying tools to get the desired result. By following the instructions you will be able to change hair color in Photoshop or any other object with the proper shades, light, and shadow.

To get started, open Photoshop and both images in different Photoshop workspaces. Drag and drop the photo or use the Open command.
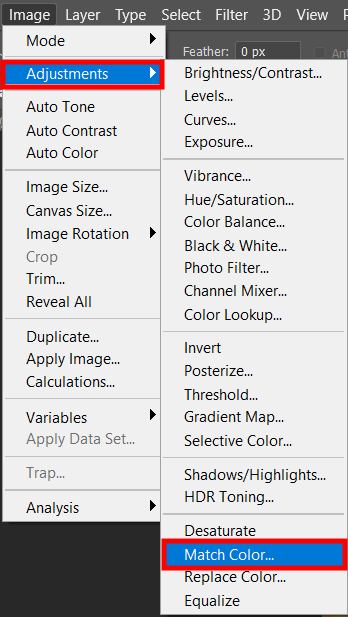
In the top menu, click Image › Adjustments › Match color.
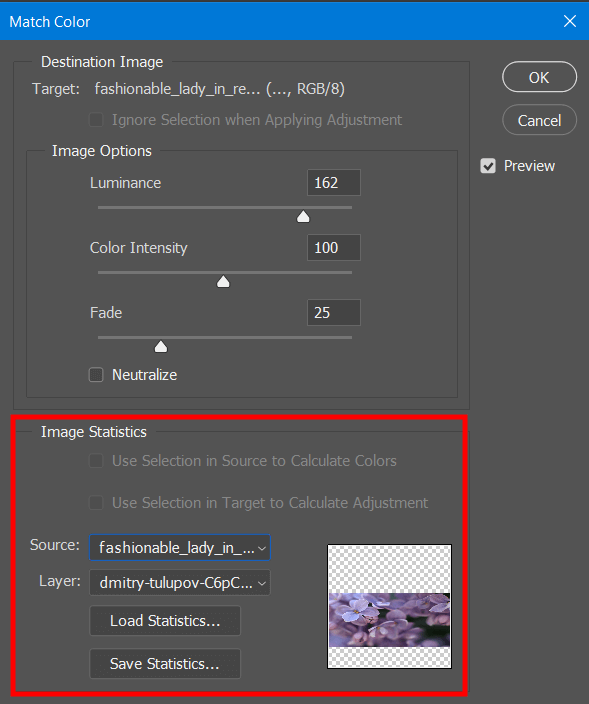
In the Match Color dialog box, you’ll see a Source box under the Image Options sliders. Select the source picture and the layer from which you want to sample the colors.
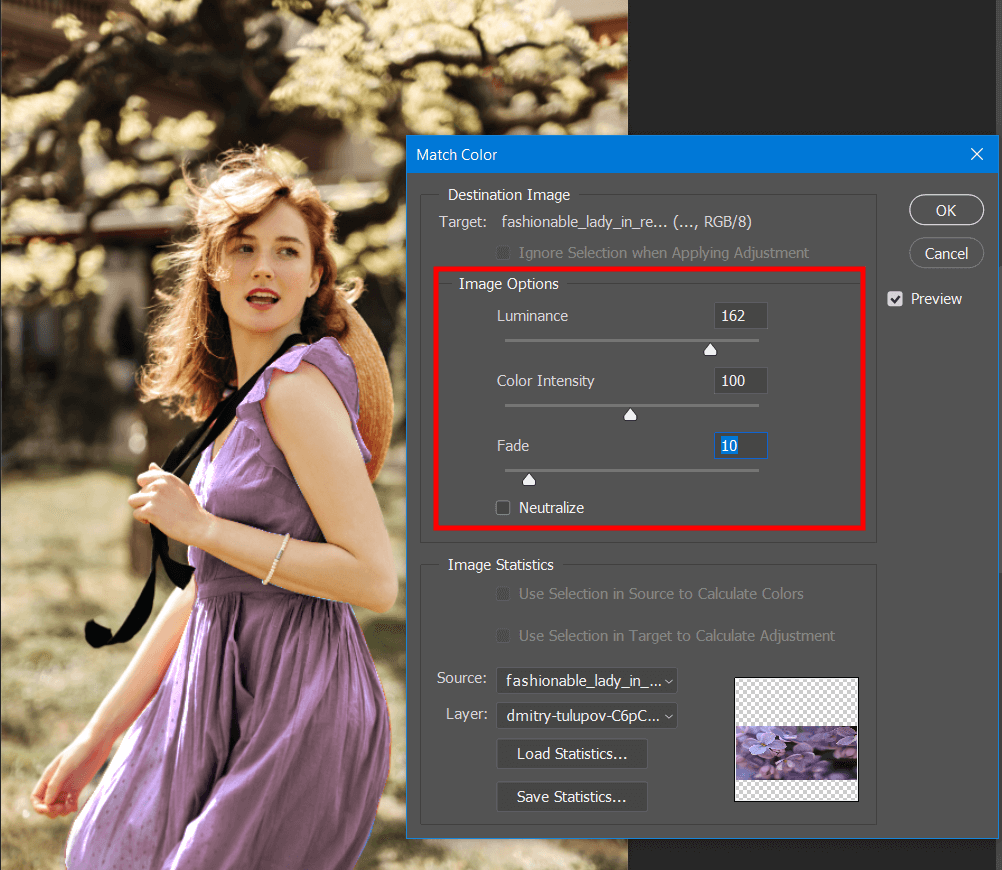
After selecting the source, you can see a preview of the resulting image. Move the Luminance slider to adjust the brightness, and play around with the Color Intensity and Fade sliders until you’re satisfied with how it looks.
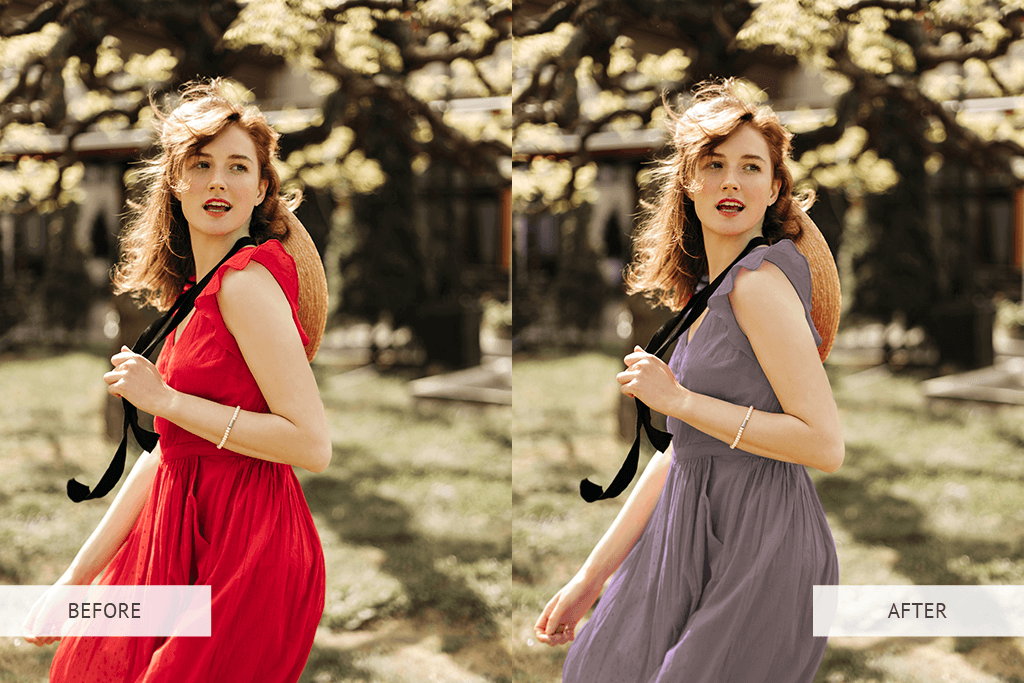
Click OK on the dialog box when finished and you’re done.
The second is used to change the color of the object, for example, clothes, be it a sweater or jeans.
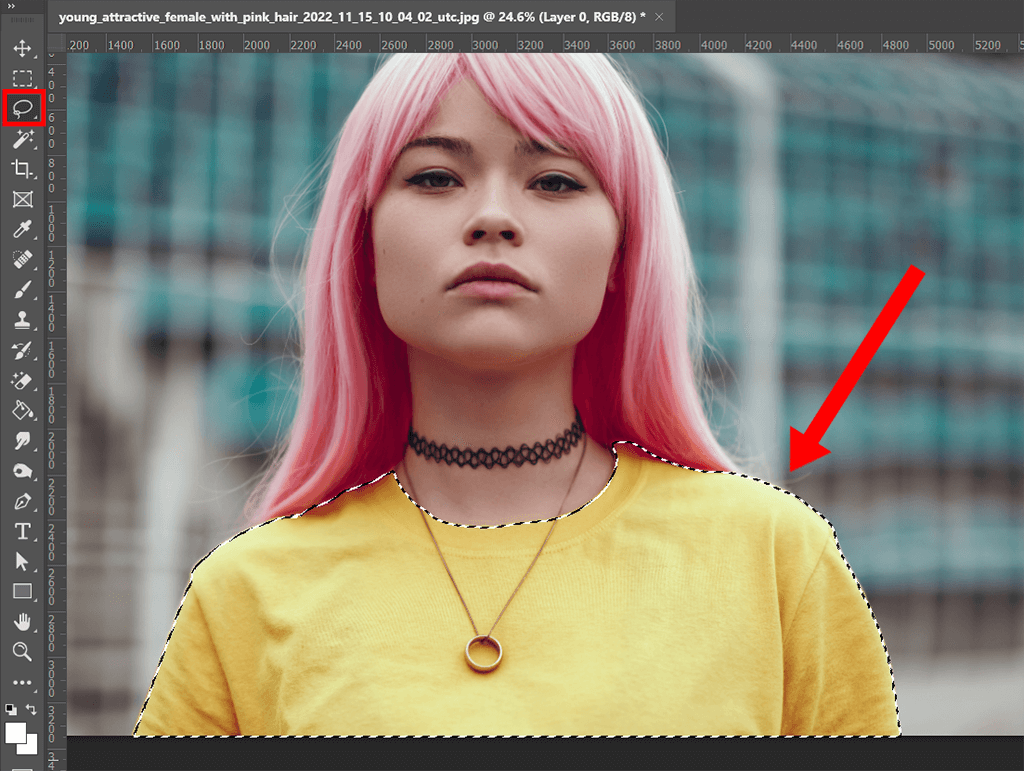
The quickest way to select an area in an image or layer that you want to take as an example is to use the Lasso tool. If the selection fails, use the following Photoshop keyboard shortcuts to undo the selection: Ctrl+D or Comm+D.
Then use the Object Selection tool to select the object that you want to change on the target layer.
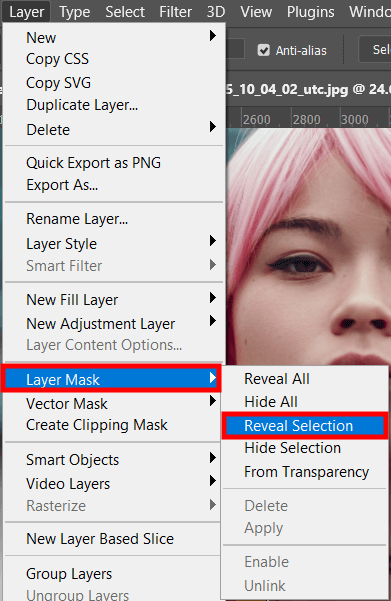
Use masking in Photoshop to make changes to the desired layer. Click Layers › Layer Mask › Reveal Selection.
Next, you should be able to see the layer mask thumbnail near your layer in the Layers panel.
If everything is correct, then the frame will be black, but the object whose color you want to change will not.
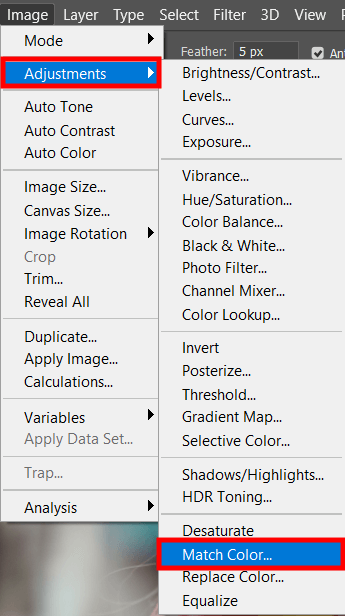
Check if you have selected the image thumbnail of your target layer in the Layers panel. Next, click Image › Adjustments › Match Color.
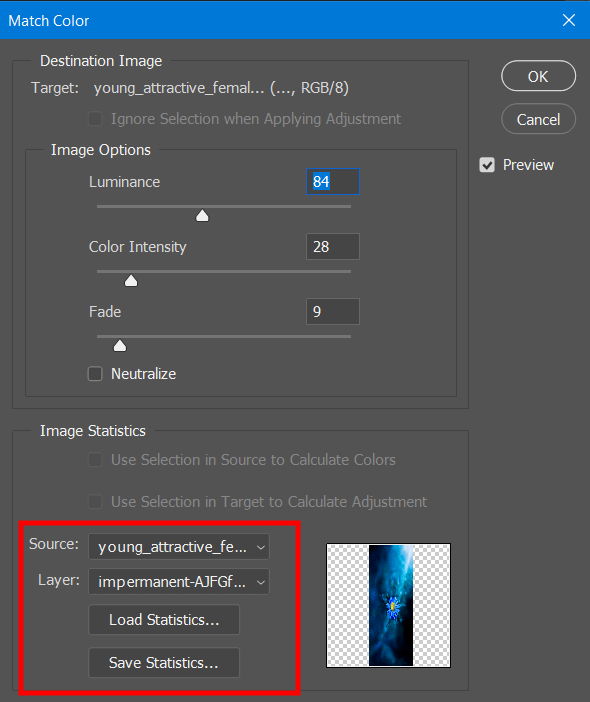
Next, in the Photoshop Match Color dialog box, you need to select the source with your selection.
In the case of another layer of the same image, find the Layer drop-down menu under the Source menu and select it there. Don’t forget to check the box Use Selection in Source to Calculate Colors.
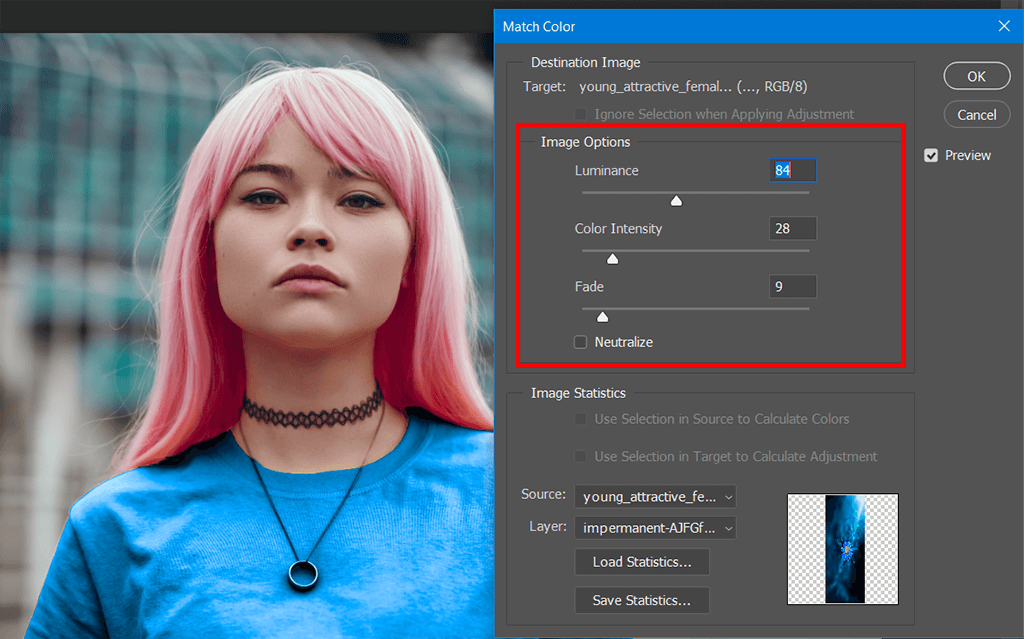
The source swatch will appear as the target color. To achieve the perfect color-matching result, experiment with the sliders.
If you want the color cast or tint to be automatically removed from the target photo, then use the Neutralize function, which can be found below the sliders in the dialog box.
Keep Preview always turned on to keep track of all the changes you make to your project.
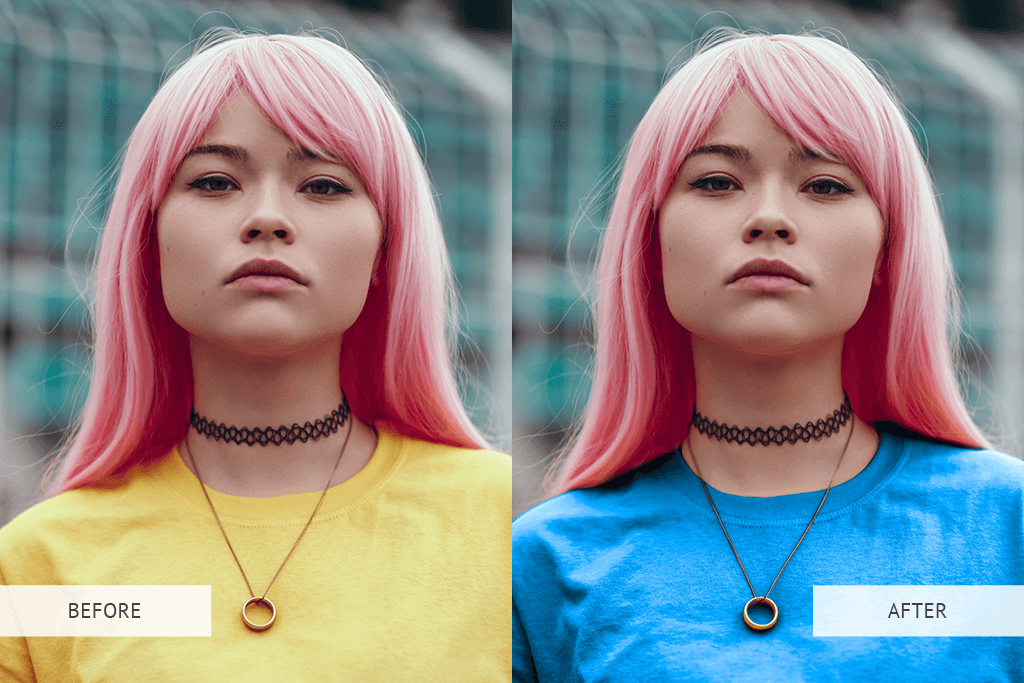
If all these methods on how to match colours in Photoshop seem too complicated for you, then contact professional retouchers. They will help you quickly and easily bring all the photos to the same color scheme, tone, and temperature.
Open the image using the method that is most comfortable for you, as in Step 1 of the first method.
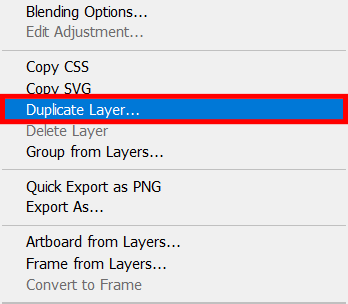
Duplicate the layer so you don’t change the original image permanently. That way you can always come back and try something different. In the top menu click Layer › Duplicate Layer.
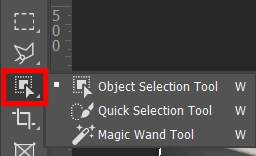
On the left panel, click on the Selection tool and use it to select the object you want to modify.
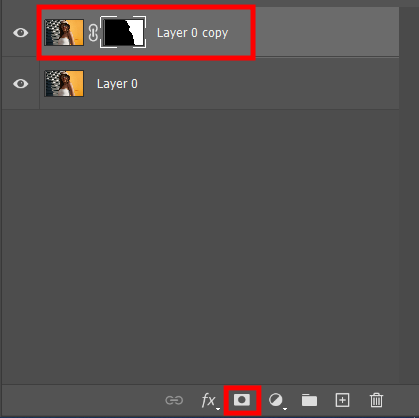
Click Layers › Layer mask › Show selection. In the Layers panel, you’ll see a layer mask thumbnail next to your layer. Your selection will be displayed as black in the thumbnail.
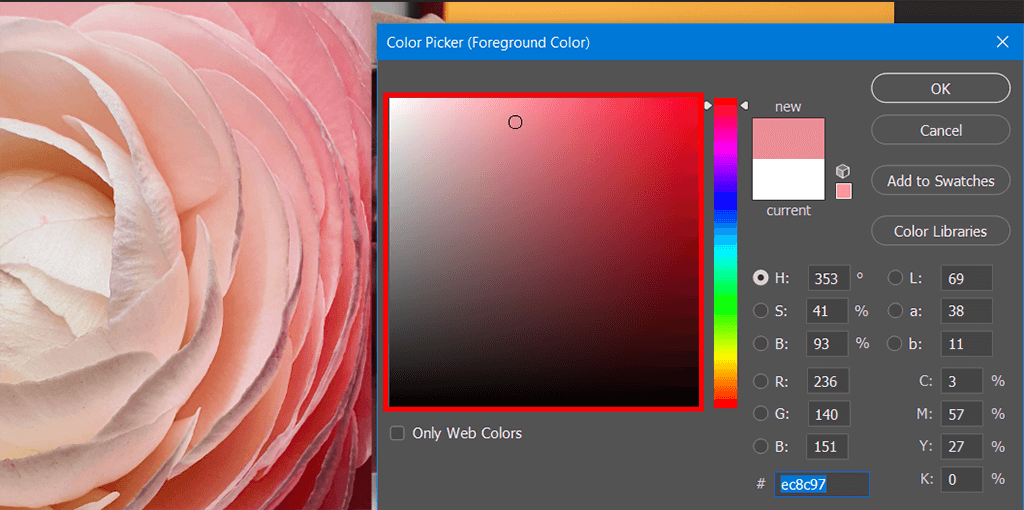
Click the color box on the toolbar. A color picker dialog box will open, but if you hover your mouse over the image, you can use the eyedropper tool to select the desired color from the colors in the image.
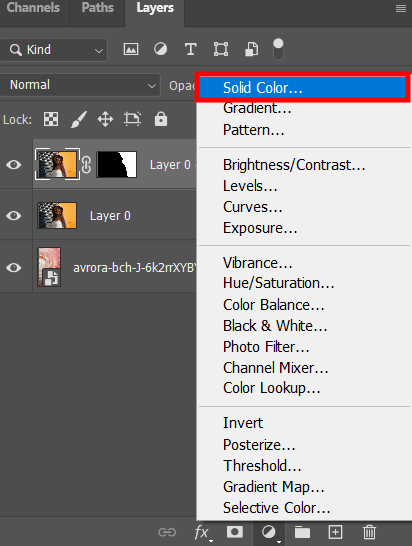
Click the Fill/Adjustment Layer icon at the bottom of the Layers panel, or choose Layers › New Fill Layer › Solid Color from the top menu. In the Layers panel, place the new layer below the Layer Mask layer so that the new color only affects the object you select.

Play around with the blending mode that suits you. In this variant of using the color match tool Photoshop, the Hue variant is selected.
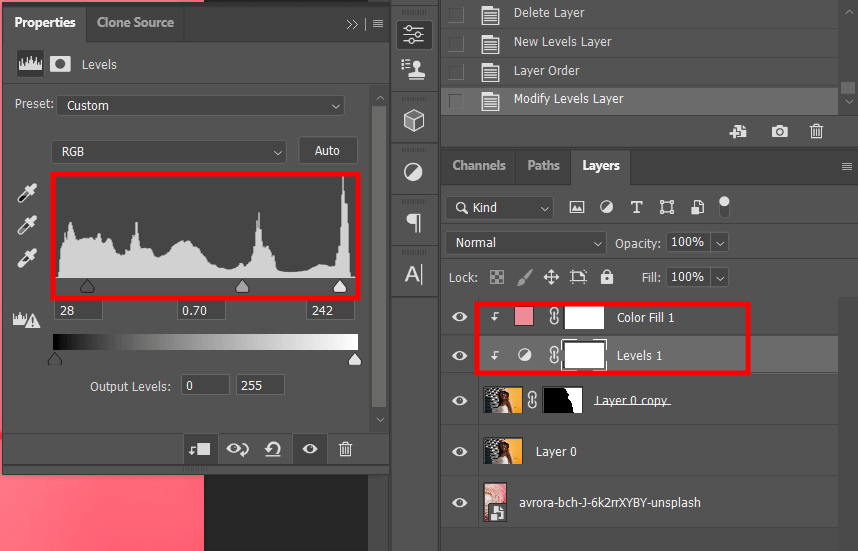
Fine-tune the brightness and contrast levels for more accurate color matching. In the top menu select Layer › New Adjustment Layer › Levels. In the Layers panel, move the Levels layer below the Color Fill layer and click the Levels setting icon next to the layer thumbnail.
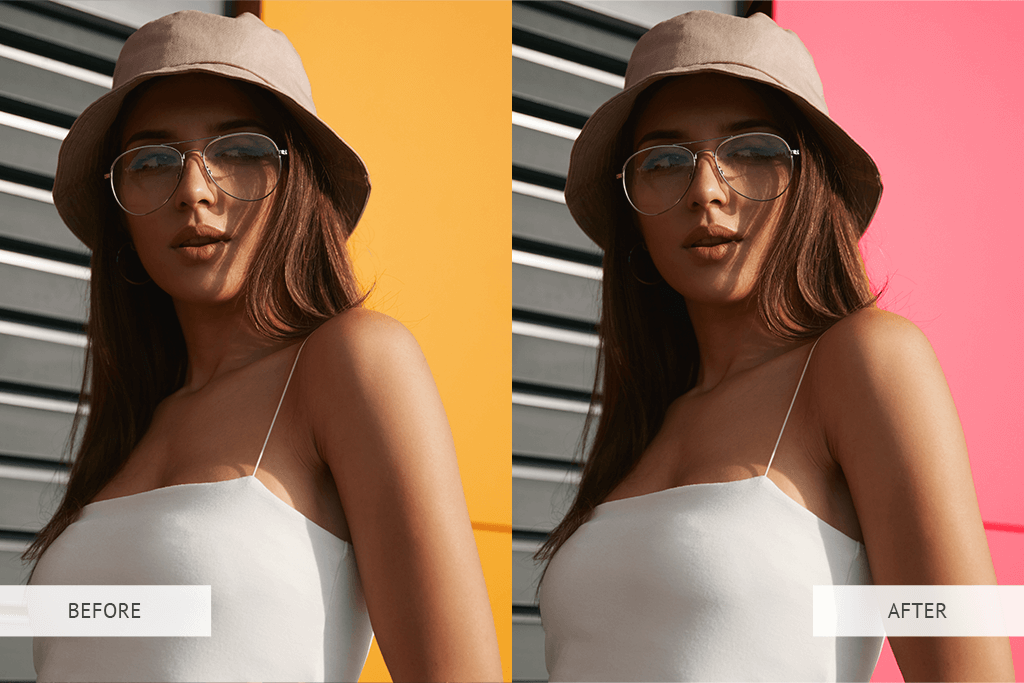
Ready! Now you know how to match a color in Photoshop within a single image quickly and easily. This method will come in handy when you want to change the background color in Photoshop.
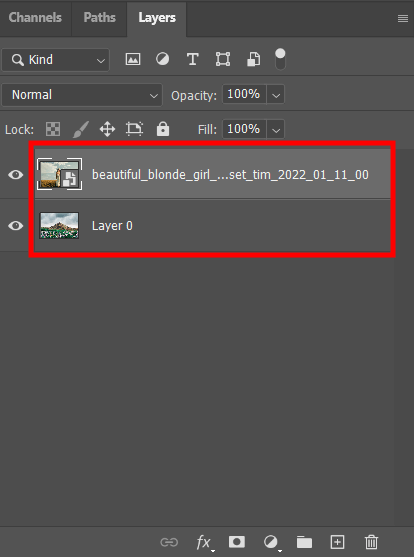
Having opened two necessary images using the method comfortable for you, arrange them so that the object layer is above the background layer.
If you still need to remove background in Photoshop, use the Object Selection tool. It looks like a white silhouette on a black background in the layer mask thumbnail.

Click Layer › New Adjustment Layer › Curves.
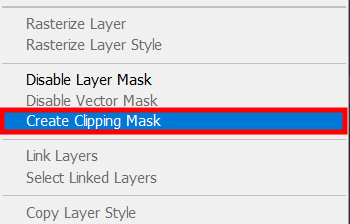
In the top menu, choose Layer › Create Clipping Mask. This way you can be sure that only your object will be affected and not the whole image. Go to the Properties window by double-clicking on the clipping mask (curve icon) in the Layers panel.
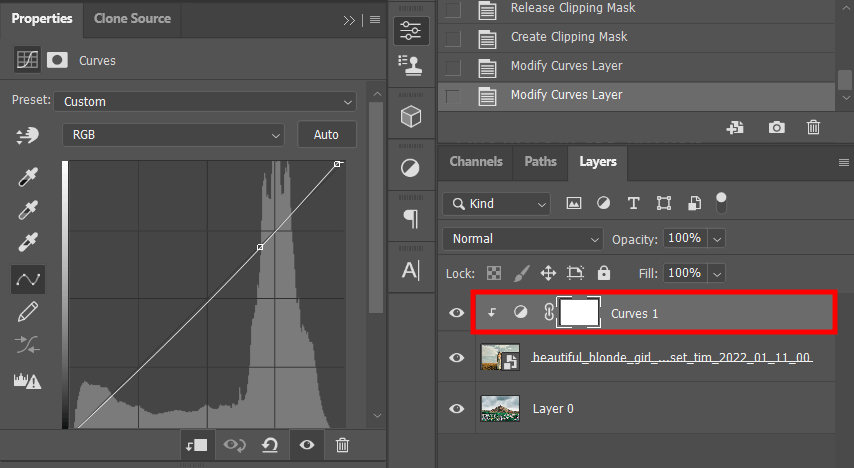
To open the Auto Color Correction Options, you need to click the Auto button while holding Option or Alt. Select Find Dark & Light Colors and uncheck Snap Neutral Midtones if it’s checked.

Open the color palette by clicking on the Shadows box. Find the darkest area in your background photo, but not black, and select it. Repeat the same for the lightest area, but not completely white.
Next, click OK and click No, avoiding keeping the default colors.
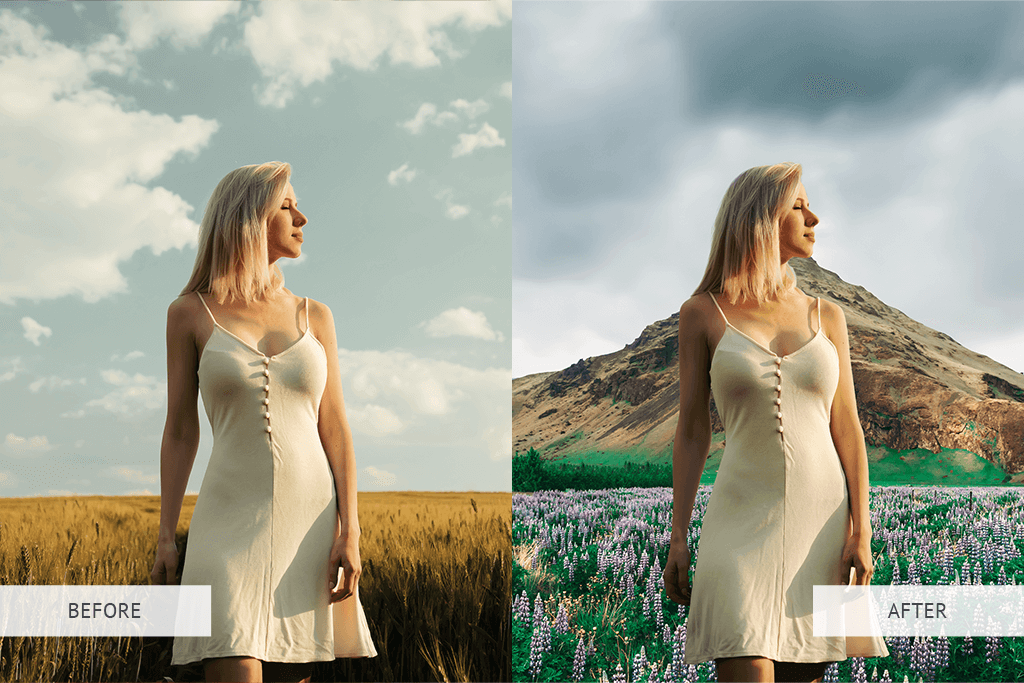
Now that you know how to match colours in Photoshop, all that’s left is to slightly adjust your foreground and background so that the colors are in perfect harmony.

By combining different tools and blending techniques in these Photoshop tutorials, you can bring images to a consistent tone, or replace some colors quickly and hassle-free.
If you want to give your photo a professional look without much effort, then use ready-made Photoshop effects. They can help add color and vibrancy to your photos, as well as enhance shadows and exposure to make colors more saturated and dark areas brighter.