We’ve described multiple methods that will help you change background color in Photoshop. You can use them if you specialize in lifestyle product or portrait photography. They will also come in handy for those who take product photos and perform e-commerce image optimization.
By following these steps, you can learn how to remove the background of a picture in Photoshop. Since this is quite effective, most people prefer using it when working with pictures in Photoshop.
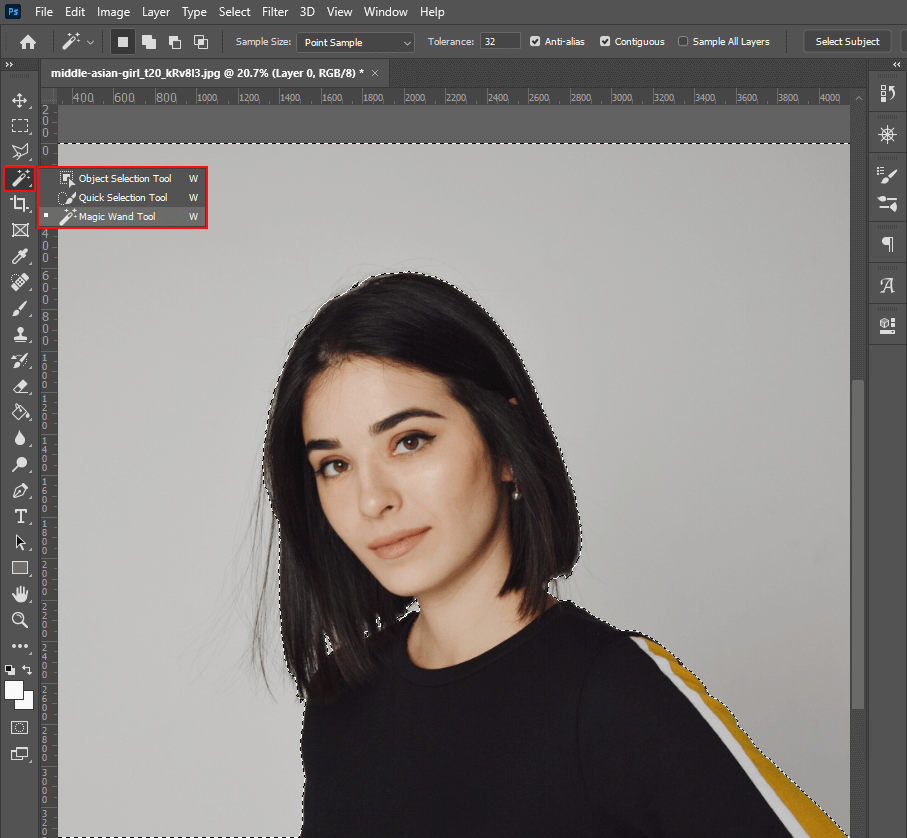
To remove the background, you need to open the photo and select an area with the help of a dedicated tool.
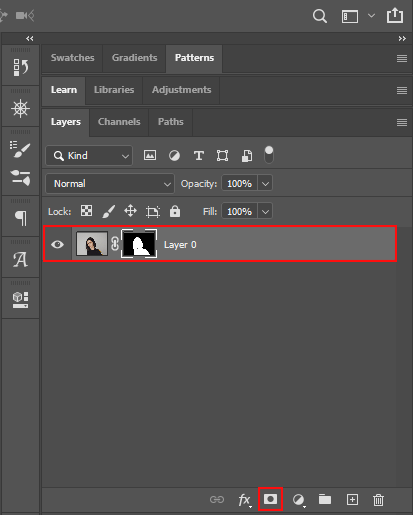
You can delete the background from the menu by clicking on the layer mask.
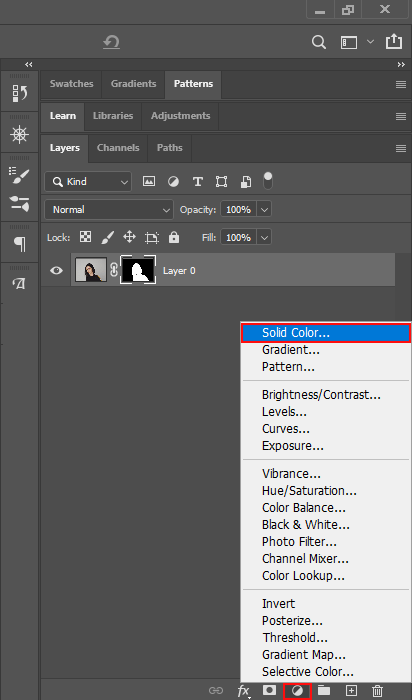
You can select the desired fill color without leaving the menu.
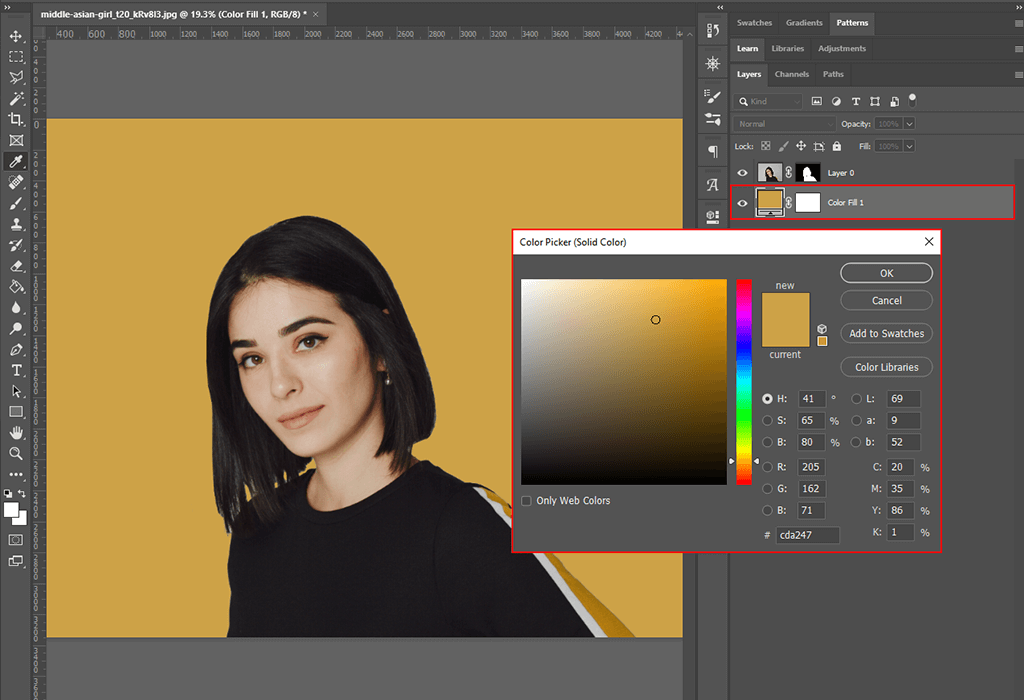
Keep in mind, you have to place the color fill under the image. If you don’t like the result, you can later change it by double-clicking on the layer mask. Otherwise, save the image.
If you need high-end results, we recommend ordering professional services. Our team will change the background color of your image within several business days.
You can change background color in Photoshop without creating a new file all the time. Follow this detailed guide or watch Photoshop tutorials on YouTube to proceed.
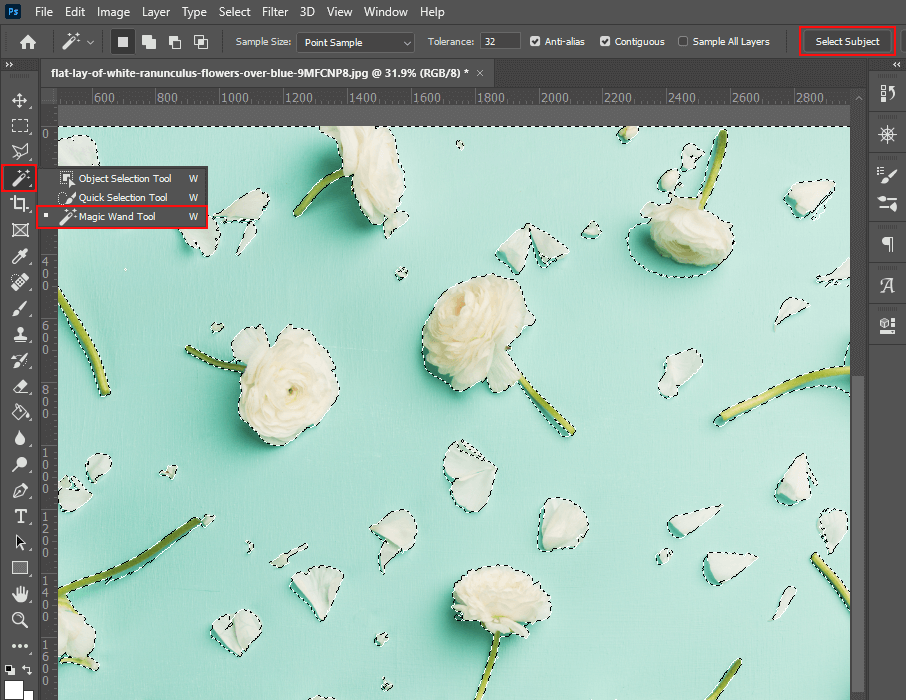
Select an image and open it in any of the Photoshop versions. We’d recommend using the quick selection tool to change the background color. You can find it in the "Tools" menu.
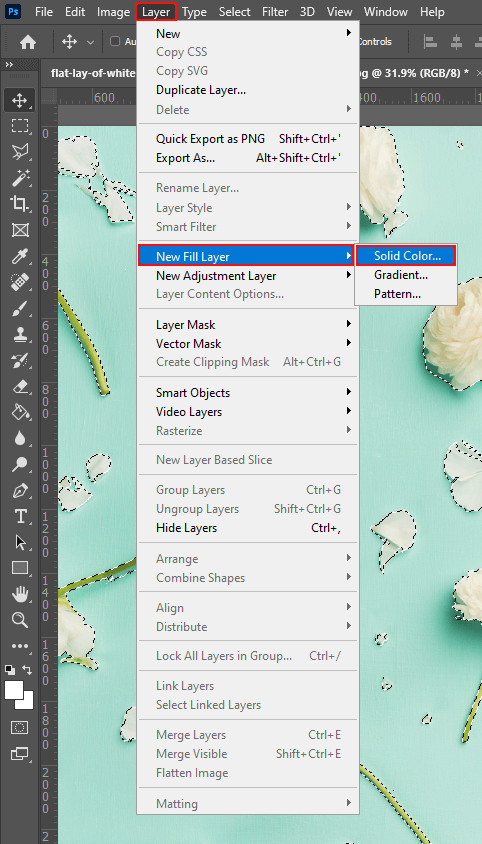
Create a solid color fill layer. Go to Layer> New Fill Layer> Solid Color.
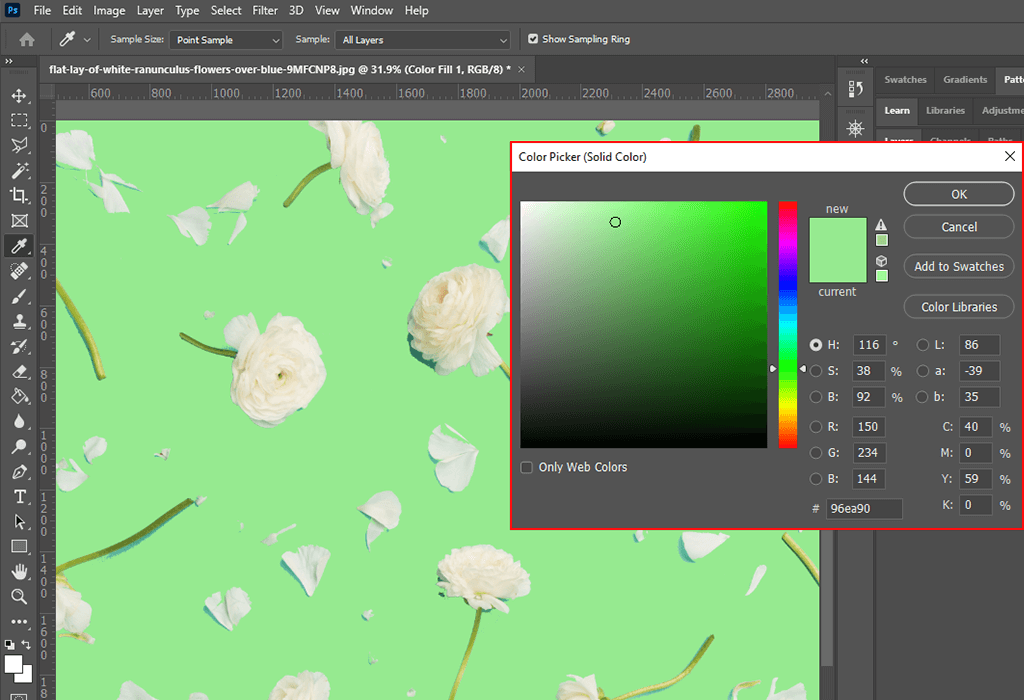
After applying the desired color, save the result by pressing OK.
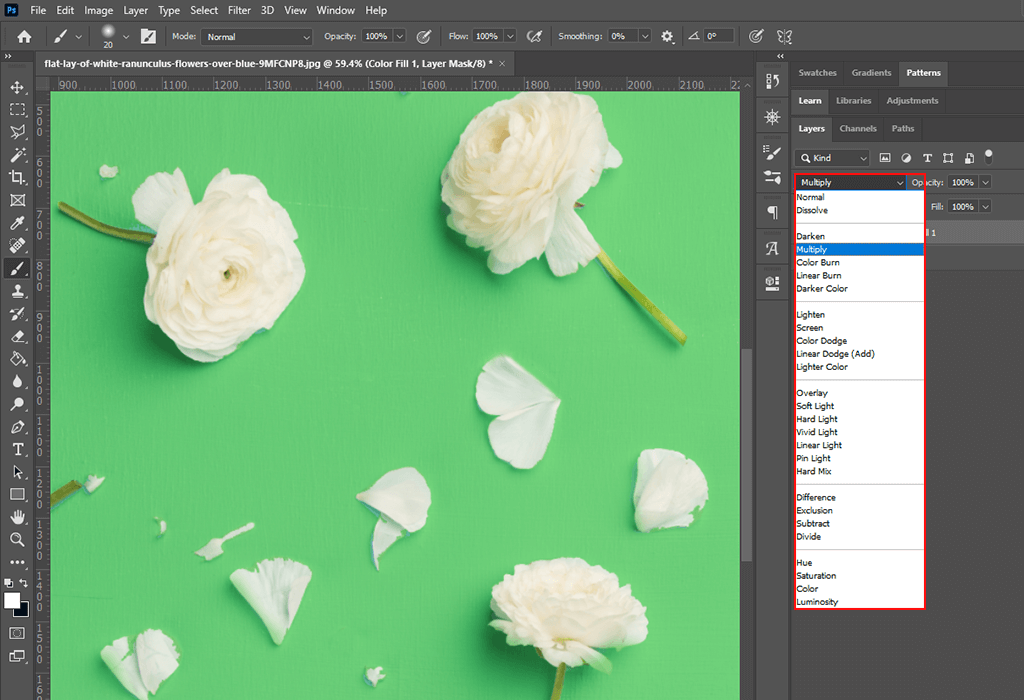
Change the fill blending mode to Multiply after the settings are saved.
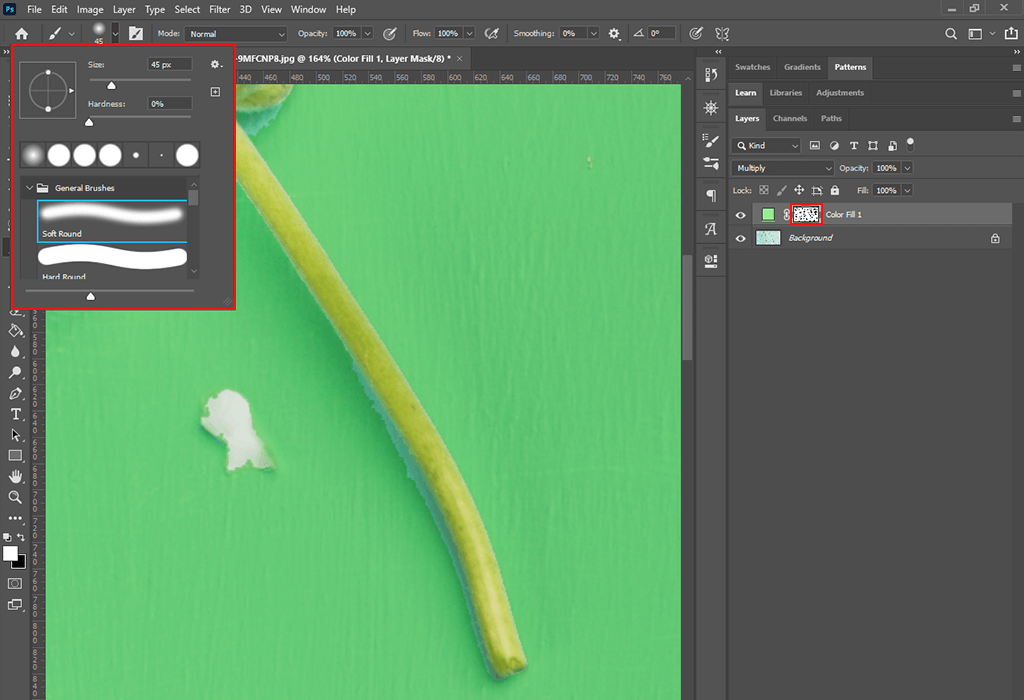
You can correct some areas on the layer mask using the brush tool. Once everything is done, save the project.
When you work with a new file in Photoshop, you will notice that its background is white by default. However, you can change its color.

To change the color of the background, click on "New Document".
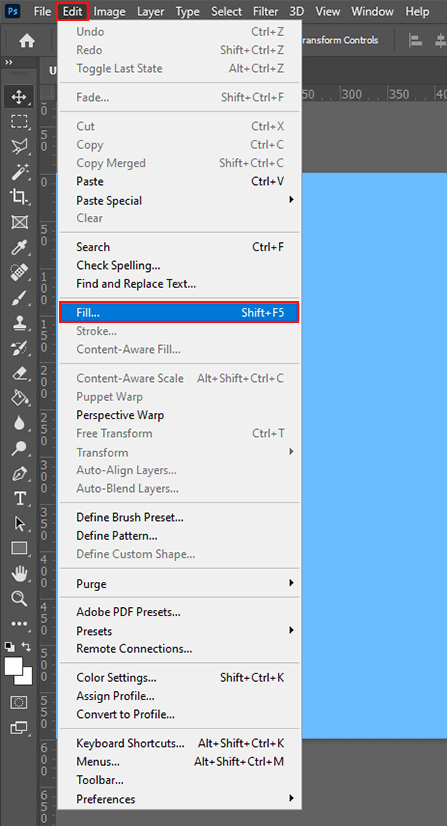
Go to "Background Content" to pick the desired color when working with the new file. You will see a wide range of colors in the palette. Choose the one that meets your preferences.
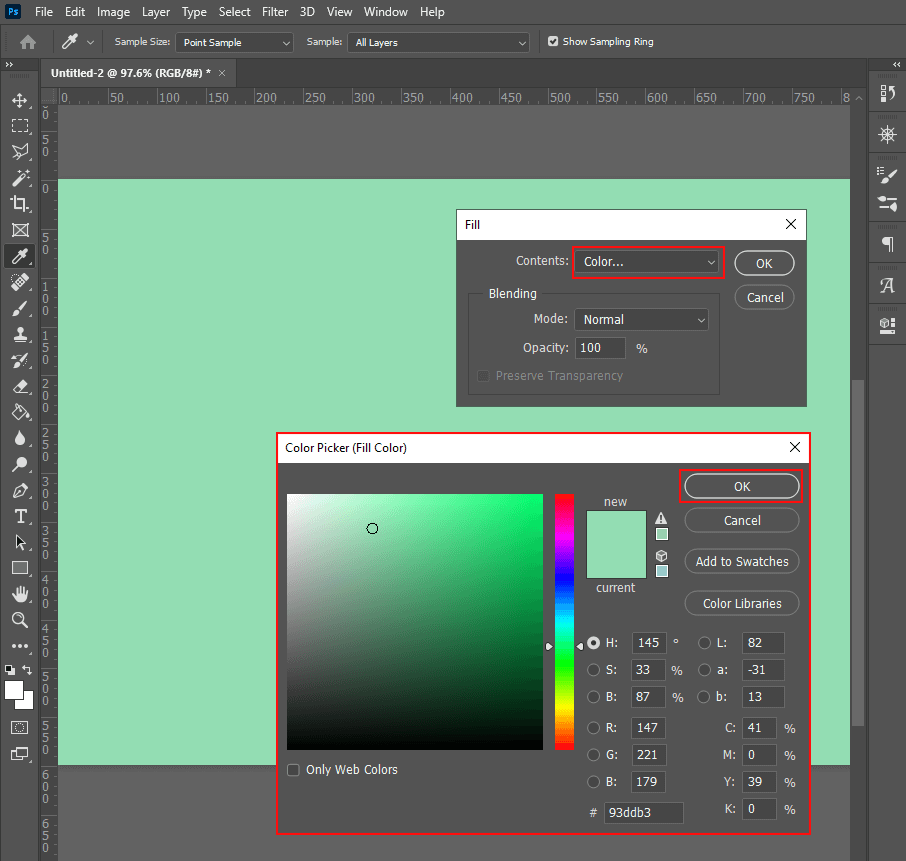
The final step is to save the result. Click OK to save the chosen background color.
You can also change the background color with the help of photo editing software for beginners. This method requires working with a fill layer. You need to take a few steps.
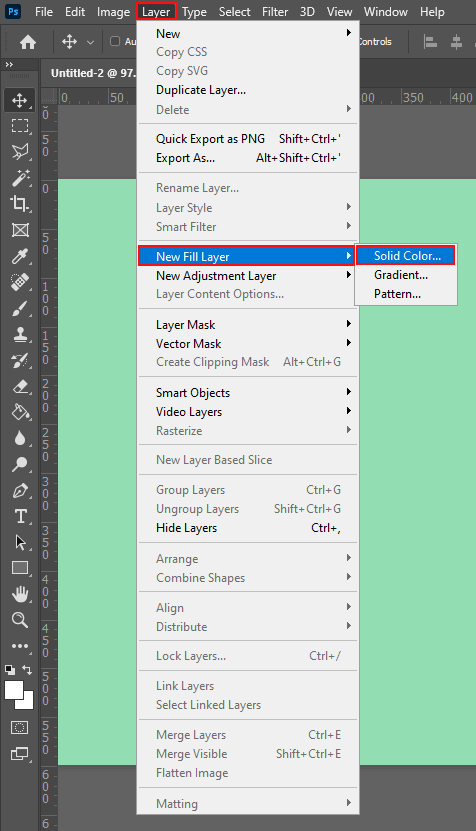
It’s easy to change the Photoshop background color with the Fill Layer option. To find it, go to Layer> New Fill Layer> Solid Color.

You’ll see a color palette. To create a new fill layer, click on the desired color. You can change the selected color with Adobe Photoshop Express. To proceed, double-click on the color in the layers panel.

If there are no suitable actions in your library, you can check out this pack created by the professional designers who work at FixThePhoto. It includes actions that will help you make your shots more attractive.