Have you return from vacation and decided to look through images taken with your smartphone with a flash on? Do you have red eyes in most photos? Then study this tutorial on how to fix red eye in Photoshop in semi-automatic mode and make your pictures look perfect without much effort on your part.
The latest Photoshop versions received various AI instruments, including red eye tool Photoshop. Now you can fix this defect automatically without learning the functionality of the program.
The software performs correction with 99.9% accuracy unlike a free Photoshop alternative that leaves areas or even the edges of eyes red after processing.
Studying this quick tutorial, you can virtually automate the process of fixing a red-eye defect in your photos without using third-party Photoshop plugins.
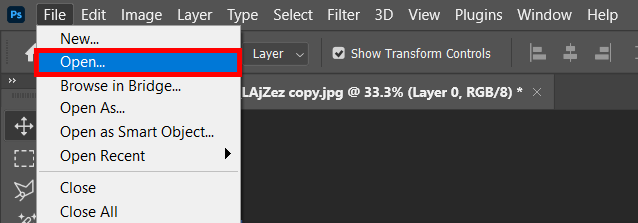
Upload your photo. Head to “File” and “Open”, find the necessary folder, and choose the file in the pop-up menu. Another convenient option is to drag an image into the Ps window.
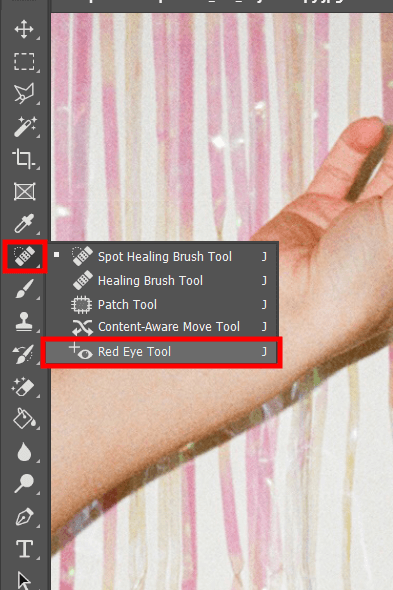
To choose the necessary tool, pay attention to the left part of your workspace – the toolbar is located there. Choose the "Spot Healing", which is displayed as an eraser.
Click on the tool and choose "Red Eye Tool” from the drop-down list (it is shown as an eye). You can also activate the tool with the “J” hotkey.
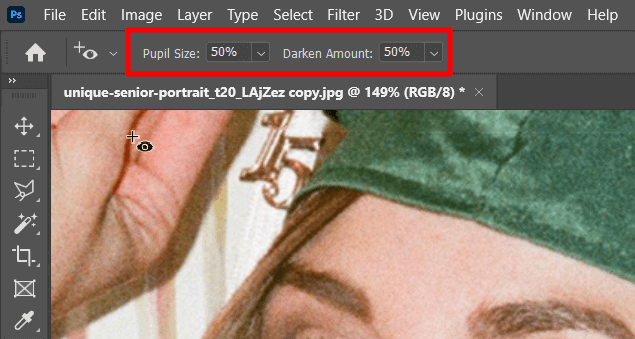
Before starting to fix red eye in Photoshop, it is important to customize the tool properly. Make sure that the "Pupil Size" and "Darken Amount" values, which are located at the top of the space, are set to 50%.
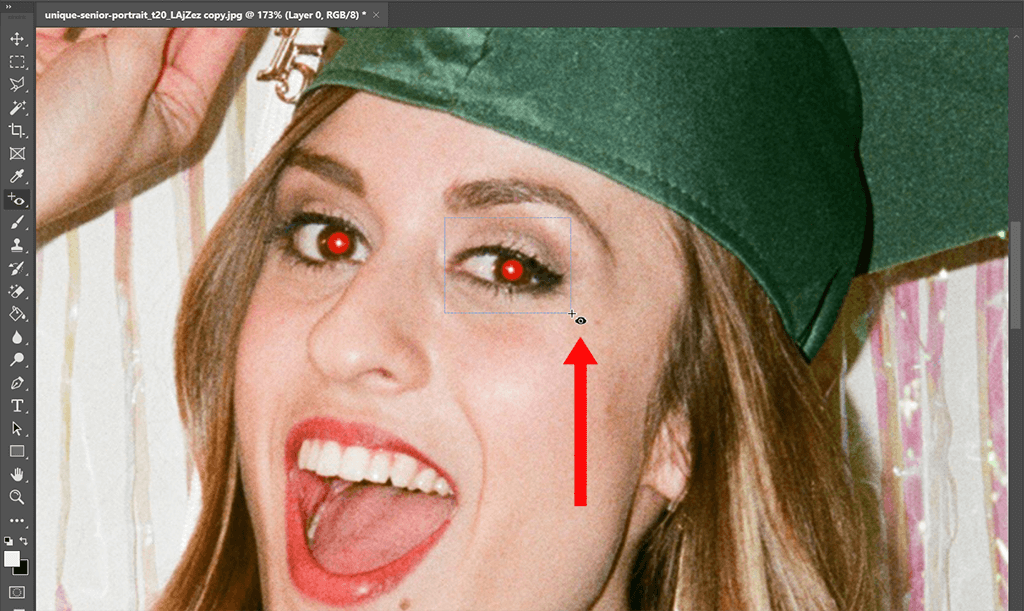
Now you can start fixing the defect. Click a mouse and drag a cursor to select an area as a square. Make sure that the apple of the eye is in the center, as shown in the screenshot. Repeat the action with the other eye. The apples of the eye should become naturally black.

Export the finished file in any convenient format by choosing “File” > “Save As”.
If the result doesn’t satisfy you and you lack time to edit photos using this method, you can turn to FixThePhoto professional retouchers who will fix red eye in Photoshop fast and at an affordable price.
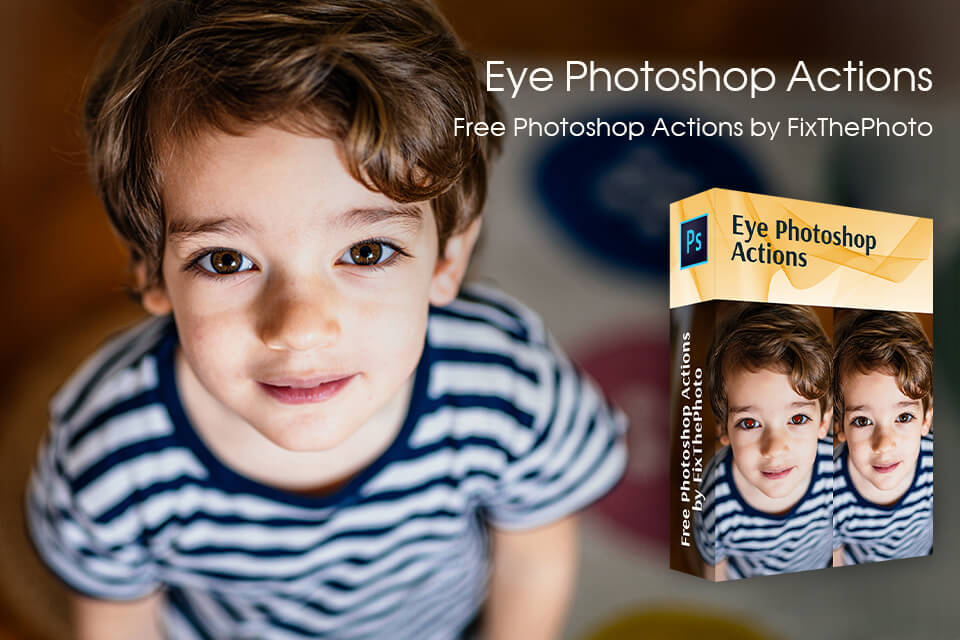
If you are used to the old version of Photoshop or you do not want to update for any reason, then we recommend taking advantage of the free actions developed by FixThePhoto designers. These are actions written in code that “tell” the editor exactly what to do for you. Your only task is to install Photoshop actions and apply them to photos using an automatic mode.
You can apply this AI tool to any type of photo format, including RAW, PNG, JPG, and others.
You are likely to use the outdated version of Photoshop (CS2 or lower). To add this tool to the menu of your program, you can check a quick guide and download Photoshop free.
Your photo is likely to be overexposed or, on the contrary, very dim. In this case, we recommend switching to Camera RAW and correct this setting. After that, return to the Red Eye Tool and try to fix the defect again.
No, Photoshop doesn’t support batch editing. However, you can learn how to create an action in Photoshop and automatize the process of red-eye effect removal.
Perhaps, you have installed the updates incorrectly or have not followed the relevant instructions during the process. In this case, we recommend you reinstall Photoshop. If you want to avoid reinstalling the editor, check out these useful tips on how to prevent Photoshop lagging.