If you want to find out how to remove objects in Photoshop with little to no effort, read this simple tutorial to learn about the best ways to do it. You can easily delete an unwanted object or a person in the frame or replace them with something else. In this article, I will tell you about the 4 simple methods that you can use to delete objects of various complexity.
Experienced retouchers prefer deleting objects with the help of the Clone Stamp Tool that allows them to quickly copy pixels and use them to paint over the selected area. While this tool is pretty basic, you can use it to solve complex tasks as well.
With it, you can quickly copy pixels from one part of your image to another. It will come in handy for those who want to learn how to remove stray hairs in Photoshop and solve other similar tasks.
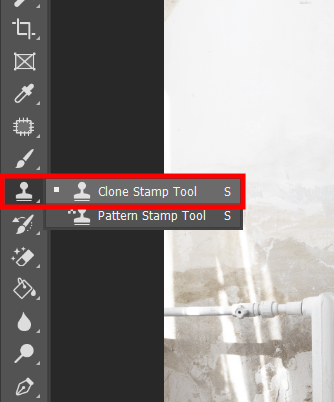
First, you need to open Photoshop. Then, create a new layer and find the Clone Stamp in the Tools Panel. To save time, you can use Photoshop keyboard shortcuts, such as S.
You need to check Aligned and adjust the Sample settings by setting them to Current & Below. With the Clone Stamp, you can copy pixels from one area of your photo and use them to paint over the area that you want to enhance.
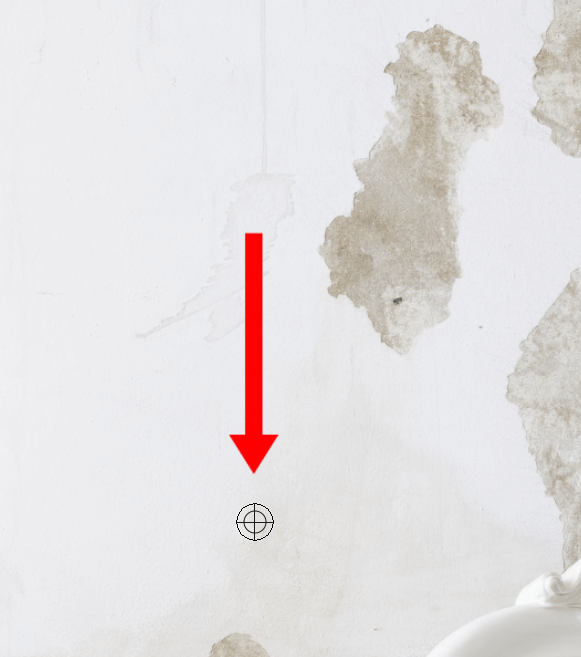
Hold Alt until the cursor starts looking like a crosshair. Then, click on the area that you want to replace the unwanted object with. By using the [ ] keys, you can change the size of your brush.
If you want to learn how to remove items in Photoshop without making an output image look overly edited, make sure to use the tools from the Clone Source Panel. They will enable you to scale, flip, rotate, and offset the source pixels. This way, you can decide how to use these pixels to hide an unwanted object.
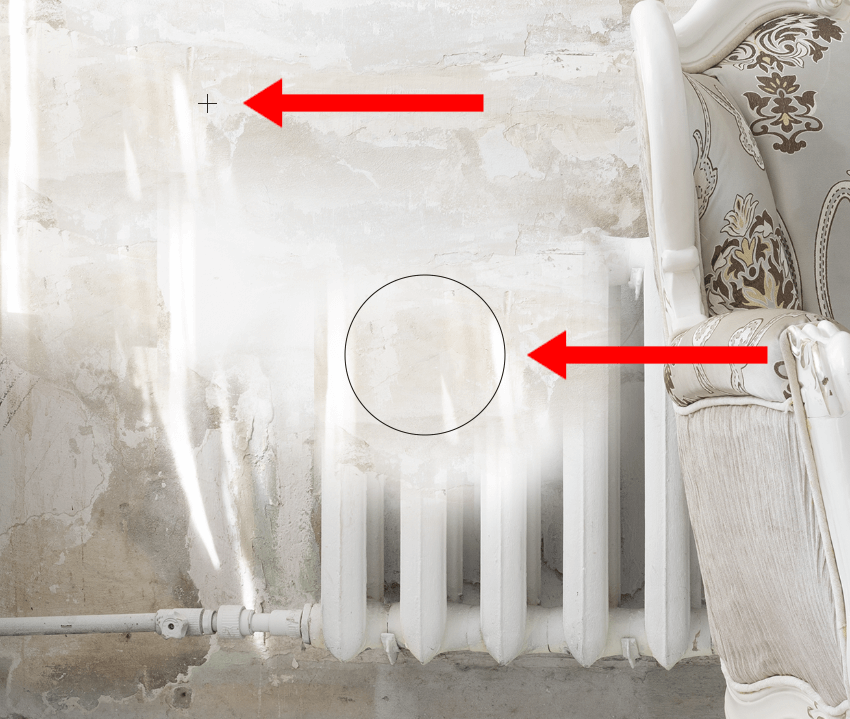
Start painting over the unwanted object with a left mouse button. When using the clone tool, you can preview the result to ensure that all the parts of the objects are removed.
Brush away all the parts of the object. This way, you can replace its pixels with the pixels that you selected during the previous step.
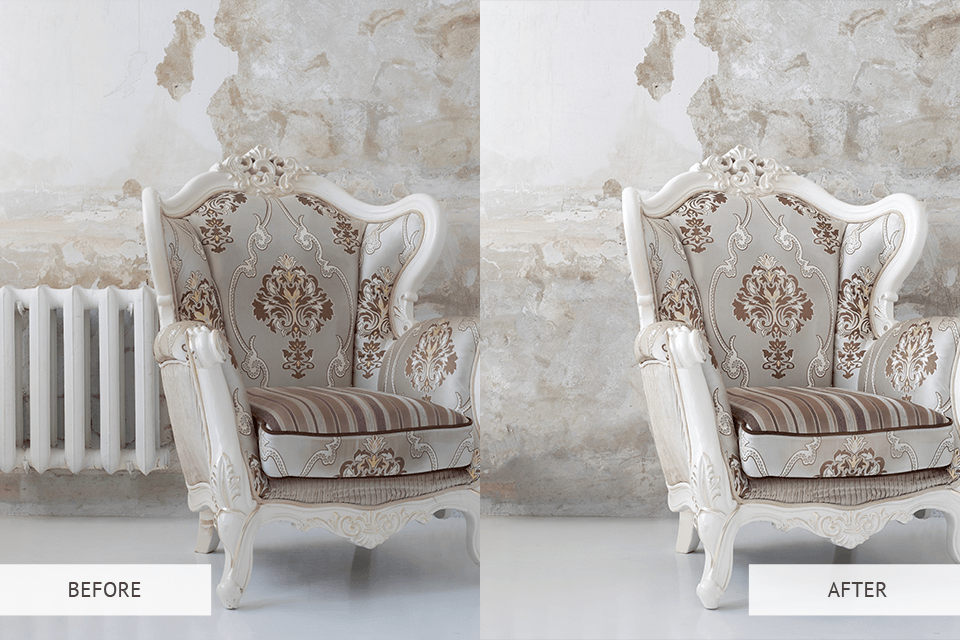
Done. As you can see, this tool comes in handy even if you need to delete such a complex object as a radiator. If necessary, you can also learn how to Photoshop someone into a picture and replace the unwanted detail with another object.
If you think that your skills aren’t up to the task or fear that it might be too time-consuming, make sure to contact our professional service. Our photo retouchers will delete any object from your image for an affordable price. They can also replace any object with another one or fully remove it and fill the space with adjacent pixels. Thanks to a quick turnaround, you will get your photos in a few workdays.
With the help of the Content-Aware Fill feature, the program analyzes your photo to find the best way to replace the unwanted object. You can also edit the result manually, delete groups of people or remove objects from photos with a complex background.
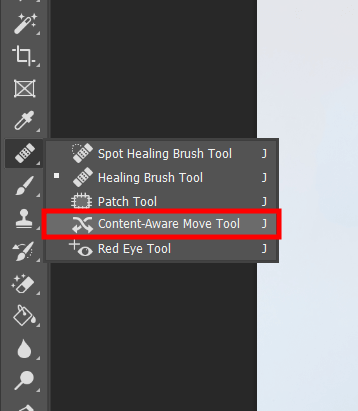
Select the Content-aware (J) brush from the Tools Panel.
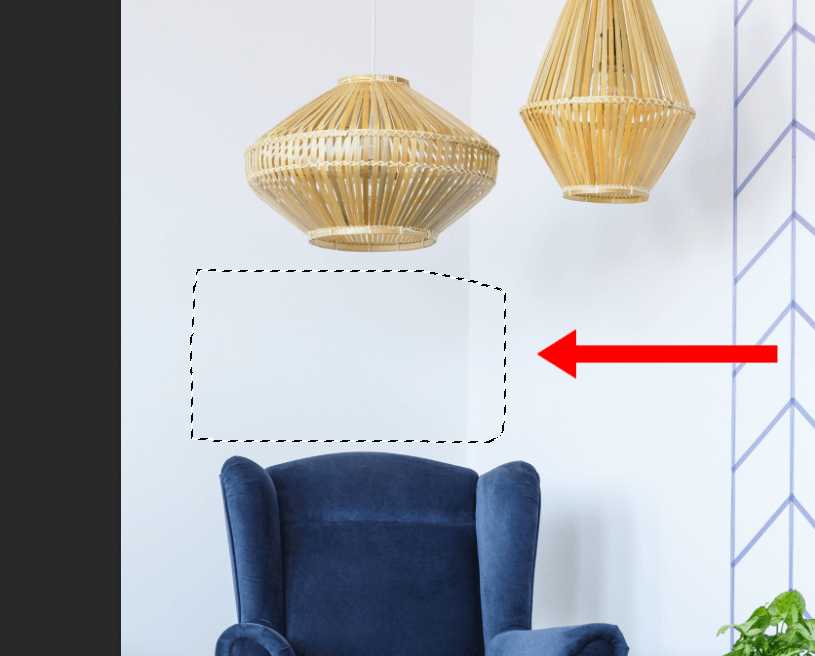
To use this tool properly, you need to select an object first. You can create a selection with the help of various tools. Then, select a source area and use the Content-Aware Fill option.
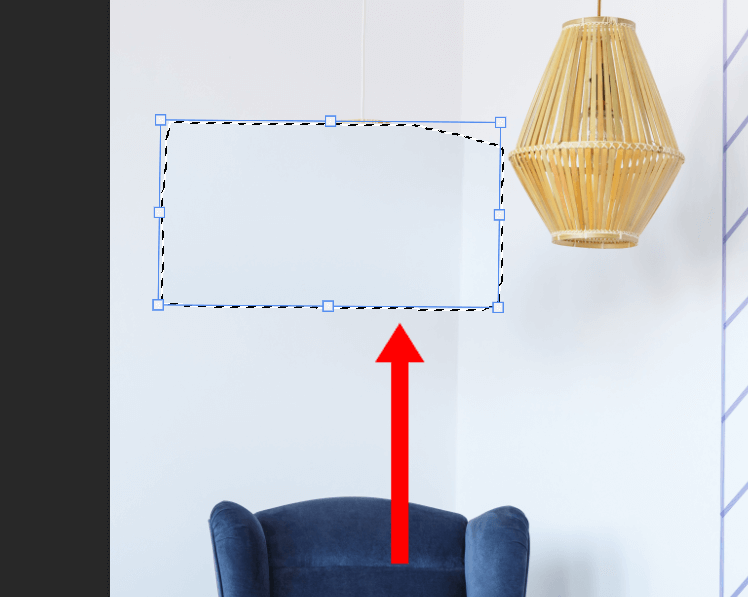
Drag the selected object higher while holding the left mouse button.
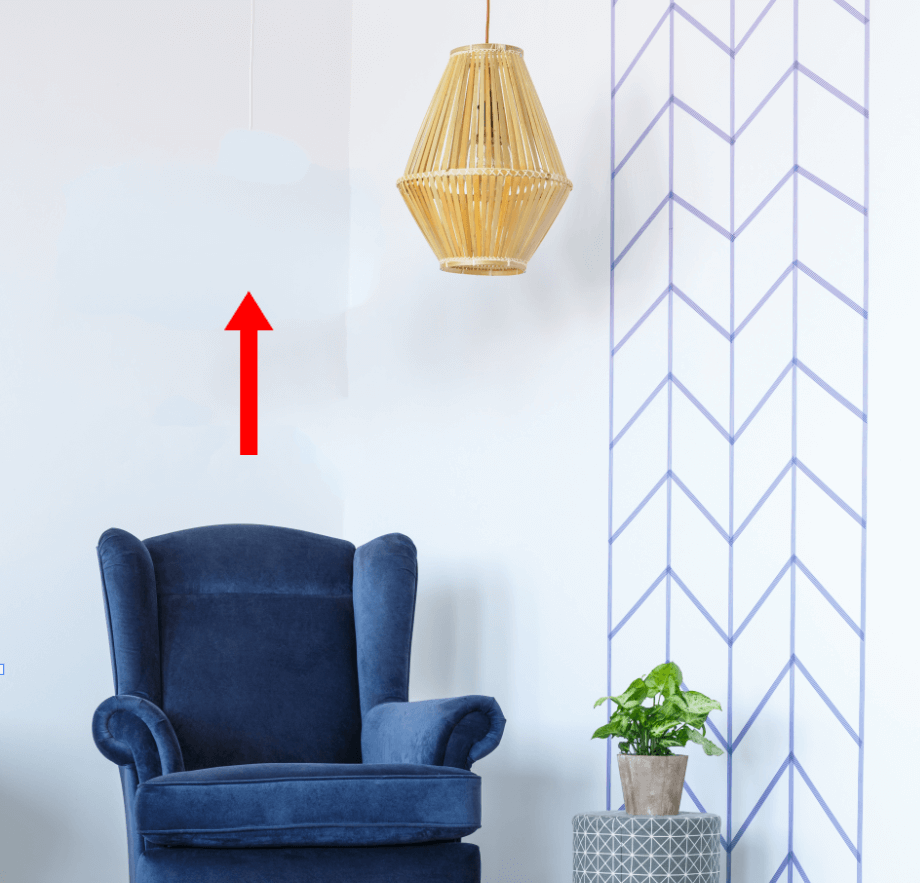
Press Enter to deselect in Photoshop.

Once I have removed one light fixture, the composition became much better. You can also learn how to remove the background of a picture in Photoshop so that it doesn’t distract viewers from the main subject.
The Patch tool is another great option for those who want to discover how to remove something from a picture in Photoshop. It’s perfect for photos with a solid background, such as black or white.
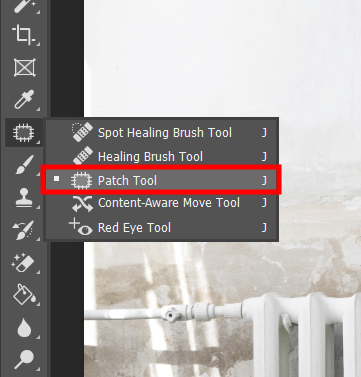
Find the Patch Tool in the left toolbar. You need to set it to New Selection, then select the Normal Patch Mode, and select Source. This option is quite different from the clone stamp tool. With it, there is no need to select the sample area. However, you need to select the object that you want to delete.
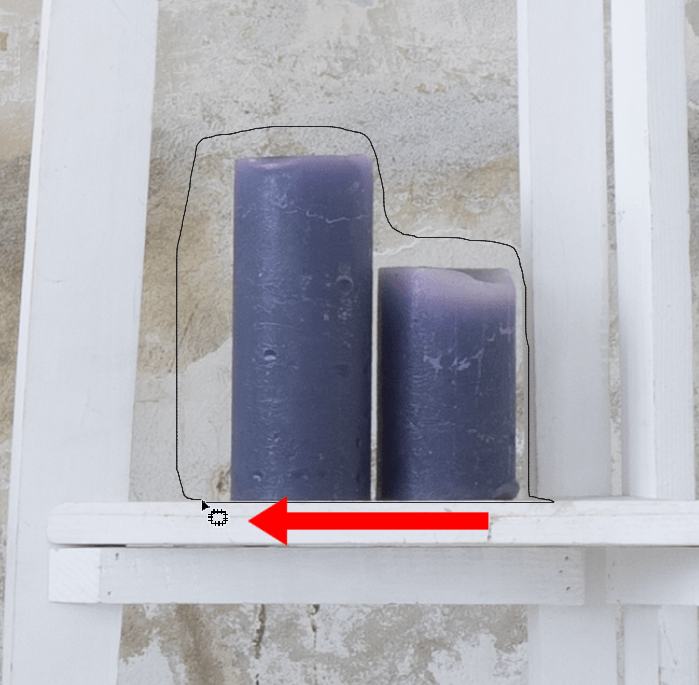
Zoom in on the part of your photo that you want to delete. Select the patch tool and draw a line around the object. It’s better to draw straight lines and keep the same distance from the object all the time.
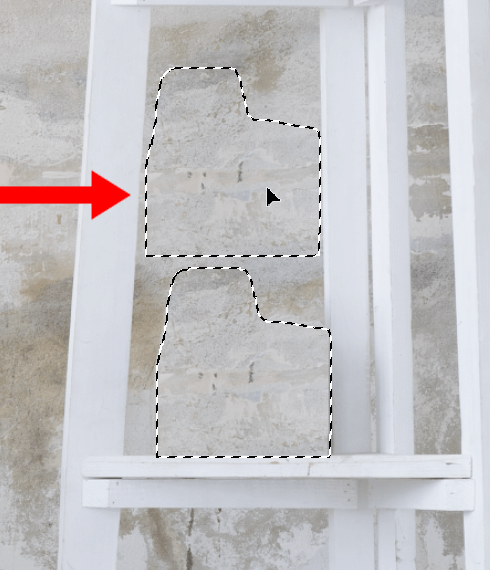
Select the object that you want to delete. Then, move the cursor inside the selected area. Then, you need to click on the area with the left mouse button and drag it to the area that you can use as a patch sample.
Once the selected part fully covers the sample area, you won’t be able to see the object that you wanted to hide. If you have selected the patch area with similar surface and lighting settings, nobody won’t be able to notice that your photo was edited.
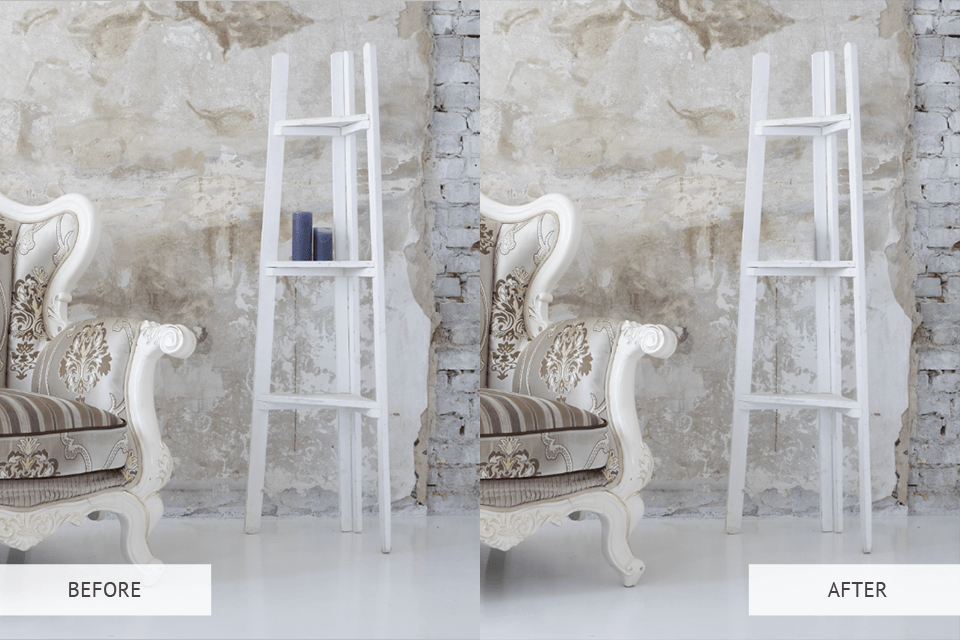
After removing the object, save the result by pressing the Ctrl+S key combination. Then, you will see a new window. Select a folder for your image and click OK.
To delete unwanted objects in a few clicks, you can also use the Spot Healing Brush. You will see it under the Eyedropper tool. This option is perfect for photos with a simple background or images with small defects. For instance, you can use it to smooth skin in Photoshop by deleting small blemishes, pimples, and imperfections.
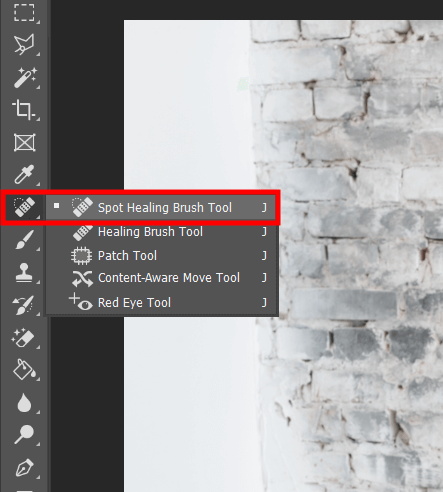
You will find the Spot Healing Brush tool in the Tools menu on the left.
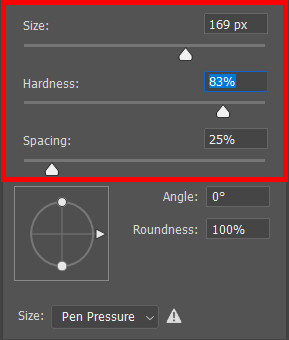
Go to the Options menu to change the size and hardness of the Spot Healing Brush. Its size should match the object that you want to delete. You can set the size with the [ ] keys and use the brush to paint over the defect that you want to delete.
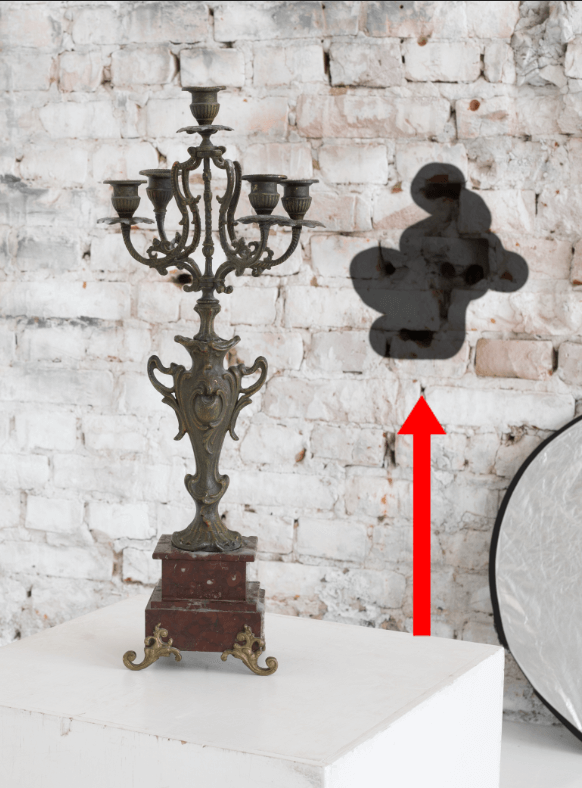
Click on the selected area or drag the cursor over the defect that you want to delete. Thanks to its in-built AI tools, Photoshop will automatically replace pixels in the selected area. You don’t have to select source pixels and use them for filling the selection.
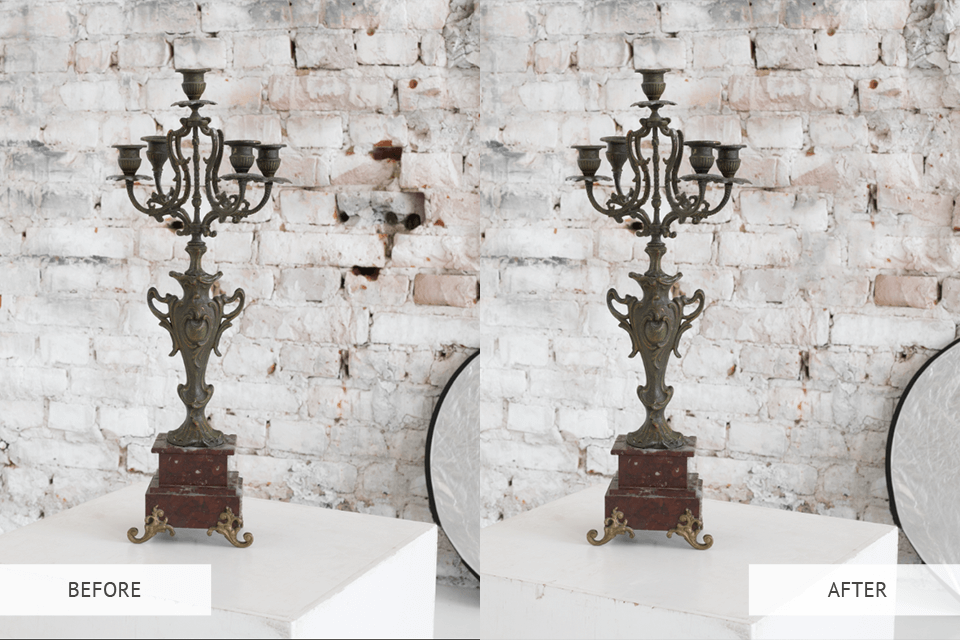
Now, the wall in my photo looks more solid and natural. You can also use this tool to remove clothing wrinkles in Photoshop.

If you don’t want to waste your time enhancing photos, try using these actions that can be applied in one click. With them, you won’t need to spend hours working on your photos. Use them to make your images more eye-catching by adding nice hues.