You can invert any photo’s colors to make it look more visually pleasing since some colors might look better than others. You can even go to the extremes and make your photo look surreal and otherworldly. To achieve such an effect, you just need to invert each color to the farthest color in the spectrum.
For instance, you can turn black pixels into white, blue into red, green into purple, etc. You can invert images with the help of various software. If you are wondering how to invert colors in Photoshop, read this tutorial to learn how to do it in a few clicks.
Photoshop has several tools that allow you to invert your photo. Besides, you can either invert a single picture or batch-process several photos. Regardless of what version of Photoshop you have, the steps that you need to take remain virtually the same.
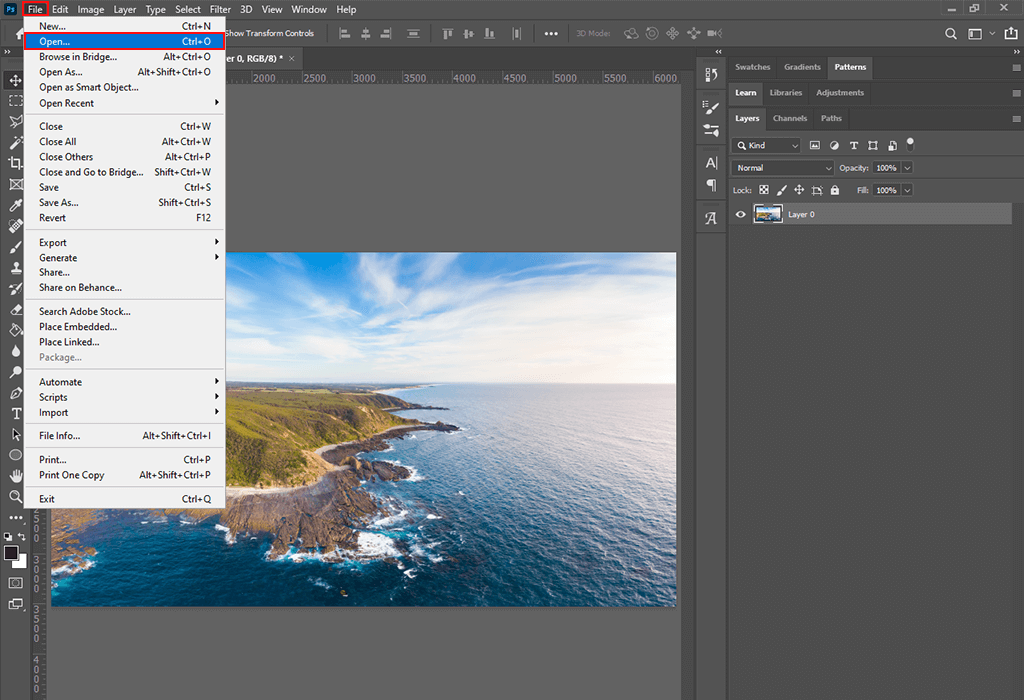
You need to select an image that can be potentially inverted since if it’s too light or dark, the result might be not what you are expecting. In an inverted image, every color will be replaced with its opposite.
The software will automatically convert the brightness value of each pixel to the inverse value using the 256-step color scale.
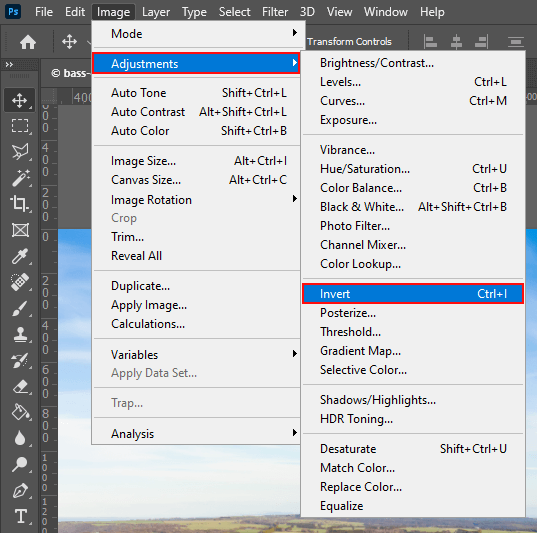
In the top panel, select the «Image» option. In the «Adjustments» menu, select «Invert».
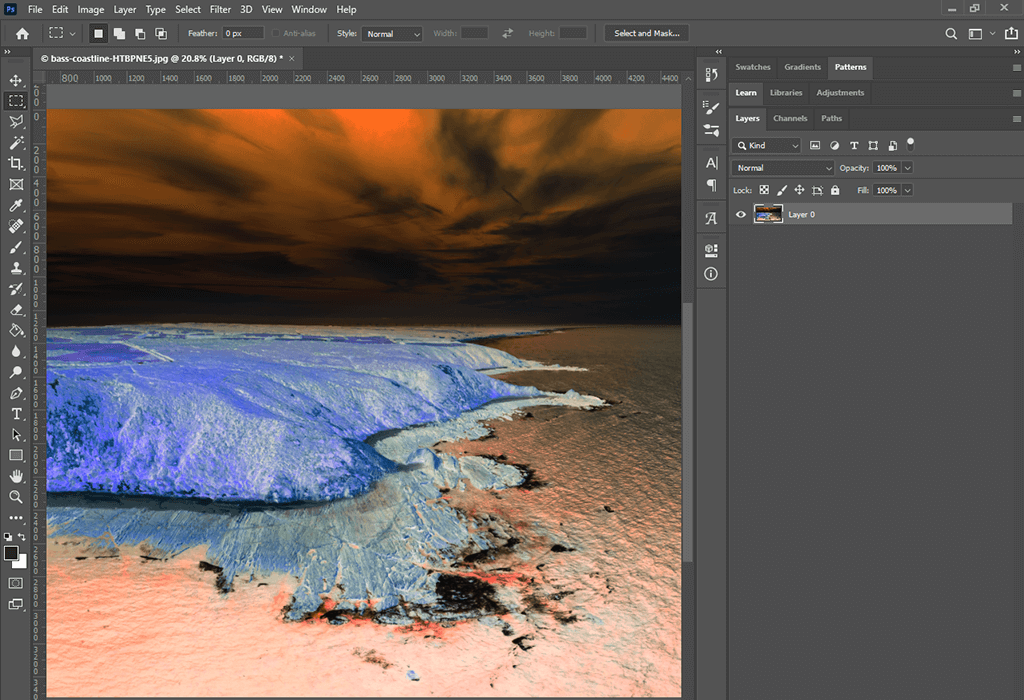
Here you see your photo after using Invert tool. You can stop there, but if you want to master this technique better, see below.
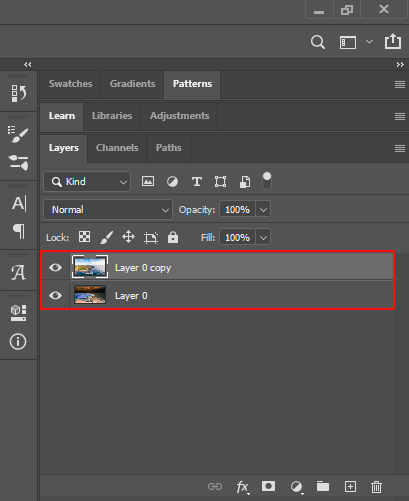
You can also select a specific area of an image to invert only it. To do it, duplicate a layer and invert the image back.
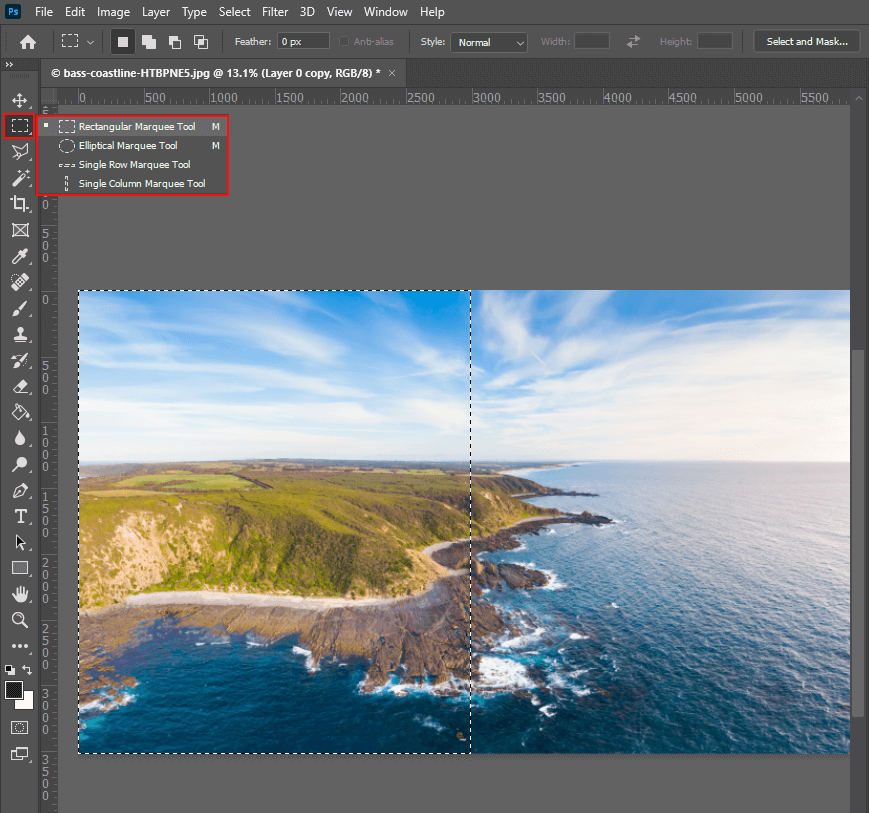
Use a dedicated tool to select a part of an image that you want to leave as it is, without inverting it. If you need more information on this, you can also read another tutorial that will help you learn how to invert selection in Photoshop.
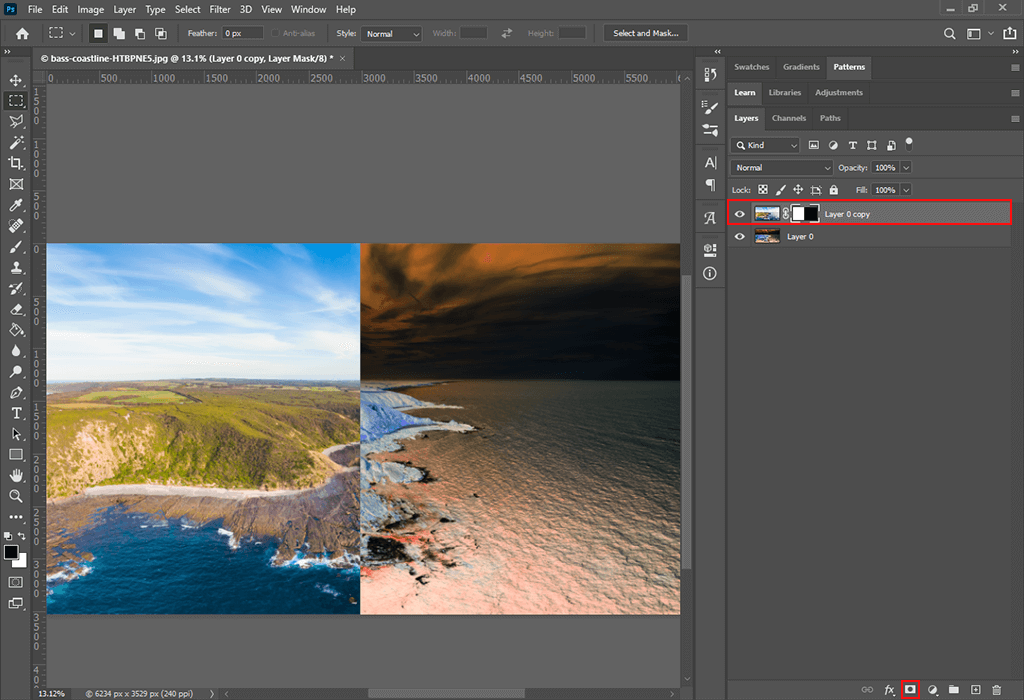
Click on the mask layer to split your photo into an input image and its inverted copy.
Quick Tip: If you need to invert a complex photo, try creating a new layer first and then dragging it on the top of other layers. Then, use the Shift+Ctrl+E key combination to create a merged version of all the layers without changing the deeper ones.
To optimize your workflow, you can also use other Photoshop keyboard shortcuts to perform all the tasks in no time.
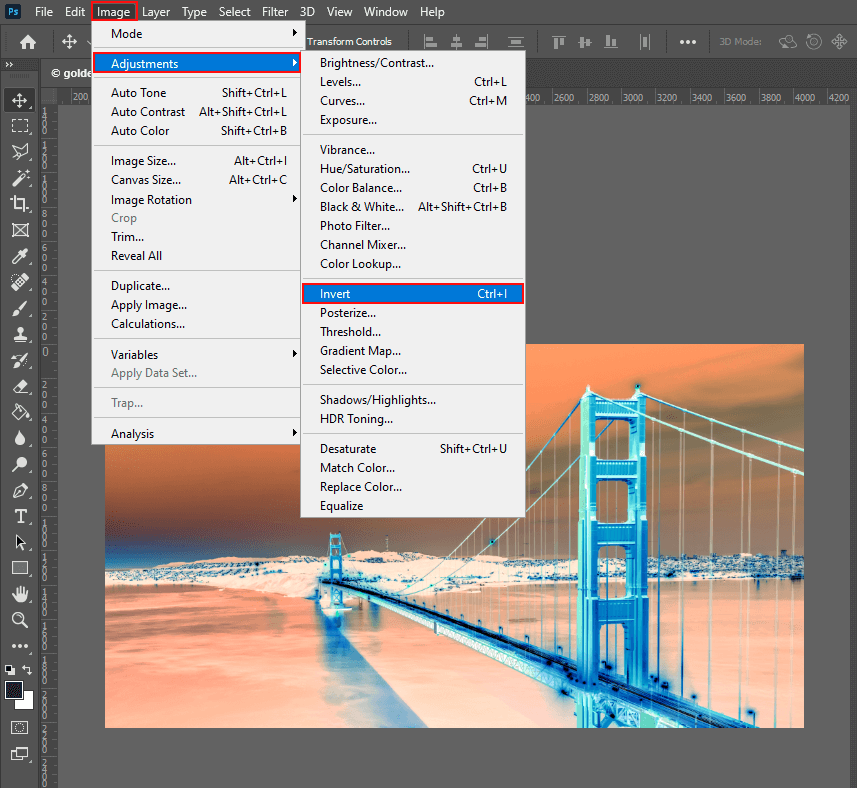
You can invert your second image in the same way. Just open the “Images” menu as you did before and follow the same steps.
If you want to learn how to invert black and white in Photoshop but don’t have much time, make sure to contact a professional service. Experienced photo retouchers will also assist you with such complex photo-editing tasks as head replacement, surreal manipulations, creative digital drawing. You will receive edited images within a few business days.
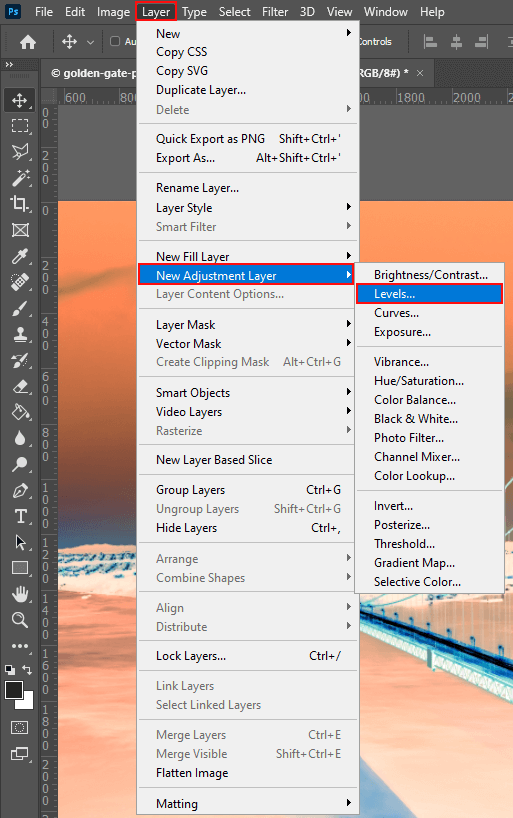
Go to the «Layer» menu, then, click on «New Adjustment Layer» and select «Levels».
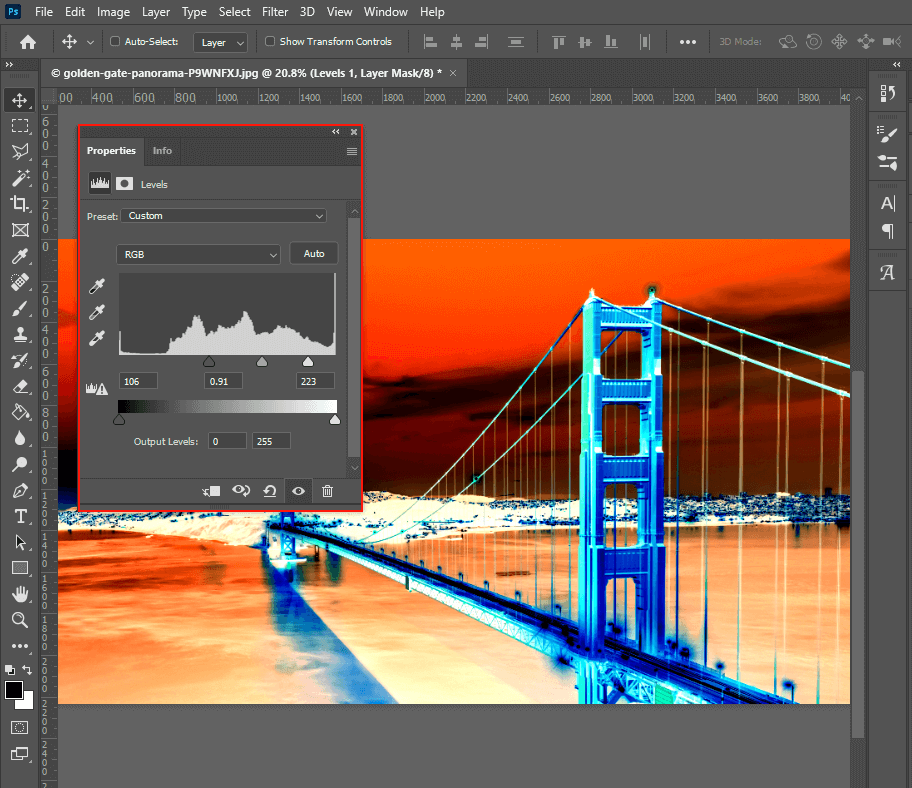
Now, you can move the sliders of the Levels to adjust their settings. You can also add and customize the «Brightness/Contrast» layer to boost the contrast of your image.
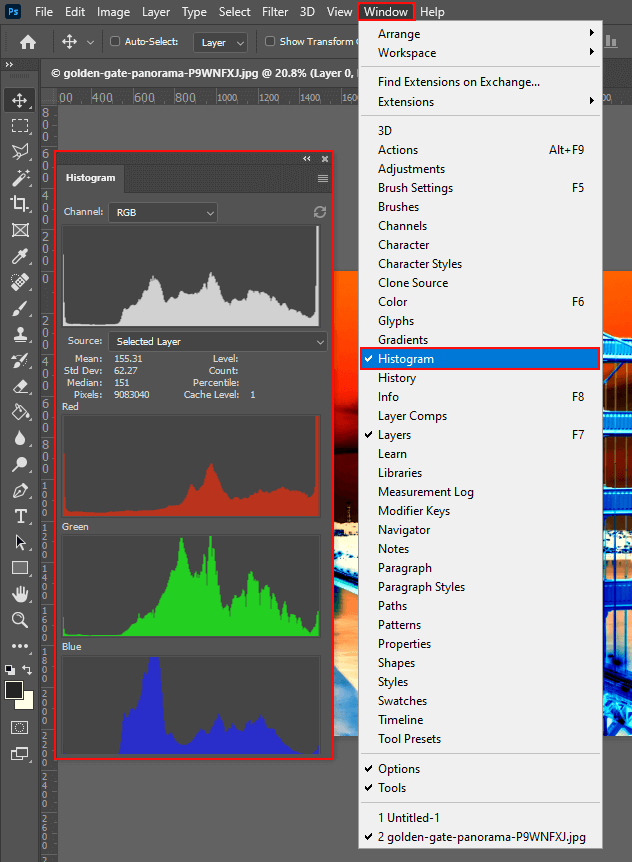
Do it to learn more about the tonal range of your photo.
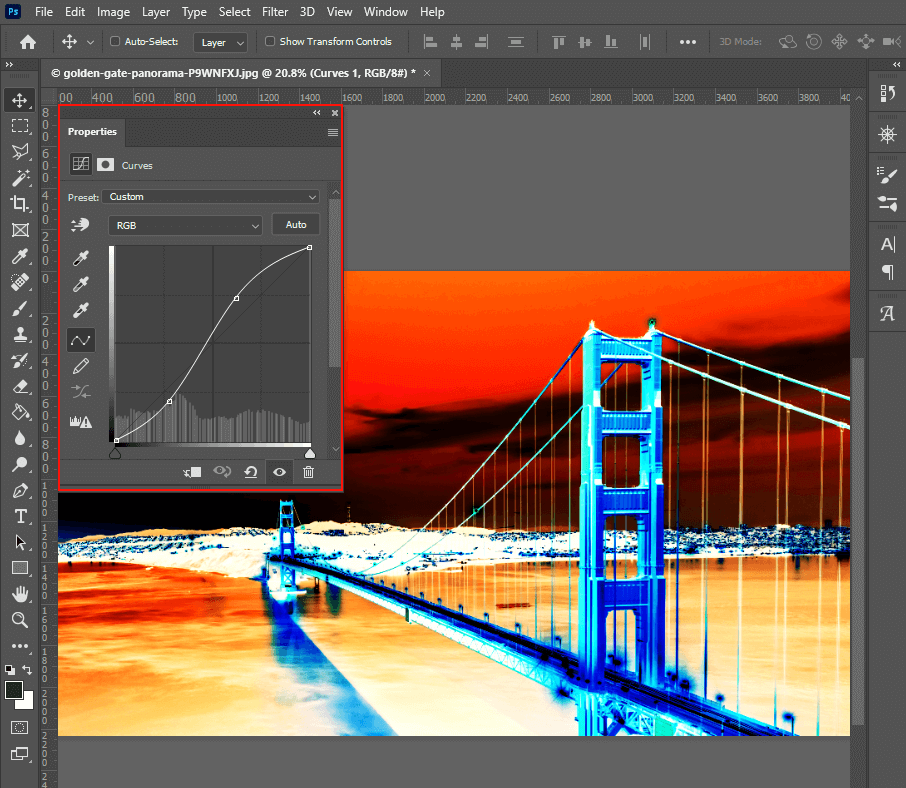
Move the Shadows, Midtones and Highlights sliders to adjust the image settings until you are satisfied with the result.

If you have already figured out how to invert colors in Photoshop and want to further enhance your images by applying unusual effects, try using this collection of Photoshop actions. They will give a retro feel to your photos and make them look as if they were taken decades ago.
With them, you can fully transform the atmosphere in your photos, create unusual glitch effects and experiment with shifting colors to make your images more mesmerizing. You can apply these actions to your photos in various versions of Photoshop, such as СС or CS 4-6. Download any filter that you want to use for your current project or opt for a whole pack of actions.