Users often need to upload more than one image as a single Photoshop document for merging pictures, building collages, or designing layouts. Each image should get its own layer being a part of a document.
However, Photoshop doesn’t support this feature and opens each file in a separate document instead. Therefore, we have to move pictures from one document to another ourselves.
To begin with, this tutorial deals with Load Files into Stack option. There will appear the panel, where you can import multiple images. Take advantage of this Photoshop feature to work with numerous pictures in layers without opening other documents. Here is the detailed instruction on how to open multiple images as layers in Photoshop in just several minutes.
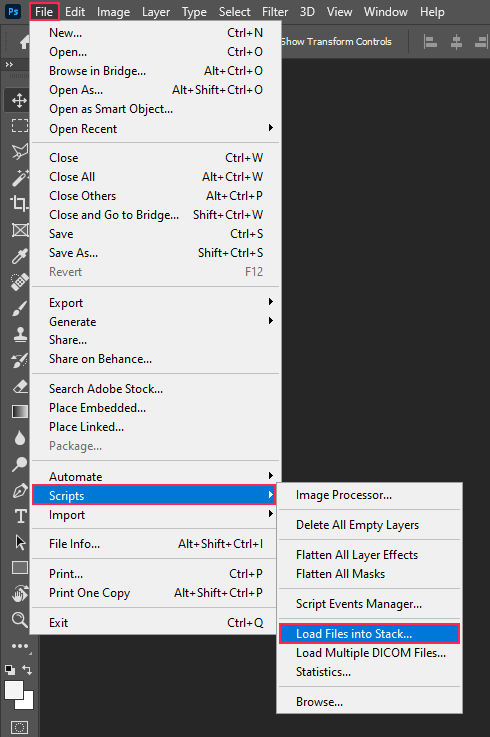
STEP 1. Open Photoshop, head to the File menu in the Menu Bar, select Scripts > Load Files into Stack.
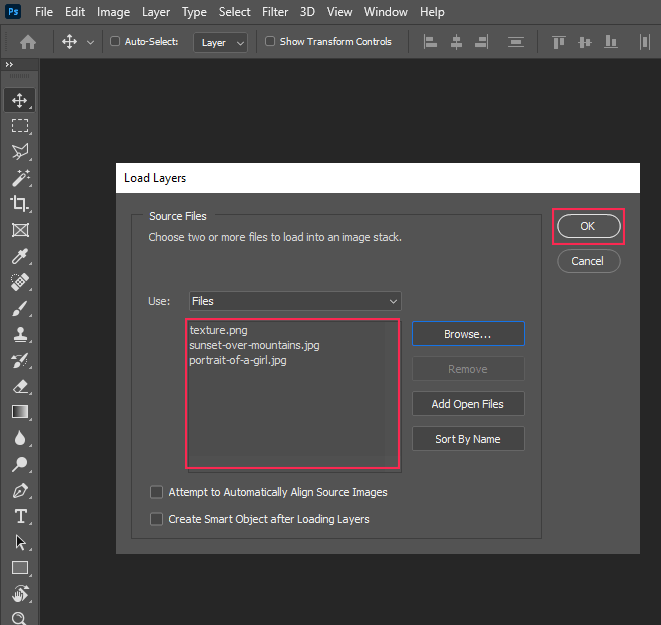
STEP 2. There will appear a Load Layers dialog box. Choose either Files or Folder from the Use drop-down list. The Files option allows picking individual pictures within a folder, whereas the Folder option makes it possible to import all images from the selected folder to a program. I’ll choose Files and click the Browse button.

STEP 3. All chosen images will appear in the window. Then you need to click OK.
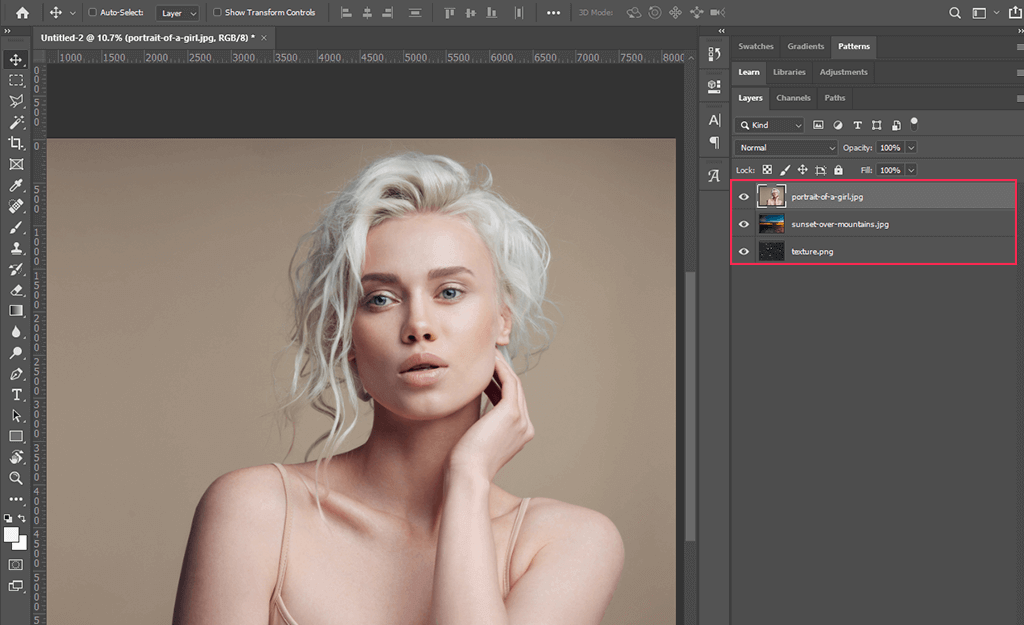
STEP 4. Create a new document in Photoshop, and import the images to it. In the «Layers» panel you will see that each selected picture is displayed on a separate layer, which bears the name of the image.
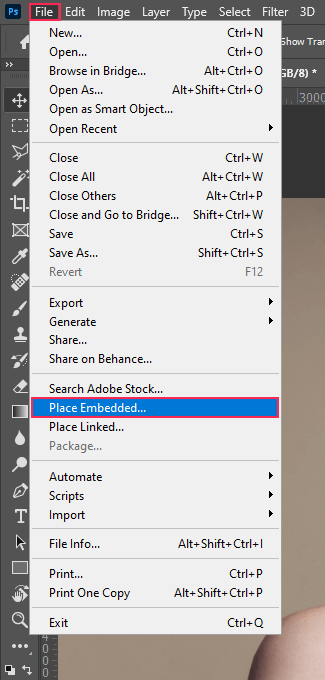
STEP 5. The other option is to place the image into the open file. To do this, go to the «File» menu and select «Place Embedded».
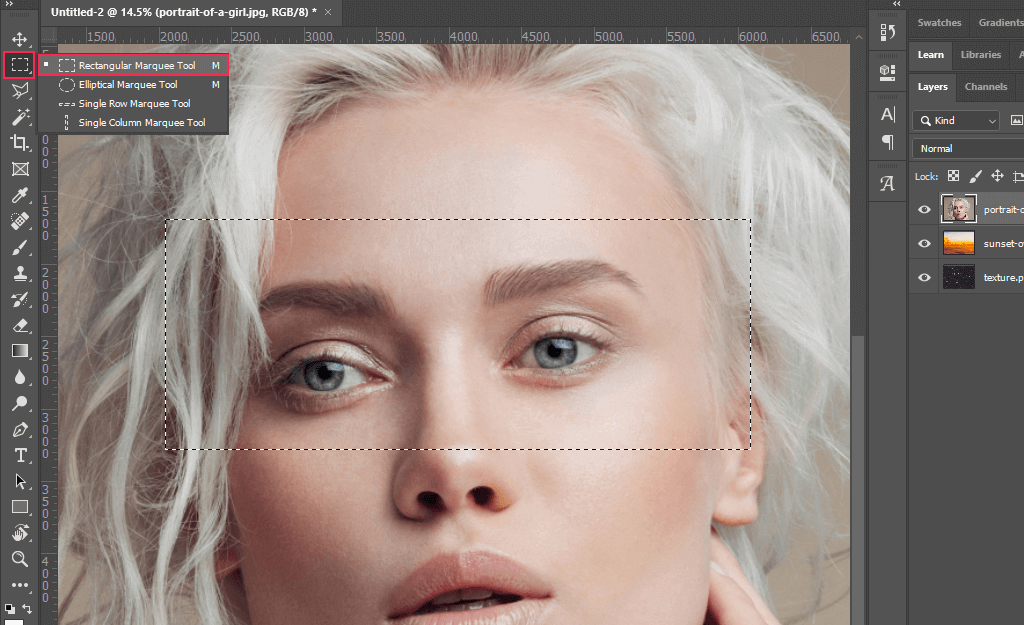
STEP 6. Then you can work with layers. For instance, you can cut out the part of the layer. To do this, go to the toolbar, pick Rectangular Marquee Tool and select the part of the layer.
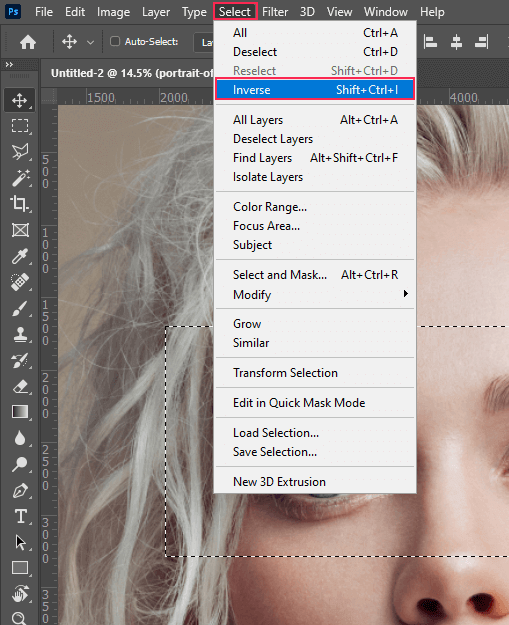
STEP 7. Invert the selection to remove not the eyes from the portrait, but the area around them. To do this, press Select, then Inverse.
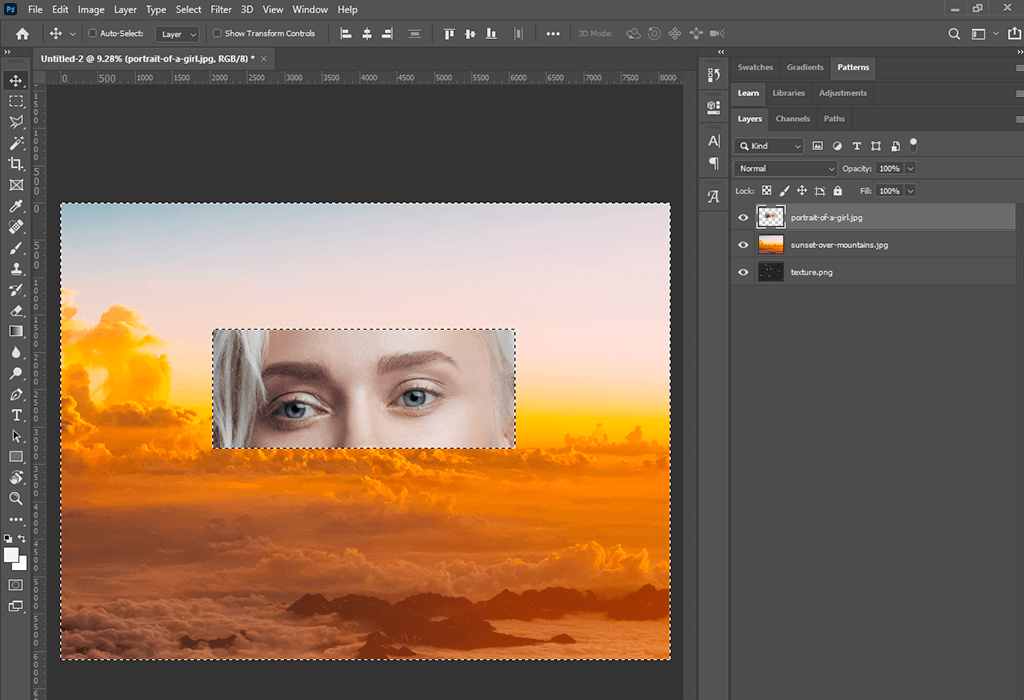
STEP 8. Press Backspace on the keyboard and delete the backdrop. I advise you to check Photoshop keyboard shortcuts combinations to perform the majority of operations quicker.
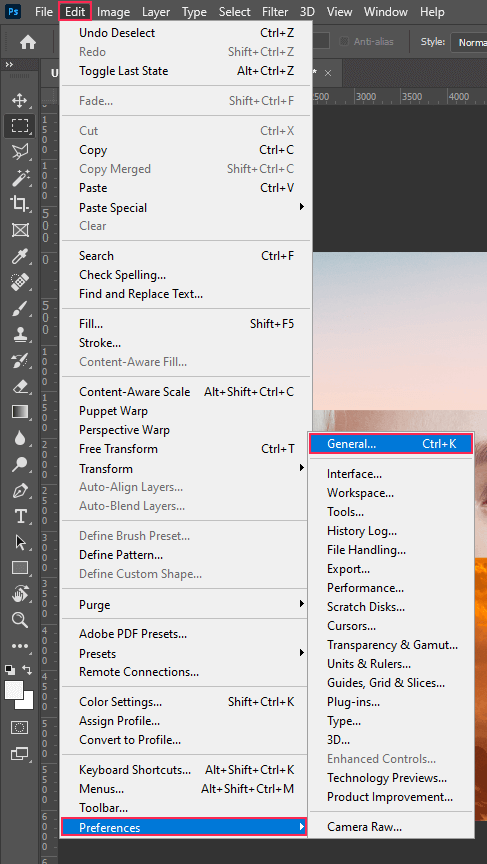
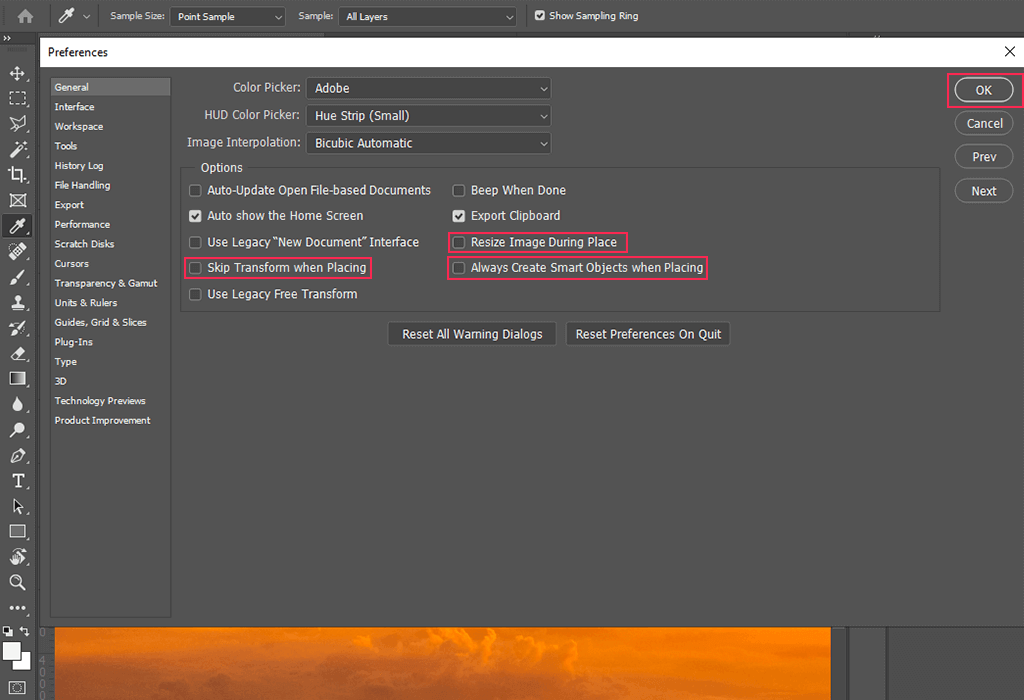
STEP 9. To arrange images within the document quicker, go to Edit - Preferences – General.
STEP 10. To prevent Photoshop from launching a random transform feature every time you import an image, turn on the «Skip Transform when Placing» setting. To prevent Photoshop from converting images into smart objects, deactivate the «Always Create Smart Objects when Placing» parameter. Besides, you need to uncheck the «Resize Image During Place» box.
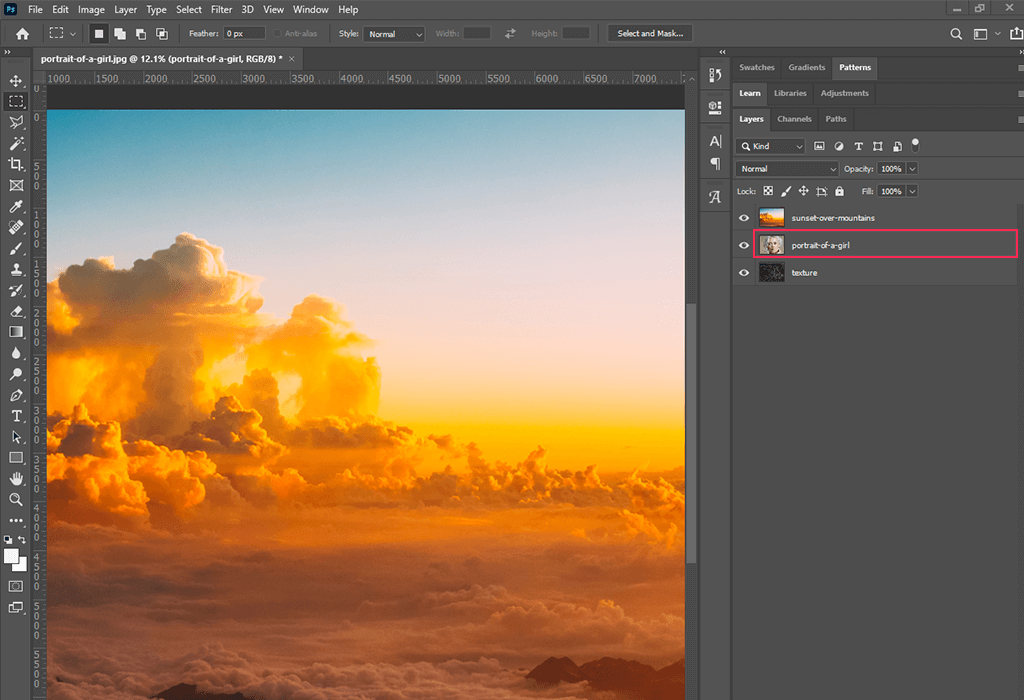
STEP 11. Then you need to go back to the girl photo and place it under the sunset layer. To understand this process better, read tips how to unlock a layer in Photoshop.
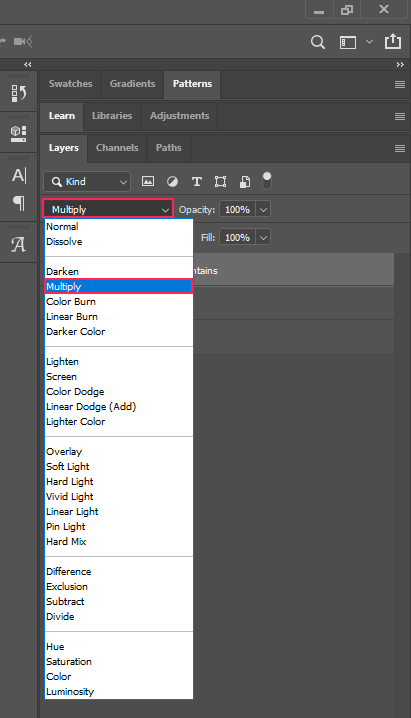
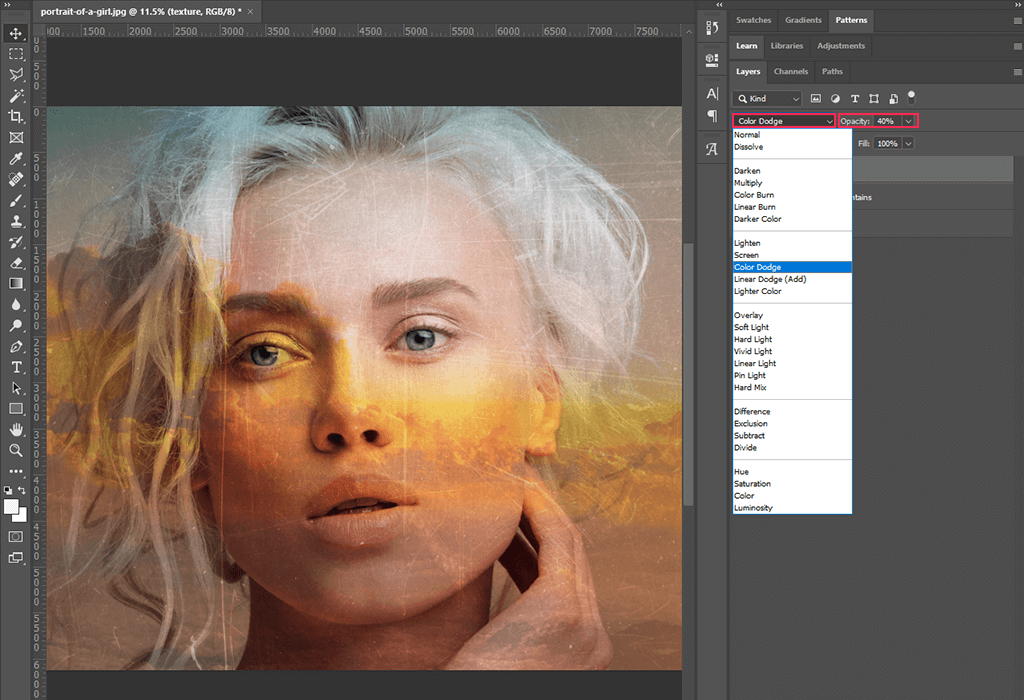
STEP 12. Select and apply the sunset blend mode of your choice.
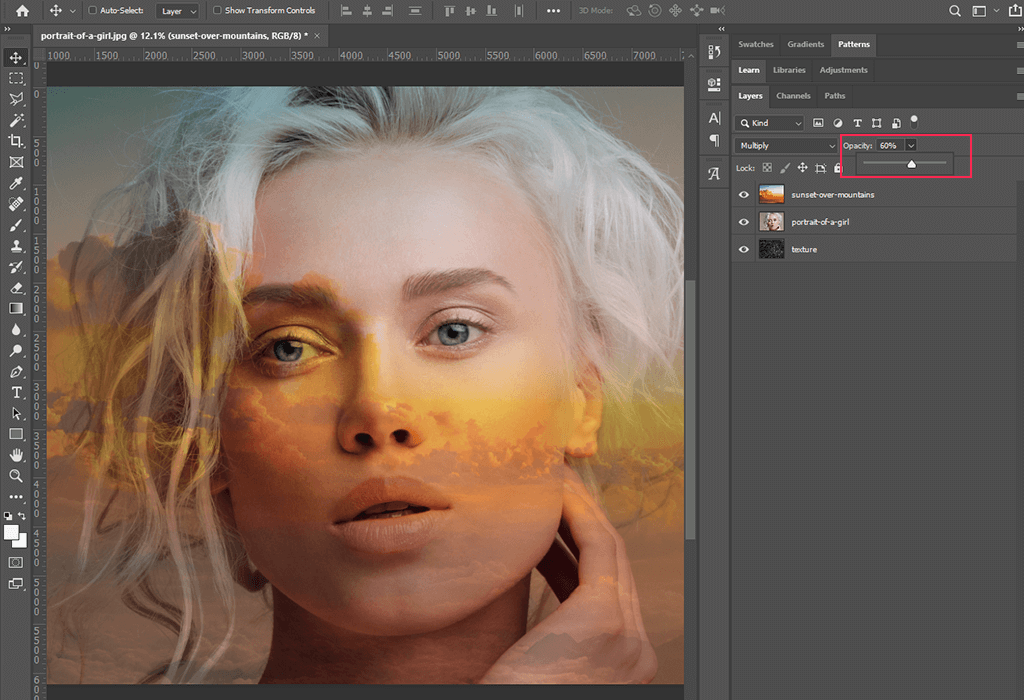
STEP 13. You also need to make the layer more transparent. Actually, you’ve managed to create a double exposure in Photoshop at this stage.
STEP 14. Place the texture layer over the others. My recommendation is to benefit from free Photoshop textures from this list. With their help, you can make your images look more original and captivating.
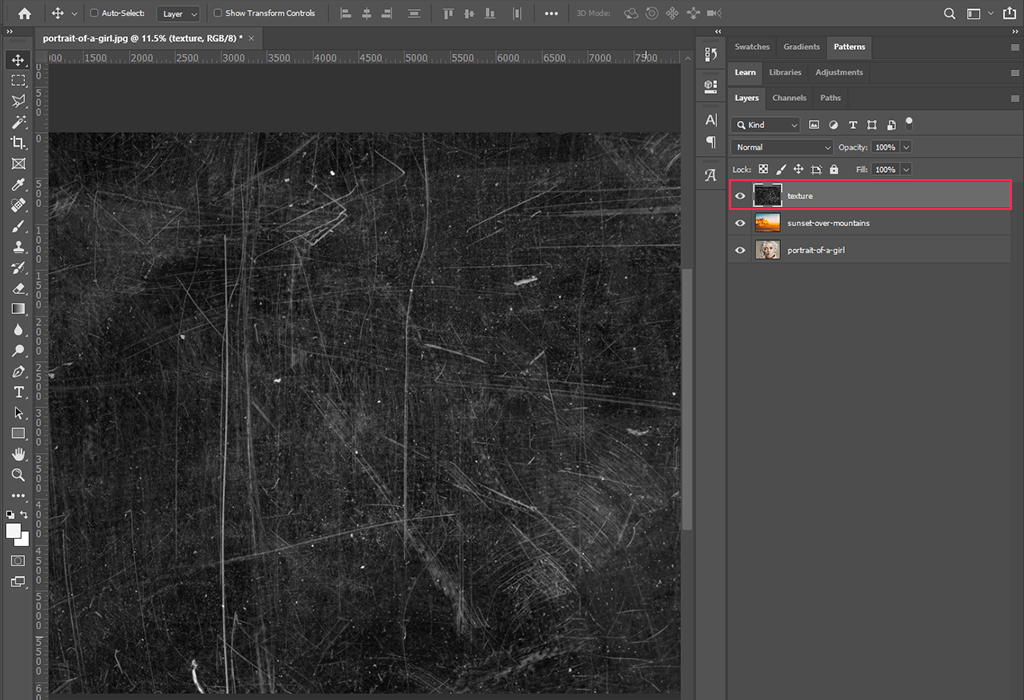
STEP 15. Also, select the Blending Mode and make the texture layer more transparent.
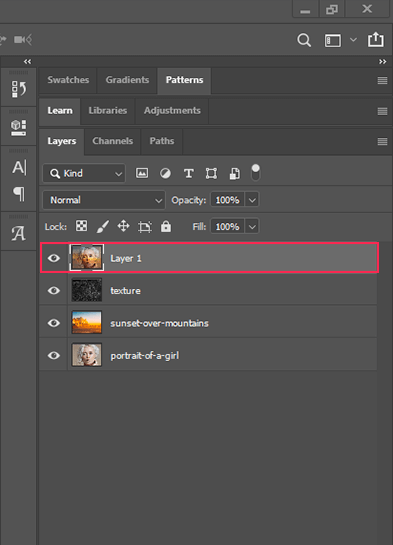
STEP 16. Merge all layers into one by pressing Shift + Ctrl + Alt + E.
STEP 17. To increase the contrast, go to the Image menu and select Auto Contrast. In such a way your double exposure photography will achieve a more colorful and complete look.

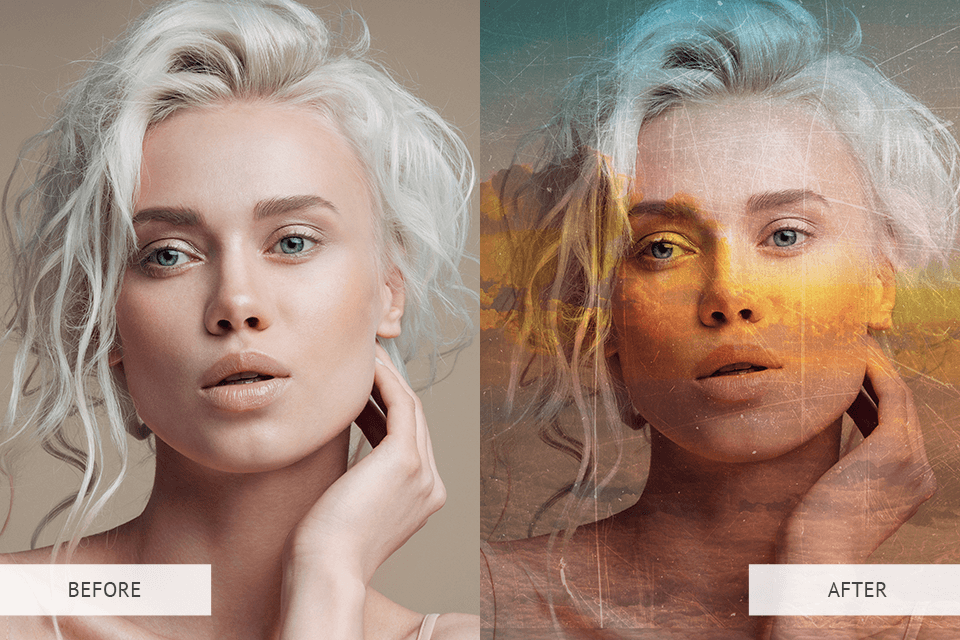
If you have completed all the steps from our guide on how to open multiple images as layers in Photoshop properly, you will create an impressive multi-layered picture like the one shown below. To create other original double-exposure photos, use these free double exposure actions.
To get faster and more qualitative retouching, we recommend you turn to professionals. Our retouchers can help you with various editing tasks like head replacement, creative digital drawing, surreal manipulation services and complete your order within several business days.

This bundle comprises more than 300 freebies for shooters of all genres, including portrait photography, product photography, landscape photography and others.
You can use Photoshop CS 4-6 or Photoshop CC to apply these actions. Download the desired filter or all the free actions from the page to use them when designing the other projects.