The Magic Wand is one of the first selection tools created by Photoshop developers. Unlike other similar options that allow you to select pixels within a selected shape or around the edges, it can select pixels of a specific tone or color.
Beginning retouchers and designers often don’t know how to use Magic Wand in Photoshop. It might be challenging to control which colors will be selected. In this step-by-step guide, we will tell you how this tool is supposed to work and explain how to adjust its settings in the right way.
Most people use this feature to remove the background of a picture in Photoshop. It’s a perfect choice for product photography. In this article, I will tell you how to perform ecommerce image optimization by deleting the background from your product photos.
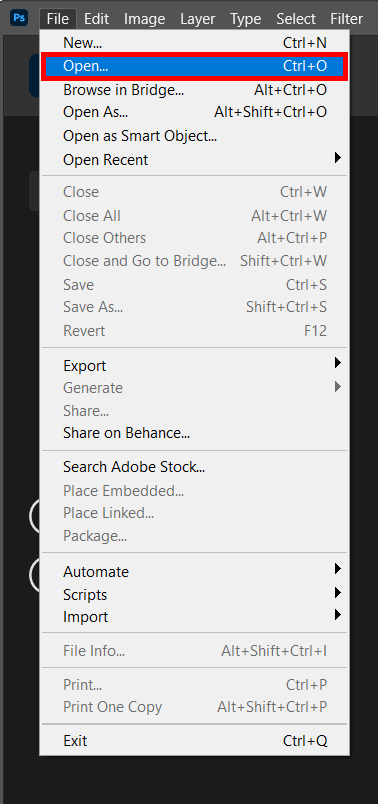
First, you need to run Photoshop. Then, import a photo that you want to edit. You can do it by selecting Open in the File tab. Besides, you can use Photoshop keyboard shortcuts. By pressing Ctrl + O, you can quickly open any file you need.
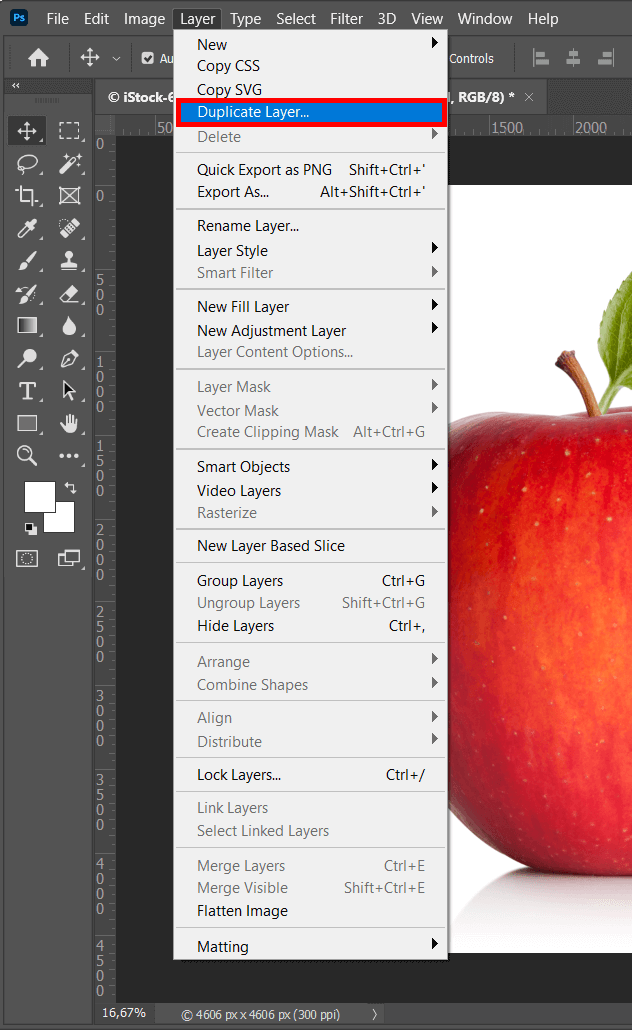
Then, you have to duplicate your background layer. Go to Layer > Duplicate Layer. You can also press the Ctrl+J/Cmd+J combination on your keyboard to quickly copy your layer.
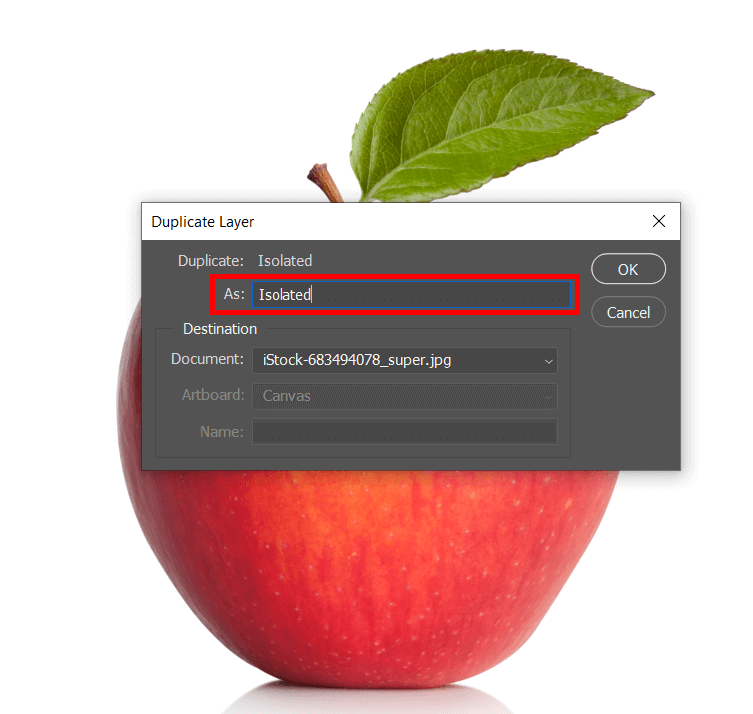
Make sure to select a title for your layer so that you can find it easily whenever you need it. I will name it “Isolated.” Then, you can click OK to save the renamed layer.
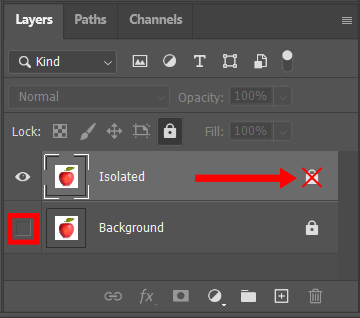
Make the background layer invisible by clicking on the eyeball icon. Then, you need to unlock a layer in Photoshop. To do it, click on the padlock icon near the layer.
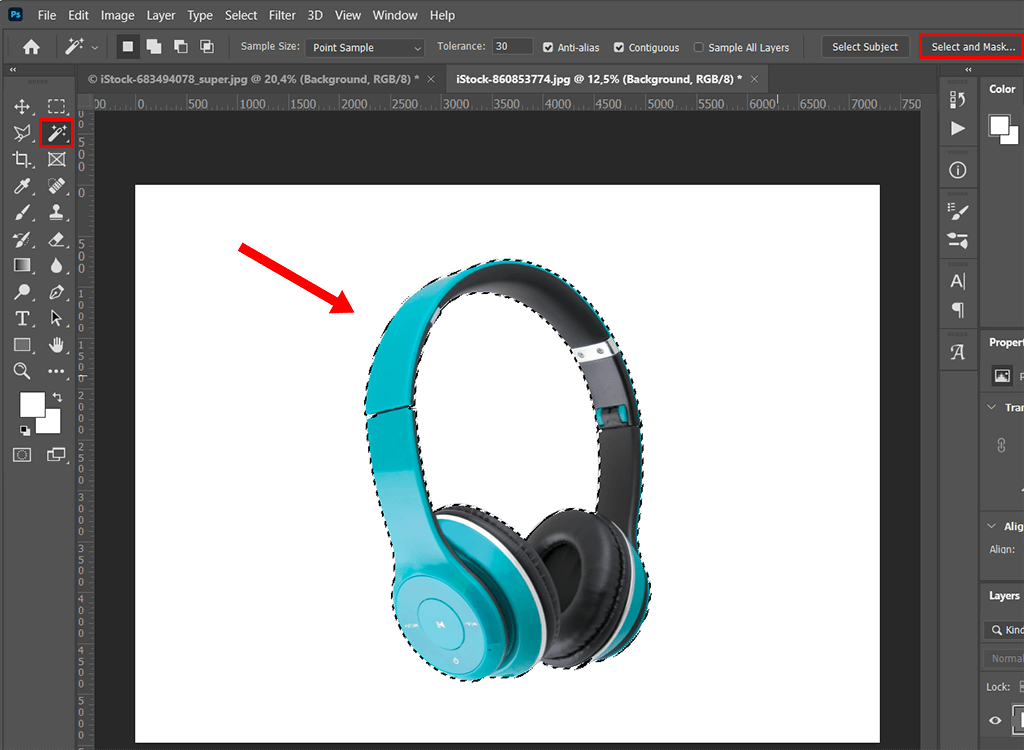
After selecting the new layer, select the Magic Wand Tool (W) in the Tools menu. When it’s done, you can change its settings to control how many pixels you will be selected with it. You will see the Settings menu at the top.
Single Selection: You will need to use it when you start selecting your first objects.
Add to and Subtract from Selection: With this option, you can add and delete pixels from the selected area without creating a new selection.
Intersect with Selection: This allows you to create a new selection with pixels from your previous selection.
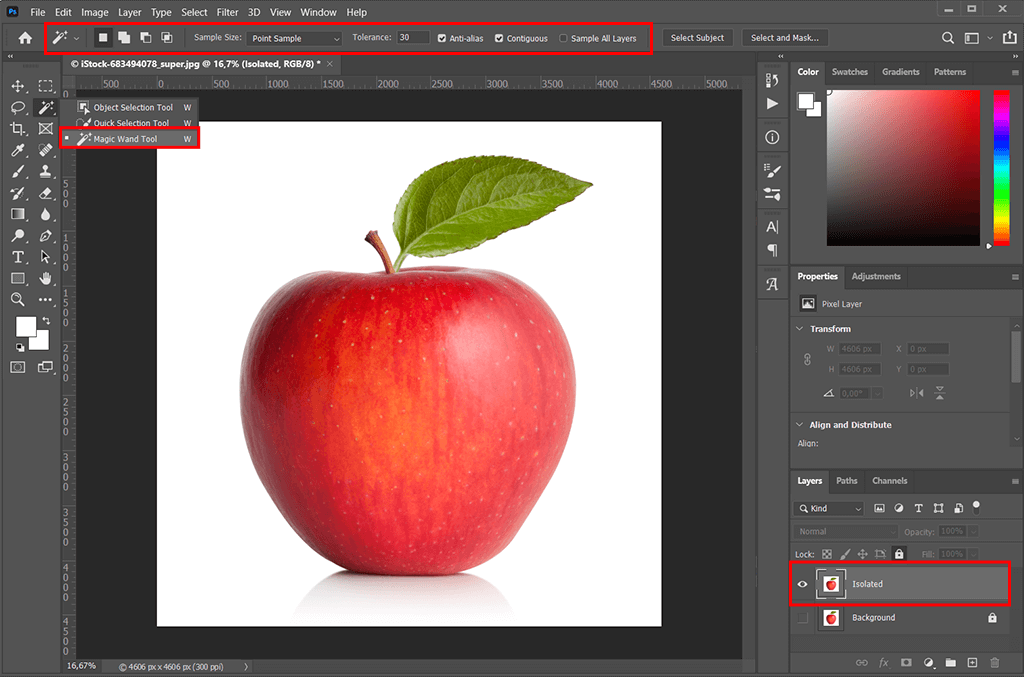
Sample Size: By default, you can use this tool to select one color. However, you can increase the sample size so that the colors of adjacent pixels will get selected as well. On the screenshot, you can see that we set the Sample Size to Point Sample.
Tolerance: By adjusting this parameter, you can use the Magic Wand to select a larger area. In most cases, you will need to set it somewhere between 15 and 30. When editing my image, I set it to 30.
If you want to select the subject of a photo, you can select either the background or the subject. The former option is more suitable for product images that often have a single-color background. However, if you need to edit a photo with a complex background, it might be easier to select the subject and then invert selection in Photoshop.

I used an image with a single-color background so I just needed to click on it to select it. You can also press Ctrl+D/Cmd+D if you want to deselect in Photoshop and create a new selection.
Press Shift and hold it to make your selection more accurate. You need to click on the areas that weren’t selected automatically and include them in the selection. When I edited the image, I needed to select the reflection of the apple.

Press the Del key and delete the background.
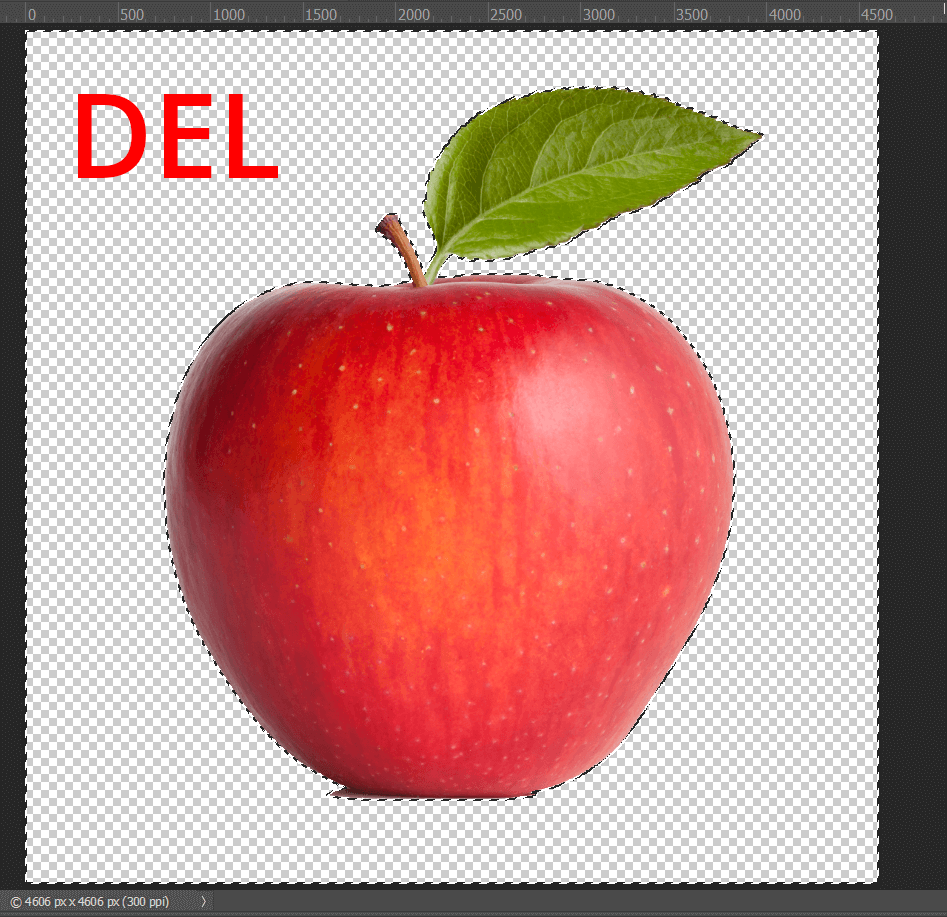
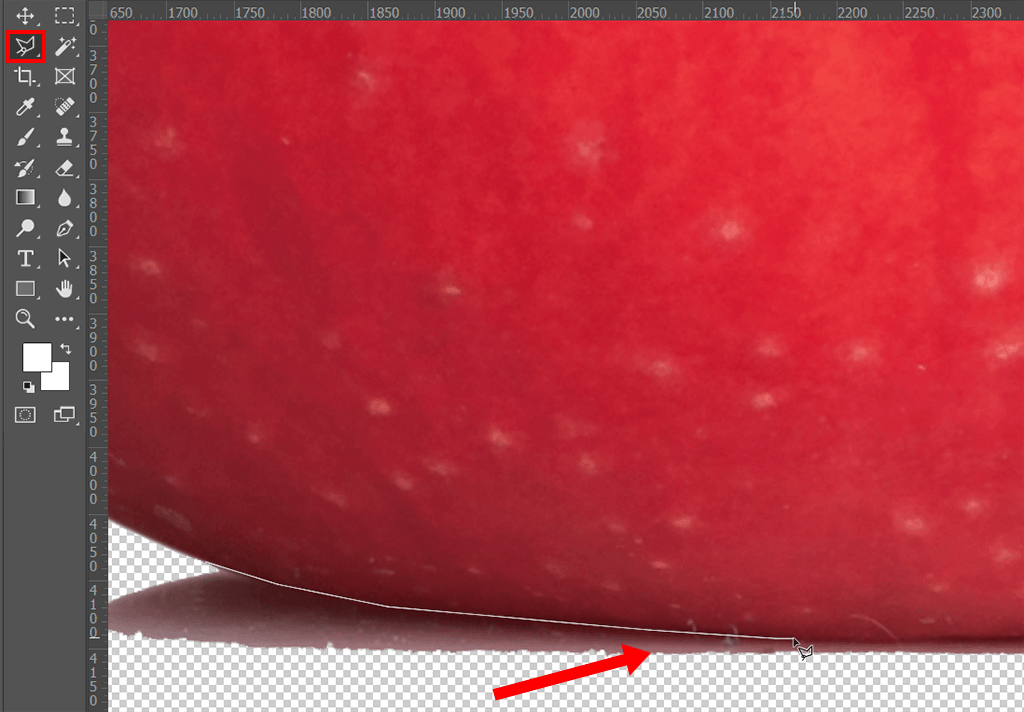
Now, you can clean up the background if you didn’t manage to fully delete it. To do it, I use the Polygonal Lasso (L), select the areas that you need to clean up and press Delete.
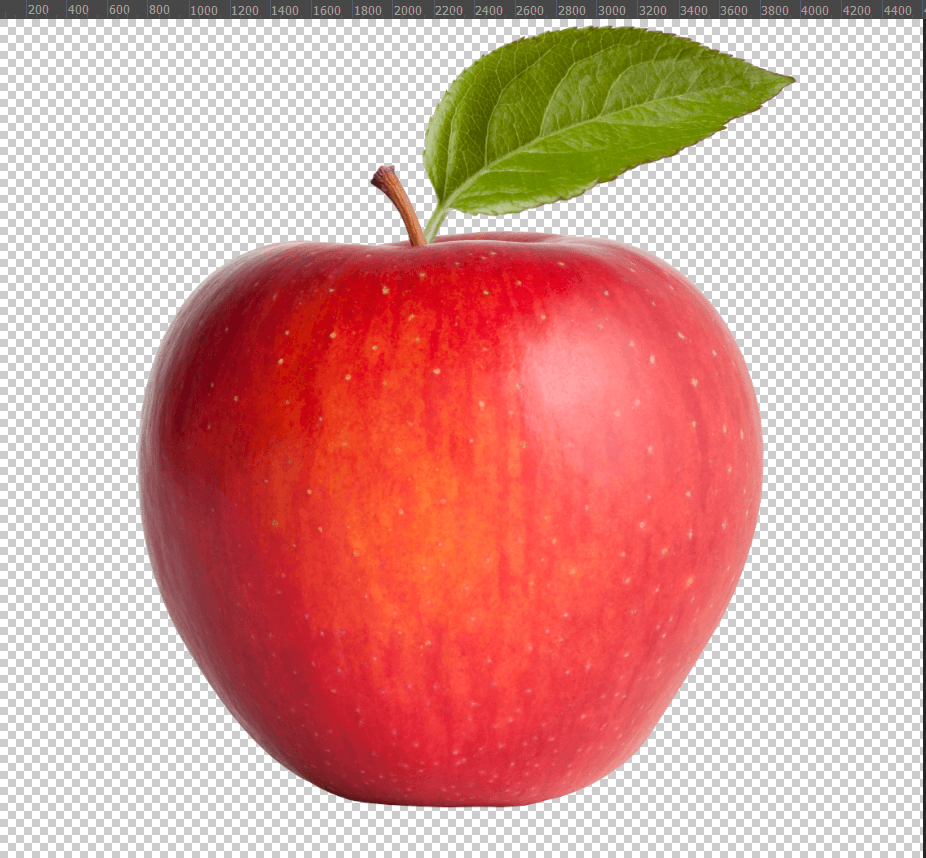
This way, you can quickly select and delete any simple background. If you need to remove the background from portraits, you can read other Photoshop tutorials to learn how to remove stray hairs in Photoshop and fix other issues to make your photos look more professional.
If you have never tried to remove the background before and don’t want to spend too much time on it, you can outsource this task to professional retouchers. Make sure to address a service with fast turnaround times and affordable prices.
Photo editors will quickly edit your product photos and send you images that meet all the requirements of popular ecommerce platforms.
The Magic Wand Tool is a great option for those who want to display their product in different settings using various product photography backdrops. Below, I will explain to you how to select a new background color.
Open your image and select the object with the help of the Magic Wand Tool. Then, click on Select and Mask.
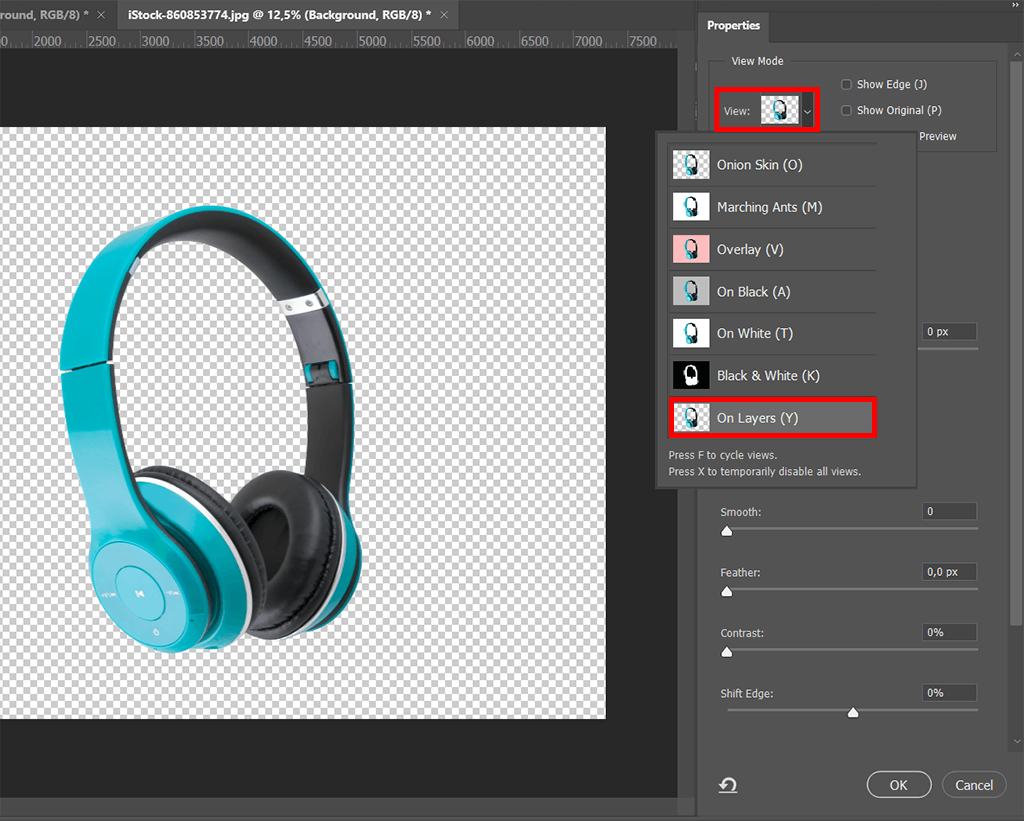
In a new window at the top of the screen to the right, you need to click on the View button under the Properties tab. Make sure to click on it while the option On Layers (Y) is selected. It will allow you to see your subject without its background.
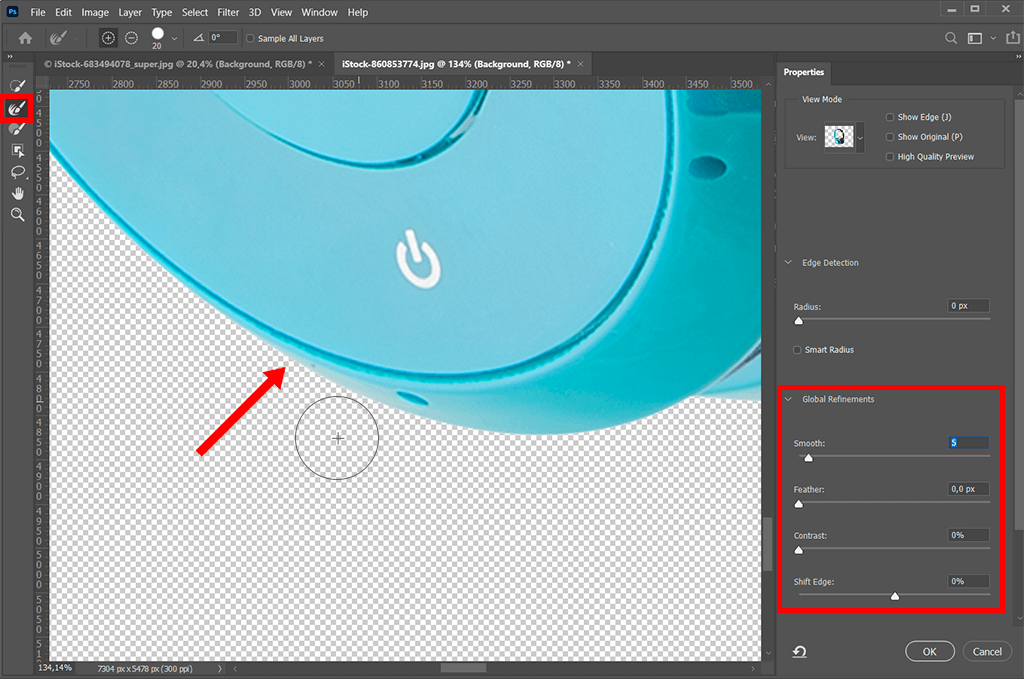
You can use many options in the Settings panel to enhance your image. As for me, I prefer the Smooth feature and Photoshop refine edge tool to make the edges of the selection look more accurate.
You just need to move the Smooth slider to the right to soften the edges of the selection. Then, you can use the Refine Edge Brush Tool (R) to make the edges look smoother. Find this option on the toolbar on the right and paint over the areas of the image that require further improvement.
Once everything is ready, click on Output Settings in the bottom right corner of the screen, select Output to: Layer Mask, and click ОК.
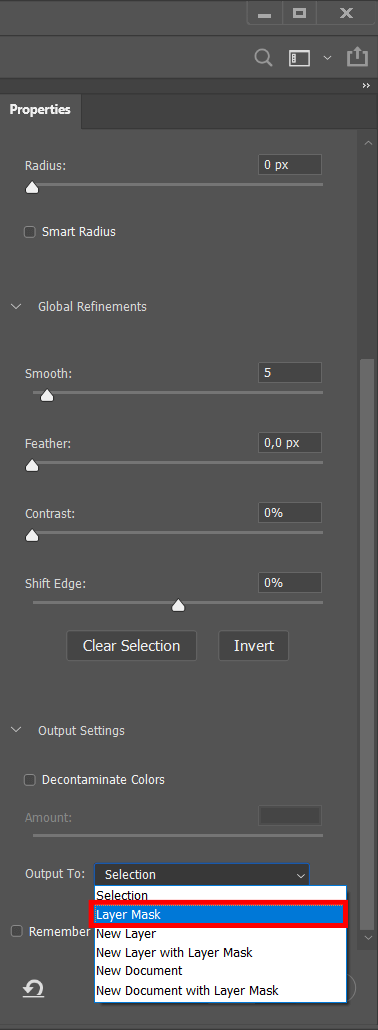
If you did everything correctly, your subject now should be isolated from the background thanks to a layer mask.

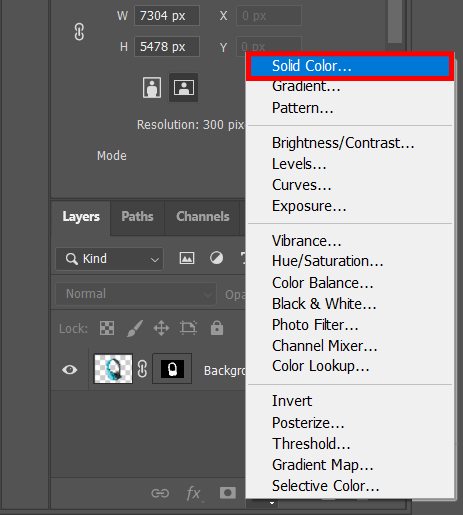
Now, you need to add a new background. Find the option Create new fill or adjustment layer in the Layers menu and select Solid color.
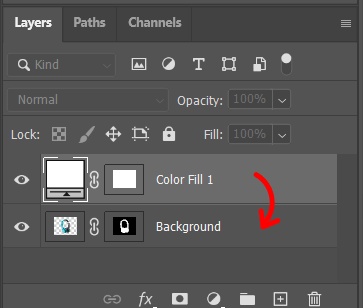
Click on the new layer and drag it underneath other layers.
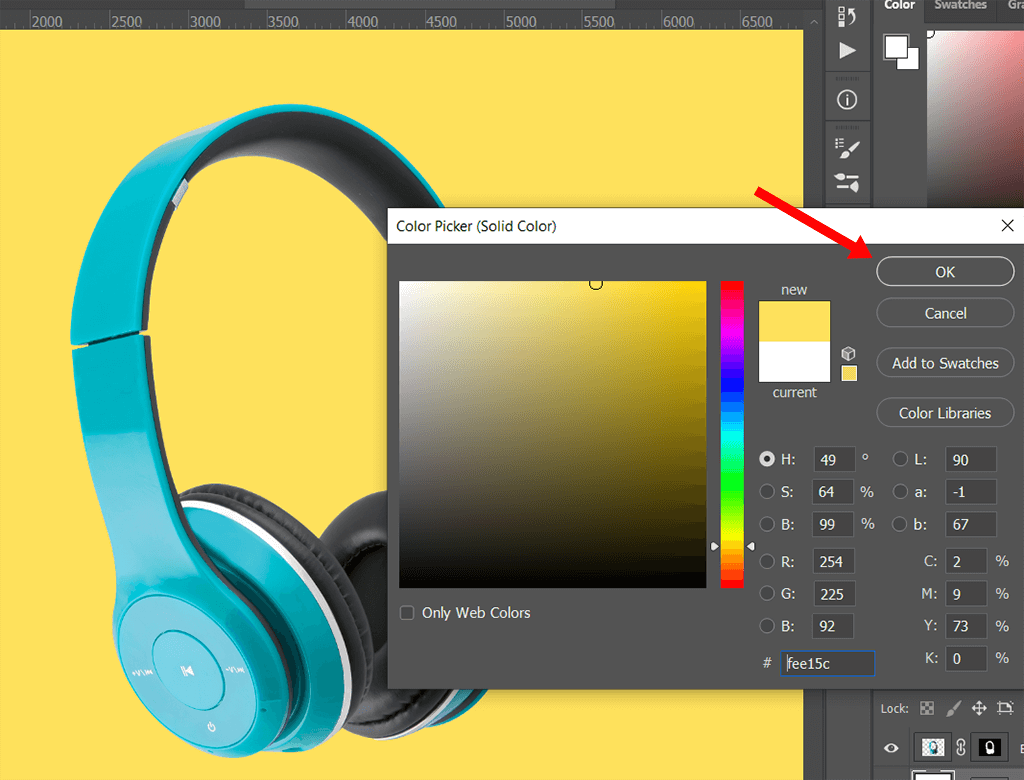
When you see the Color Picker window, chose the color that you want to use and then click OK. You can always change the background color again if you don’t like it.
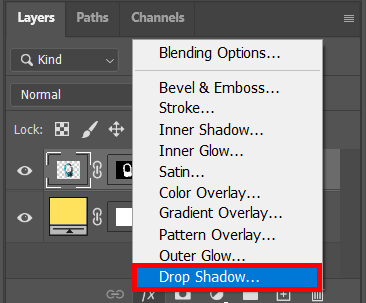
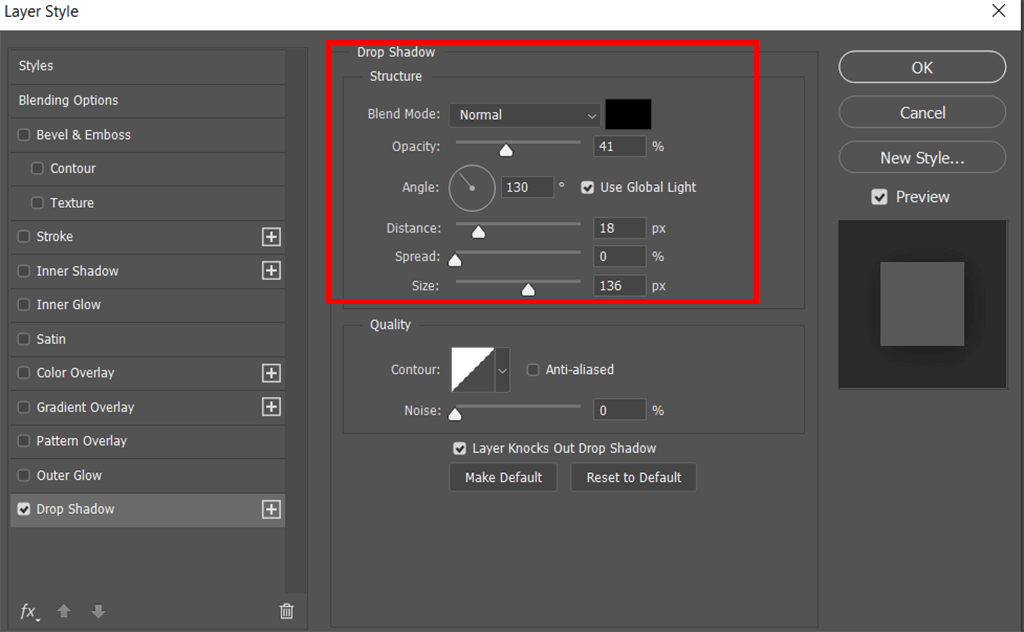
To make your image even more realistic, you can add a drop shadow in Photoshop. When your layer is selected, click and hold the Add a Layer Style button that you can find at the bottom part of the Layers menu. Then, select Drop Shadow from the drop-down menu.
In a new window, you need to adjust the setting in the way I did it on the screenshot and click ОК.

Done! You have successfully changed the background color with the help of the Magic Wand Tool. Now, you can try using other Photoshop tutorials if you want to learn how to change the color of an object in Photoshop and embellish your photos more quickly.

If you don’t want to spend much time on editing, you can solve this task more quickly by using these handy actions. With them, you can make your photos look more professional in a few minutes by enhancing colors, fixing light issues, and raising sharpness.