Do you think your images look too dark or overexposed? Regardless of what caused these problems (bad weather or incorrect camera settings), you probably want to know how to fix overexposed areas in Photoshop. Below, I will tell you about 4 most effective and relevant methods.

Are you a beginner trying to figure out how to get rid of overexposure in your photos? Would you like sunsets in images to become less bright and unnaturally white? Then check out these quick methods of how to fix these issues in Photoshop.
STEP 1. Download a photo and add a new layer.

STEP 2. At the top, find and select "Filter" - "Convert for Smart Filters" and click "OK".

STEP 3. Add a Shadow/Highlights adjustment layer. Select "Image" - "Adjustments" -"Shadows/Highlights" to access the settings.
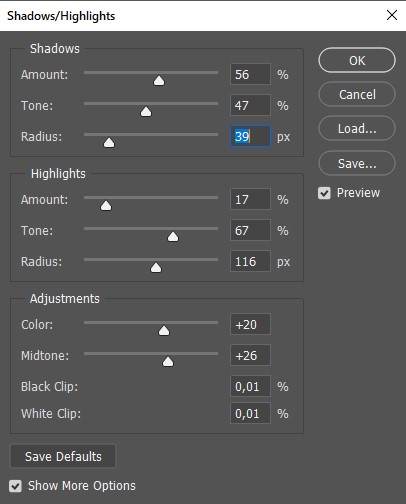
STEP 4. If there are dark areas in your photo, and you need to lighten them. You should adjust the "Shadows" parameter in the pop-up window.
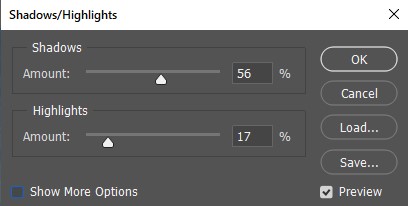
STEP 5. Drag the “Highlights” slider to make the details visible.
STEP 6. To change other parameters such as exposure, blacks, whites and contrast you need to open "Show More Options".
STEP 7. Done. Now merge the layers and save the photo.
If you have tons of photos but lack time to fix overexposed areas, you can turn to professional retouchers and delegate the task to them.
STEP 1. Upload your image and go to the "Layers" panel.
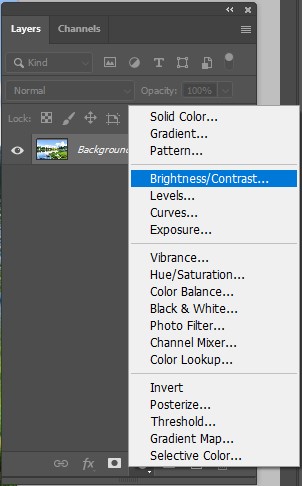
STEP 2. Click on the "New Fill or Adjustment Layer" icon in the bottom part of the Layers panel and select the “Brightness/contrast” correction layer.
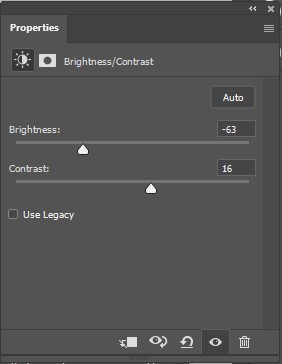
STEP 3. In a new menu, lower “Brightness” and rise contrast.
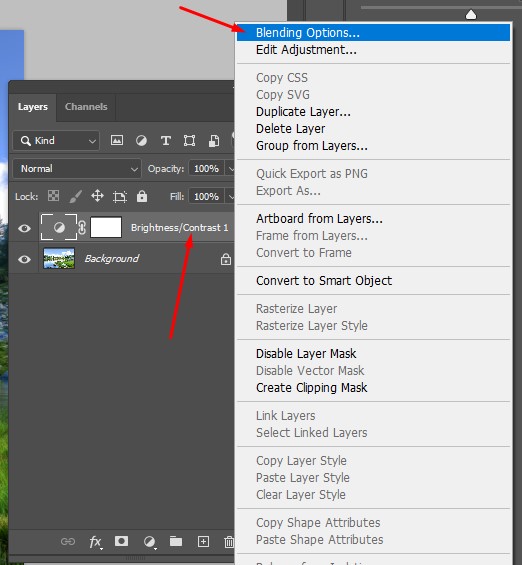
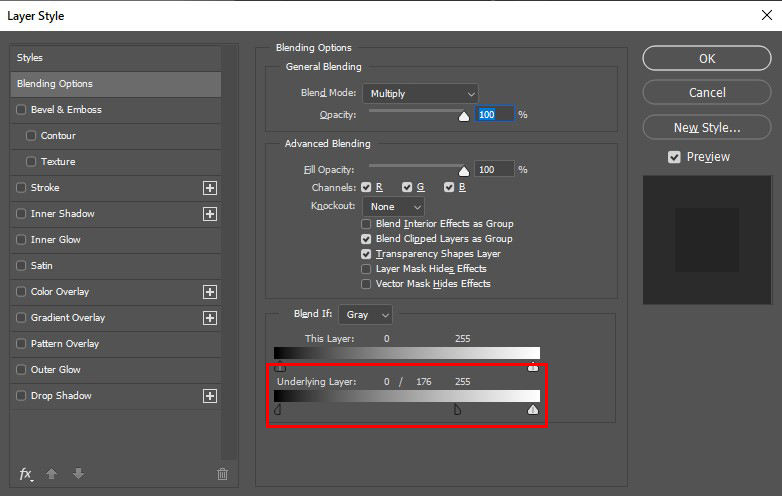
STEP 4. If you aren’t satisfied with the result of setting adjustment, right-click on the layer and select “Blending Options”.
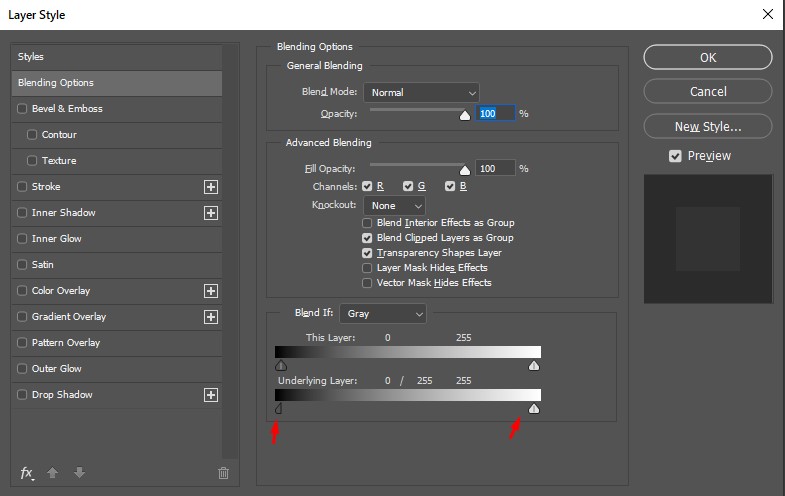
STEP 5. Use the screen as a reference, press Alt, click on the bottom slider to split it and move one part to the right.
STEP 6. Done. Merge the layers and save the photo.
STEP 1. Download your picture and go to the "Layers" panel.

STEP 2. Click "New Fill or Adjustment Layer" at the bottom and select "Levels" from the drop-down list.
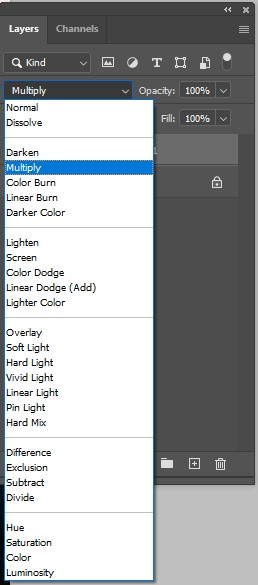
STEP 3. If you want to darken an image, then change the parameter in the "Multiply" blending mode. The "Screen" mode is suitable for too dark photos.
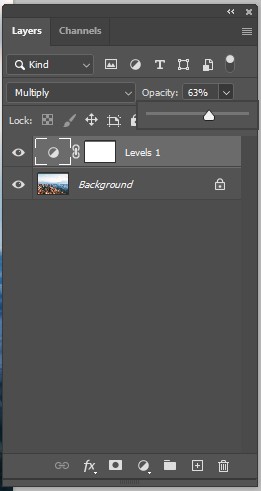
STEP 4. If you’ve applied an adjustment layer you noticed that the image looks too bright or dull, use the "Opacity" options. I recommend setting the value to 50-65%.
STEP 5. If you like this effect and want to leave it only on the bright part of the image, double-click on the layer and use the Alt key to split the slider. Then, move one of its parts to the right like in the example.
STEP 6. Done. Merge the layers and save the photo.
STEP 1. Upload a RAW photo.
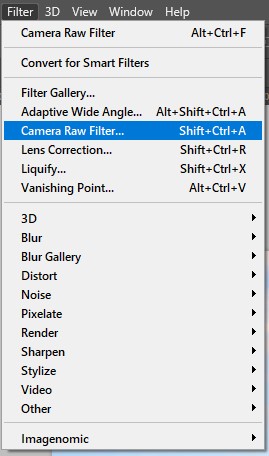
STEP 2. Select “Filter” – “Camera Raw Filter”.
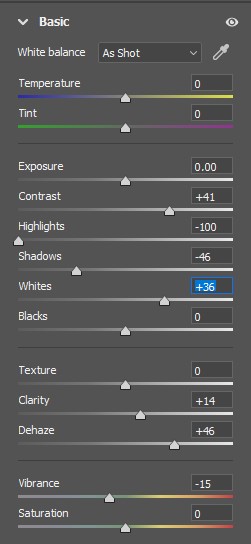
STEP 3. Find the “Dehaze” and “Highlights” sliders and move them to adjust the settings. You can use the same settings as in the screenshots.
STEP 4. Done, save the photo.
You can improve a RAW photo in the CameraRAW module.
Yes, this action can be automated. But you should first learn how to create an action in Photoshop to avoid further possible problems.
JPEG images are suitable for publishing on the net and social networks. You only need to choose the right size. However, if you want to continue image editing in the future, then you can choose a PSD format.
You are likely to use an older version of the software. Check out the quick guide to get the latest free Photoshop version.
Now you know how to fix overexposed photos in Photoshop in 2 ways. However, it will take quite a long time if you have hundreds of photos to correct. In this case, using actions is a great option.
The FixThePhoto team of professional designers and retouchers has selected the most effective actions that can fix your dark or overexposed images in one click. All you have to do is check out the quick tutorial on how to install Photoshop actions and apply the ready-made settings to your photos.


