You don’t need to be a professional retoucher to brighten a photo in Photoshop. Even a beginner can handle this task, as Photoshop allows dealing with small exposure issues in a matter of moments. The only tool you need for this job is an adjustment layer.
This guide will teach you how to brighten photos in Photoshop with minimum effort. By following one of these Photoshop tutorials, you’ll enhance your photo in less than a minute.
The easiest and most obvious way to brighten photo in Photoshop is to adjust the brightness. To do so, you don’t even need to look for suitable Photoshop actions. Just select the photo you want to enhance and follow the instructions below.
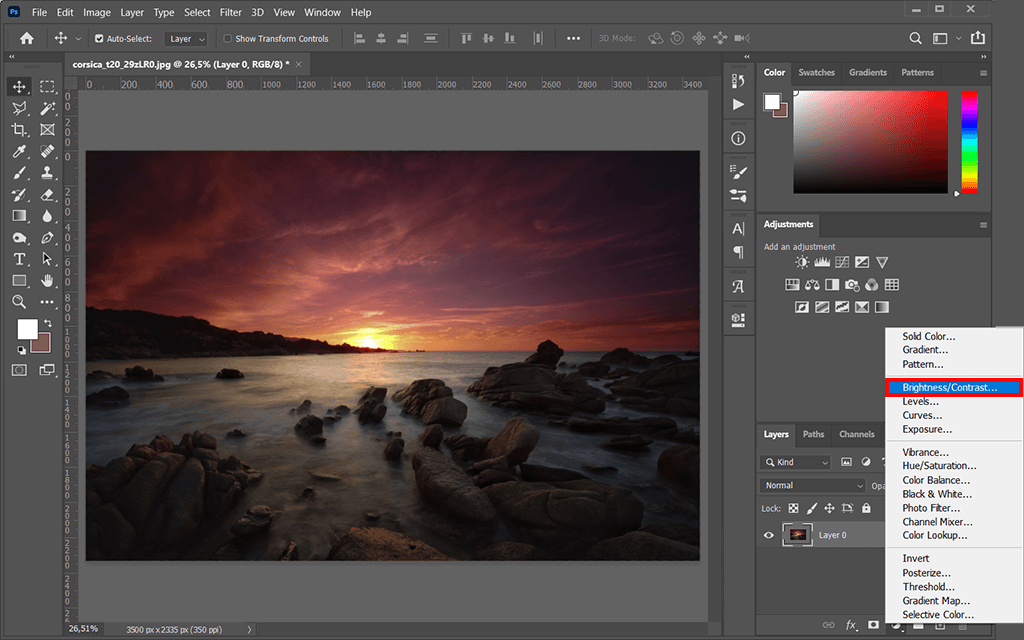
Open the photo. Now, create a new Adjustment layer on the Layers panel, select Brightness/Contrast.
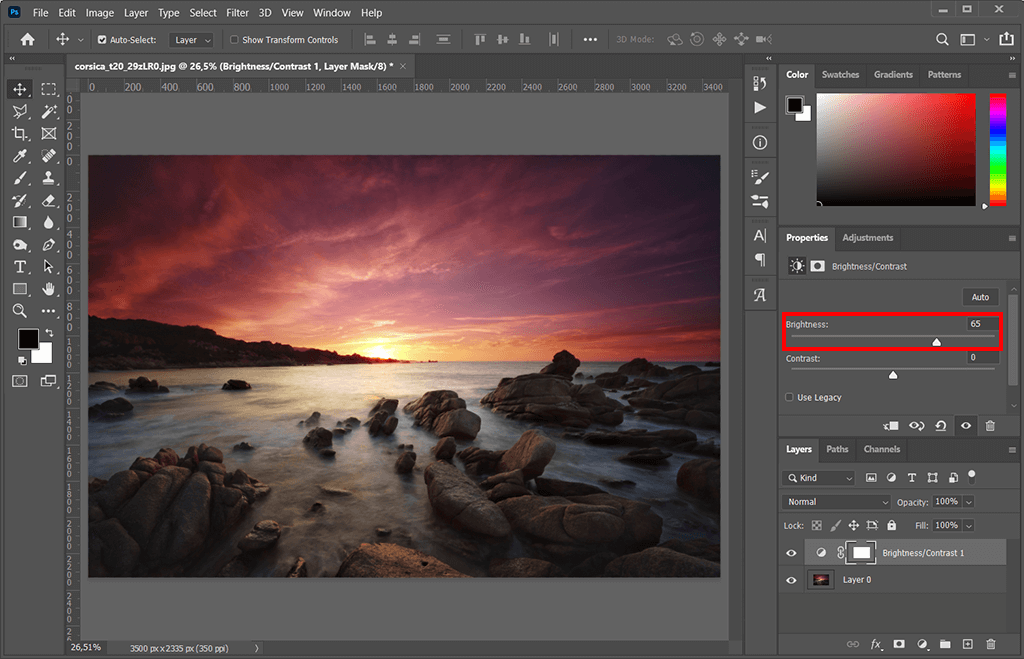
Next, move the “Brightness” slider a bit to the right until you’re satisfied with the result. This menu also lets you alter the contrast if that would be beneficial for the image.
The second Photoshop lighten image method you can choose is Curves. While this feature might seem a bit scary initially, once you learn how to use curves, they’ll become your best editing friend. This method is also applicable if you need to whiten teeth in Photoshop or change hair color in Photoshop.
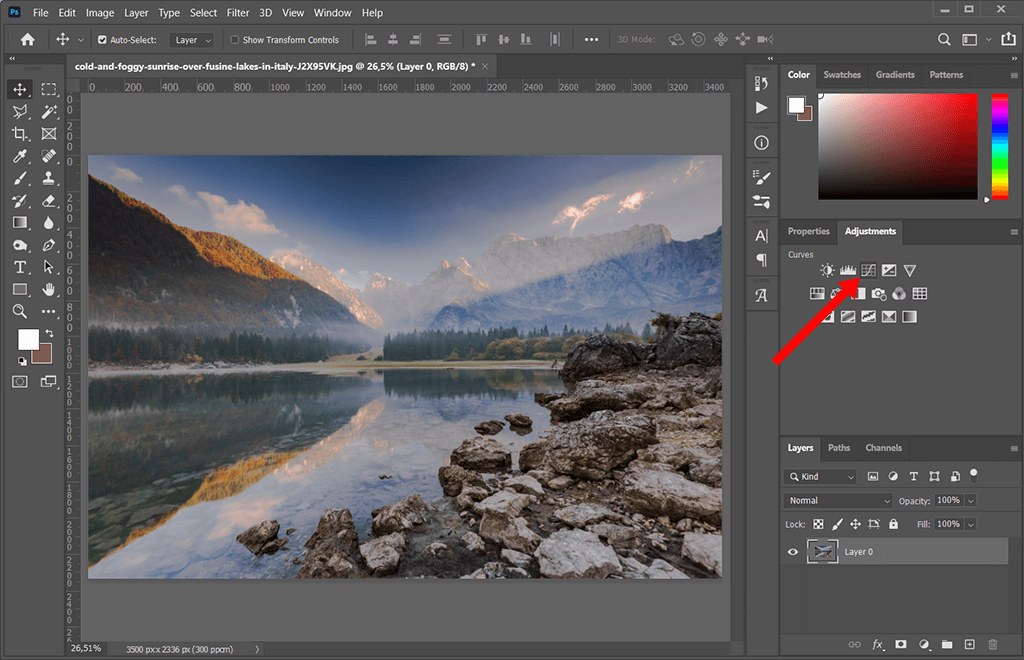
Open the photo. Locate the Curves menu by either clicking Image > Adjustments > Curves or pressing “Ctrl” or “Cmd” and “M” simultaneously. Click the icon like the one in the example.
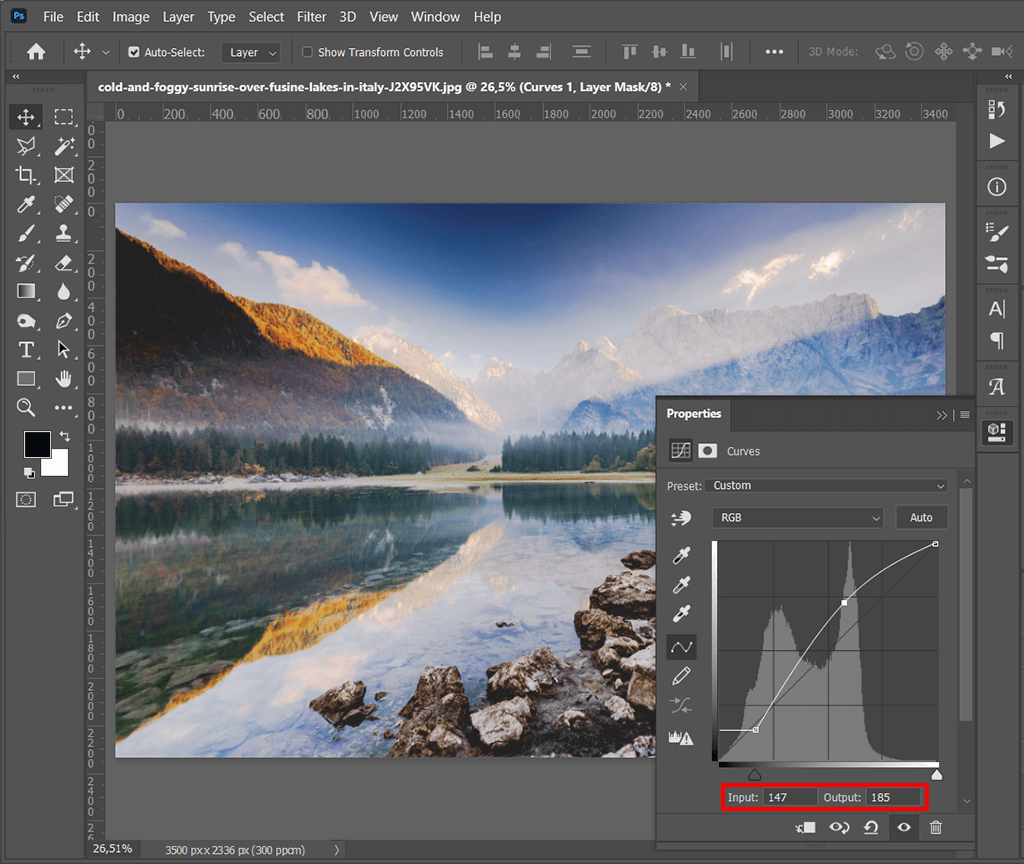
You’ll see a small graph akin to the one you can see below. To make the image brighter, you merely how to drag the curve upward so that it looks like mine in the example. Be careful not to place it too far away from the starting point. Once you’re satisfied with the result, press “OK”.
If you’re dragging around the line but nothing is happening, check if the “Preview” option is enabled.
Creating an Exposure Adjustment layer is one of the simplest ways of learning how to brighten a photo in Photoshop. Akin to the previous tutorials, this method won’t take up more than a minute of your time. By the way, you can also use an Adjustment layer to change eye color in Photoshop.
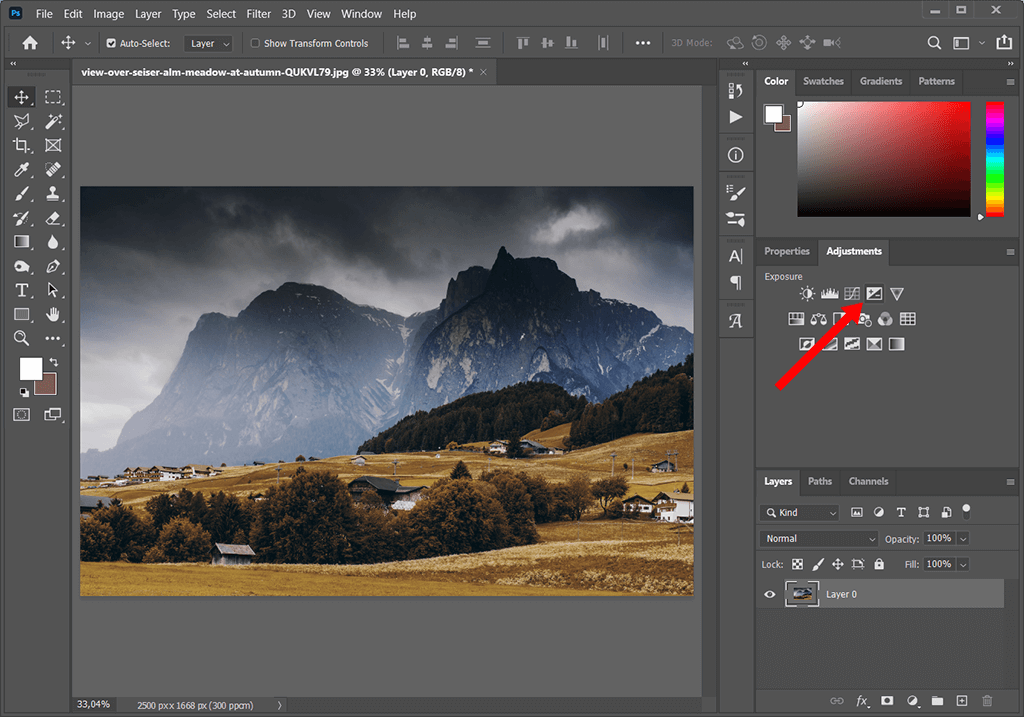
Open the photo, add an Exposure Adjustment layer, and click the icon that is shown in the example.
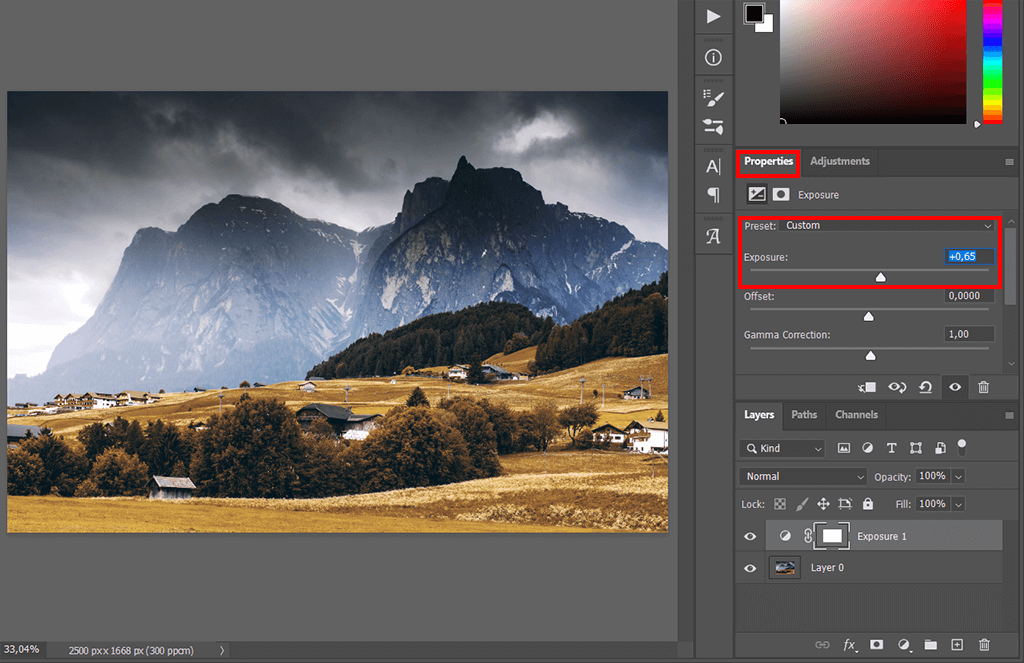
After making an Exposure Adjustment layer, you’ll be able to tinker with three sliders: exposure, offset, and gamma correction. Drag the exposure to the right to brighten the image. When working with an Exposure Adjustment layer, it’s advised to apply changes in small increments since these parameters can significantly impact the photo even with a tiny change.
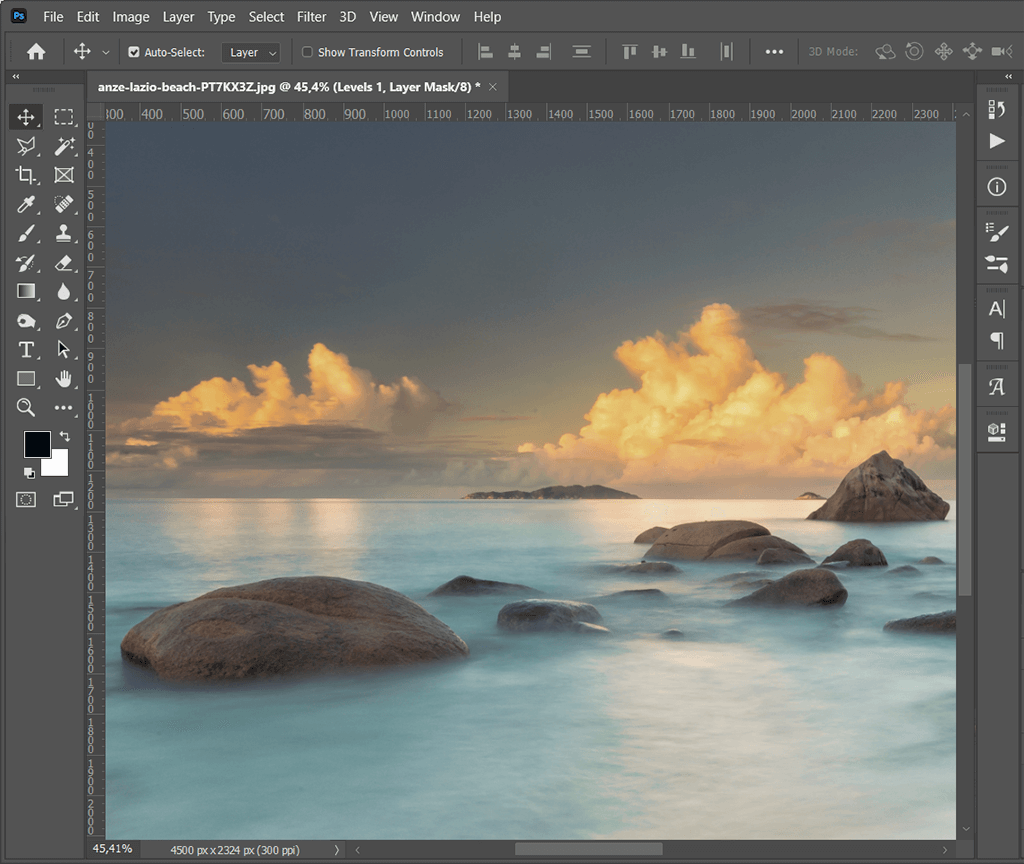
Other than Exposure and Curves Adjustment layers, another tool you can use for learning how to brighten an image in Photoshop is Levels. This photo editing tip will help you achieve better precision and flexibility in image retouching.
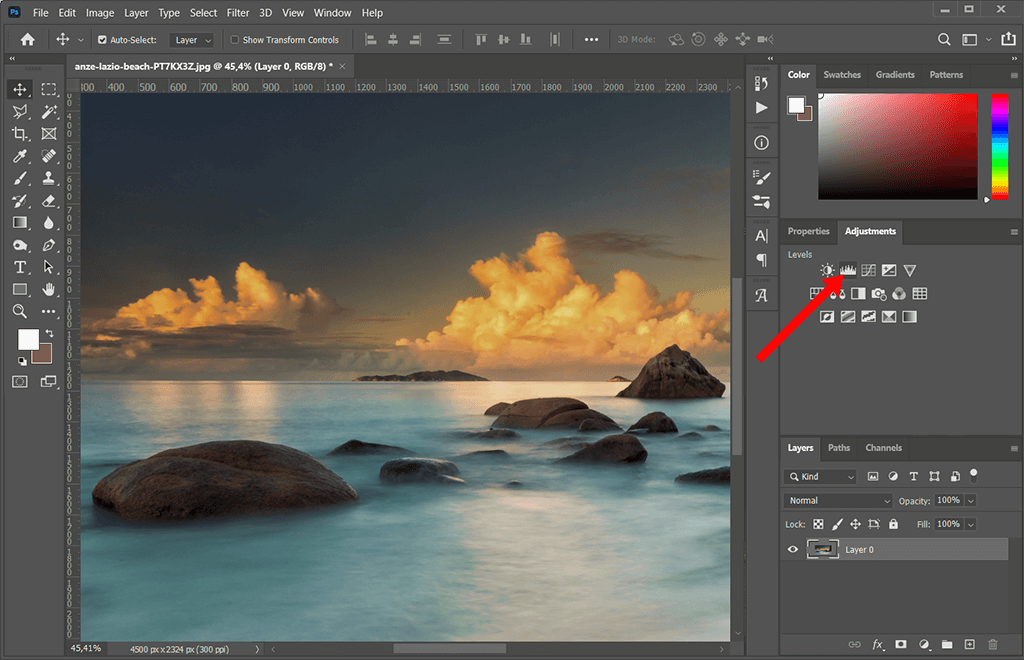
Open the photo and add a Levels Adjustment layer, click the icon shown in the example.

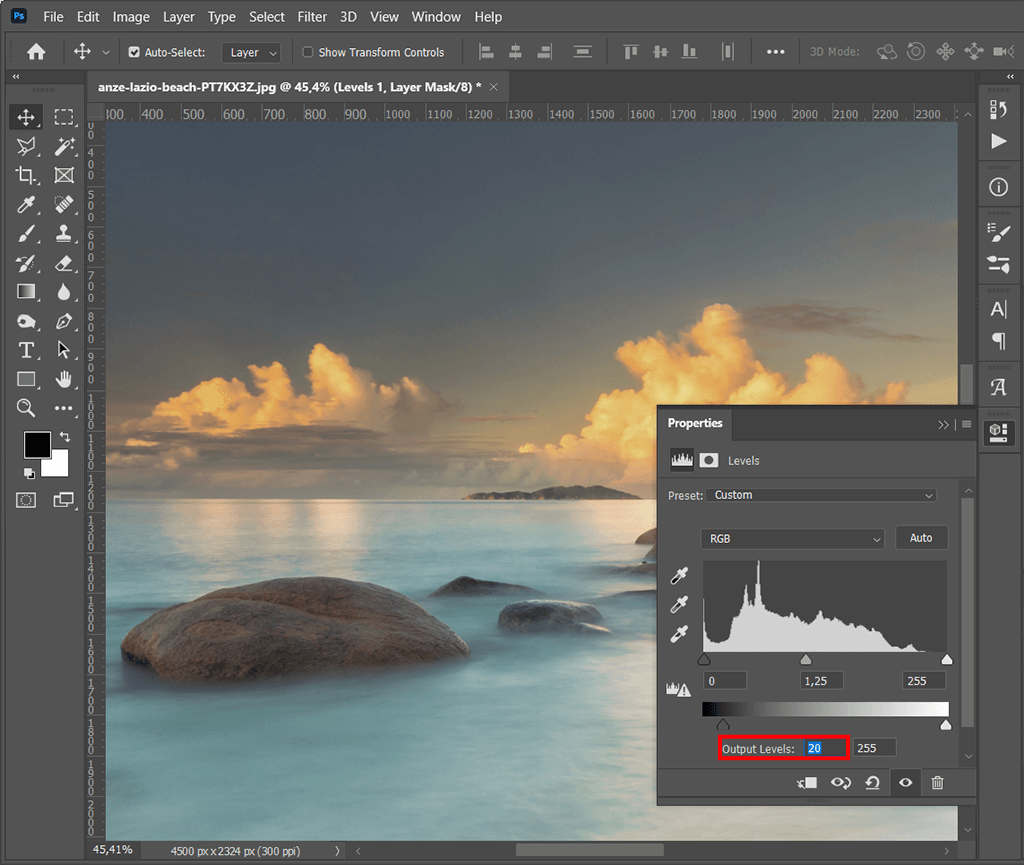
Levels allow you to drag the central point to the left to lighten the mid-tones or the right point to the left to brighten the highlights (tread carefully so that you don’t overblow them).
This feature also lets you move the black output slider to the right, achieving a hazy-like brightness in the process.
At this stage, you’re going to have a brightened photo. However, you can continue experimenting with the Levels Adjustment layer by changing the blend mode.
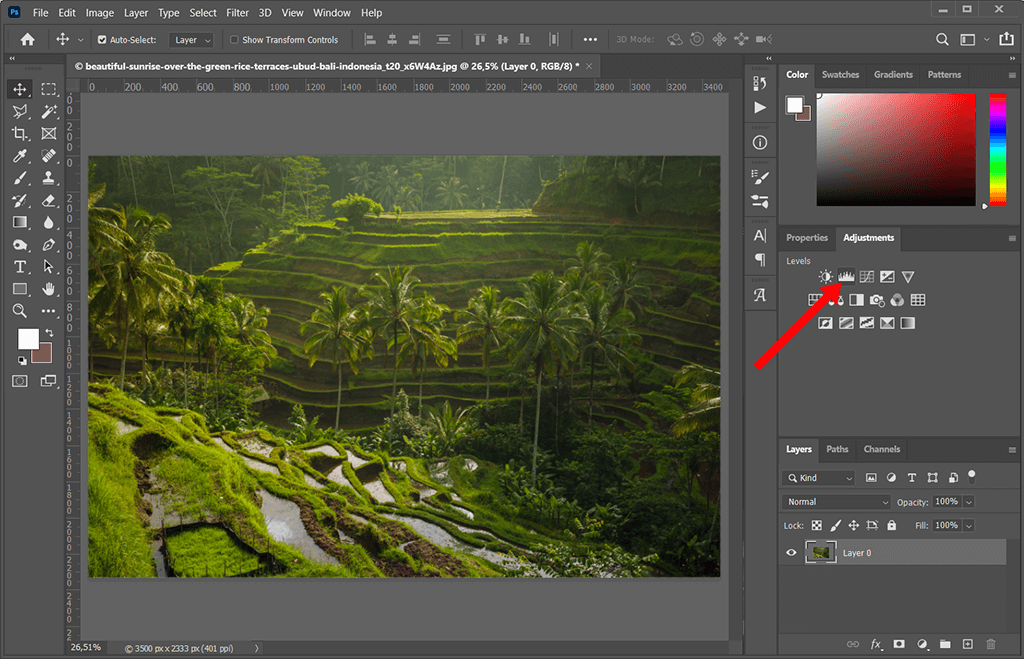
Open the photo again and add another Levels Adjustment layer.
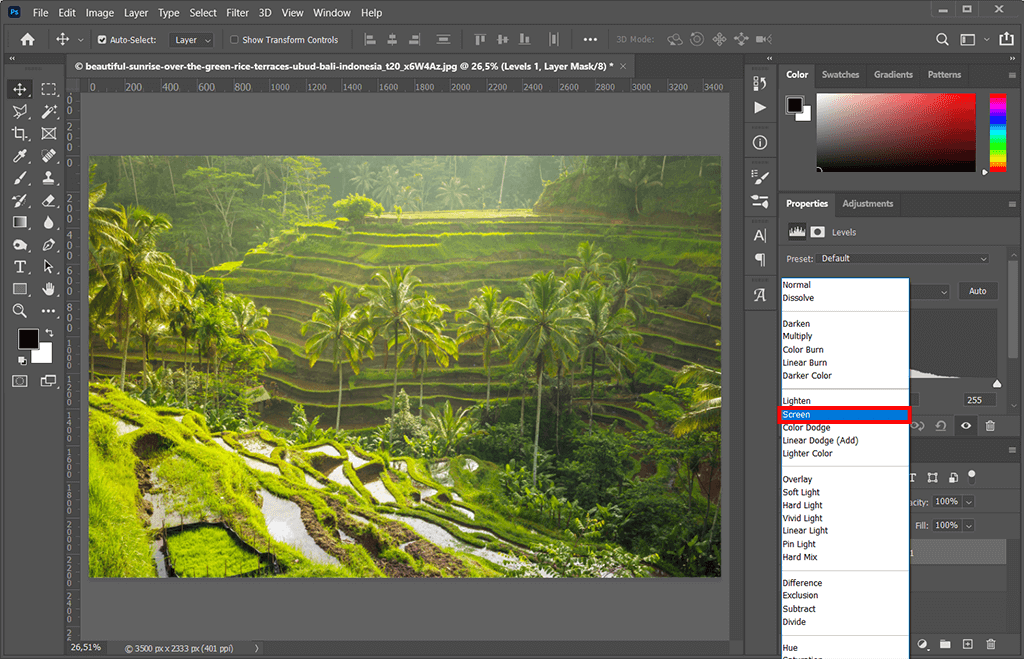
Pick the new Levels layer and change the blend mode. Go to Blend mode > Screen. Done, your photo is now brighter.
Don’t have time to enhance dozens of photos from the last photoshoot by yourself? To transform your amateur photos into professional ones, make use of a high end retouching service. The retouchers will brighten the photos, while also enhancing the makeup, hair, and colors.
You can improve the quality of your photos with a single click with the help of professional actions. Here you'll find more than 300 free actions for photographers of any genre. The collection includes tools for enhancing portrait, wedding, and lifestyle photos. You can use these filters in Photoshop CS4-6 or Photoshop CC.


