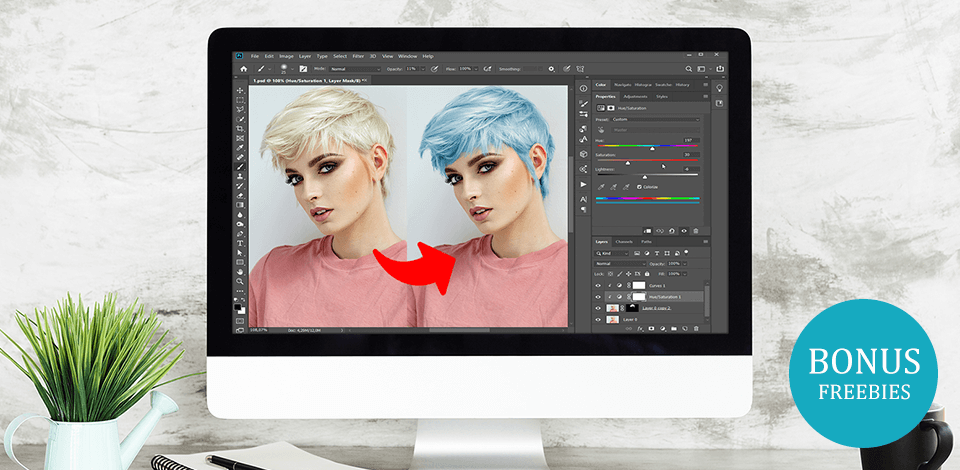
Want to experiment with your hair color without dying it? Changing your look is easy if you know how to change hair color in Photoshop. Don’t risk ruining your hair with toxic hair dyes. I’ll show you how to naturally alter its hue without losing all the textured details. Follow the steps below for quick and realistic results.
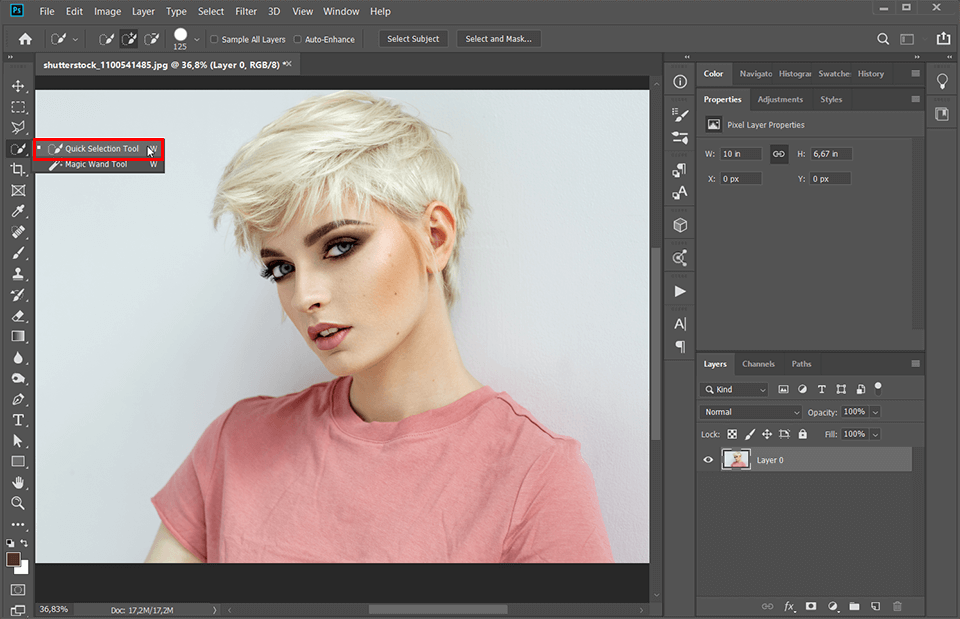
Launch Photoshop. Upload the photo of your choice. Grab the Quick Select Tool (W) in the Tools panel.
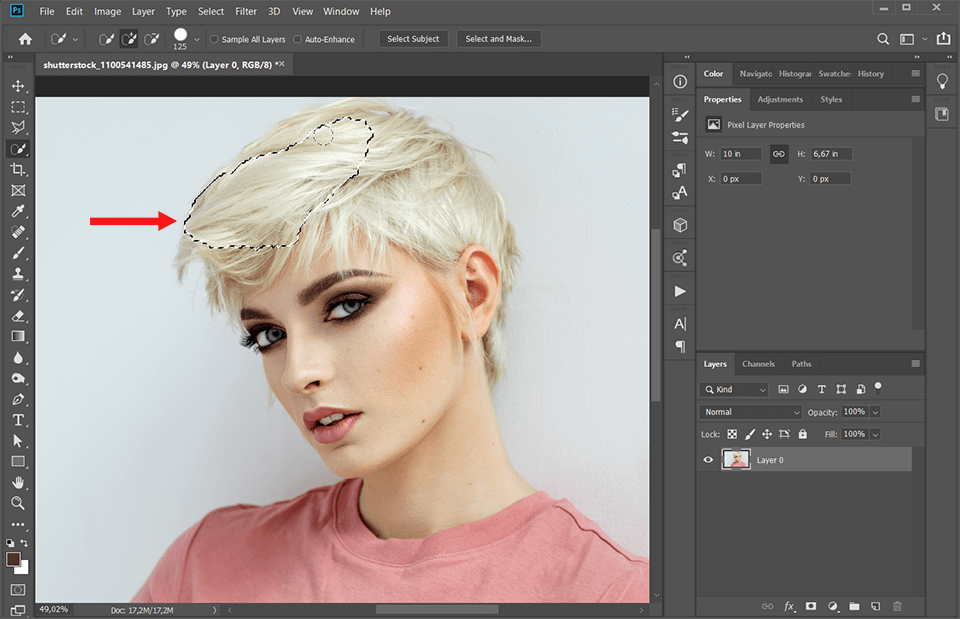
The next step of our change hair color Photoshop tutorial is selecting the hair. To include more areas, just click and drag over them. If you selected more than intended, you can remove content, by pressing the Alt/Opt keys as you click the part you want to remove.
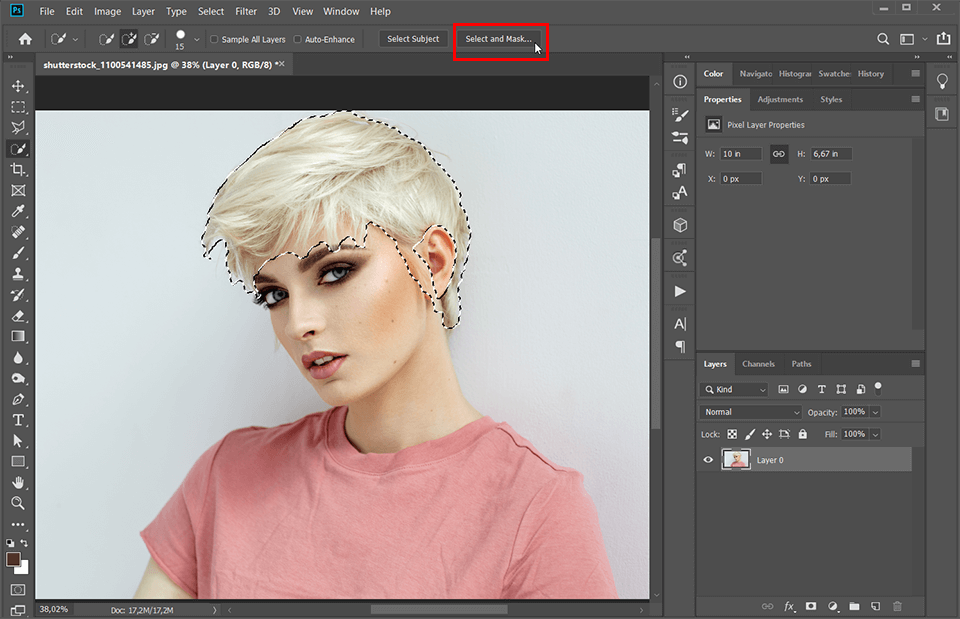
To make our selection more accurate, click on the “Select and Mask’. You’ll see it in the Options Bar along the top. This will bring up a new window, where you’ll be able to further improve your selection.
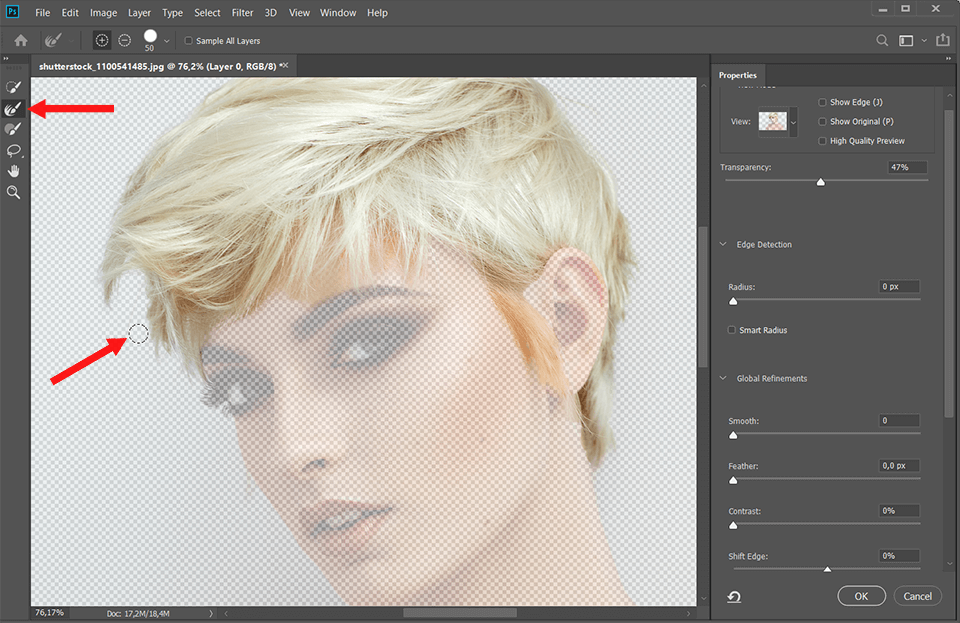
In a newly appeared window, you’ll see the toolbar on the left. It contains a bunch of tools that will help us refine our hair selection.
We’ll be using the Refine Edge Tool, as it’ the best for which is second from the top. It will help you deal even with the most difficult hair selections. Outline the rough edges to make the selection more accurate.
Remember, holding down the Alt/Opt keys will help you add or remove content from it.
After that, make sure to tick the boxes next to the “Smart Radius” and “Decontaminate Colors” options. The latter will help you fix any color fringing issues while the “Smart Radius” option will apply a smaller radius to clear-cut edges and a bigger one to more complicated ones.
Open the dropdown list next to the “Output to” box. Select “New Layer with Layer Mask.”
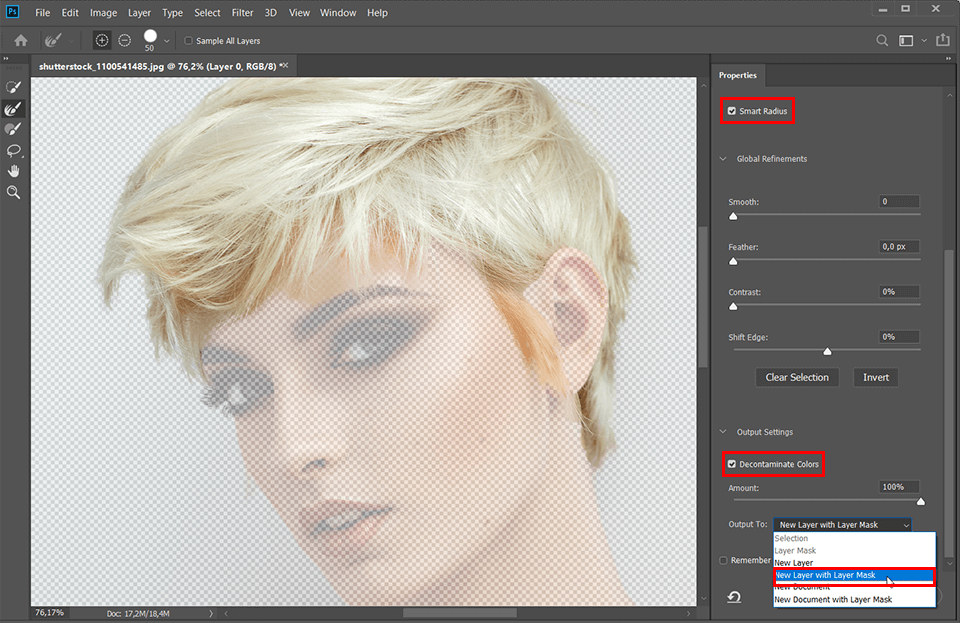
Press “OK” to apply the changes. Once you’ve finalized them, your selection is ready.
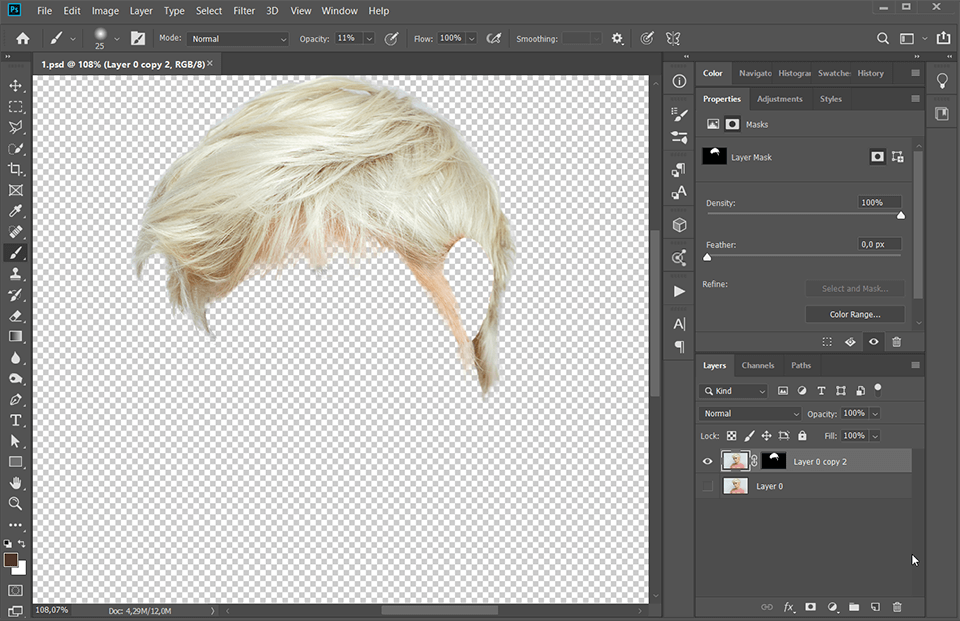
Once you have done that, go to the Layers panel. If it’s not activated, you’ll find it under Window > Layers. If you’re a fan of Photoshop keyboard shortcuts, use the F7 key.
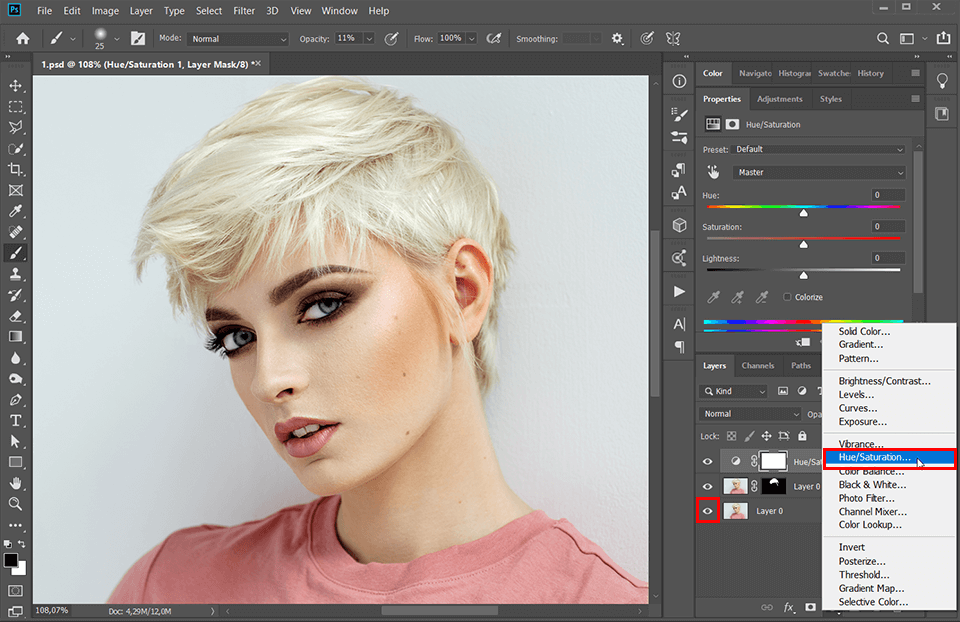
Then, activate the background layer. Add 2 adjustment layers: Hue/Saturation, Curves.
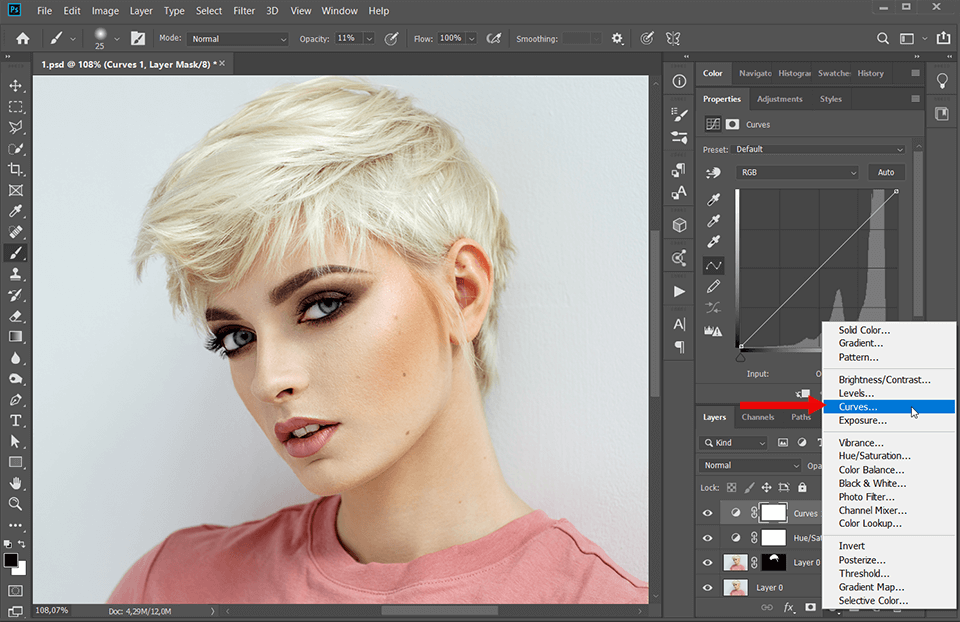
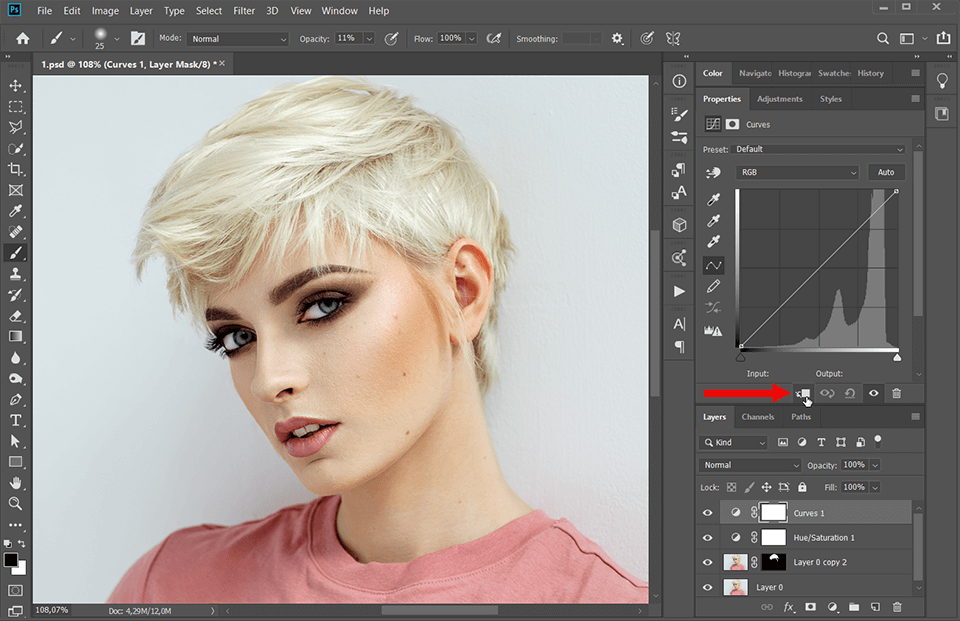
We don’t want our changes to be applied to all of the layers below. We only want to influence our current layer. In order to do this, click on the Clip Button on both Adjustment layers.
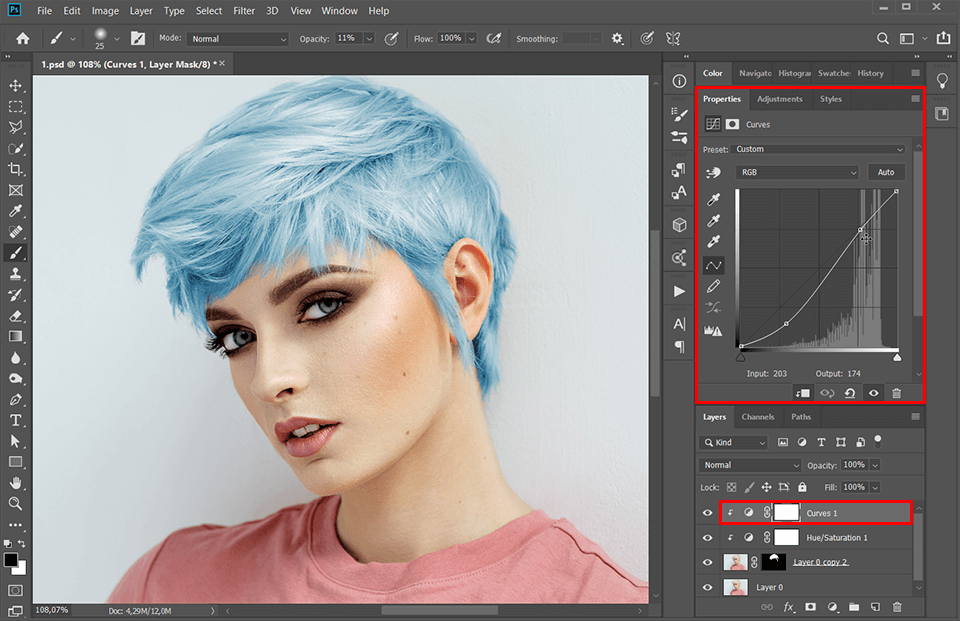
Use the Curves tool to achieve the desired color. You may need to experiment with the values a bit to get the color you like.
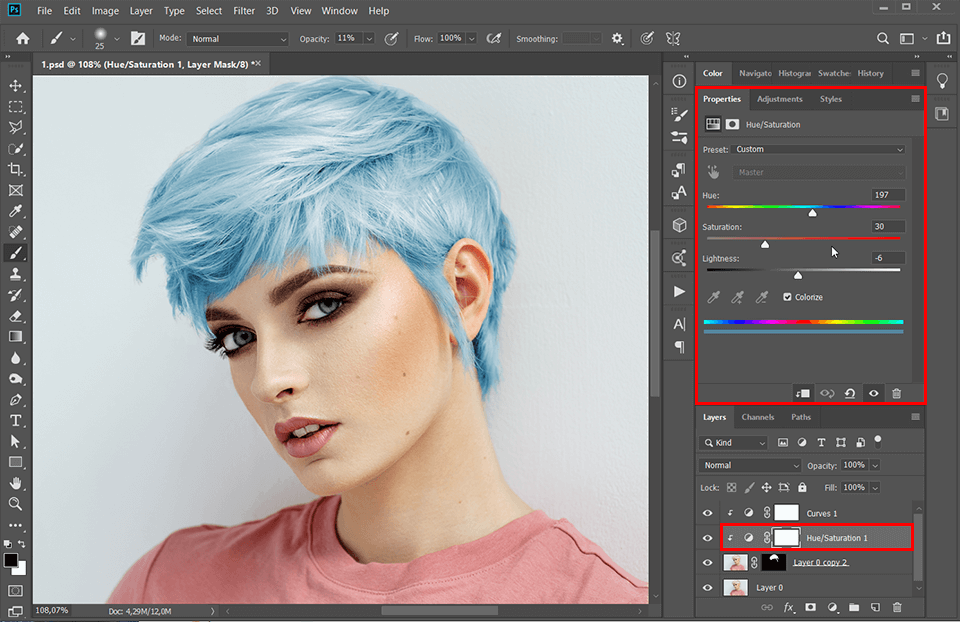
Finally, we’re going to further adjust the color. Once the Hue/Saturation window pops up, use the 3 sliders to find the exact shade you want. The “Hue” slider alters the overall color, while “Saturation” is responsible for making it brighter or duller. “Lightness” can be used for light and dark adjustments.
Done! You’ve learned how to change hair color in Photoshop. For better photo editing results, you can also learn how to change eye color in Photoshop as well as the color of an object in Photoshop.

One of the most difficult things to deal with in photo editing is hair: you need to learn how to remove stray hairs in Photoshop, as well as how to shape and fill in hair for your beauty, fashion, or portrait photographs. To make your life a little easier, I am offering you a bundle of high-quality hair brushes. Coming in a set of 5, these tools will help you create luscious locks with a simple click.