Took a great photo and realized that the colors don’t complement each other? Have a specific hue that you don’t like or need to show a product in several colors? Learn more about how to change the color of an object in Photoshop in 7 simple steps.
I’m going to show you how to select any color in a photo and easily alter it using a single Adjustment Layer. This unique technique can replace any color and can be used on any photo. Besides, you can use this approach when working in any online photo color editor.
Select the color range you’d like to alter from the dropdown list. A simpler way to do it is by using the Targeted Adjustment Tool right next to it and clicking on the area, that needs altering.
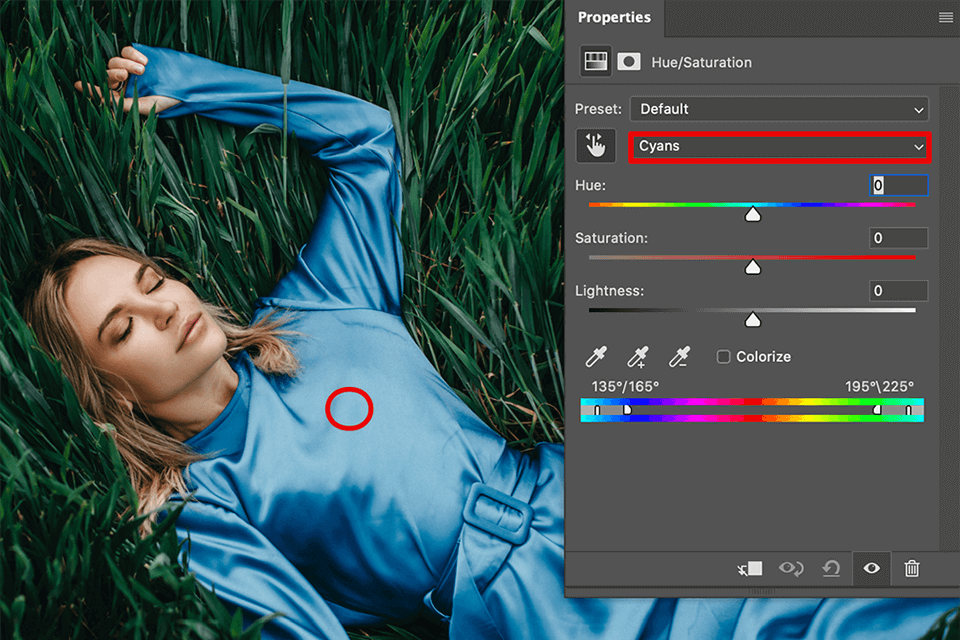
Start altering the color by using the hue and lightness sliders to find the desired shade. Drag them left or right. Note, this step will affect the entire image. For example, if you change the cyan range, this will alter everything of that color in your picture.

Next, invert the layer mask by clicking Ctrl+I (Command+I). If you look at the layer’s thumbnail, the inversion will make white parts black and vice versa.

An important part of masking in Photoshop is editing the mask to make sure that only the needed areas are affected. In order to do this, select the Brush Tool (B). Press the [ or ] bracket keys, if you need to increase and decrease its size. To remove the area from the mask, paint it with black. To add to it, paint the area with white.

Since this workflow is non-destructive, if you change your mind, you can go back and experiment with the hue at any point of your editing process. You can also use this technique to change eye color in Photoshop and whiten teeth in Photoshop.


Tired of photos with dull colors? Use these 5 absolutely free actions created by professionals to enhance the colors in your portraits. These actions will make them vibrant, and eye-catching.
These actions are a game-changer for photographers, graphic designers, and anyone who wants to effortlessly enhance their images. With just one click, you can instantly apply stunning color effects, breathe new life into dull photographs, and create captivating visuals that will leave a lasting impression.
Whether you're a professional photographer looking to streamline your workflow or an amateur enthusiast seeking to take your images to the next level, these actions will save you valuable time and effort, allowing you to focus on what you love most – creating incredible visuals.


