
If you’d like to learn how to delete a background in Photoshop or make it transparent without much effort, here is a great tutorial by Fixthephoto retouchers. It is written in a simple way so even beginner users will cope with the task. The recommendations given below are equally helpful for handling images of different genres. You’ll also understand how to isolate an object and how to keep its edges smooth while performing different manipulations.
In case you are interested in deleting just a background text, without removing the background itself, here is a great tutorial about how to remove text in Photoshop without ruining the background.
First, open your image in Photoshop and look at the layers panel. If for some reason you don’t have this panel, then you need to turn it on/off by pressing the F7 key or going Window > Layers. There should be one layer there; the program defines it as the Background. There is a lock icon on the right of the layer. It means that the layer is locked for editing and currently you can’t remove background from image.

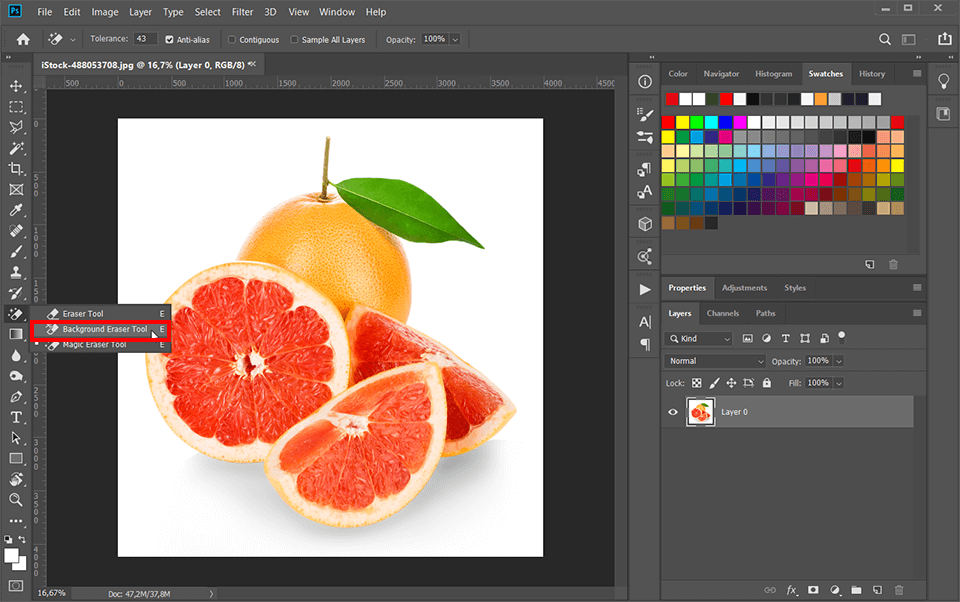
By default, the Background Eraser is located behind the Eraser Tool. To activate it, right-click (Win) or Control-click (Mac) on the Eraser Tool > choose the Background Eraser Tool from the drop-down menu.
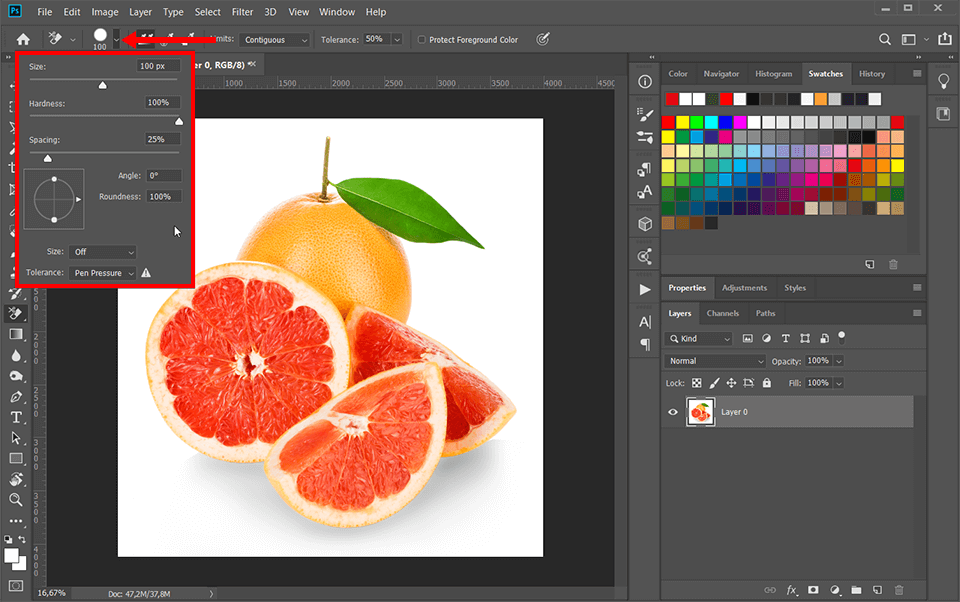
You need to choose the same settings as shown in the screenshot below. At this stage, you need a Hard Round Brush. The Background Eraser Tool is actually a brush, and like the other Brush tools in Photoshop, you can adjust its size right from your keyboard. Press the left square bracket key "[" several times to make it smaller, or the right bracket key "]" to make it larger.
You can also adjust the hardness of the edges by pressing a Shift key. Press Shift + left square bracket "[" several times to make the edges softer, or Shift + right square bracket "]" to achieve the opposite effect.
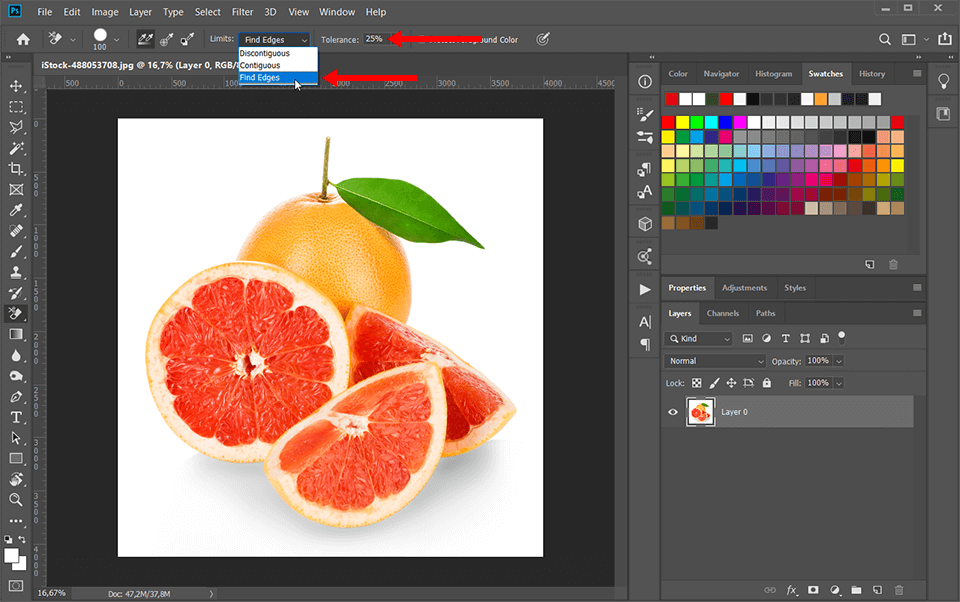
The parameter that largely affects the success of Photoshop deleting background process is the Limits of the Background Eraser. When the program grasps which color you want to get rid of, Limits gives the cue of where to look for appropriate pixels. While altering Limits, you can choose Contiguous, Discontiguous or Find Edges modes. I recommend selecting “Find Edges”.
You also need to adjust Tolerance, which “tells” how much a pixel’s color differs from the sampled color not to confuse Adobe Photoshop. By default, this value is set to 50%, but you need to go as low as 25%.
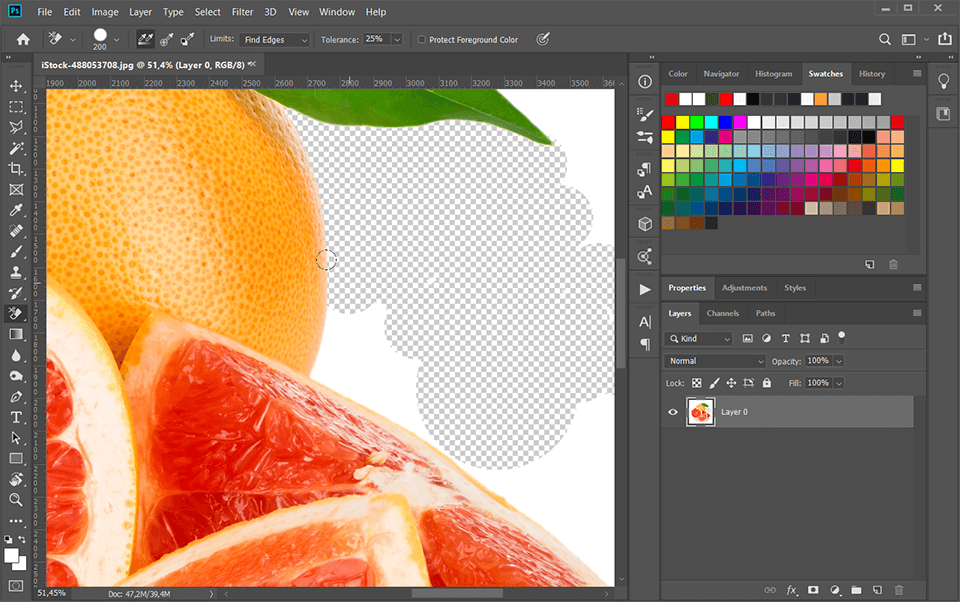
Now you can increase the size of the Eraser and start deleting background in Photoshop. Don’t restrict your movements, as the tool won’t erase your main object, but will work only with the background. Your background will be painted over with a checkerboard, which denotes a transparent background. You can place the object on another background that suits you or leave it on a transparent one. If you want to expedite the process of background removal in Ps, have a look at the Slazzer plugin. It allows completing the task with a single click.
Once you are done removing the background, take a closer look at the result to make sure there are no unnecessary parts of the background left. Export the image as a PNG file. Click File → Export → Quick Export to PNG. If you save it as JPEG, all our hard work will go in vain, as the picture will be saved with a white background. JPEG doesn’t support transparency.
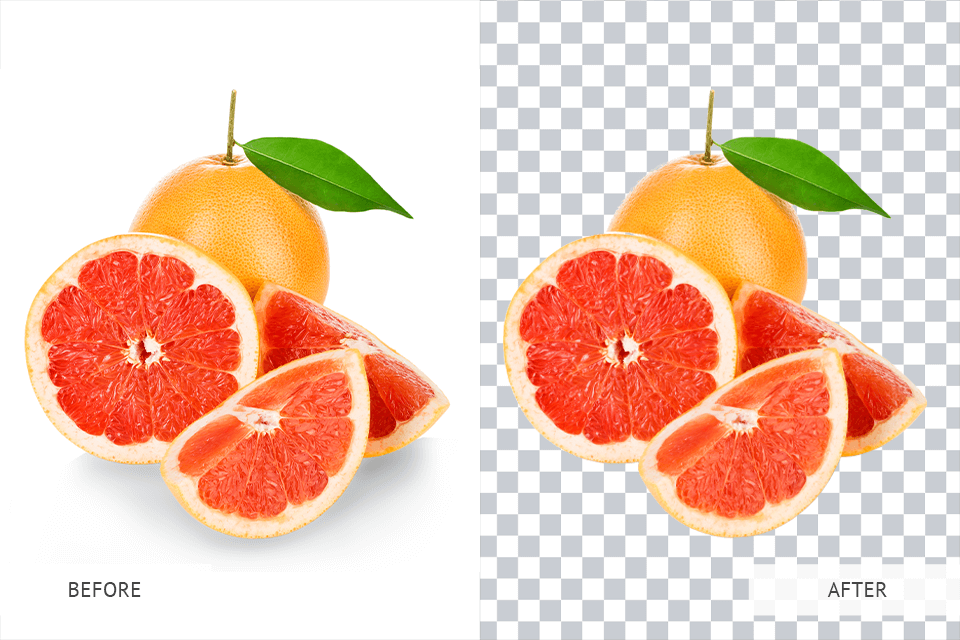
Be careful! While deleting background in Photoshop, you simultaneously remove the shadows that the object cast. That’s why, it is a good idea to learn how to add drop shadow in Photoshop. The process boils down to 8 simple steps, but guarantees realistic results.

Want to perform mind-blowing Photoshop manipulations in a couple of clicks without spending hours learning the program? Take advantage of these actions and enjoy the full potential of this photo editing software.