
Photo editing is of paramount importance for those who want to create eye-grabbing and professionally-looking pics. Having over 10 years of experience in this field at FixThePhoto, I created this guide with handy tips about basic photo editing for beginners that you can take advantage of when editing pics.
There is no doubt that JPEG format is the best for quick snapshots, but serious editing is only possible when using RAW files. The RAW format allows tweaking the exposure, WB, color, and more considerably. As for JPEG files, they are not for heavy editing. But if you decide to apply some serious changes to such files, you’ll have to deal with different undesired artifacts, like banding.
An angle tool, which is offered by many photo editing software for beginners, allows straightening a bit wonky horizon. The outer lines or the edge of the pic will let you straighten your image. However, keep in mind that the picture does not have to be ideally horizontal, as it depends on the perspective. In such cases, you should be guided by your opinion.
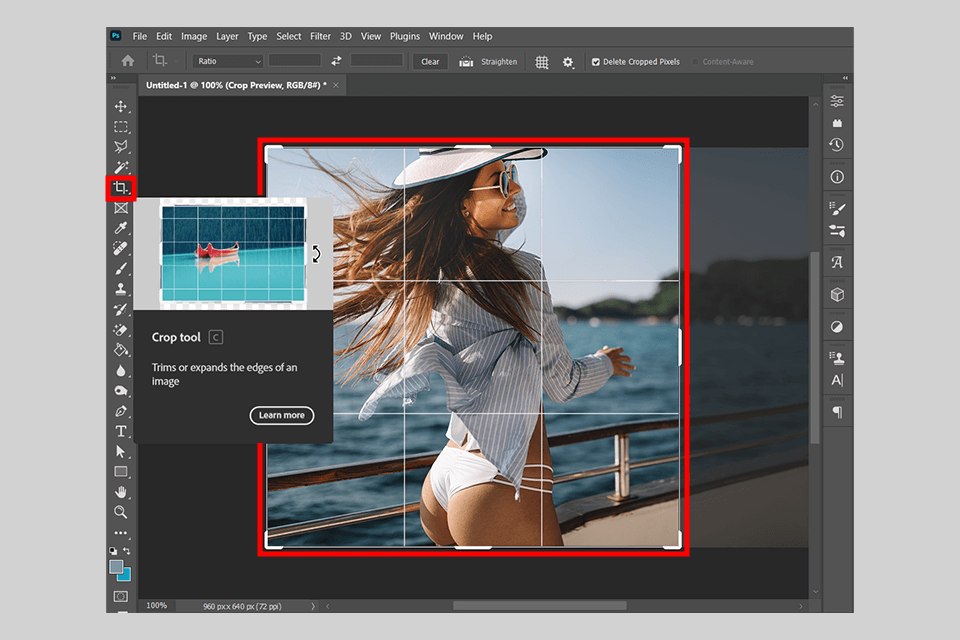
The cropping tool is an ideal instrument for deleting undesired elements from the edges of the pic or changing the position of objects to create an ideal composition. Sometimes, it is possible to transform an image beyond recognition by cutting off only a small section of the photo.
Besides, you need to consider the position of your subject. If the provided tools for adjusting the dimensions of a picture are too confusing for you, have a look at Calculate Aspect Ratio service.
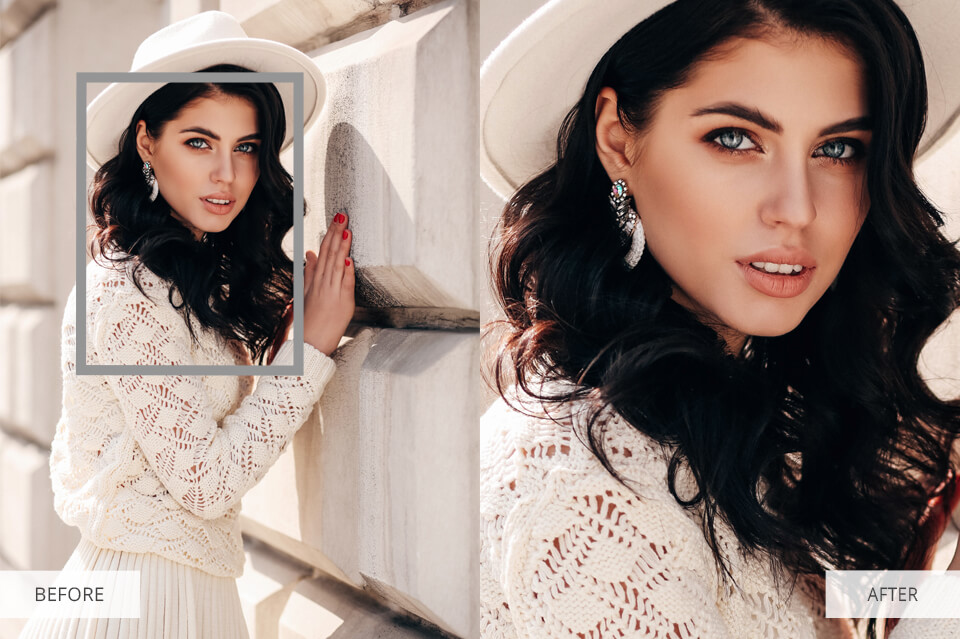
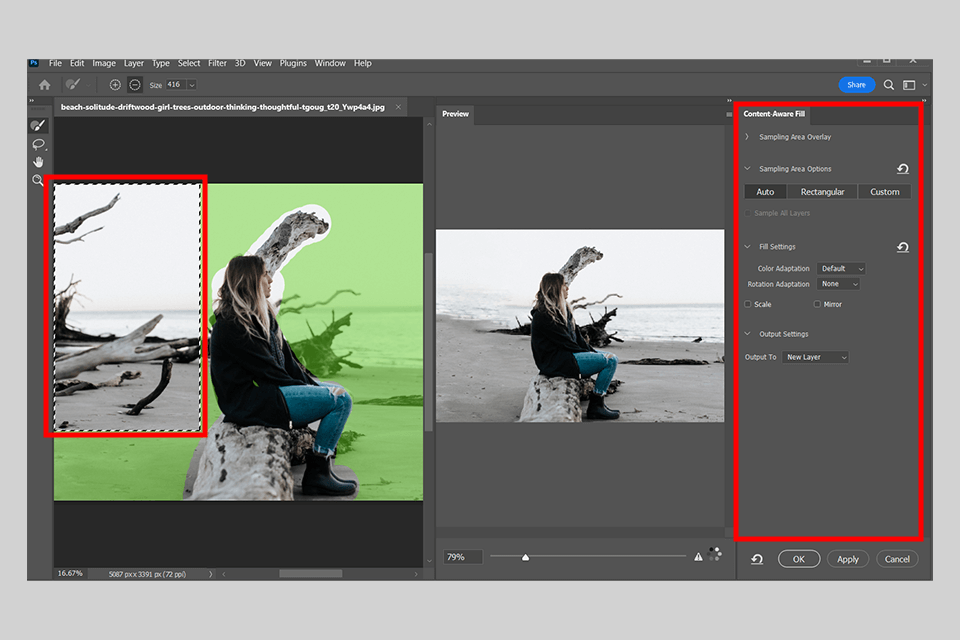
Some photos may have such defects as spots or red eyes that spoil the overall look distracting the viewers’ attention from the subject. It is necessary to delete such elements to polish an image.
Depending on the photo editing software for PC, there are different tools to perform this task like repair brush or the object eraser. They remove the affected image section filling it with a similar or surrounding area.
Increase or decrease the brightness of the entire photo, if the whole image is too bright or too dark. Or adjust the bright areas of the pic. Altering the exposure, you can easily make the photo brighter or save underexposed areas.
A histogram is another handy option. It illustrates how tones in your image are distributed. Peaks toward the middle part of the histogram represent midtones, while peaks directed to the left represent shadows, and peaks forwarded to the right represent highlights.
Take a look at the image, analyze the histogram, and then get the desired result by dragging the Exposure slider.

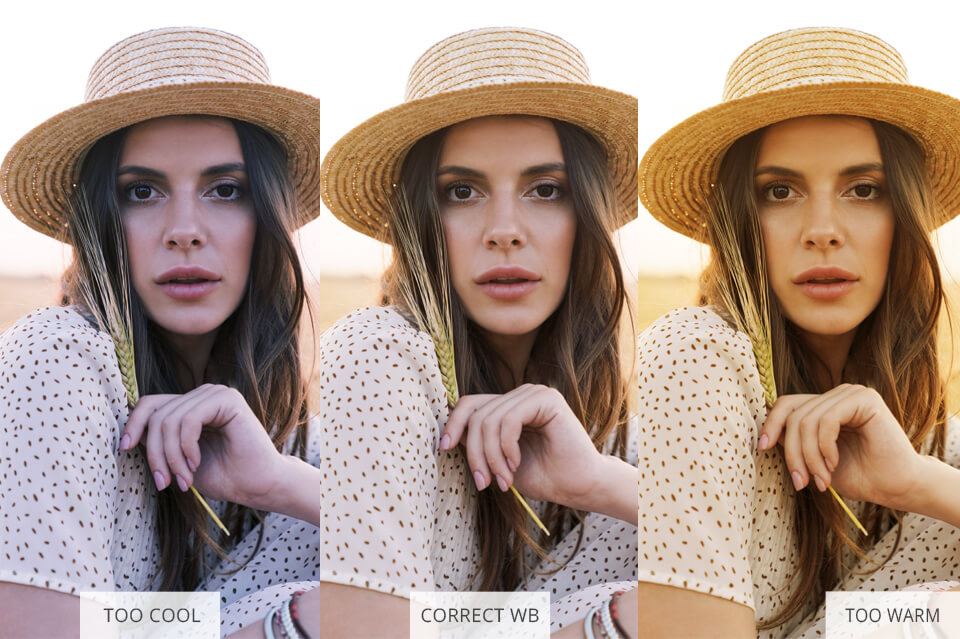
White balance (or temperature) setting can adjust the color temperature of the pic. Tweak it according to your liking or what your photo should represent. A warm color temperature makes the overall image atmosphere more inviting, whereas a cool WB makes the subject more distant.
The majority of image editors let users select a white balance dropper. For instance, you won’t struggle to adjust white balance in Photoshop. To do this, click on the image section that should be a neutral gray or white. It is also possible to correct the tint to neutralize green or magenta hues in a photo.
One of the most important tips for editing photos for beginners is to proceed with editing colors after exposure and WB corrections, which can alter the colors in your image. These options are required to brighten the colors in your pic:
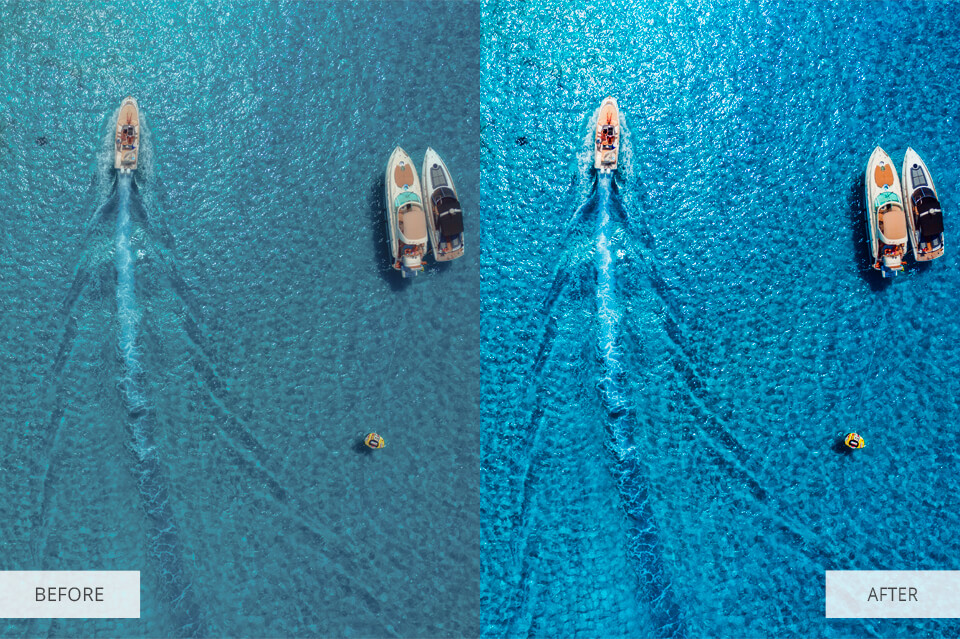
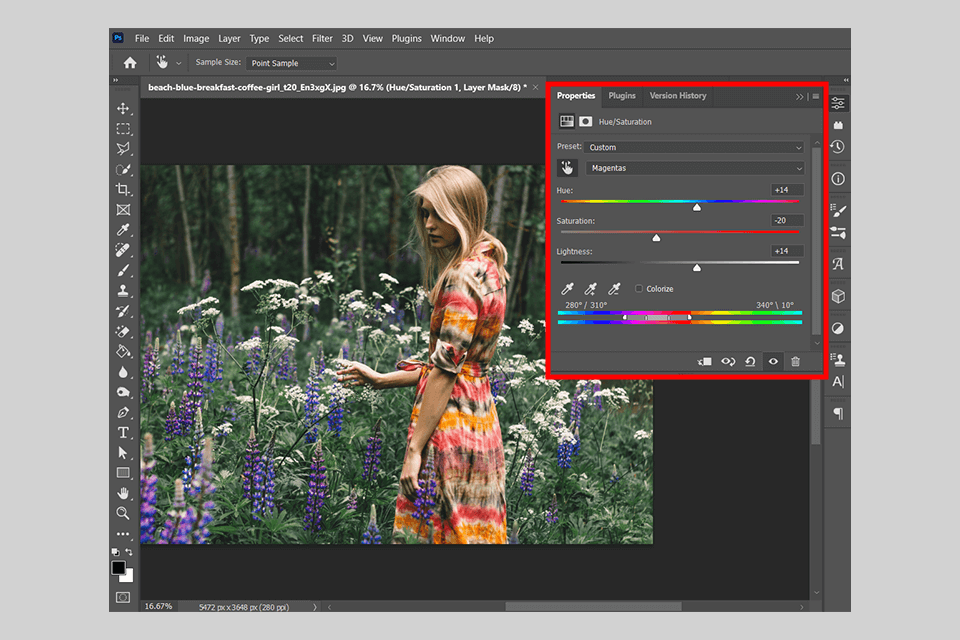
Saturation: By tweaking this setting, you can manage to change the colors in the photo equally. A high saturation intensifies the colors of your image, whereas a low saturation makes them less radiant.
Dynamics: This configuration alters the colors that lack saturation. With it, altering the color effect in a more targeted and subtle way is an intuitive procedure.
Adjustment of individual color channels: Many photo editing tools allow editing individual colors. Use the red color channel to adjust the red color, making it more intensive or desaturated.
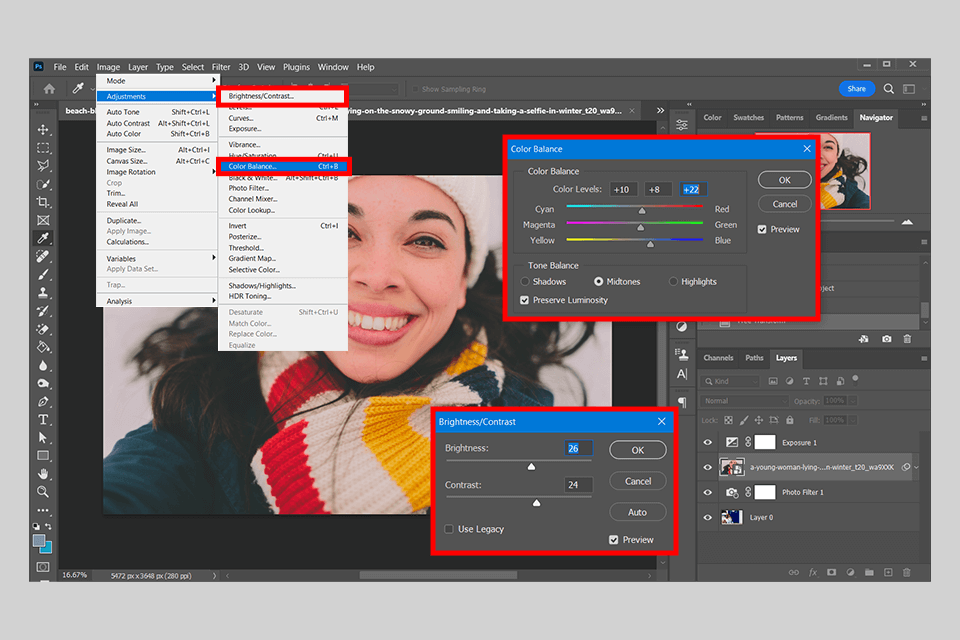
The difference between the darks and lights is an image is described with a term contrast. If an image features intense dark and light colors, the contrast is high, whereas softer darks and softer lights result in low contrast. Usually, RAW files are not so contrasted, but you can fix the situation with the Contrast slider and drag it until you get the desired result.
But do not get overboard with contrast, otherwise, you’ll end up with a spine-chilling effect.
Take note that by decreasing the Contrast slider, you’ll manage to achieve a soft and ethereal look. This works well for images taken in foggy weather, as the low contrast can help create the appropriate mood.
By increasing the photography saturation, you can enhance the overall look of your pic. Some photo editors offer users to adjust the vibrance, which is similar to saturation. However, by tweaking this setting, you will only manage to make subtle changes.
Sometimes, editors need to make images less vibrant or saturated. For example, you’ll need to decrease the brightness of color to create a moody image. Even a slight drop of saturation will let you achieve a sophisticated cinematic effect.
RAW photos often suffer from blurriness. Leverage photo sharpening software to fix this issue. Frequently, even subtle changes can make your photos look more realistic.
One of the handiest photo editing tips for beginners is to use the Masking slider to exclude the image sections that you do not want to be sharpened like a subject’s face.
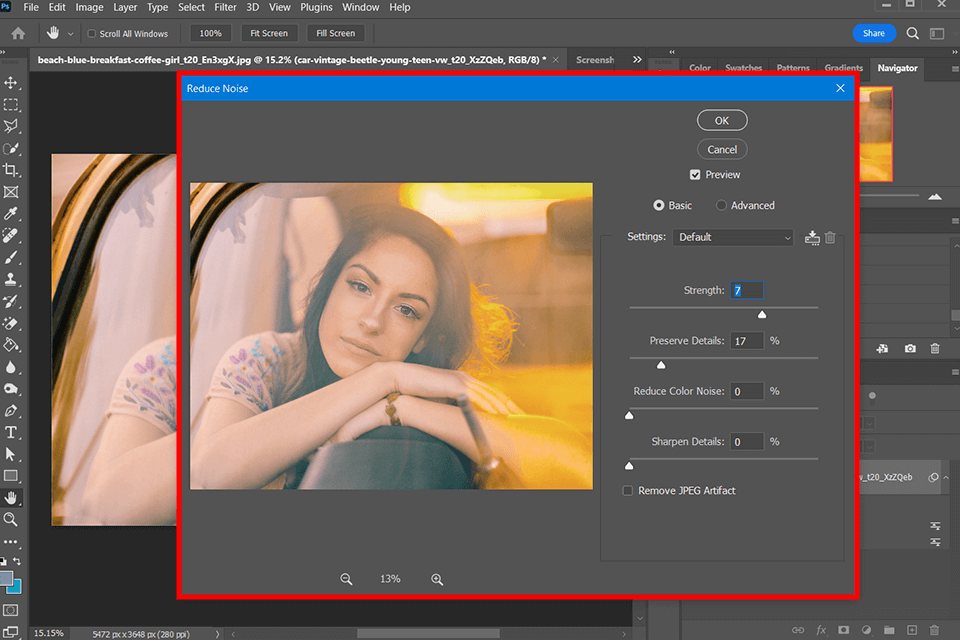
Keep in mind that noise reduction does not necessarily work for any image. If at 100% magnification, you’ll notice little speckles, try to minimize luminance and color noise. Be aware that too much can decrease sharpness and deteriorate the overall look of a pic, so do not go to extremes.
It will let you bring your post-production to a new level and won’t be limited by simple color corrections or brightness adjustments.
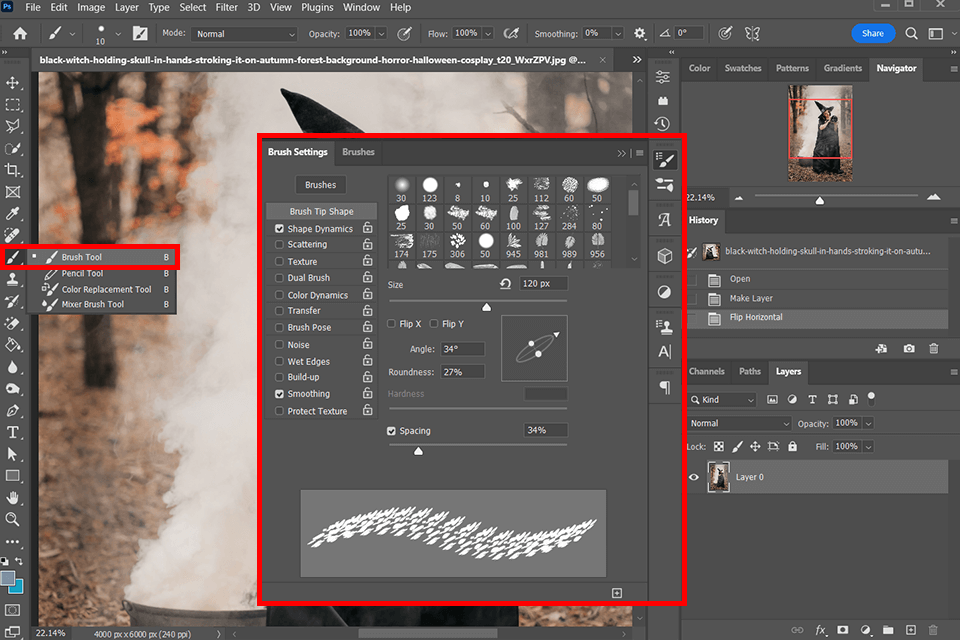
Photoshop enables editors to import their custom brushes or create their own ones to retouch images like a pro. Using them, it is easy to create a completely new setting like putting snow in a photo taken in a cloudy or even a sunny day (be sure to fade the colors first).
Of course, as with editing photos for beginners on Photoshop or any other editor, you’ll need time to learn more complex editing techniques and tools. However, sometimes it is more reasonable and cost-effective to address the task of image retouching to professionals who are sure to deliver top-level outcomes.

FixThePhoto specialists are experts in editing pics providing high-quality touch-ups for just $1.50 per photo. You’ll get pics with professionally corrected colors and retouched skin without any imperfection. These guys will make your photos eye-grabbing in no time.
Adobe Lightroom. Lightroom is quite an intuitive software. It is the best fit for all those who need to enhance photos, spruce them up with the effects, or change their size or crop. The batch-processing mode is a real highlight of this editor. This time-saving feature lets editors process multiple images in one go.
GIMP. GIMP allows performing as many corrections as required. It also allows altering the source code. This is a perfect solution for all those who need to improve lighting, exposure, and contrast. GIMP for beginners is available for free and offers unique graphic design elements, components, and effects to jazz up pics.
Luminar Neo. The editor leverages AI to automate many complex manual tasks. Besides, it comes with intuitive one-click tools to upgrade your images in the shortest possible time. Try the Enhance AI tool first to tweak your image’s color, details, contrast, and depth.
ACDSee Photo Studio Ultimate. The main advantages of this editor are a GPU-powered system and updated adjustment layers. Thanks to these features, you can easily satisfy all your creative needs and achieve the results your clients expect. ACDSee comes with a color palette enhancer, non-destructive specific area targeting, fast facial recognition, black-and-white modes, and excellent contrast and exposure tools that ensure top-rated outcomes.
Fotor. Fotor is the most functional solution for creating collages. The editor offers multiple ready-made samples, as well as allows users to implement all their creative ideas. Besides, it is an ideal tool for fixing blurry pics. Leveraging advanced AI technology, the app can clear up your pics and increase their sharpness in an instant.
Although these applications are effective, you will need much time to edit pics using them. Besides, the result often looks artificial. Those who need to get professionally retouched images in no time getting naturally-looking pics should consider using the Fix The Photo Editor & Retouch app.


The team of experienced specialists will cover all your requirements, no matter how complex they are. Import your photos, provide instructions, and get brilliant results in just a few hours.
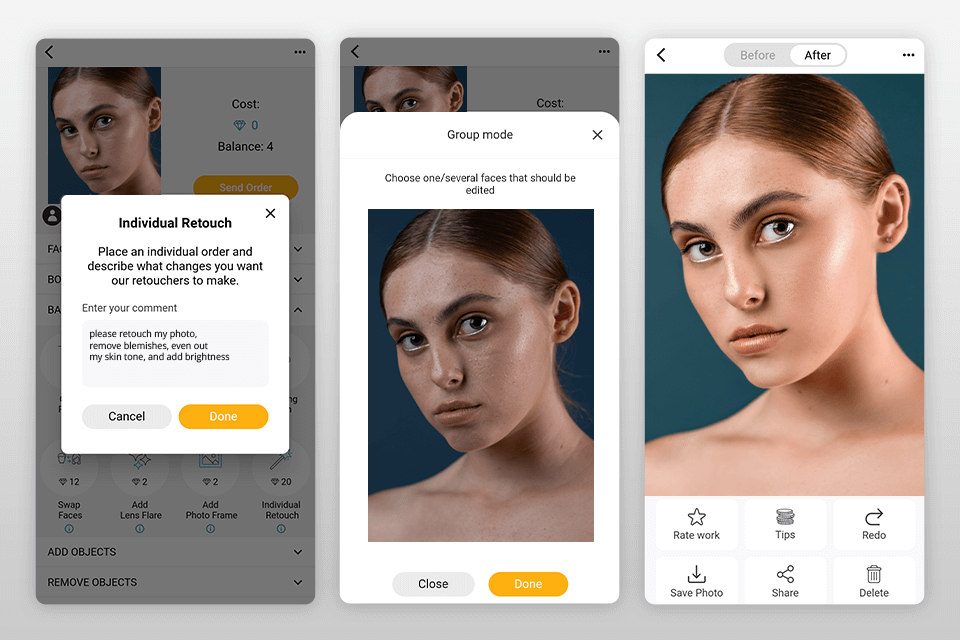
Whether you need to make your face slimmer, correct makeup, remove objects, or change the color of your hair, this photo editor is what you need. Retouchers work round-the-clock to realize all your creative ideas, providing you with pics of top-level quality.
Editing photos for beginners can become easier thanks to these photo editing freebies. They can make your photo editing workflow more productive and creative. The package includes freebies for Lightroom, Photoshop, templates, plugins for photographers, overlay freebies, etc.
These tools can help you achieve vintage film, matte, pastel, light & airy, B&W, and other effects to jazz up portrait, food, street, product, and interior photography. With these filters, any photo editing task becomes a one-click procedure.


