ACDSee Photo Studio
Verdict: The key takeaway from this ACDSee review is that it’s a fantastic option if you’re interested in a 2-in-1 solution that's suitable for both editing and managing your images.
It offers a selection of organizational features that won’t pose any challenges even to complete beginners. Meanwhile, its image editing functionality nearly rivals classic versions of Lightroom and Photoshop.
| Feature | Description |
|---|---|
|
Supported platforms |
Windows, macOS |
|
Supported file formats |
RAW, JPEG, TIFF, PNG, GIF, BMP, and more |
|
Image editing tools |
Layered editing, Adjustment layers, Filters, etc |
|
Digital asset management |
Cataloging, tagging, keywords |
|
Batch processing |
✔️ |
|
Face detection and recognition |
✔️ |
|
AI-powered enhancements |
✔️ |
|
Mobile app sync |
✔️ |
|
Free trial |
✔️ |
|
Linux version |
❌ |
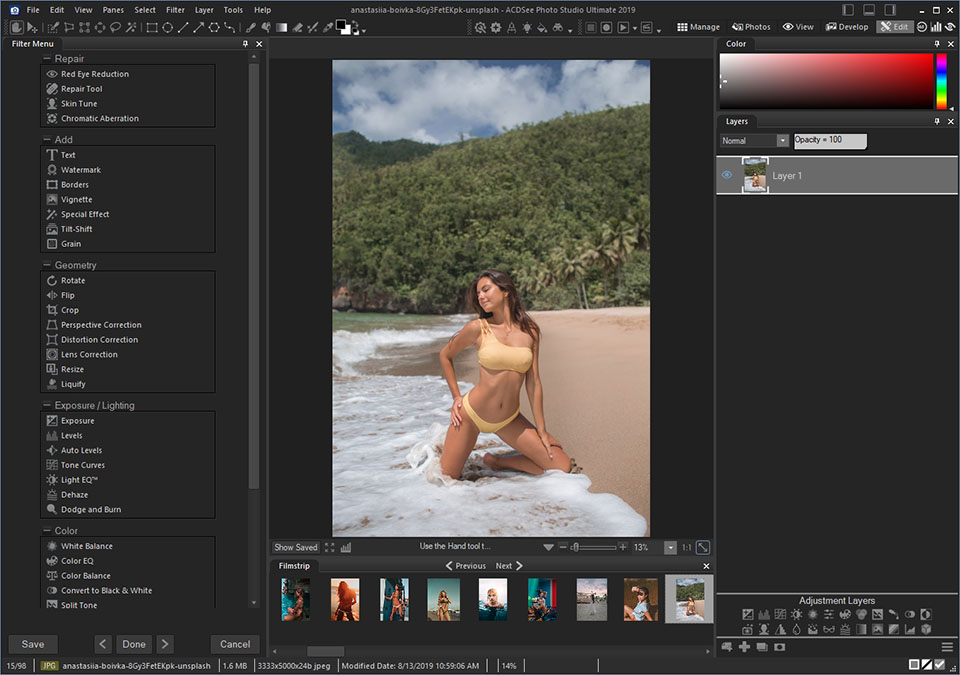
You will see a convenient, customizable interface with modules similar to those in Lightroom, basic and advanced settings for color correction and even retouching tools that employ layers and masks, as well as a handy free photo organizer.
Summing up, ACDSee can be called one of the best alternatives to more popular image editing software for a more reasonable price. It combines color correction from Lightroom and some advanced functions from Photoshop.
ACDSee Photo Studio isn’t a free program, but it offers a 15-day trial version that includes all the available features allowing you to try ACDSee for free.
ACDSee can be purchased for a single-time payment of $149.99 or you can take advantage of the subscription option, which will send you back $89 annually or $8.90 monthly.
Such a plan allows you to install the program on up to 5 devices (Mac or Windows) while also providing access to proprietary galleries for displaying your creations as well as 50GB of SeeDrive Clour Storage. You can expand the storage by another 50GB for $25 or 100GB for $50.
| Operation System | Windows 10 (64-bit editions only), Windows 11 macOS Monterey (12), macOS Ventura (13), or macOS Sonoma (14) |
| Processor | For Windows: Intel or AMD processor with 64-bit support, Intel i5 or better processor recommended For Mac: Apple Silicon or Intel processor |
| Storage | 4 GB of available hard disk space; more space is needed to download content |
| RAM | 4 GB RAM (8 GB RAM or more recommended), 512 MB Video RAM (VRAM) |
| Monitor resolution | 1280 x 800 display resolution (1920 x 1080 recommended) |
If you’ve previously used or studied Lightroom, you probably remember its individual modules. They are used to significantly simplify the learning curve.
Thankfully, the developers decided to continue this tendency and divided ACDSee into 5 main modes located in separate tabs.
Manage - Management mode consists of a library of images where you can index scores, categories, labels, and more. This feature is quite useful since it allows you to find the right shot out of thousands in a matter of seconds.
Photos - This mode is similar to Manage. It offers a more comprehensive way of viewing image files on your hard drive and enables you to narrow your selection to specific day/month/year photos.
View - In ACDSee, the View mode is a more detailed section where you may view images one by one along with their large-scale versions. This is a typical feature for photo processing software, but it’s more impressive than what you’ll find in most competitors due to its high buffering speed.
Develop - Here you will find the main color correction tools: Exposure, Contrast, and Saturation – along with vibrancy and clarity settings.
Edit - The edit mode has an “all in one” structure. It includes pixel-level tools for image retouching, watermarks, and text overlays. The mode contains a long list of tools at the bottom of the left panel. This mode supports non-destructive image editing and allows performing complex manipulations.
This software uses a standard 3-panel workspace with image folders on the left, the preview screen and toolkit in the middle, and the settings on the right panel.
You can pick between different UI colors: light, silver, and charcoal as well as delete/add toolbars.
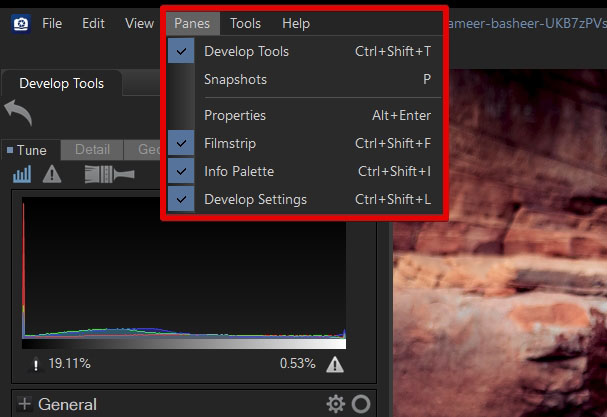
This mode greatly resembles Lightroom not only because of the toolset layout but also because of the ability to create and save presets. After saving certain settings, I’ve applied them to my other photos. You can create presets for both separate tools and entire images.
Tune – Large number of sliders for adjusting white balance, shadows, lighting, skin tone, split tone, and more.
Detail – This can be considered the main dedicated section for image retouching.
Geometry – Lens Correction, Cropping, Perspective Adjustments.
Repair – Heal/Clone and Red Eye adjustment.
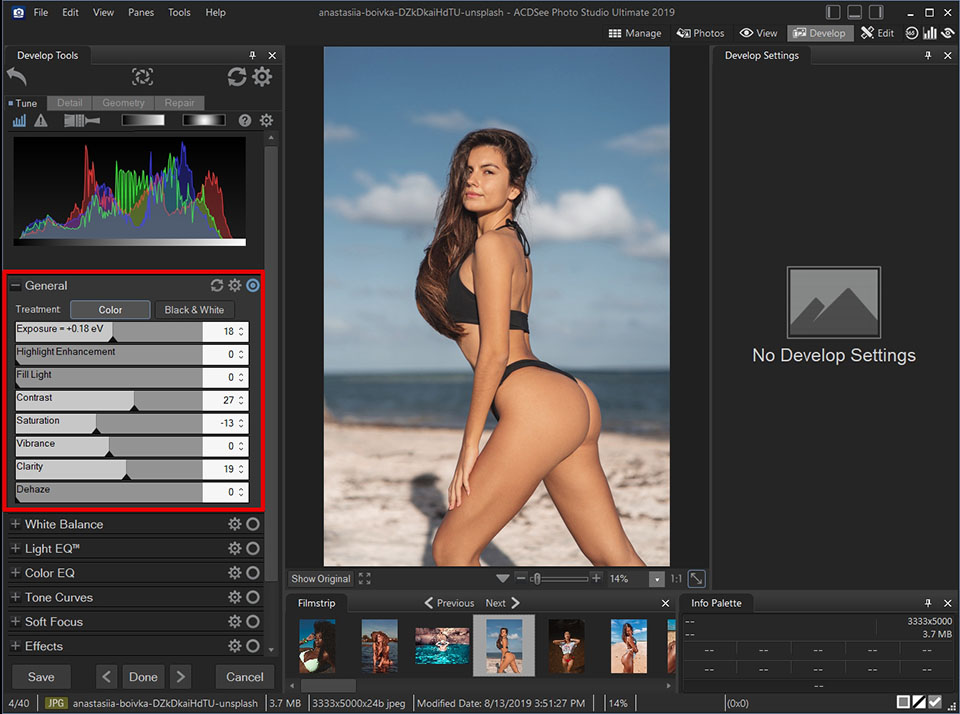
White Balance – Sliders for tweaking white balance turned out to be too abrupt and jumpy for some reason, so you shouldn’t put in a lot of effort. After setting the sliders, I got a strong starting point for moving on to more specific tones and color adjustments.
Fill Light - The General section of Develop tools includes Highlight Enhancement and Fill Light sliders. Both of these can only be set in one direction, meaning a positive adjustment or nothing.
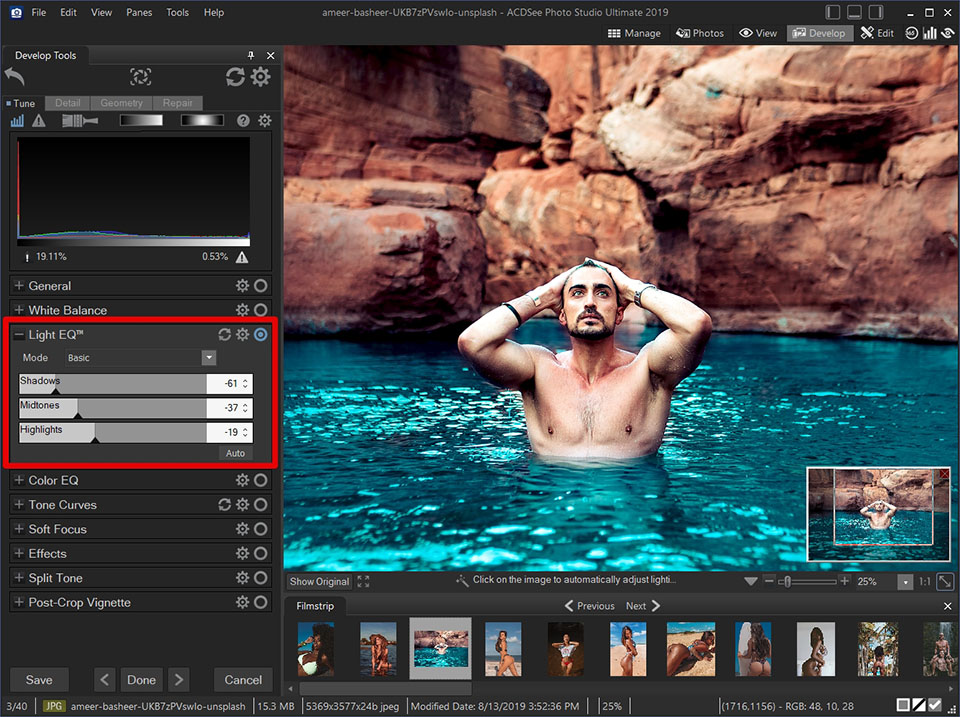
Light EQ – is very similar to the shades/shadows and white/bright tone settings, which are included in Adobe’s digital image management software and editors. Using it is also very easy – simply select the tool and click on any part of the image.
Light EQ will automatically adjust the tones, making them brighter if you click on an underexposed area, and toning down the colors if you press on a bright, intense image part.
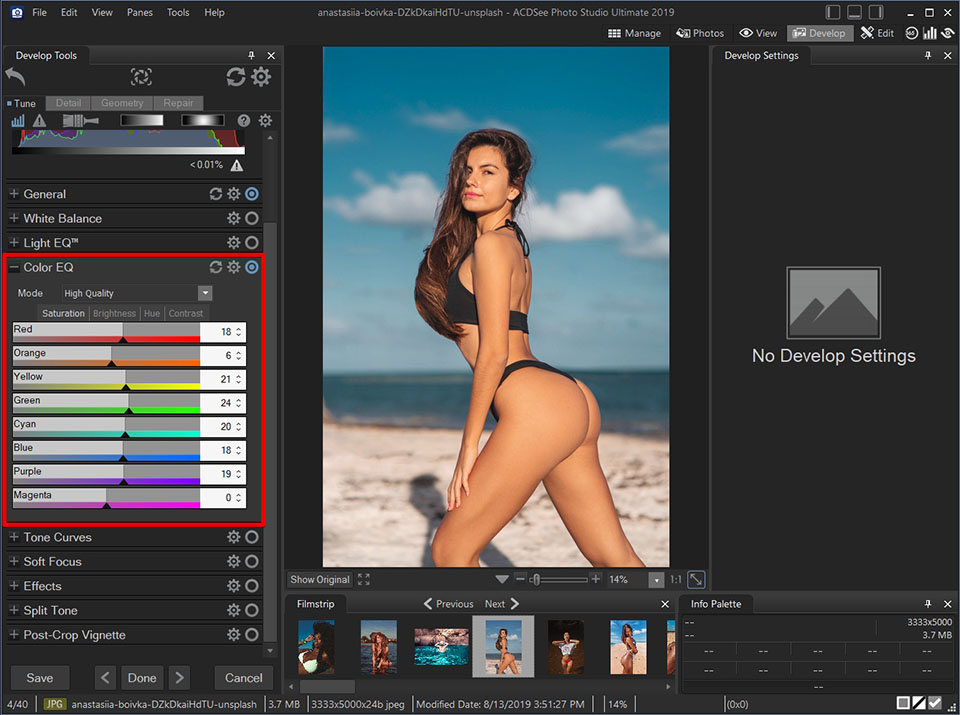
Color EQ – I suggest using the “Color EQ” tool if you’re interested in accurate color correction. It’s universal and works similarly to the HSL panel in the Lightroom. It allows you to adjust the saturation, brightness, and shade of each color channel.
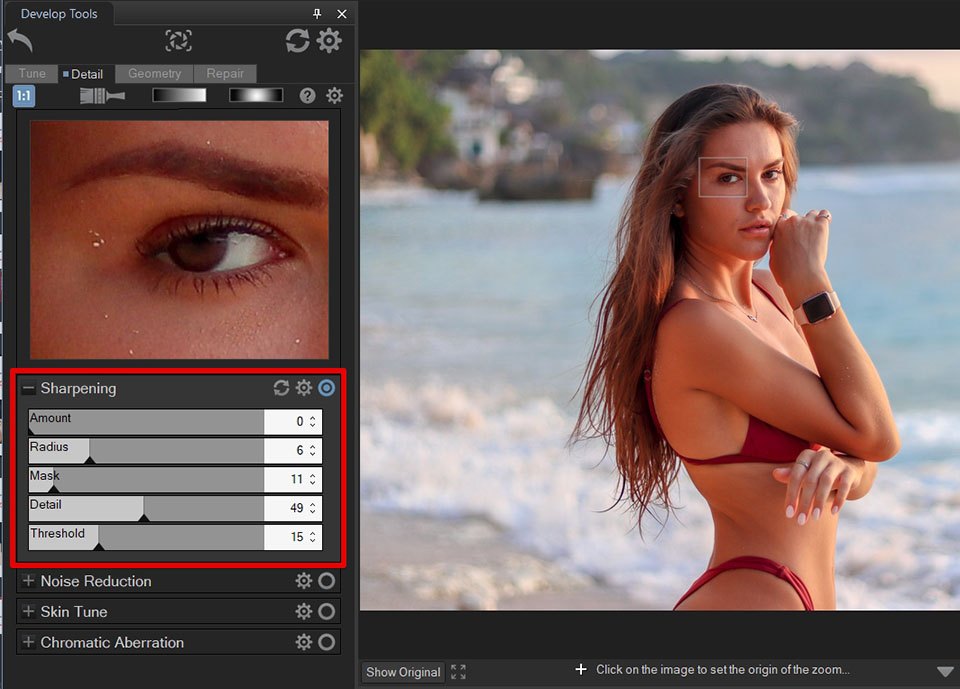
Detail – The average ACDSee review won’t recommend using the so-called “simple mode” for professional image retouching since it offers a limited number of settings, the controls aren’t flexible, and the sliders work with a slight delay.
However, if you have a simple task – like removing a pimple or some minor redness, then maybe the available functionality will be enough.

This software has introduced a selection of innovative AI-based features in its newest version, including an AI face-retouching tool capable of automatically morphing facial features. Besides, you can take advantage of new selection features for automatically selecting skies, objects, and backgrounds.
As one of the best AI photo editors, ACDSee boasts an impressive face adjustment feature that provides a broad selection of presets that can be used to tweak everything from the model’s head shape to the jawline or eye positioning. The range of available options is so diverse, you might think you’re using an incredibly detailed character creator in an RPG game.
The user also can determine the facial areas that will be affected by the AI, but I was sad to see that you can’t select the area near the ears. The software lets you tweak the width of the head, but the ears can remain in the same position.
Skin Tune - is a tool for portrait photographers. It provides three separate tabs – Smoothing, Glow, and Radius. Noise removal is performed in Edit mode, and it smoothens the noise well enough, but there is no "Auto" option.
There is an interesting viewing mode that only shows noise in shades of gray. Practically the same effect may be achieved in Photoshop if you use the method of individual decomposition.
Grain – this is a new tool and it has worked pretty poorly. However, I suppose you can tinker with the sliders for Amount, Smoothing, and Size to get a reasonably realistic look. There are more than 20 artistic effects.
However, there are no AI filters to apply various styles. My favorite filter is probably Grain. You may apply a Grain effect to give your images a stylized look similar to the grain of an old film.
The Grain tool can also be used in combination with other effects to achieve a vintage look. Additionally, you may record your edits as actions or apply premade actions, which use grain, film styles, fading, etc. This program also supports plugins.

Smart Erase allows you to automatically delete unwanted objects from the shot. You can see the same tool in Adobe Photoshop. I like that this feature takes the content into account and gives the picture a natural look, even if you remove crowds of people, clouds, phone booths, poles, and more.
All you need to do is select the unwanted object, and then the software automatically selects the background. If that doesn’t work for you, you can always fill this area manually.
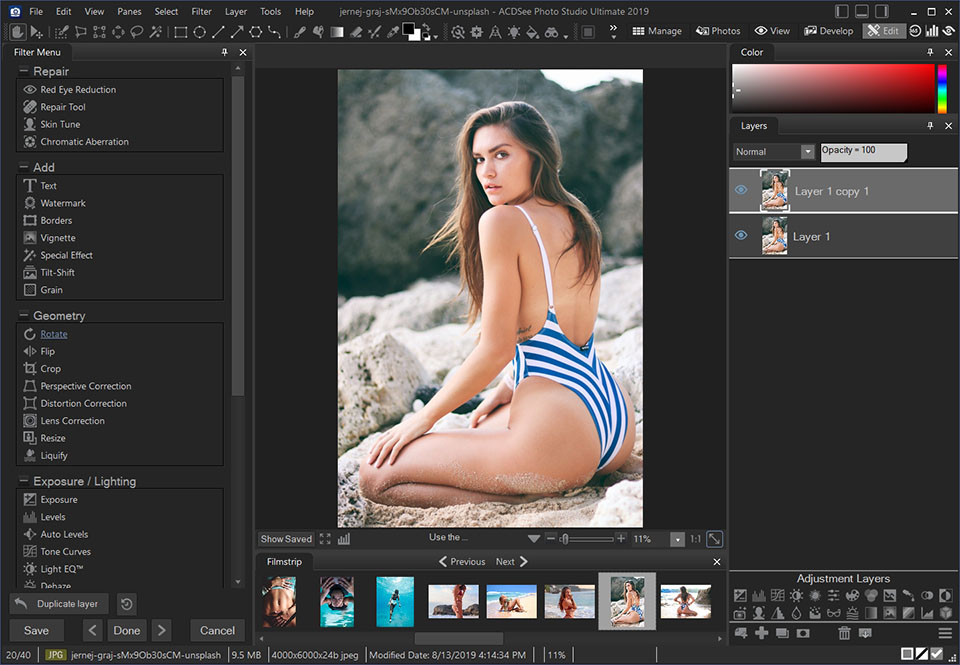
The expanded image editing mode of ACDsee is available in the “Edit” module. The offered toolset is significantly larger and each tool has deeper manual settings.
The base layout isn’t very convenient, all the available functions are on the left, the tools are located at the top, the layers are on the right, and the photo library is in the middle.
The photo editing mode offers a rather big number of additional, handy functions. Among them, you can find corrective layers for color LUTs, Smart Erase, Skin Tune, Dehaze, and Grain.
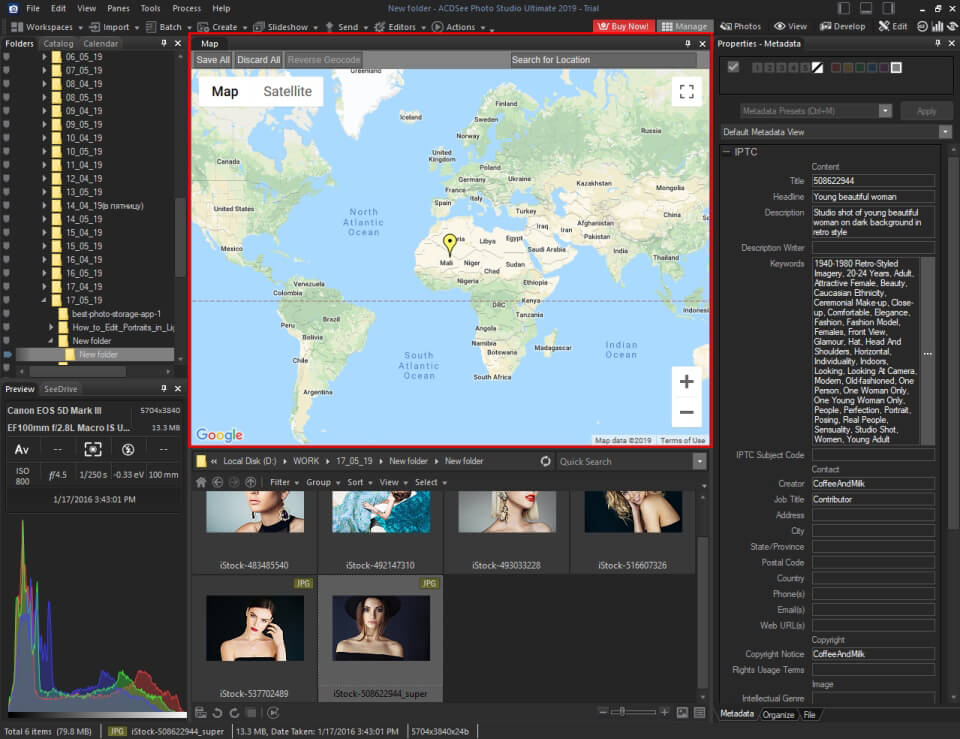
One pretty impressive image management feature is maps. This software offers a GPS feature that displays your images on a map. This is quite an interesting and, even, convenient addition.
However, when working with maps, I noticed a bug. The fact is that this feature is incompatible with pictures taken near the place where I clicked on the map. The program automatically picked a place for me, and how it works, remains unclear.
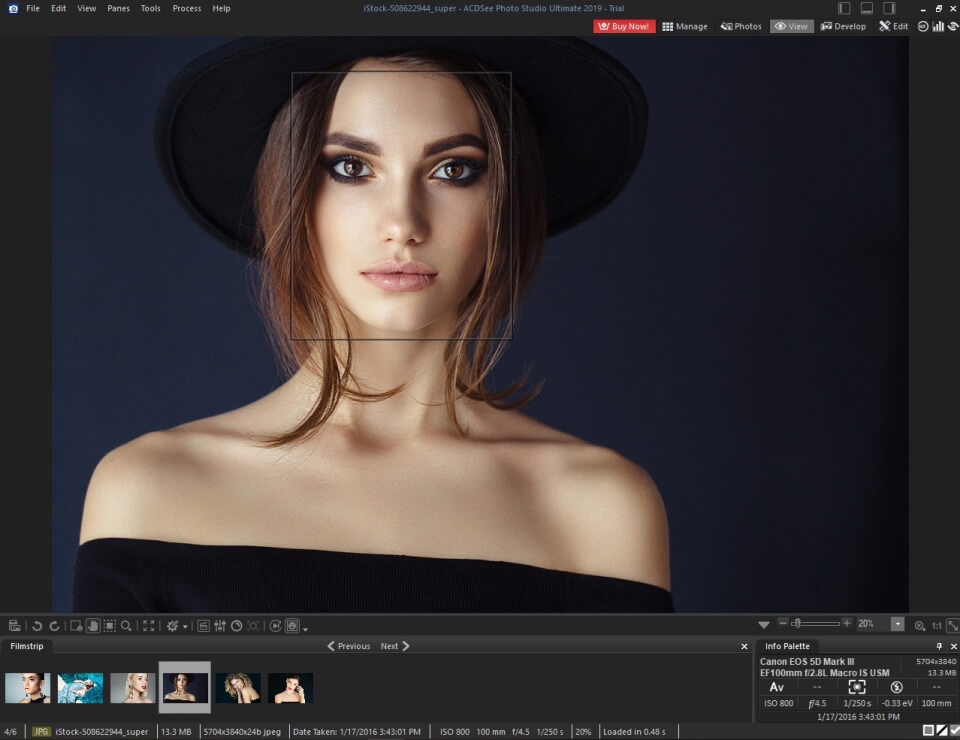
One of the latest innovations that need to be highlighted in this ACSee Photo Studio review is the “face recognition” tool. As with some of the other organizational features in this photo database software, it isn’t well-thought-out and requires significant improvement when compared to competitors like Lightroom and PhotoDirector.
If you select a model in the shot and give him/her a name, the program will automatically find the same faces in your collection. However, to see them, you need to go to the “Photo” mode, which to me is a rather inconvenient process, and then enable the “Face Detection” feature on the top panel.
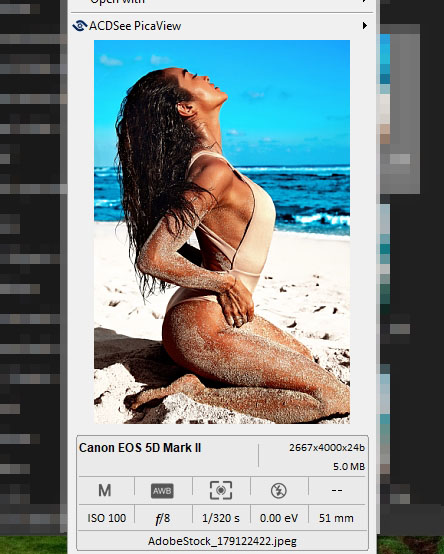
PicaView is an interesting feature that doesn’t significantly affect the photo editing process but allows you to save a ton of time, which is an awesome bonus for any photo organization software.
All it does is add a new section to the right-click dropdown menu of your OS that shows a small (but high-quality) file preview and relevant EXIF data.
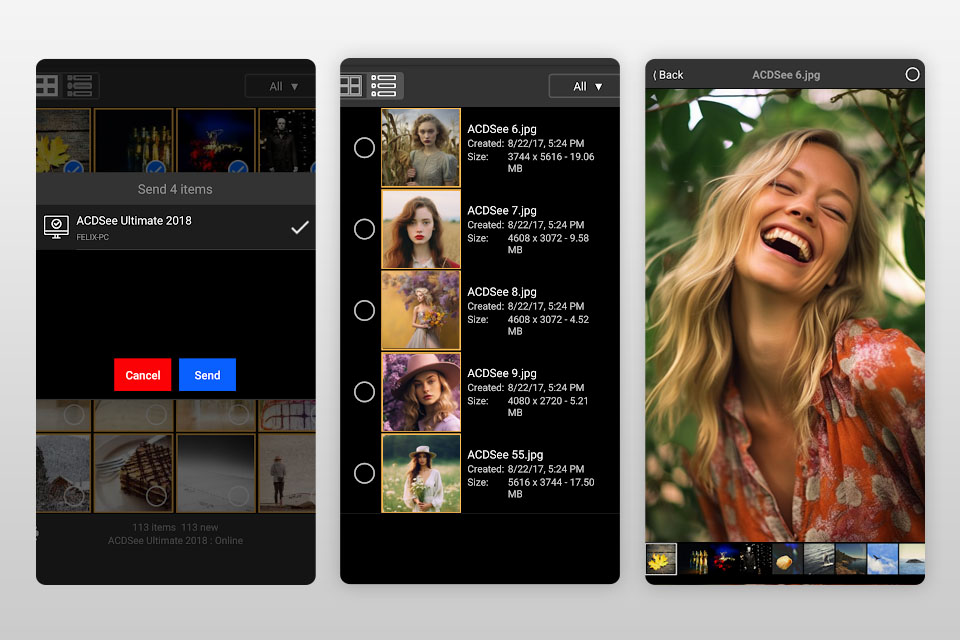
ACDSee recognizes the importance of smartphones in the modern photography landscape and has created a mobile companion application that you can download on your iOS or Android device. The Mobile Synch app is pleasantly user-friendly and can be employed for transferring your images from your smartphone to the Photo Studio software installed on your PC.
The provided wireless synchronization is super fast and convenient, offering possibly the simplest method for sending images I’ve ever used in similar apps.
The application automatically found the desktop version of Photo Studio on my PC and sent the images without requiring any convoluted pairing or sign-in procedures.
As a solution that offers detailed RAW file editing, useful management features, and AI-based tools, ACDSee is a fantastic all-in-one option for photographers interested in an establishing efficient, seamless workflow. I recommend you test the free trial version to determine if it can satisfy your needs before you pay for a subscription or get the lifetime license.
This software is a solid Lightroom and Photoshop alternative that provides a wide range of tools for managing, editing, and retouching images for a reasonable price (from $8.90/month).
Even though it’s not as innovative and technologically advanced as some of the industry leaders, it still offers impressive functionality and flexibility that will meet the requirements of most users.