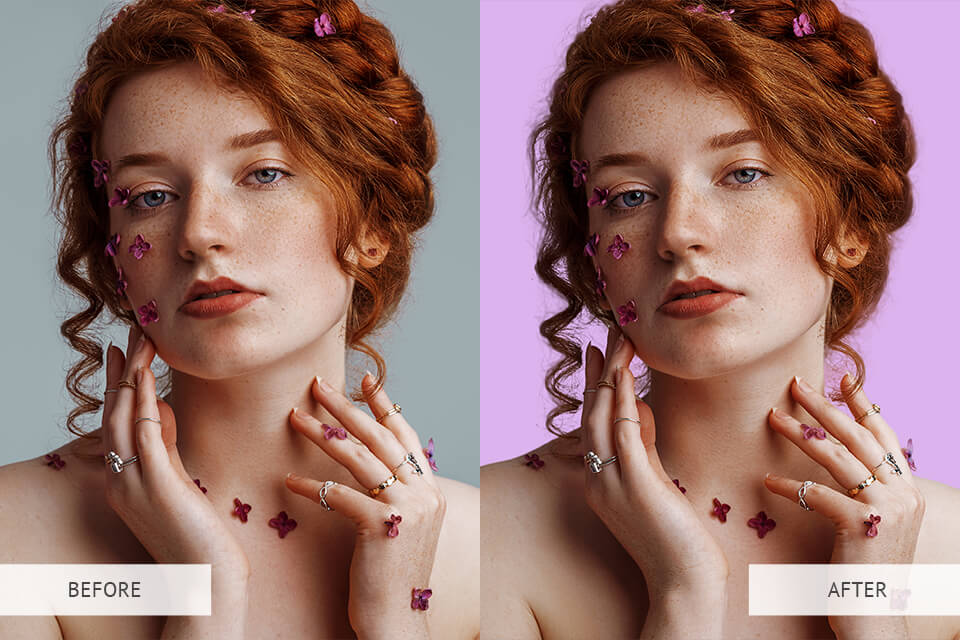
Want to change the background of your image, but you’re unable to precisely outline the object? That why you need to use the Photoshop Refine Edge Tool. This method will help you to achieve accurate selections even of the most complex edges.
Launch Photoshop. Upload the photo of your choice.
For today's tutorial, I chose a photo with the problematic hair contour. This is the most common situation where this instrument can come in handy. I will show you how to separate the girl from the backdrop while retaining all the details on the edges of her hairstyle.
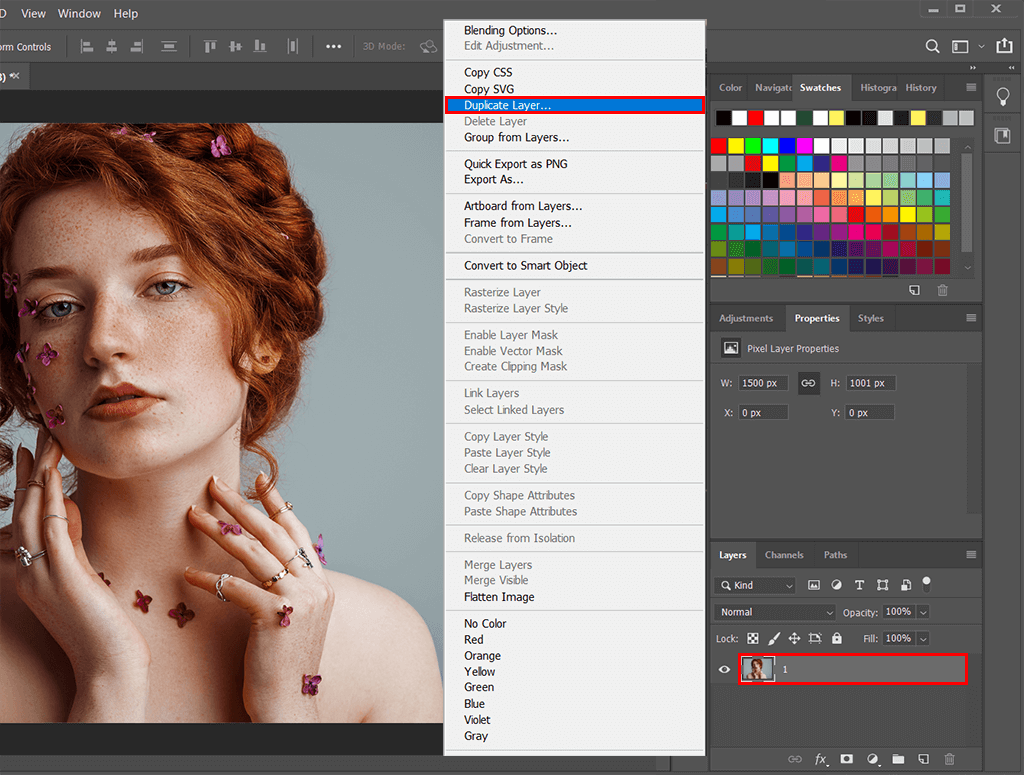
First, right-click the background layer. In a fly-out menu that appears, navigate to “Duplicate Layer”. If you prefer to save time with Photoshop keyboard shortcuts, you can also use the Ctrl+J/Cmd+J key combination. This will ensure that all of the changes are non-destructive and can be reversed.
Grab the Quick Selection Tool(W). It should be the fourth option from the top. You can use other instruments as well, but I’ve found this one to be the quickest and most efficient in this scenario.
Next, you need to make a selection. Click and drag over your subject. It doesn’t need to be perfect straight away, just make sure you’ve included all of the large areas.
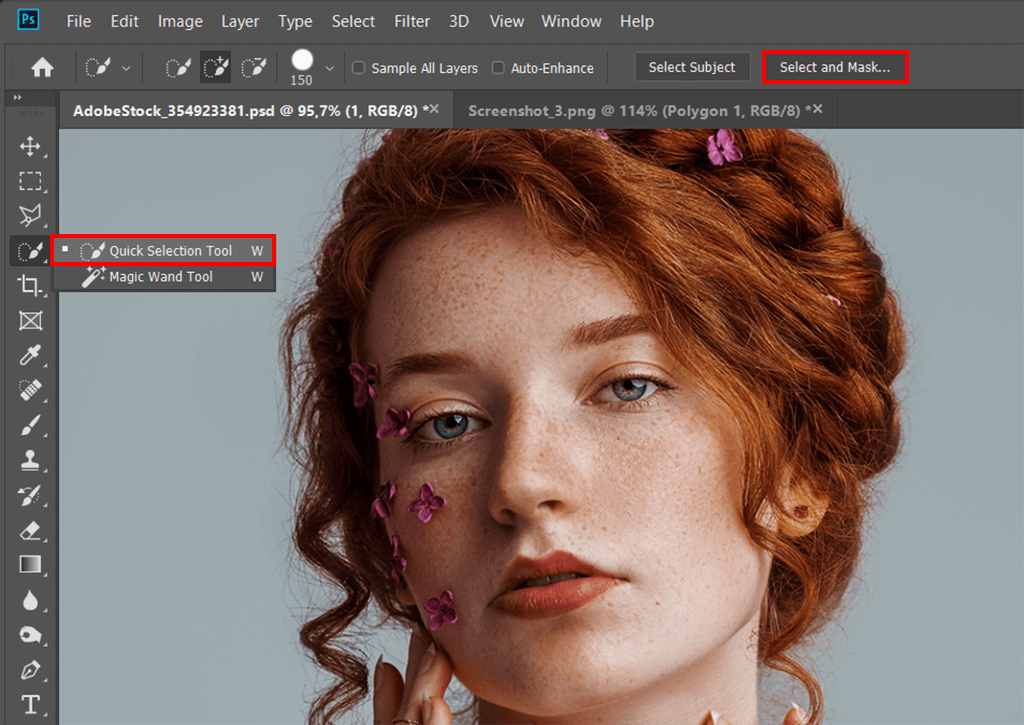
After that, look at the top of the screen and find the “Select and Mask” button. Click it, and this will bring up the workspace.

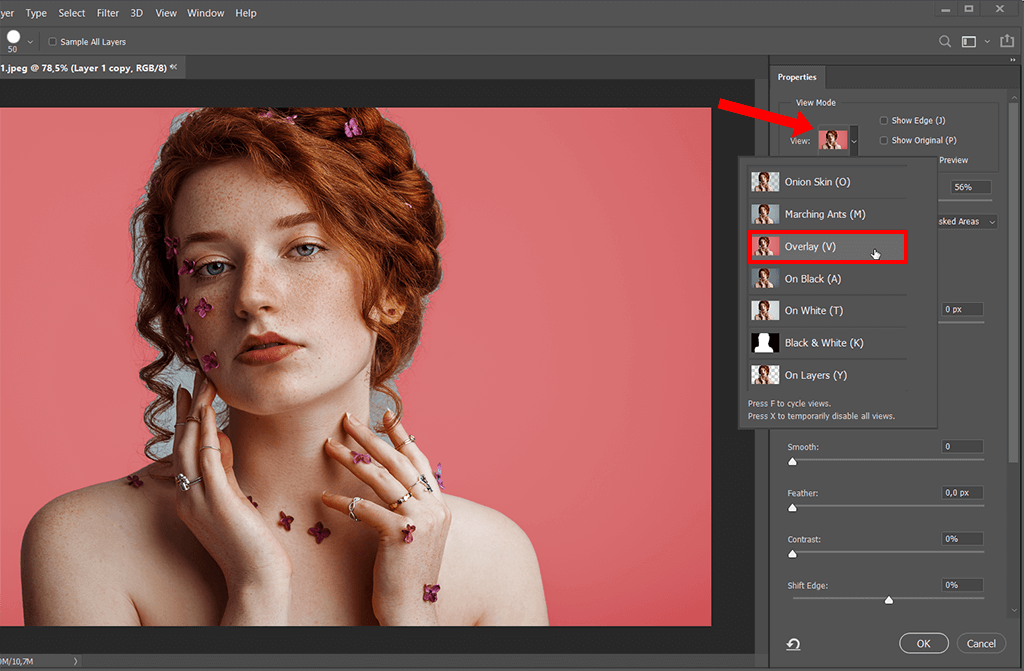
The next step of this Refine Edge Tool Photoshop tutorial is selecting a convenient view mode, depending on the colors of the photo you are using. For light objects use a black background (On Black), as it better shows all the details of the object. For dark objects, use a white background (On White).
I prefer using the “Overlay” mode. Try out different options to learn which works best for your photo.
Grab the Photoshop Refine Brush Tool (R) from the toolbar on the left. It’s second from the top.
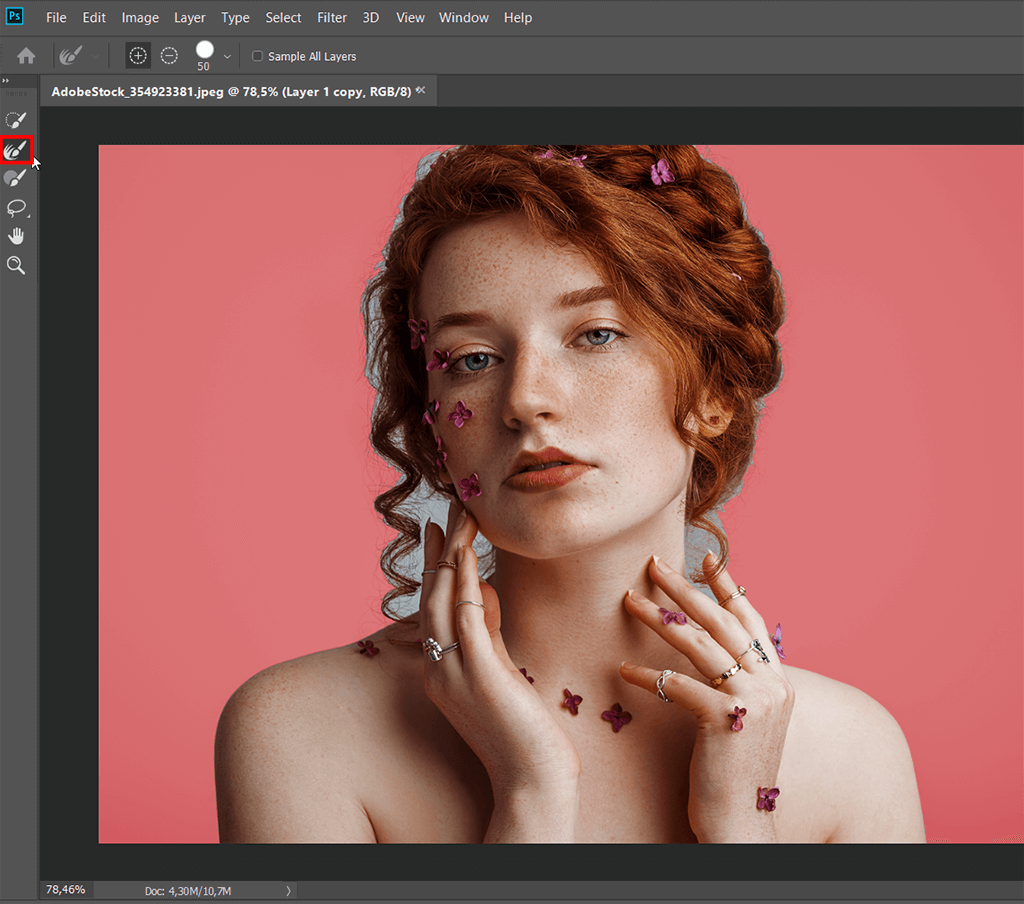
Before we move on to using the tool, we need to modify the properties, using the tab on the left.
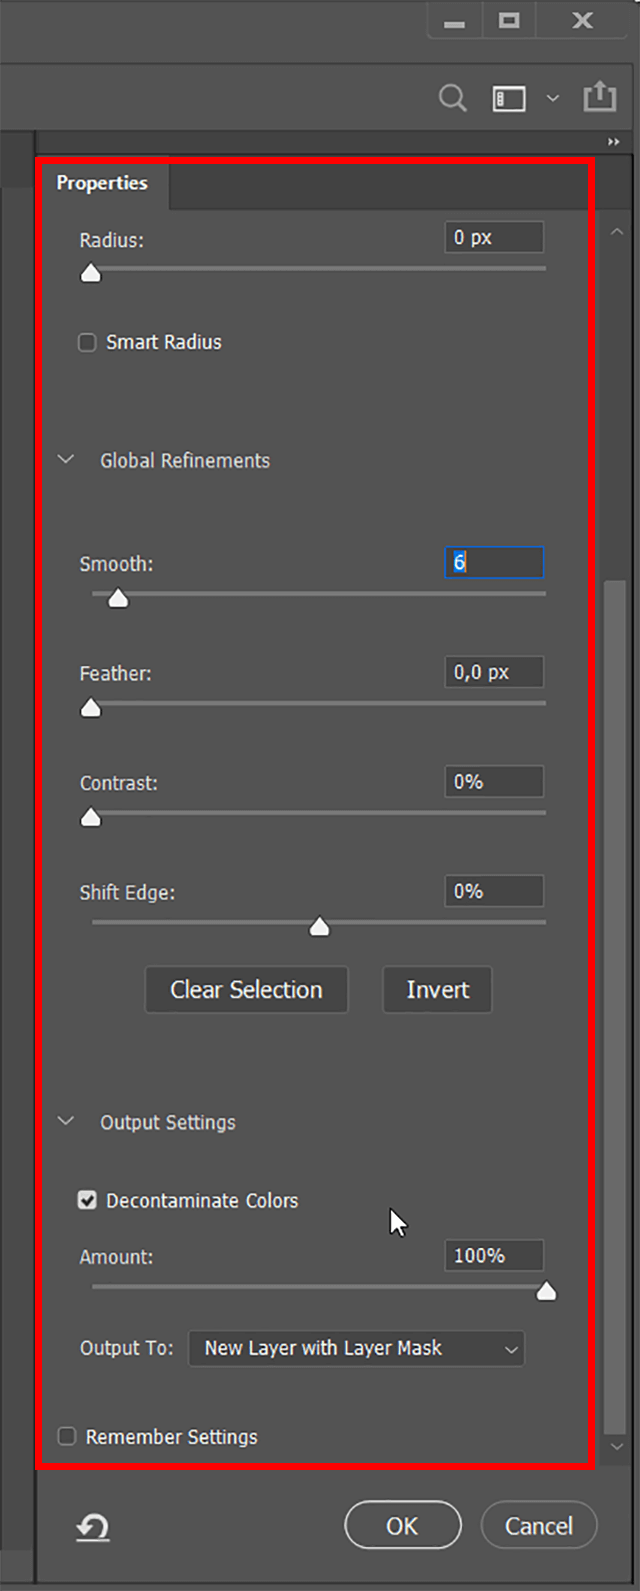
Radius: For sharp contour use small values; for soft contour use big values. Activate Smart Radius if you want the program to automatically adapt the radius to your subject’s contour.
The Smooth option is great for smoothing the contour without rounding the corners. I’ll only use this adjustment slider.
Feather softens the contour, which is why it’s commonly used for collages.
Contrast hardens the contour.
Shift Edge shifts the edges further from the object to capture more of the background, or vice versa inside the object to remove the background altogether. A slight inward shift can help with semitransparent objects like hair or leaves.
Experiment with the settings to figure out what suits your image the most.
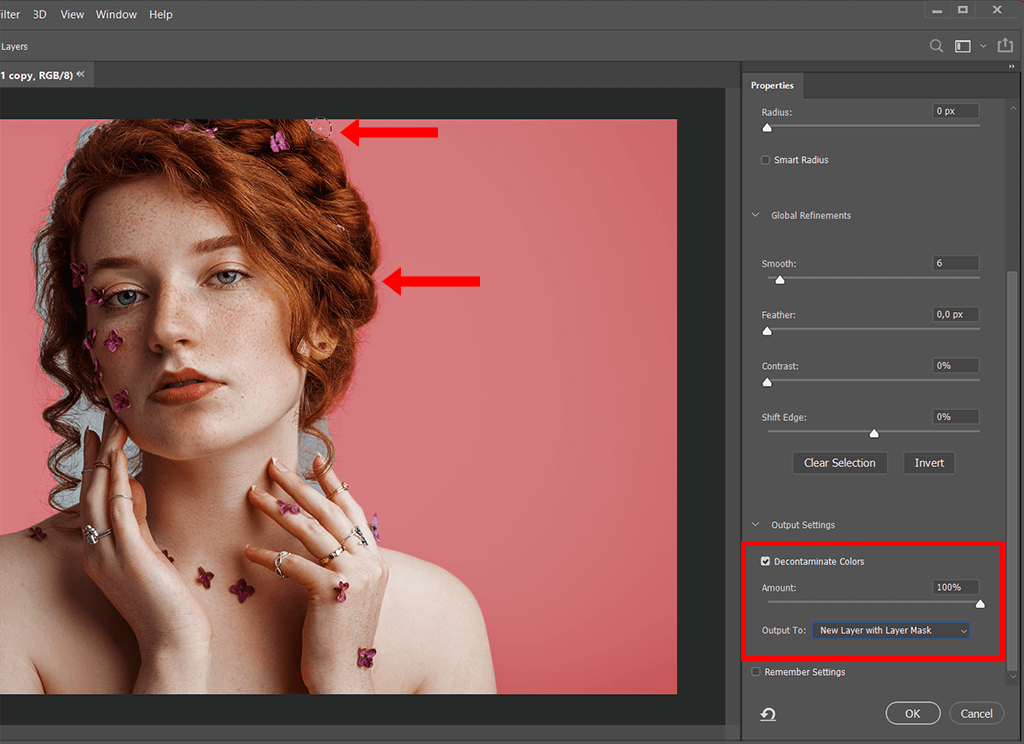
Start going over the contour with the brush to fine-tune it. To ensure your actions are as precise as possible, use the brush menu to adjust its size. Personally, I always start with a big brush and then move to a smaller size as my selection gets finer.
You can quickly switch to the eraser by holding down the Alt/Opt key. It helps when you have erased the desired detail of the hair. Since the girl in my photo is positioned against the contrasting backdrop, I’ll also check the “Decontaminate Colors” checkbox and raise the amount to maximum. This option helps deal with color fringe.
Press “OK”, once you’re done with masking.
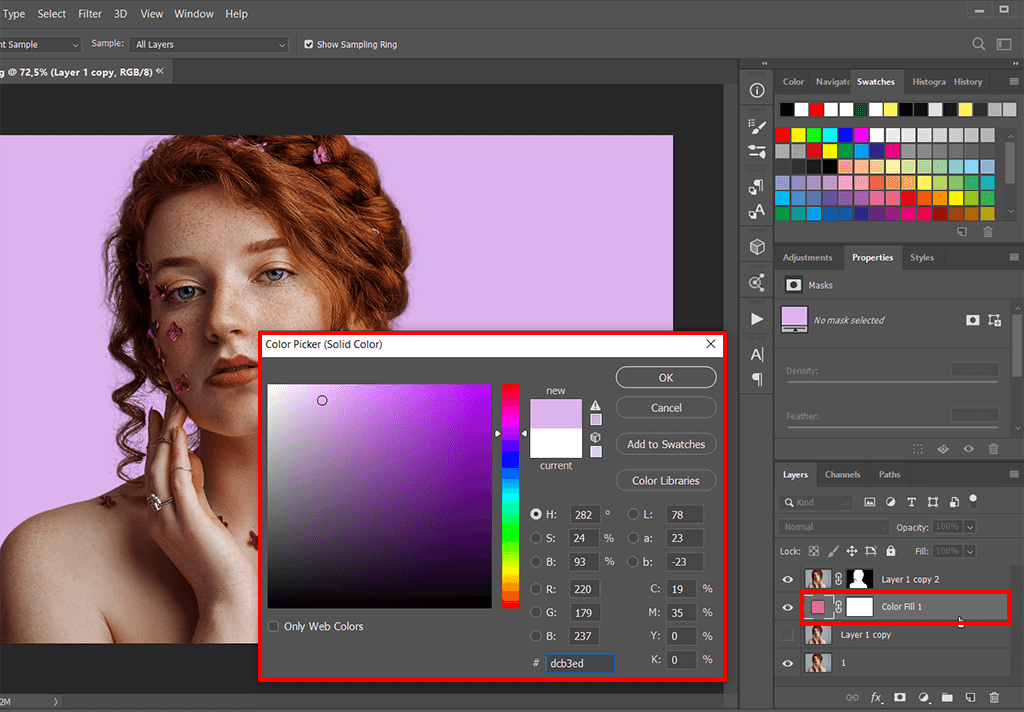
Finally, we’ll change the backdrop of our image. In order to do this, go to the “Layer” tab and navigate to “New Fill Layer”. Then, choose the “Solid Color” option. You’ll see a Color Picker window appear.
Alternatively, it can be accessed through the Layers panel. Just click on the Fill and Adjustment Layer icon. Then, select the top option.
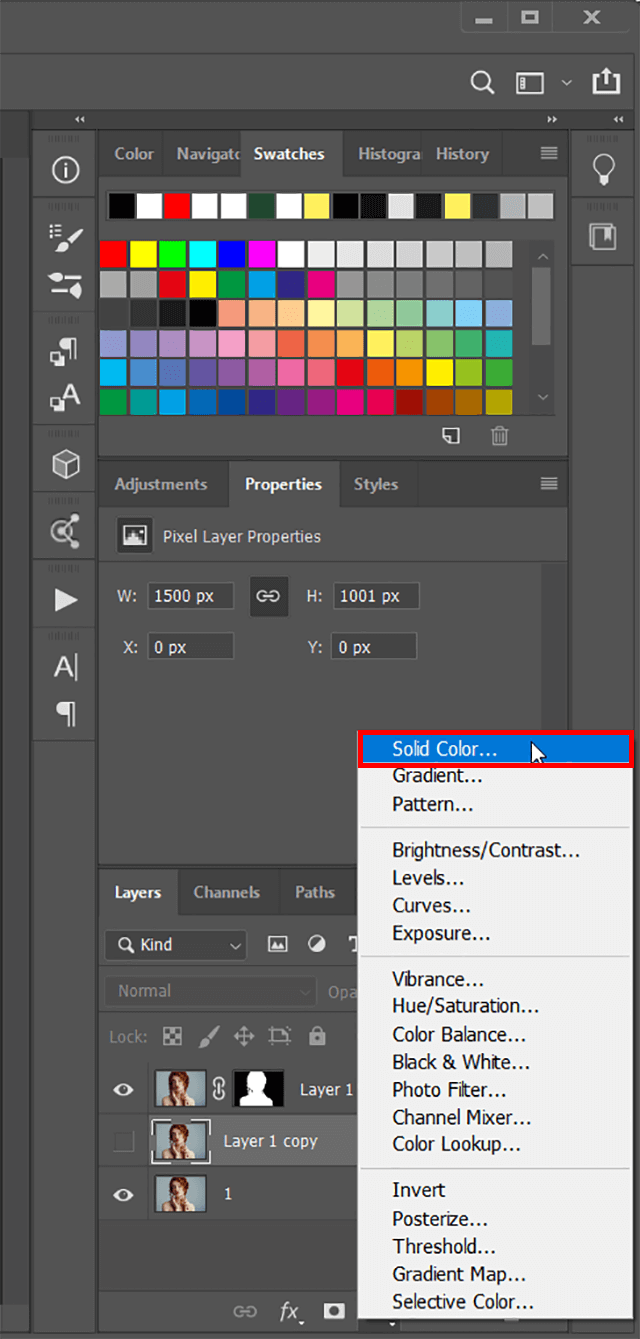
In a newly-appeared window, select any color. I’ll go for the lilac hue.
Problem solved! That’s how to employ the Photoshop Refine Edge Tool to isolate even the subjects with complex hairstyles from images. In addition to this, I recommend learning how to Photoshop someone into a picture realistically if you’re a professional Photoshop editor.