If you’re new to design and want to learn how to swap head in Photoshop, make sure to read this tutorial. Unfortunately, it’s not always easy to swap heads. The complexity of the task depends on the photo you want to edit. The best option is to use pictures shot one after the other with people positioned similarly.
You can try using different face swap apps to practice replacing heads in Photoshop. It’s better to use advanced photo editing software to make your images more realistic. Follow our step-by-step guide to learn how to quickly replace faces in a photo.
This method is suitable for those who are not very good at photoshopping portraits. However, professionals may also use it to speed up the process. If your photos are of the same size and have the same composition, you can easily overlay them in Photoshop to swap faces.
Select the face in the main photo through Rectangular Marquee Tool and copy it to a new layer with the right button.
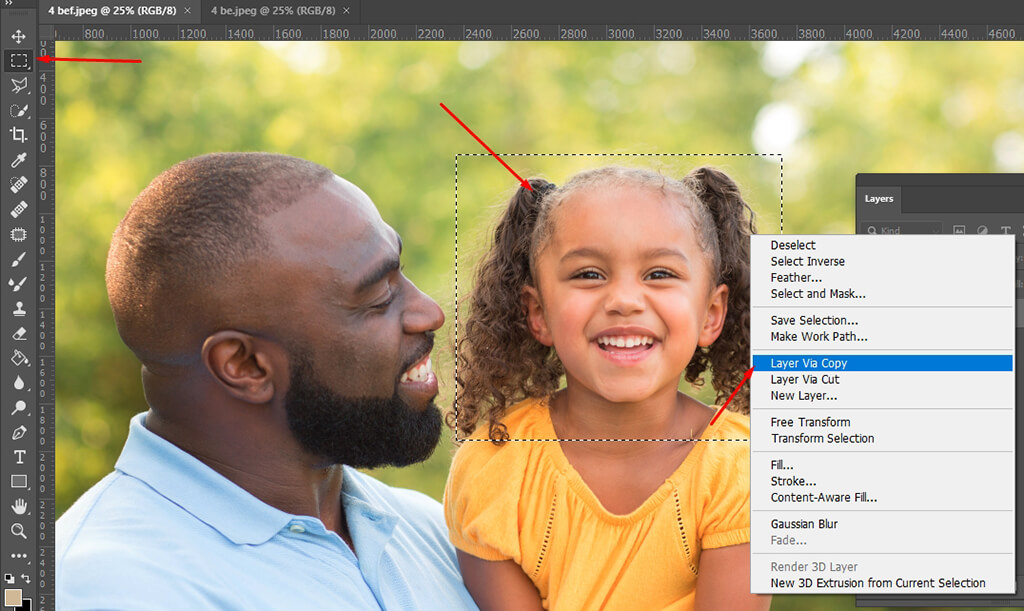
Move the layer with the face that you want to swap beneath other layers. Then move a layer with the face that you want to remove above other layers.

Align the faces in both layers using the Auto-Align tool. Before merging the elements, check whether they match.
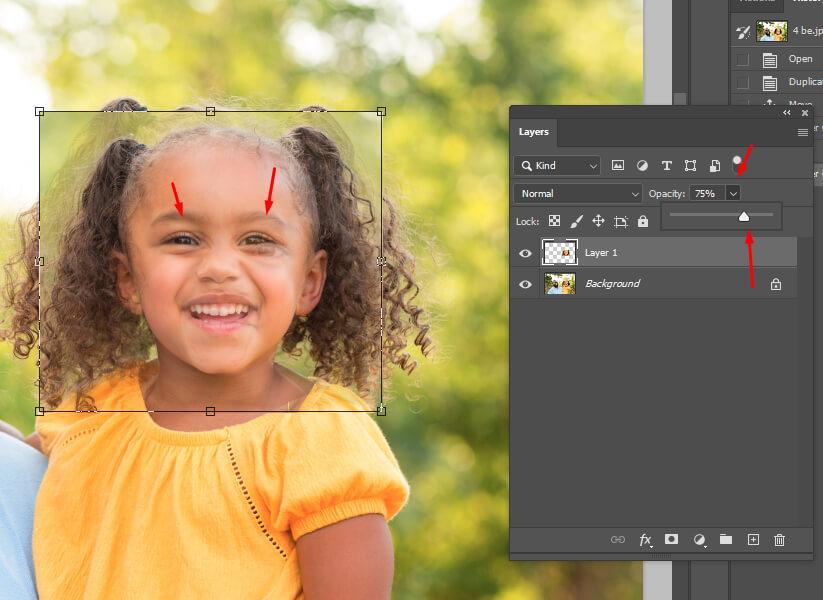
Add a white layer mask with 100% opacity on top.
Use the soft brush to change head in Photoshop. Select the Brush Tool and set the Opacity to 100%. Paint over the face you want to remove with a black brush on the mask layer. The face under the mask layer will show through in real-time.
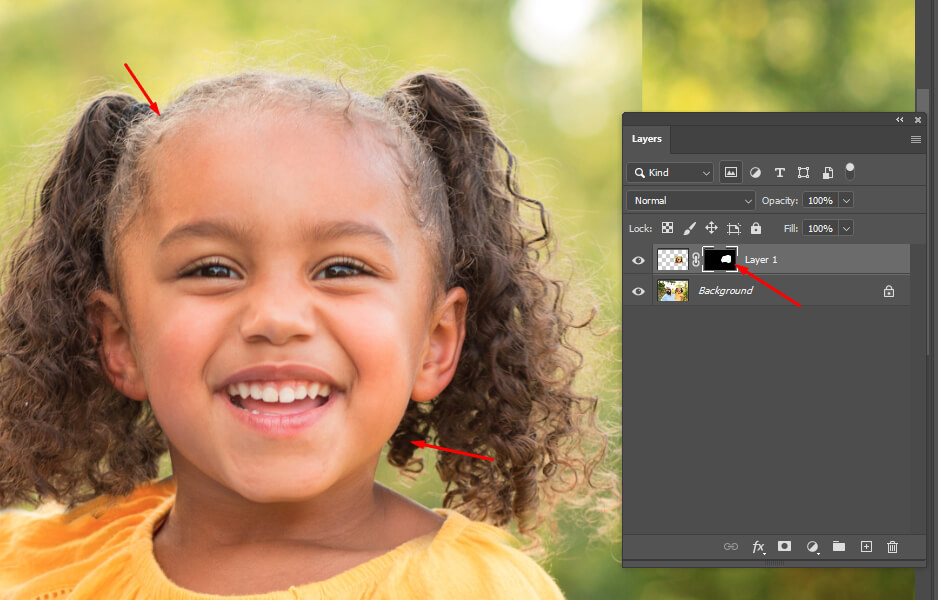
Compare the result with the original picture by using the eye icon. It will help you turn off the top layer. This method is suitable for swapping heads in Photoshop when working with similar pictures. It’s hardly suitable for more complex tasks. To change an animal head or make a creative meme, try using other Photoshop tools.

If the task sounds too complicated for you, don't hesitate to contact our photo manipulation service, which will quickly and professionally swap any head with a quick turnaround and for an affordable price.
Thanks to the Object Selection tool, users can grab various elements in the photo. It will help you change details, correct the nose or change an eye color and apply changes to the whole face.
With the Object Selection tool, you can cut and replace faces as well as remove double chin in Photoshop. Then, you need to save the edits by creating a separate layer.
Run the program and open the photo that you want to edit and a photo with the face you want to place in the first picture. Choose photos that are similar in size and angle to create a natural-looking image. Use photos without unnecessary elements on the face to facilitate the task.

Find the Lasso tool on the panel on the left (alternatively, press L on your keyboard) and select the desired face area manually.
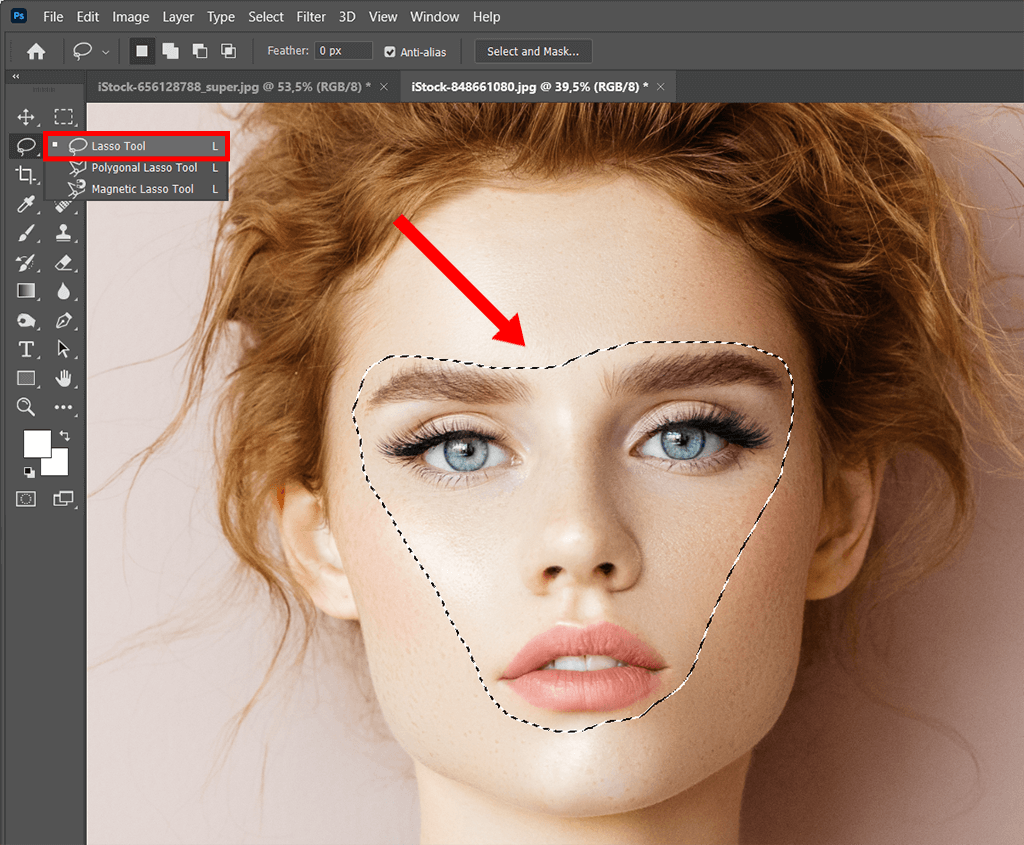
You need to select the area that you want to duplicate by enclosing it in a large circle. In this example, we have selected the entire head with hair, eyebrows, nose, and lips.
Make sure to select the highlighted parts of the face. Besides, don’t forget to leave some space for blending. Once you have selected the desired area, you will see a dotted line around the face.
If you are satisfied with the result, use Ctrl + C or Command C to copy the selection. The dotted line should stay active. Alternatively, you can right-click on the workspace to copy an area with the Copy Layer action.

Open the image that you want to edit and paste a selection by pressing V or Ctrl V. The face will appear as a new layer. Make sure to rename this layer to avoid confusion.
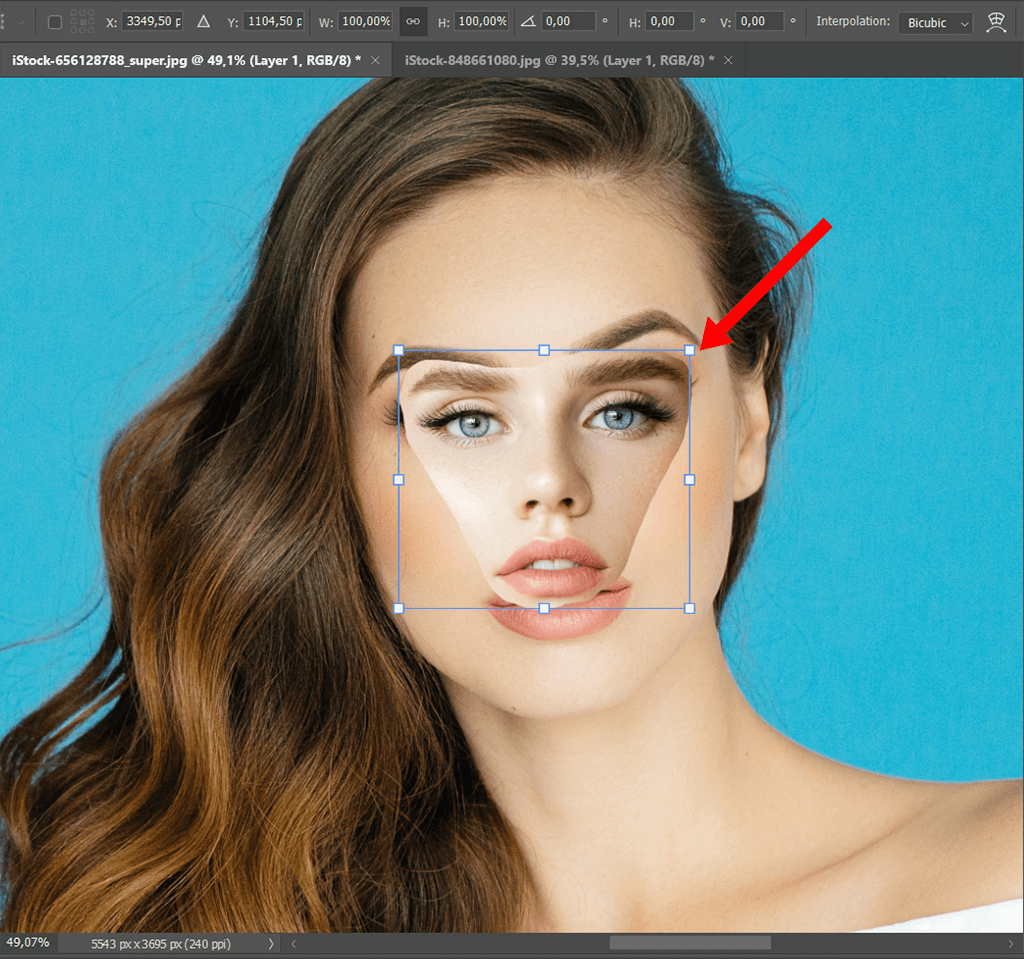
To swap face in Photoshop, you need to go to the file with the body. Use the Move Tool (V) to place the selected face where you want to.
You can also match the scale and position of the faces in both photos. The Scale Tool (Z) will help you enlarge the photo and reduce the opacity to 30-50% for better selection positioning. For additional layer transformations, use the Warp option by pressing Ctrl T or Command T.
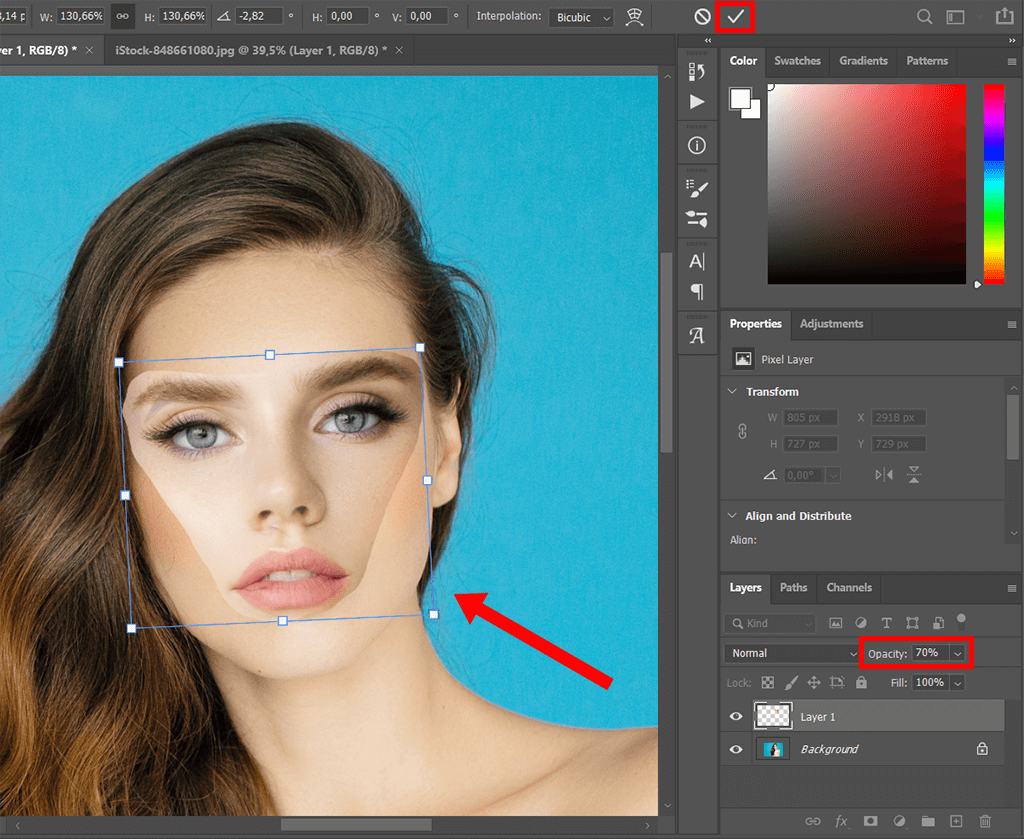
To change the size of the new face, select the target area. We recommend increasing the opacity to 70% to simplify the process. For better results, press the Shift key and drag the corners inward.
Add the new face to the photo with the Enter key. Don’t forget to increase the opacity value to 100%.
With Ctrl or Command, click on the face layer thumbnail to choose the pixels around the desired layer. The program will load a selection around the face. Click on the eye icon to hide the new face layer and make a copy of the background layer visible.

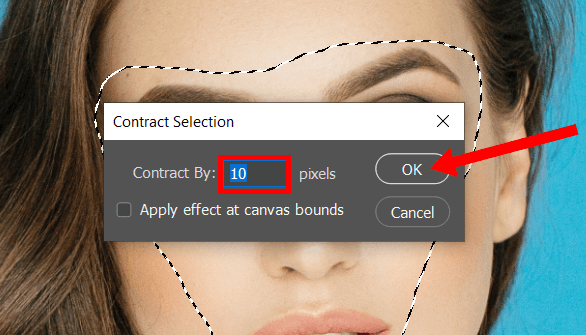
You need to decrease the selection by the number of pixels. To do this, go to Contract and set the value to 10 px. When the face layer becomes bigger than the selection, choose a new face layer in the Layers panel.
Select the body layer and use either Delete or Backspace key to get rid of pixels inside the selection. After activating the face layer, you will see that the face will become bigger than the selection.
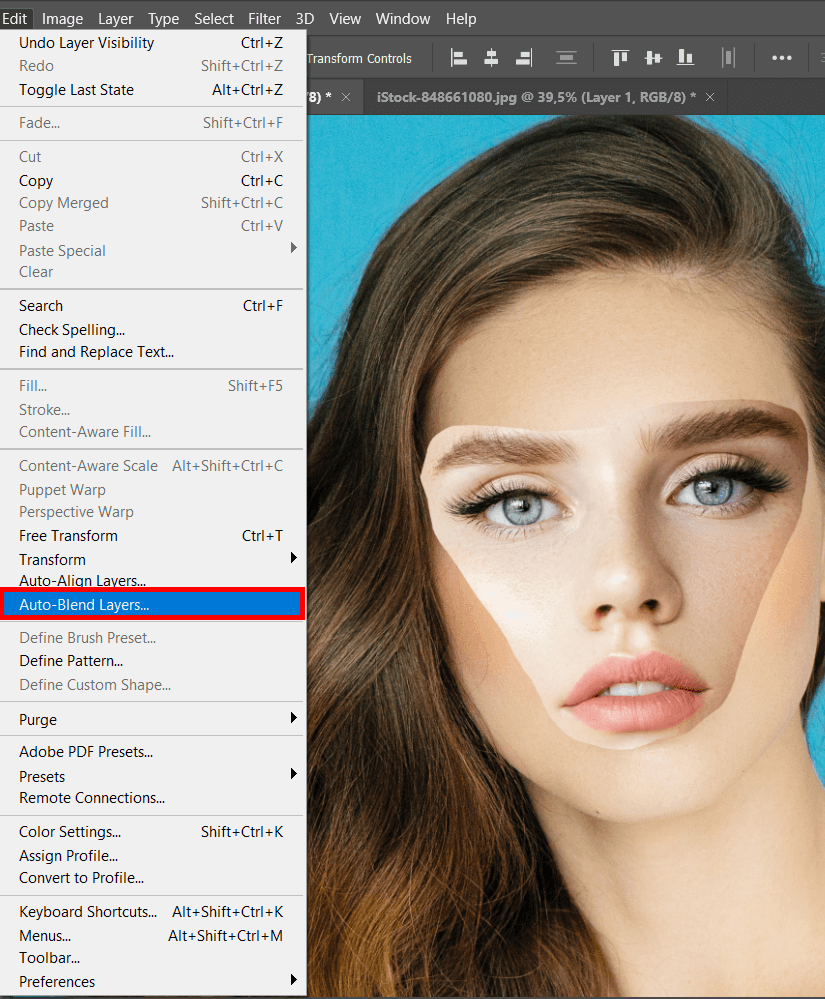
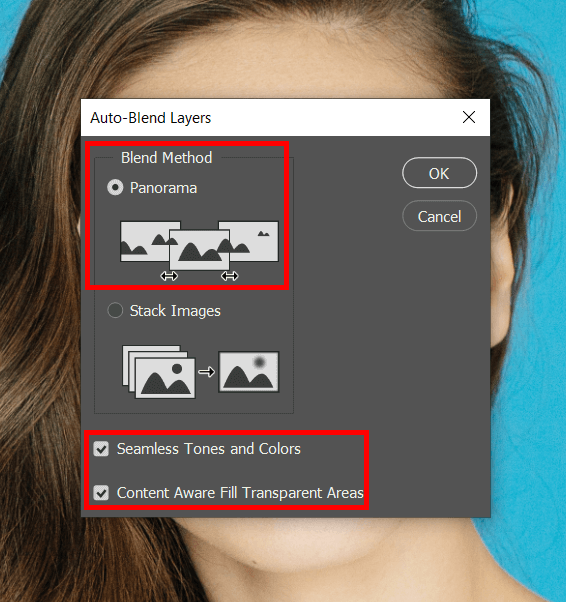
To select both layers, hold Shift and click on them. In the Panorama panel, check the boxes for Seamless Tones and Colors, and Content-Aware Fill Transparent areas, then click OK.
When your image is aligned, restore the original opacity and add a Layer Mask as the foreground color.
A Layer Mask allows you to control the visibility of the new layer. You can make some areas visible while hiding others. The Ctrl J or Command J hotkeys help users duplicate a layer. To continue working with the copy of the first layer, hide the original one by clicking on the eye icon.
The Soft Brush and Opacity tools come in handy for replacing heads in Photoshop. Set the Brush Hardness to 100%, the Spacing to 1%, and the Opacity to 40-50%. A Soft black Brush will help you make the edges of the new layer smoother and blend them with the original image.
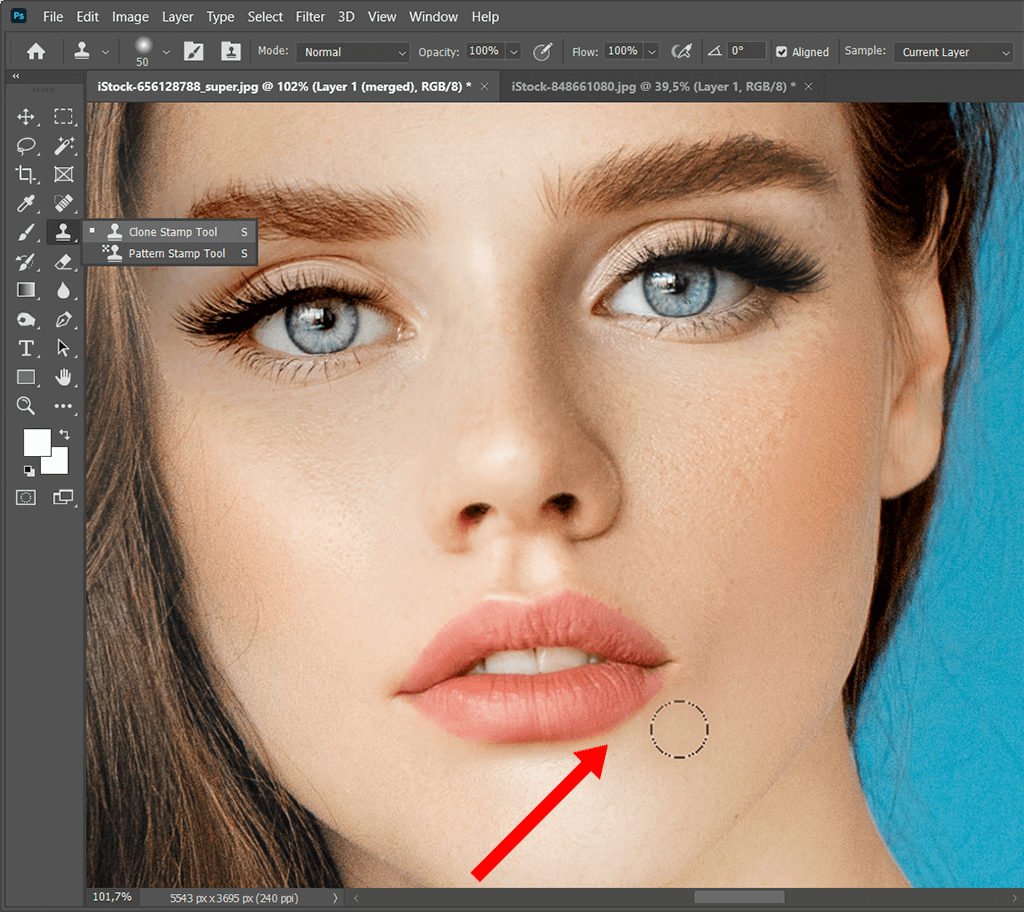
You can use the Clone Stamp as an alternative to the previous method. Use soft settings and brush over the parts of the face layer if you want to prevent it from blending. You can also hide some areas of the new face, like ears or hair.
When swapping heads in Photoshop, use a head that is bigger than the one that you want to replace since it will make your task easier. What's more, you can easily resize a large, high-quality picture without distorting it.
If you want to enhance portraits, try applying these Photoshop effects. They will help you automate your workflow, smooth out tones, and make the overall color gamut more balanced.


