If you want to learn how to remove noise in Photoshop to improve the quality of your photos so that they don’t look pixelated, then this is the tutorial for you. With the help of the 3 simple and effective methods described in this guide, you’ll be able to easily change the colors of a photo and remove digital noise in Photoshop.
This is among the most popular noise reduction methods you’ll find in Photoshop tutorials, as it deals with noise that appears because of color distortions. Color noise appears in the form of a plethora of colors rather than a solid color. If you want to reduce color noise, perform the following:
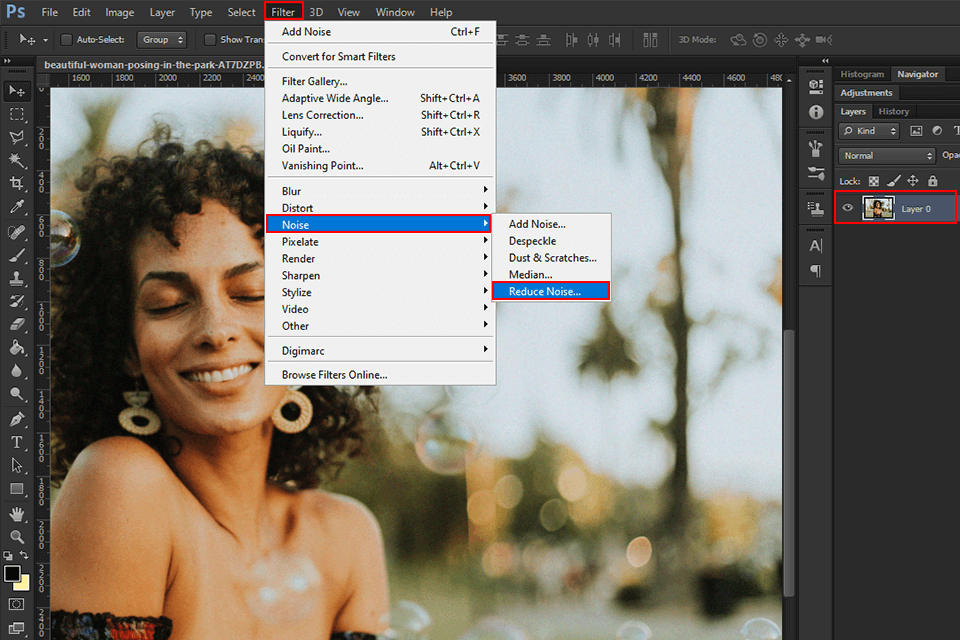
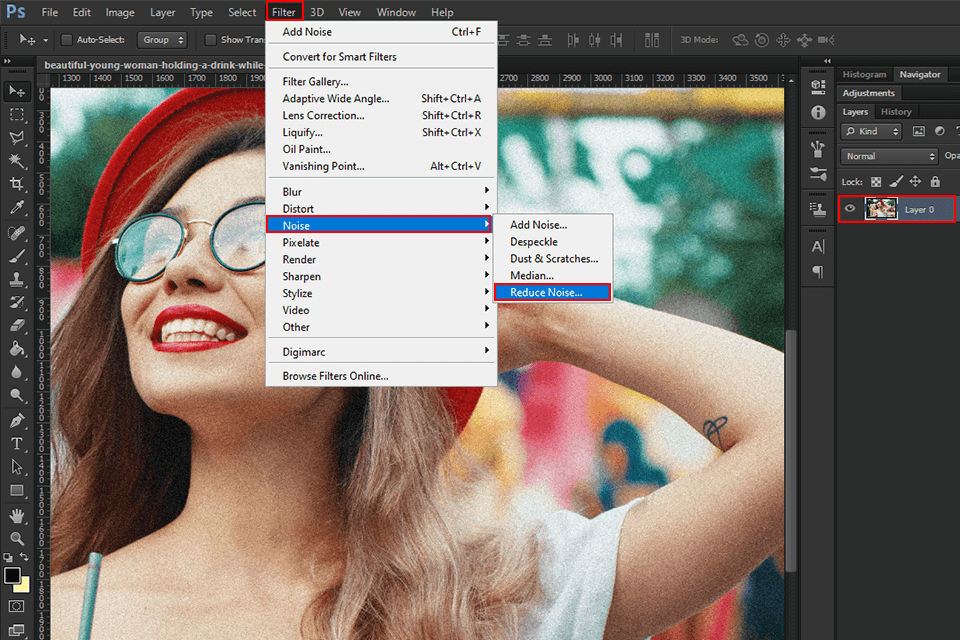
Add a photo to Photoshop, that is a really simple noise reduction software, and go to the “Filter” tab. Pick “Noise” and then select “Reduce noise”.
The “Noise reduction” dialogue window has a preview area as well as different sliders and parameters that will help you reduce different types of noise. Select the needed values to enhance the photo.
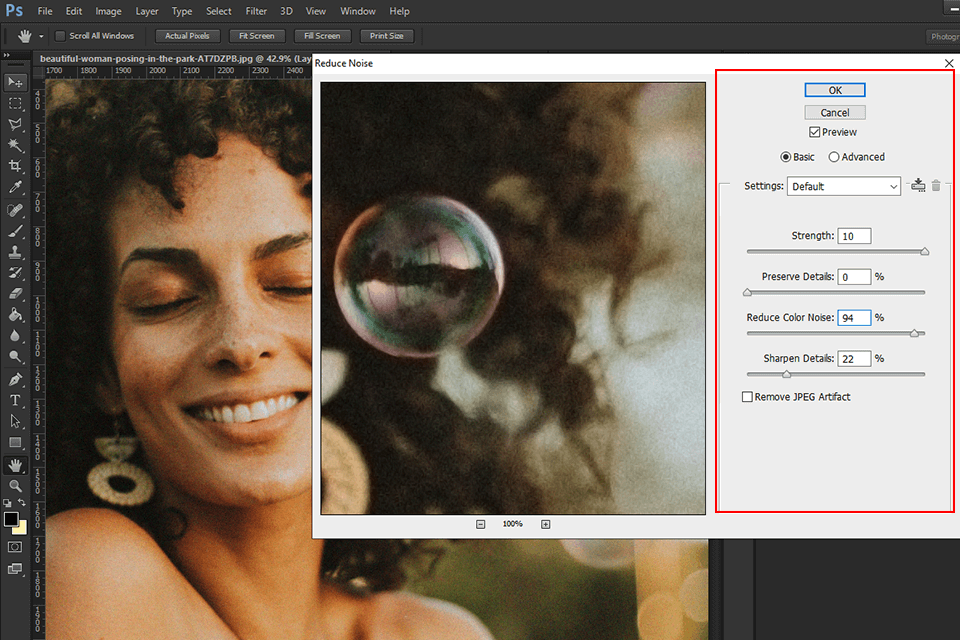
Another way to perform Photoshop noise reduction is to work with the “Reduce color noise” section. Slowly move the slider to the right until the color noise blends with the image as seamlessly as possible. You can look at the preview area when moving around the slider to ensure you don’t move it too far.
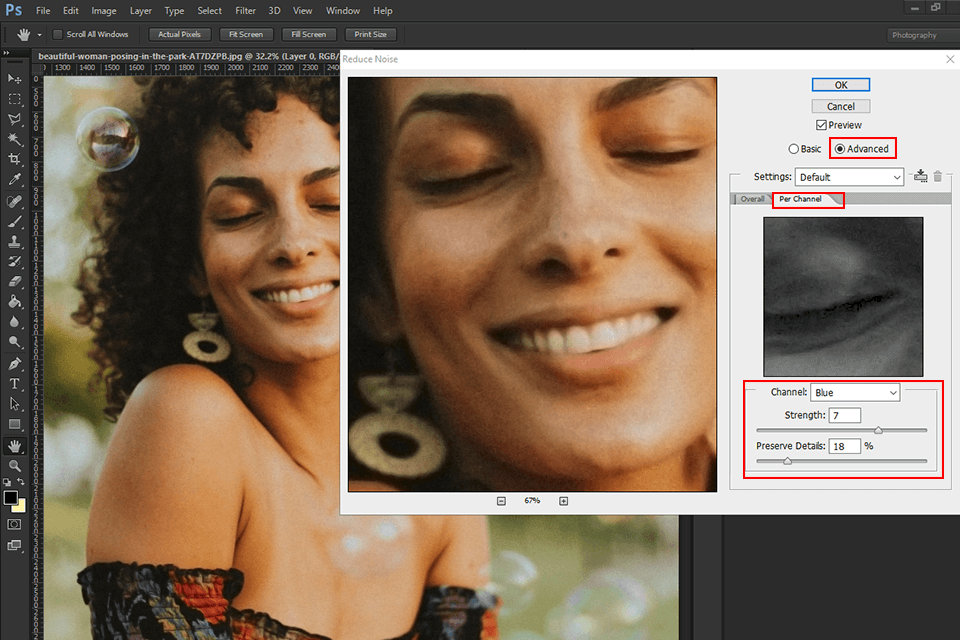
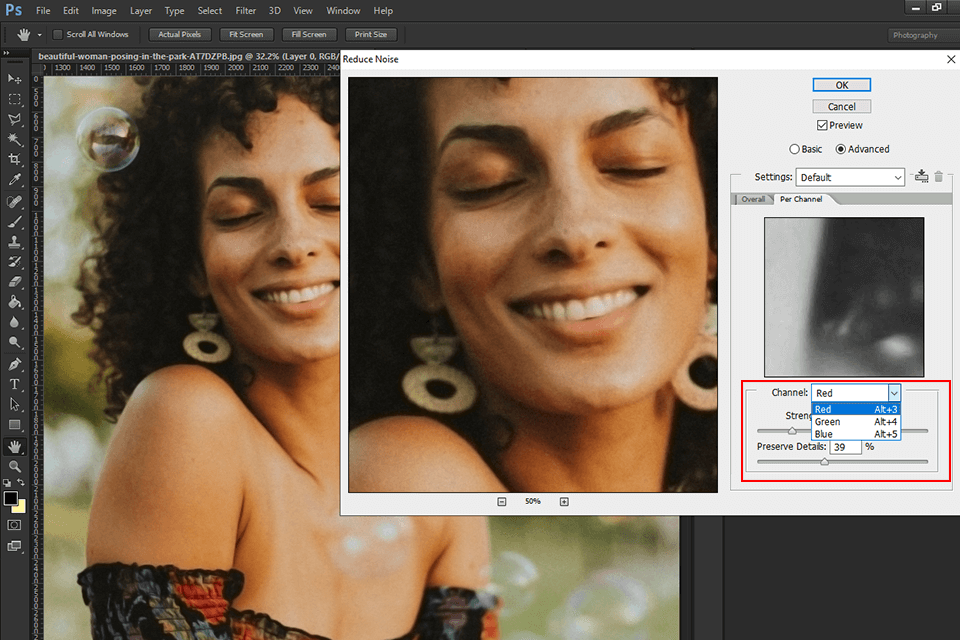
To achieve the best result, enter the parameters for each channel. If needed, some steps can be repeated.
If you need to receive high-quality photos as quickly as possible, reach out to our service to remove noise from photos at an affordable price and with quick turnaround.
Another universal Photoshop reduce noise method allows dealing with brightness-caused noise that manifests itself as grain. Unlike color noise, you won’t see any color variations. This noise type pertains to brightness, not color.
Open the photo in Photoshop and go to the “Filter” tab. Choose “Noise”, and then select “Reduce noise”.
Type in the required parameters in the dialogue window to reduce the noise.

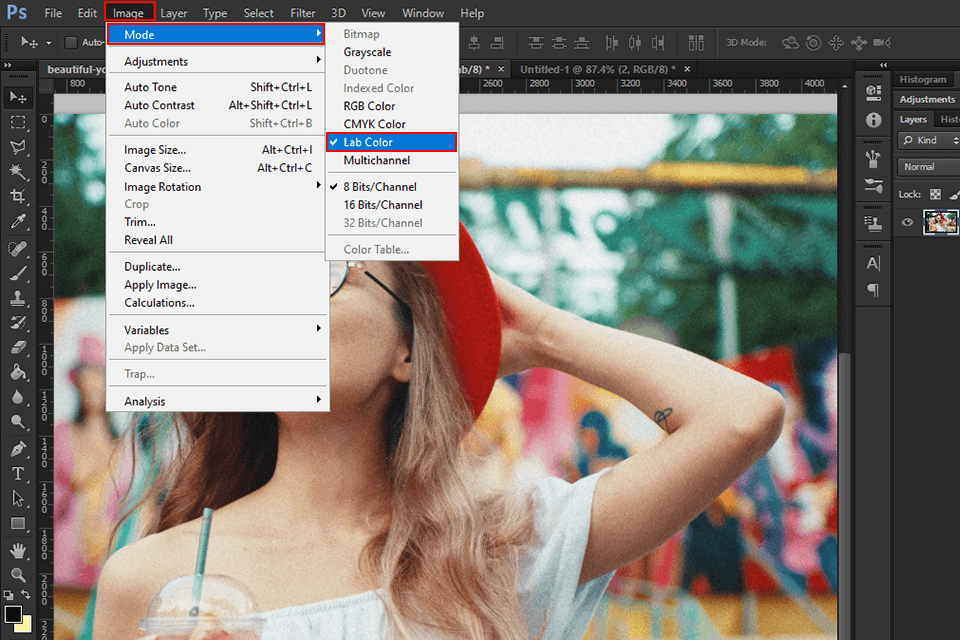
Click “Image” in the main menu, move the mouse cursor to “Mode” and pick “Lab Color”. This will allow you to switch to “Lab Color” mode. In the “Channels” palette, you’ll now see that you’re working with “Brightness” “a” and “b” instead of the “Red”, “Green”, and “Blue” “RGB” channels.
The “Brightness” channel contains detailed information about the black-and-whites and brightness of the image. Channel “a” contains details of green and purple hues, while channel “b” is responsible for yellow and blue color details.
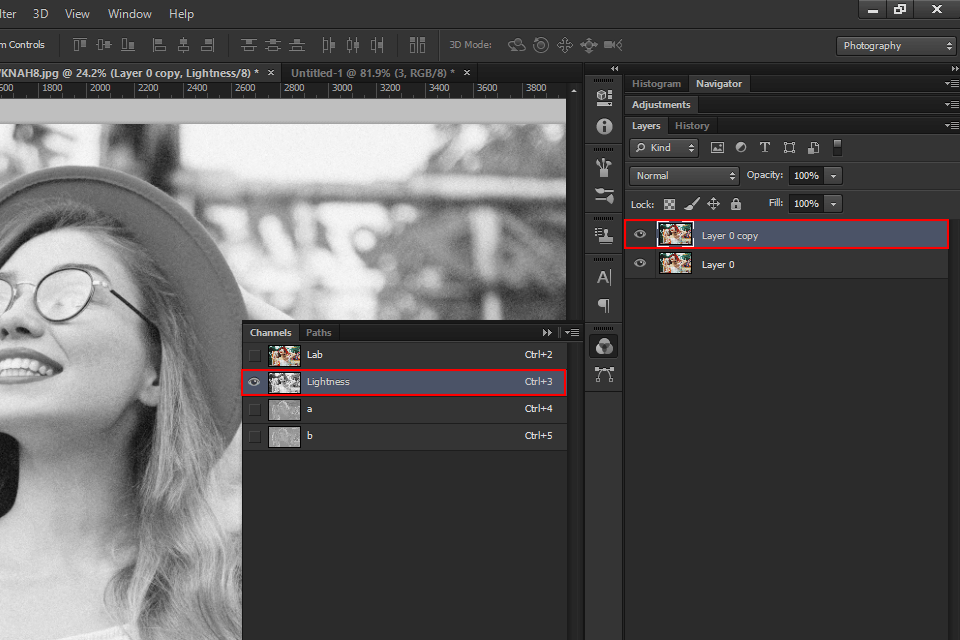
After switching to “Lab Color” mode, create a new layer. To do so, drag the current background layer to the “Create a New Layer” icon at the bottom. When creating a new layer, the original photo will remain unchanged while you apply changes to the new layer. As soon as you create the new layer, choose the “Lightness” channel and make sure only this channel is turned on.
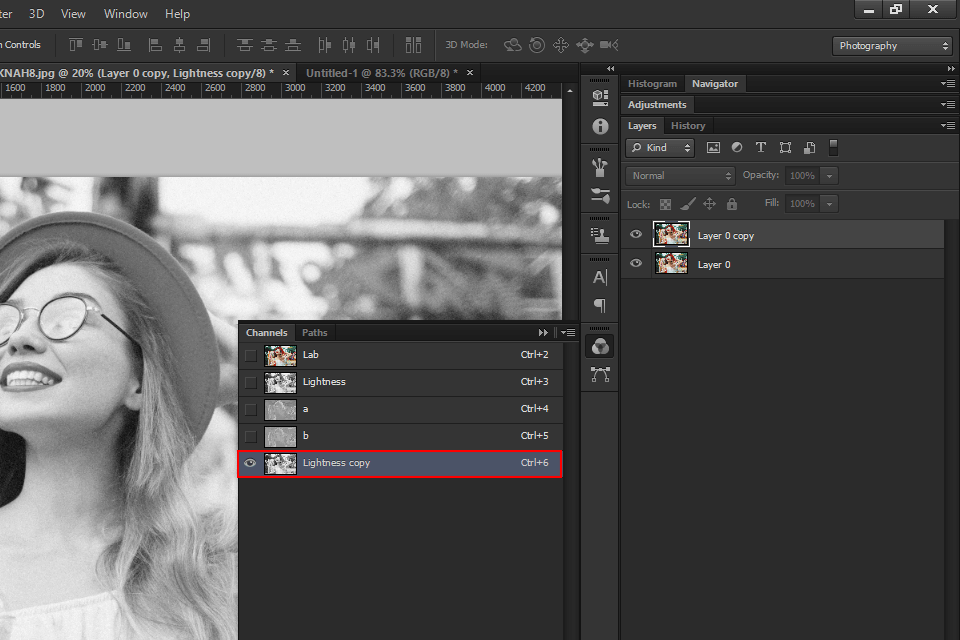
Create a copy of the “Lightness” channel. Drag the existing channel onto the “Create a new channel” icon below.
Creating a new channel allows for adjusting the image when needed without changing the original version. Before you can move forward, be sure to change the name of the new channel so that you know which channel to click for introducing additional adjustments.
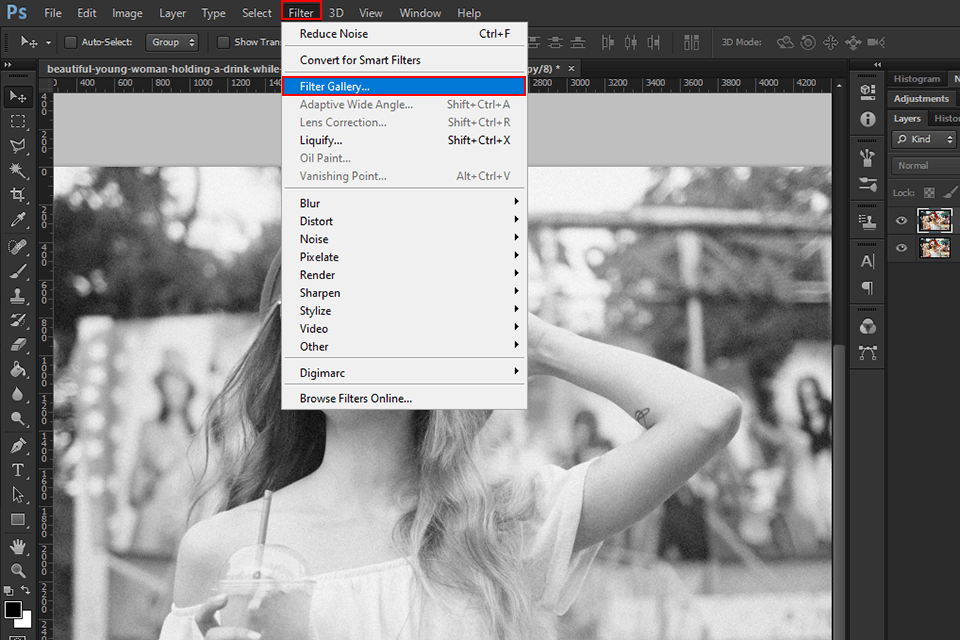
Click “Filter” and then choose “Filter Gallery”.
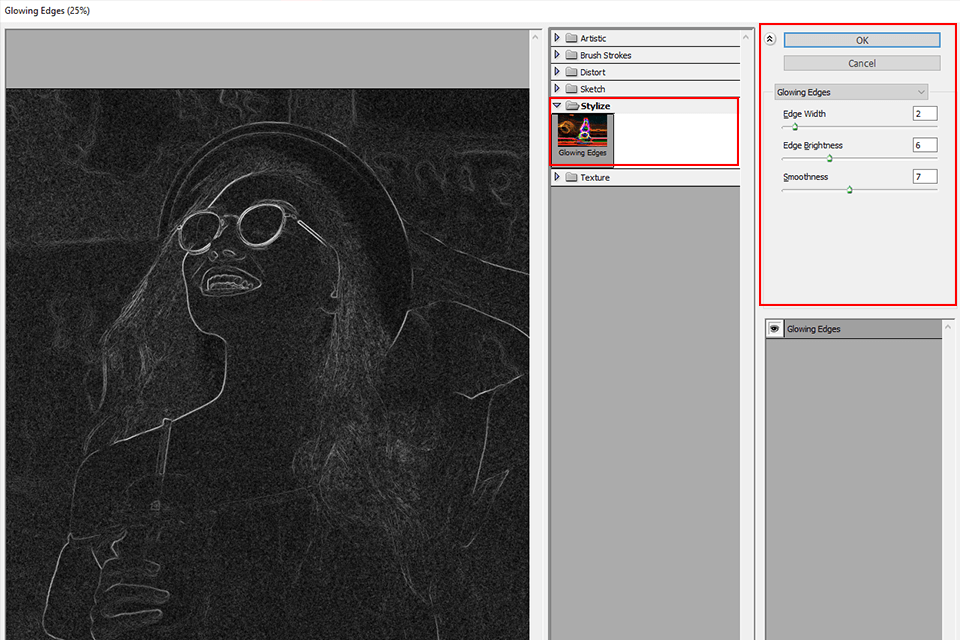
Click “Stylize” and add the “Glowing Edges” effect to the image. This effect finds the edges in the photo and highlights them in white while all smooth surfaces remain black.
Input the necessary parameters in the dialogue window.
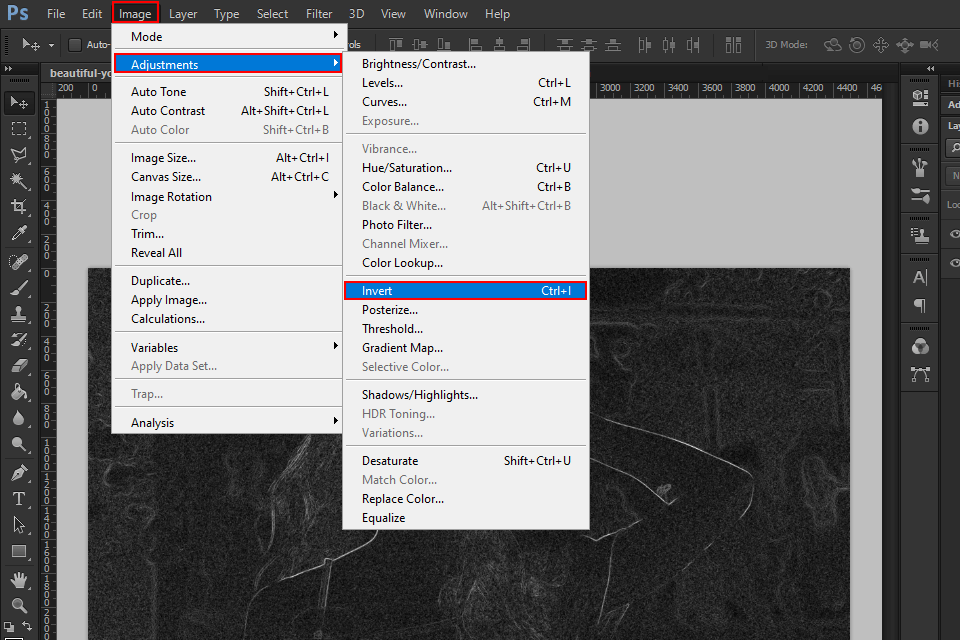
Now that you’ve made the changes to this channel, click “Image”, hover the mouse over “Adjustments”, and then pick “Invert” to invert this channel.
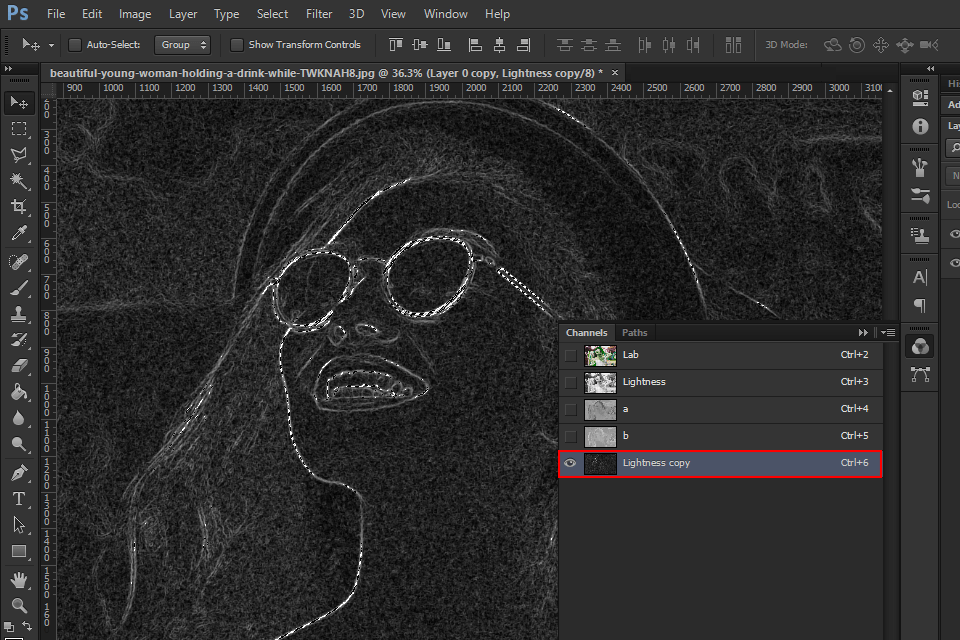
While keeping the “Command” button on Mac (“Control” on PC) pressed or while pressing Alt, click the Lightness copy. After performing this action, you’ll see that the white areas are highlighted while the dark ones aren’t.
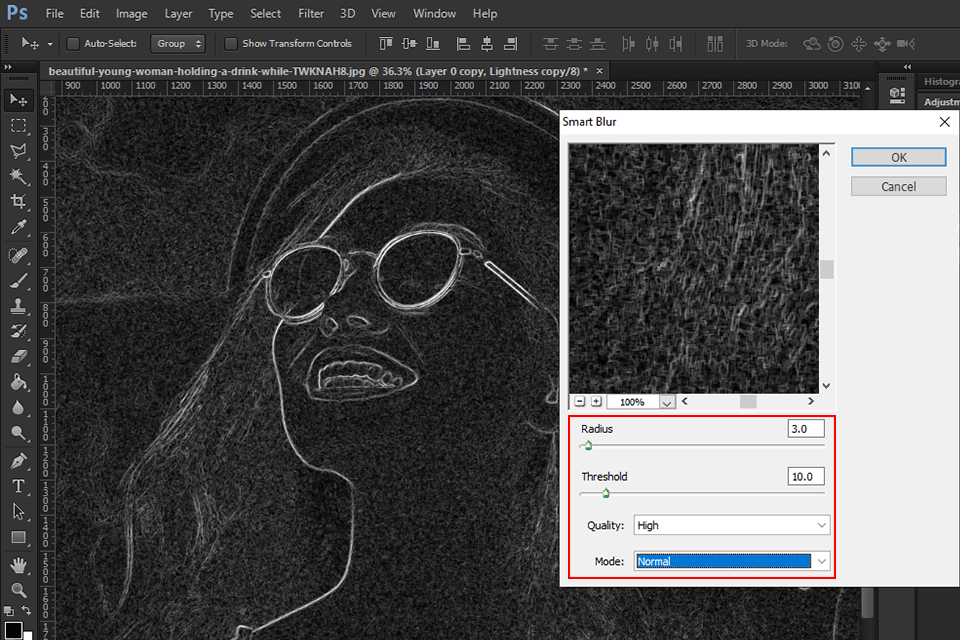
The next step is to press “Filter”, hover the mouse over “Blur” and pick “Smart Blur”.

One of the most important tips you’ll find in Photoshop portrait tutorials is to set the “Quality” in “Smart Blur” to high. As for the “Radius”, pick a lower value to avoid excessively blurring the image.
In the “Radius” tab, you’ll find a “Threshold” slider that controls the degree of applied blur. It’s vital to set the value at about 10 to avoid damaging the photo’s details.
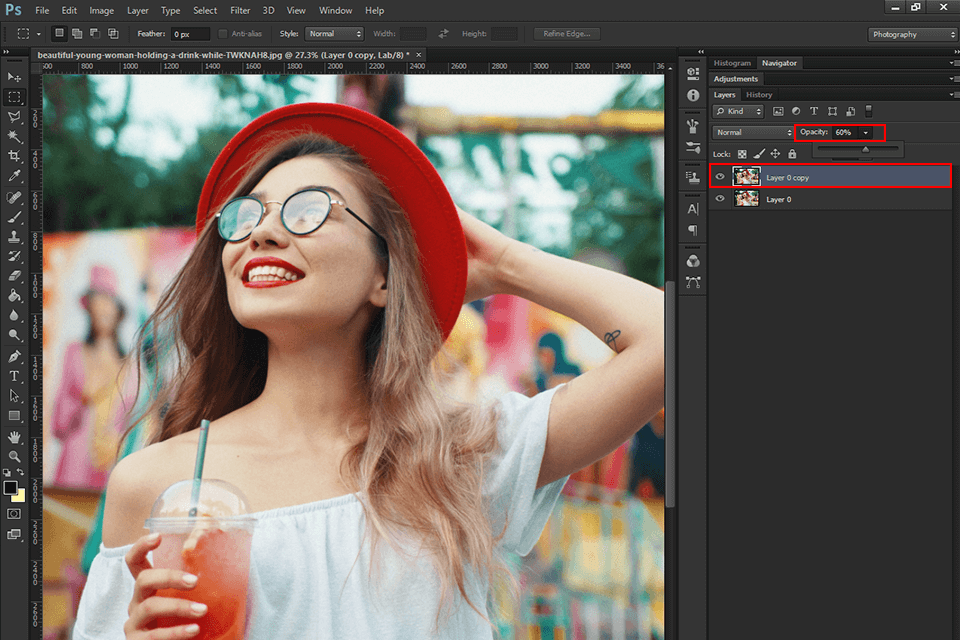
After applying blur to the image, open the “Layers” panel to change the “Opacity”. This will help you fine-tune the results of your adjustments. The optimal “Opacity” level depends on your unique photography style and desired results.
The percentage you set for “Opacity” will include both the lower, original, unchanged layer and the upper, adjusted layer. Setting the “Opacity” will also help you refine the details of the original layer.
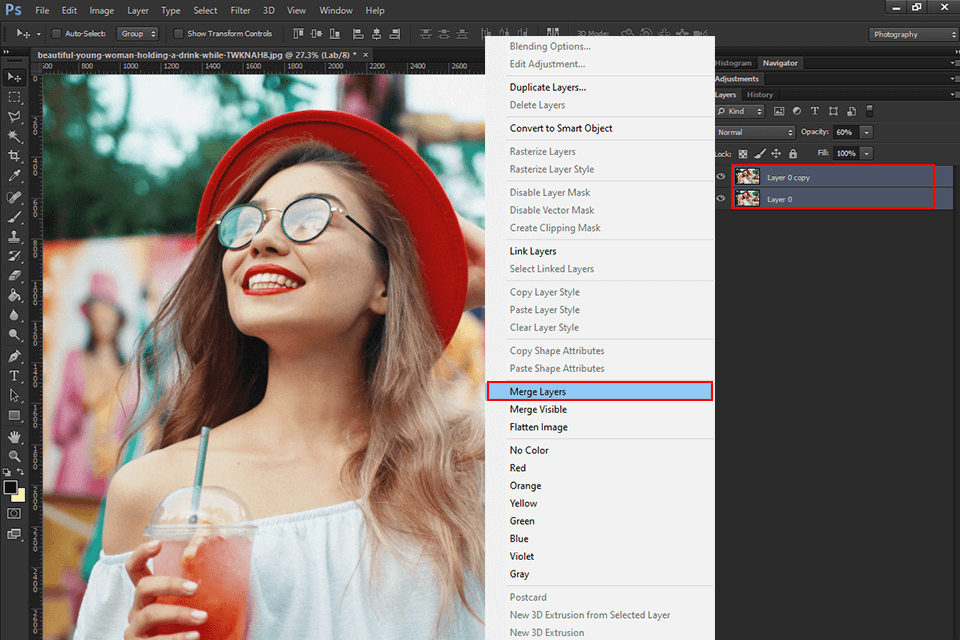
Now that you’ve made all the necessary adjustments to the image, you can merge it. Click “Layer” and press “Merge Layers”.
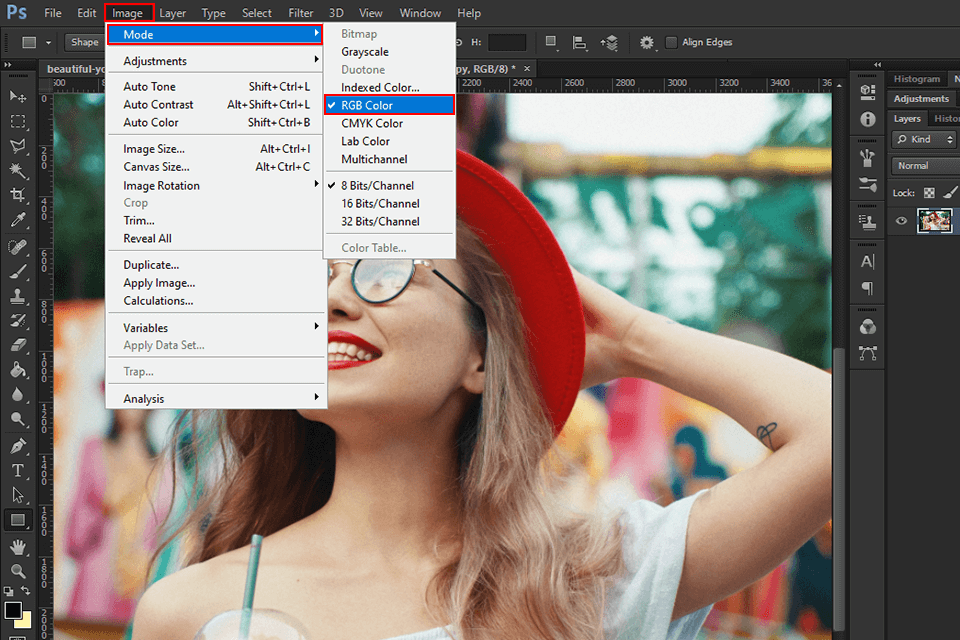
Return to the RGB color mode by pressing “Image”, hovering the mouse cursor over “Mode” and choosing “RGB Color”.
The Unsharp Mask filter is a popular tool for sharpening photos and learning how to remove noise in Photoshop. By using this feature, you can control the amount, radius, and size by which the sharpening will be applied.
Open the photo in Photoshop and create a duplicate. Click the right mouse button on the layer you want to sharpen, then select “Duplicate layer”. You’ll apply the sharpening to this layer, which will prevent you from accidentally changing the original image.
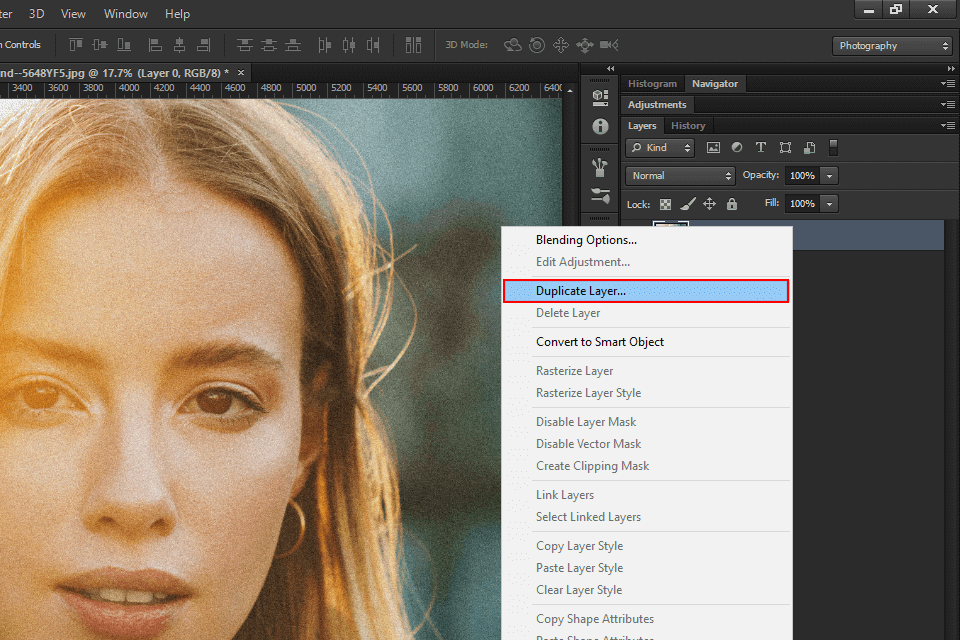
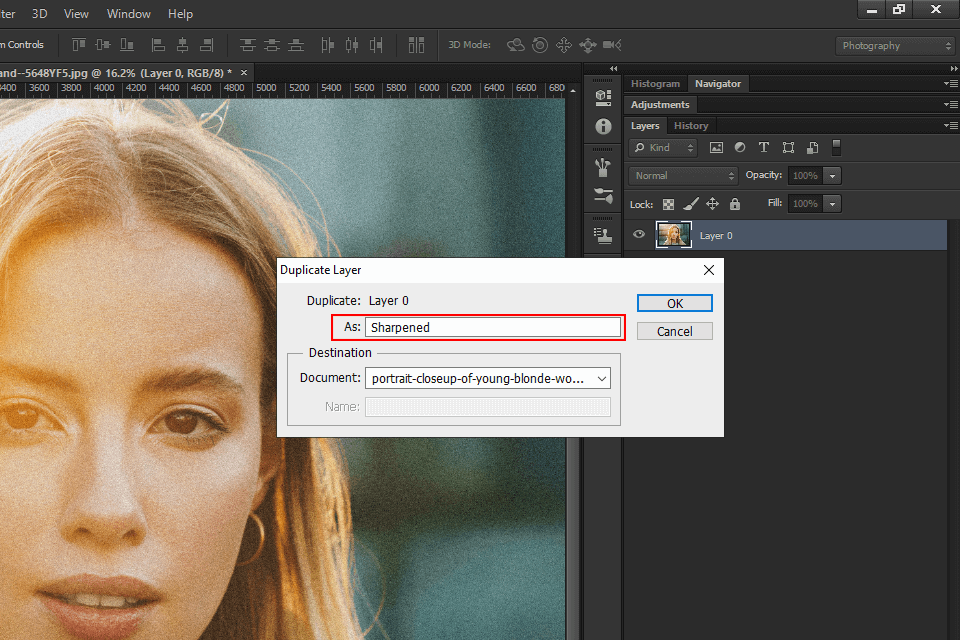
A dialogue window will appear. Type in the name for the new layer and press OK. Name the duplicate Sharpened.
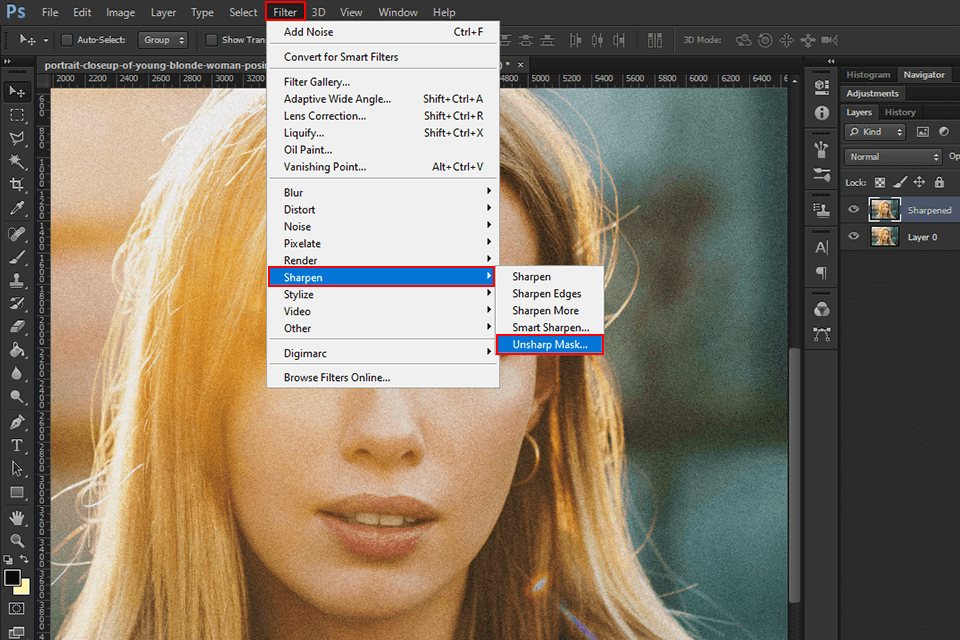
After highlighting the new duplicated layer, go to Filter > Sharpen > Unsharp Mask. If you’re using Photoshop Elements, then you need to go to “Adjustments” > “Unsharp Mask”.
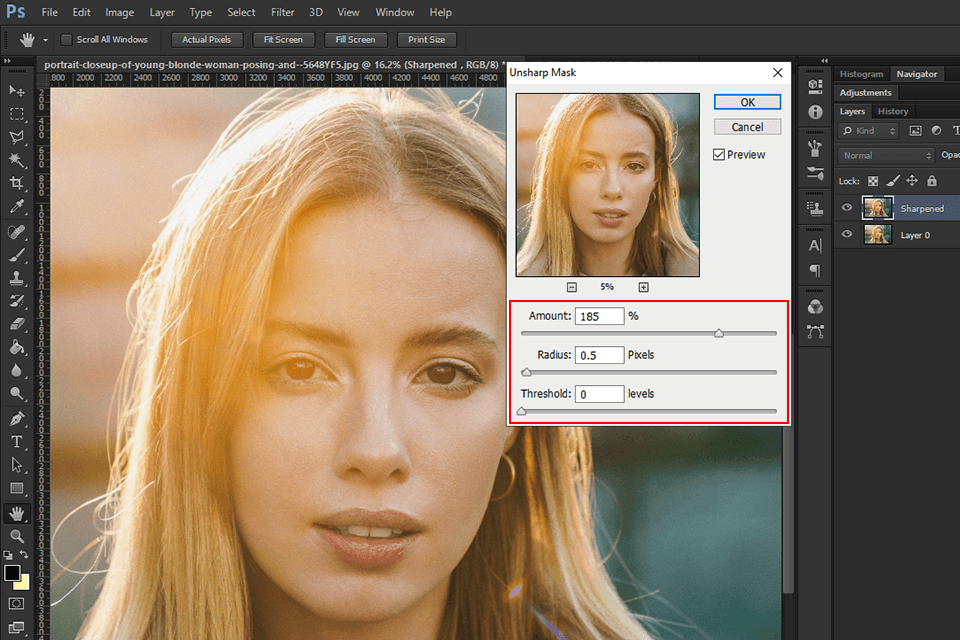
You’ll see a dialogue window. Set the desired radius size, and then choose the sharpness amount that you want to add. You can check out the preview window above the sliders to see how the sharpening will affect the image.
Click the preview window to compare the sharpened version to the original. To examine the second half of the image, click and drag the mouse inside the preview window. Keep changing the parameters until you’re satisfied with the result, and then press OK.
If needed, you can repeat the steps above.
If you want to achieve professional results in Photoshop, make use of free filters above. With their help, you’ll make your images more attractive and colorful. Moreover, they can help significantly simplify your workflow.


