If you want to diversify your typography experience and create eye-catching text effects, we recommend experimenting with 3D texts. In this review, we'll show you how to make 3D text in Photoshop. After reading it, you will be able to create entire 3D art objects and text effects.
The first thing you need to do is to install Photoshop. Since you need a lot of processor resources for 3D modeling, the lack of VRAM can be a stumbling block for creating Photoshop 3D text.
Create a new document by clicking on File in the main menu. You can use Photoshop keyboard shortcuts to speed up your workflow. To create a file, press the Ctrl + N/Cmd + N keys.
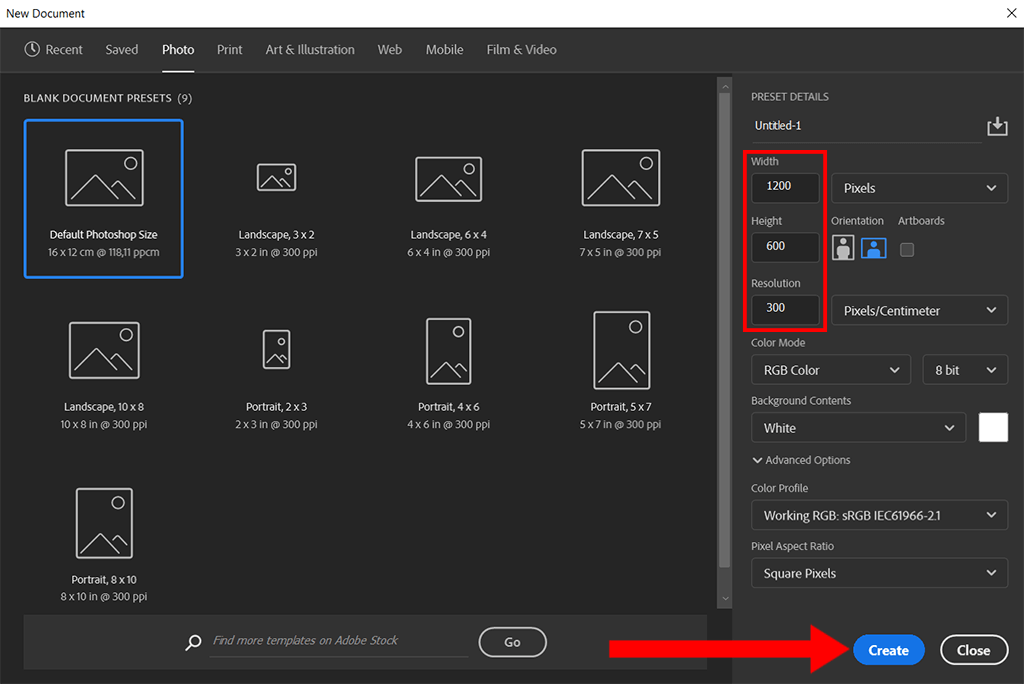
Once the New Document appears, you need to set parameters. In the example above, we used the following values: width – 1200 pixels, height – 630 pixels, resolution – 300 pixels/centimeter.
Then, click on the Create button. A new document will appear on the screen.
First, you’d add text to the document. Select the Type Tool (T) from the Toolbox. Then, enter a new text, let it be "3D TEXT". It’s better to use capital letters and set the font size to, let’s say, 22pt. You can also select any color for the text.
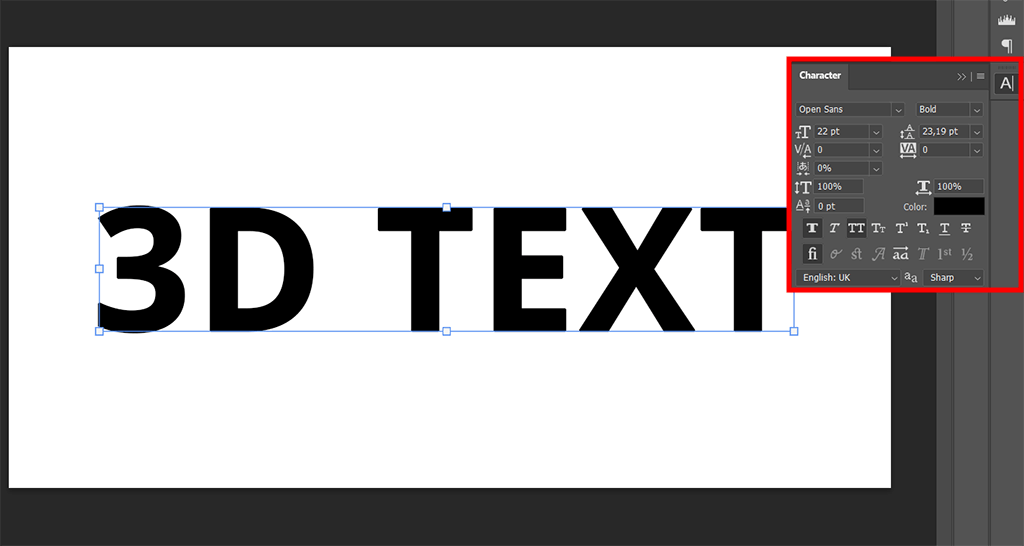
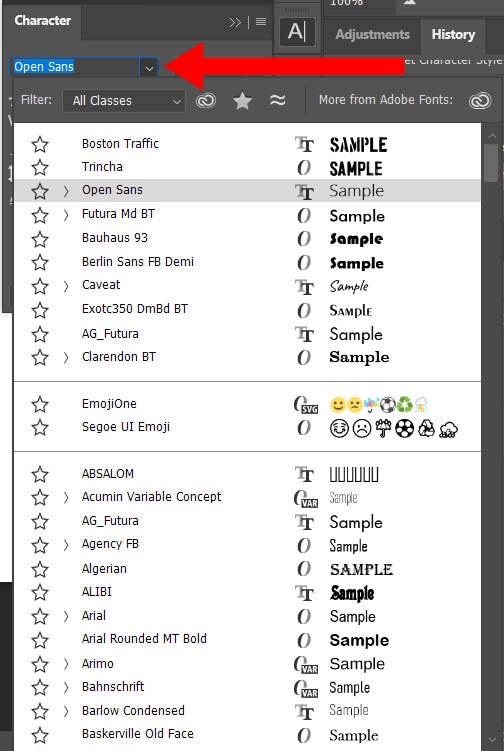
When you select a Text Tool, you can adjust text settings in the Options Bar. You can select any font for your text from the toolbar. Select one of the free Adobe fonts and set its size. We recommend using large and bold fonts to make 3D text in Photoshop.
To adjust the text size with the help of the Free Transform option, use the key combination Ctrl + T/Cmd + T. You can also drag the edges of the text box to change its size.
The next step is to select a texture and apply it to the text. To add the texture to the workspace, put it over the text and press Alt + G/Opt + G to clip the layers.
Then, click on the text layer while holding Shift. Once both layers are active, you need to press Ctrl + E/Cmd + E to merge layers in Photoshop.
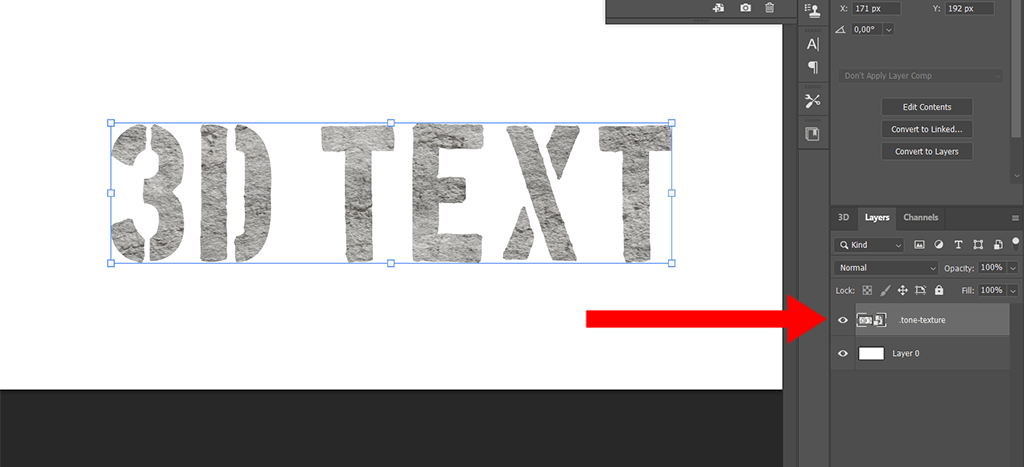
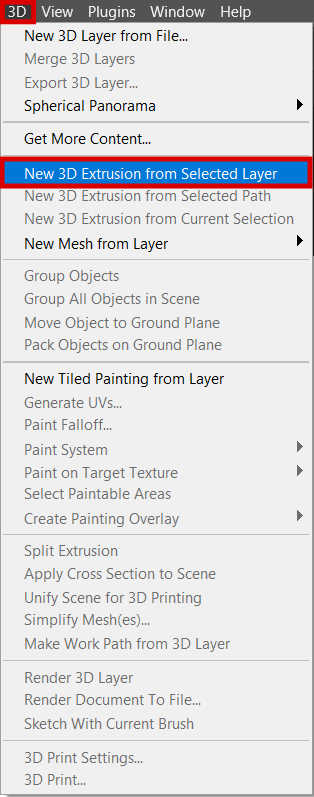
You need to check whether a text layer is active. You can do it in the Layers window. Then, click on the text layer, go to the 3D bar and choose New 3D Extrusion from Selected Layer.
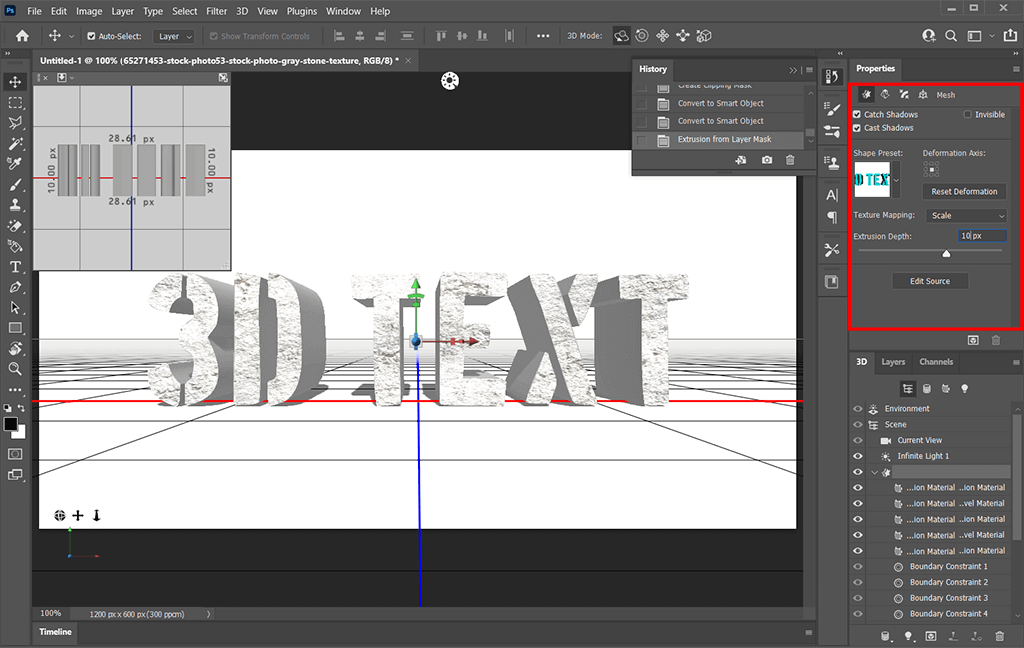
After changing the text to a 3D object, you will see the 3D Workspace window on the screen. You will also see the new Properties window in the upper right corner. In this window, set these parameters:
Texture Mapping: Scale
Extrusion Depth: 10mm
You can use the Infinite Light option on the 3D panel to adjust the light. Use the controller to adjust shadows.

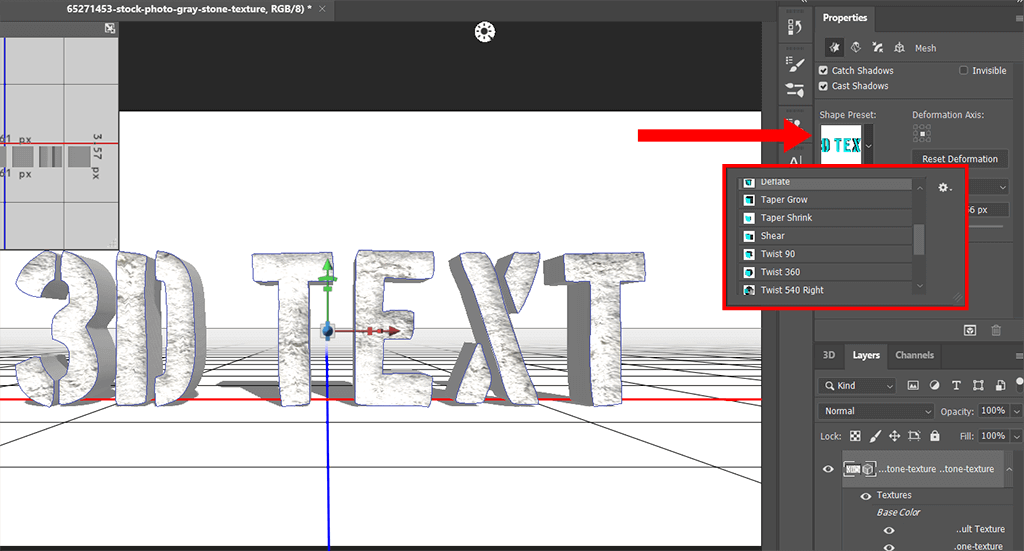
To change the settings of the 3D text, you need to select Shape Preset in the Properties panel and adjust extrusion.
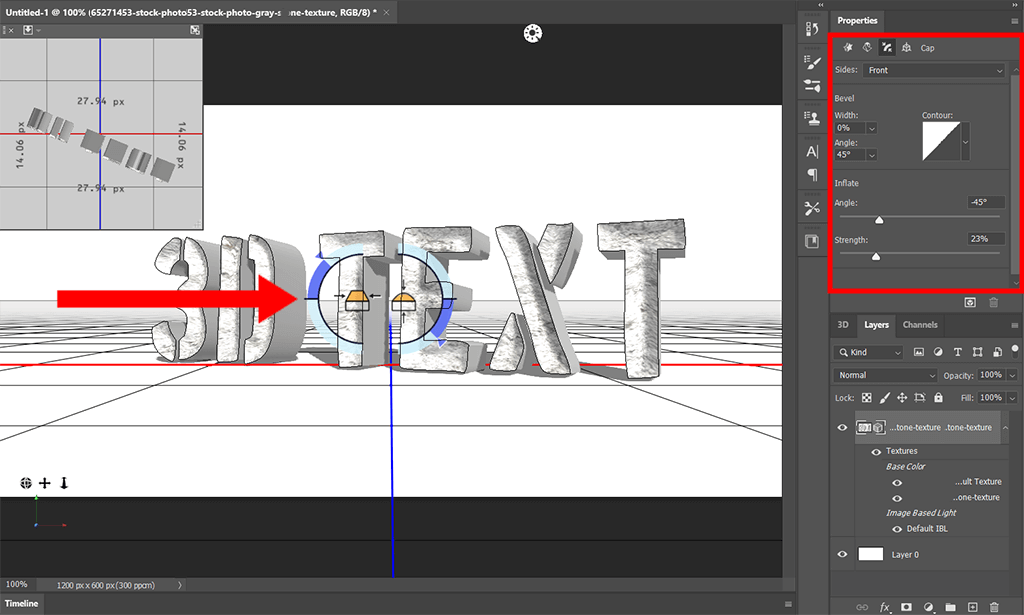
You can use the Cap tab to adjust the bevel and inflation applied to the front and/or back surfaces of your 3D object. You might also need to edit the text angle.
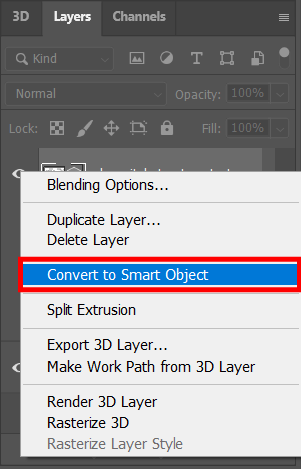
You also need to convert 3D text into a smart object. To speed up the conversion, right-click (Win) / Ctrl-click (Mac) on the layer in the Layers panel. Since smart objects are non-destructive, you can transform them without quality loss.
The Type layer is integrated into the smart object. Thus, you can open the object and edit the text anytime.
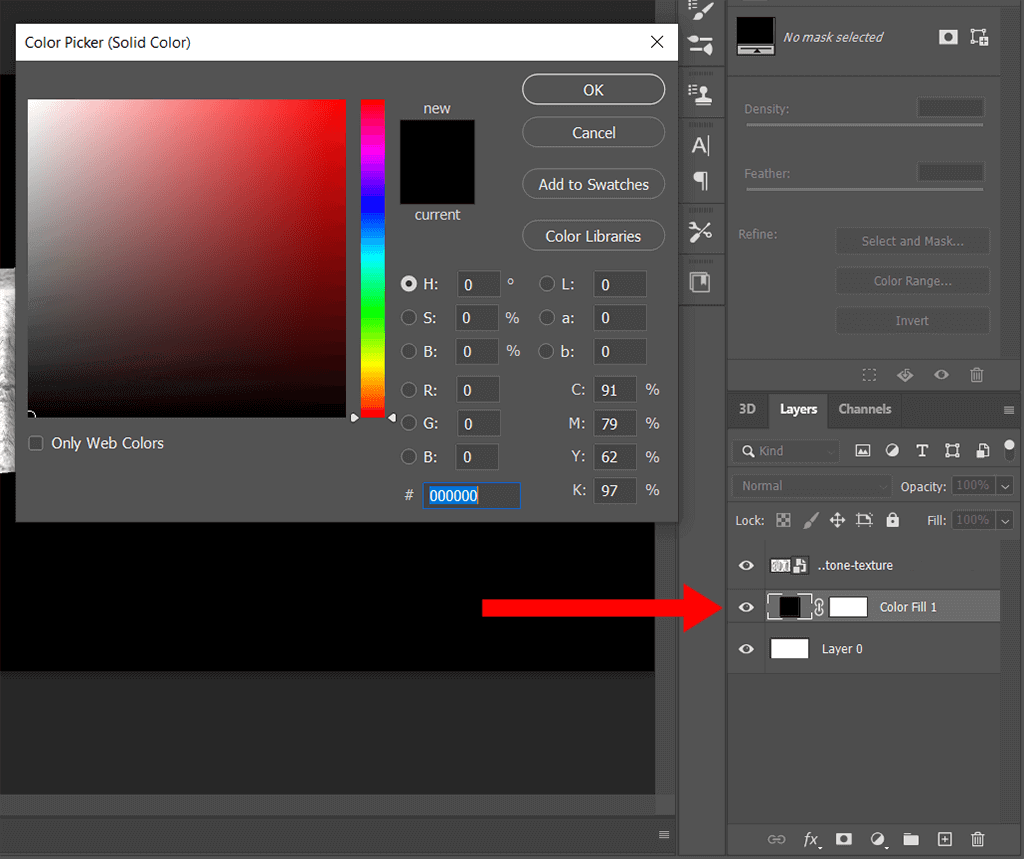
By using Color Picker, you can change the background color of the text. In the example below, we’ve made the background black instead of white.
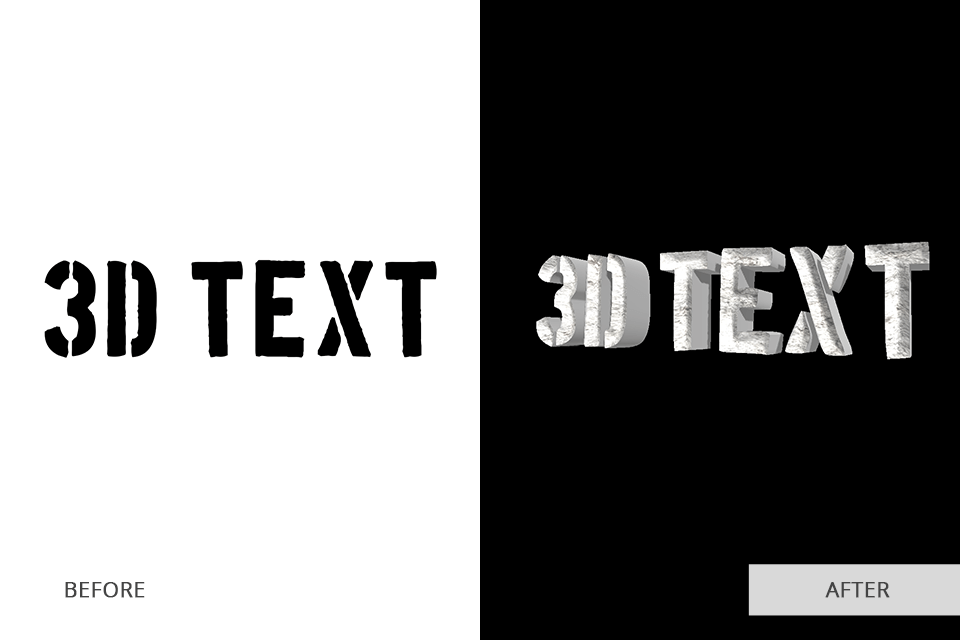
When your Photoshop 3D text is ready, you can check out other useful Photoshop text effects tutorials, including how to outline text in Photoshop.

If you’re bored with the basic Photoshop fonts and want to expand your library, take a look at this collection. While most high-end fonts on the Internet are paid ones, we have a free selection of attractive fonts. You can download them in a few clicks.
They will come in handy for everyone who knows how to add fonts to Photoshop. With them, you can significantly enhance your designs and photos.