It is important to know how to outline text in Photoshop if you are involved in typographic design, creating logos and digital publications. This technique will help you make the text easily readable on any background.
In this article, I will share three simple and proven methods of adding an outline to text in Photoshop. Each step of the tutorial is described in detail so everyone can follow through.
One of the simplest ways to outline text in Photoshop is to tweak the “Stroke” parameter of the text. In fact, Stroke gives you numerous variations of how to customize text in pictures.
Find the Horizontal Type Tool or Vertical Type Tool and add text to the picture using it. Drag the cursor on the canvas to create a text box and type in the text.
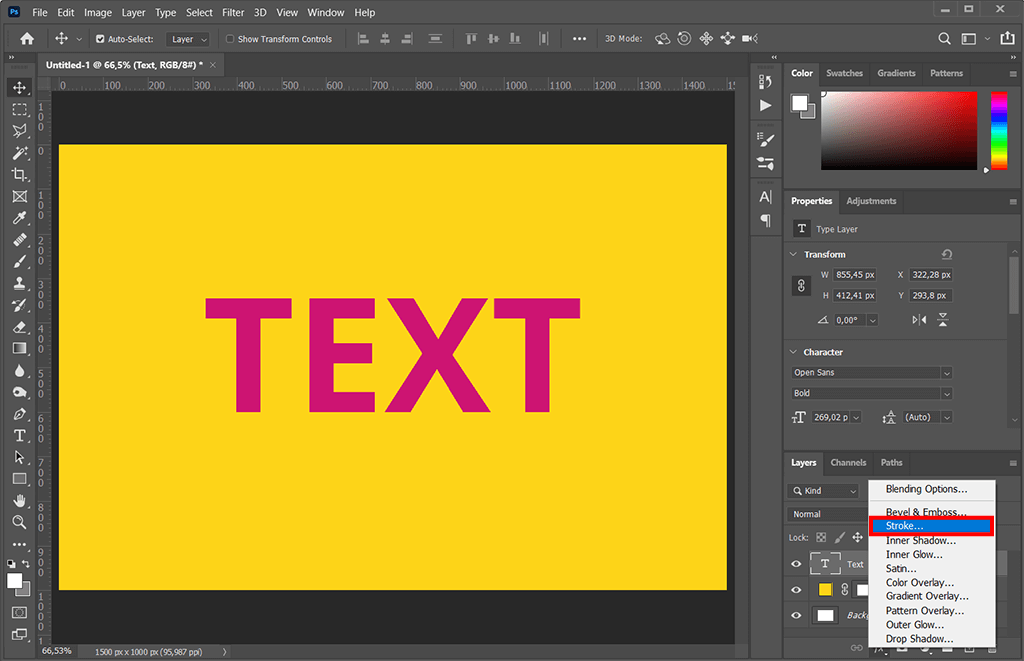
At the bottom of the Layers panel, click the “Fx” button. You will see a pop-up menu where you should choose “Stroke”. Now the Layer Style window will appear, and the Stroke layer style will be selected already.
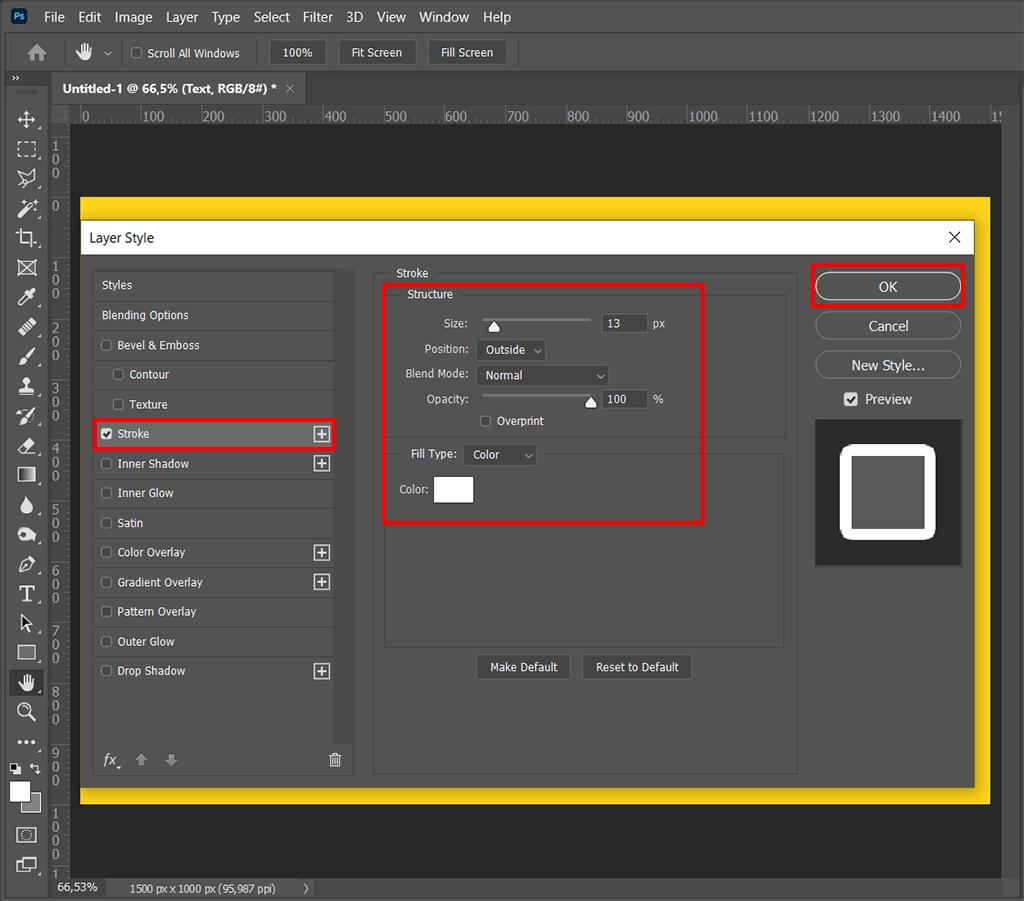
Now it is time to pick the color of Photoshop text outline via the Color Picker window. Once you settle on the color, play around with the thickness of the outline using the “Size” slider. To alter the Blend Mode, Opacity and Fill Type, take advantage of extra options within the Layer Style window.
With the Layer Style window being still open, pick some of the extra Layer Styles for the text. For instance, try adding an Inner Glow to the area within the border or a Drop Shadow beyond the text. Once you are satisfied with the outcome, click “OK”.
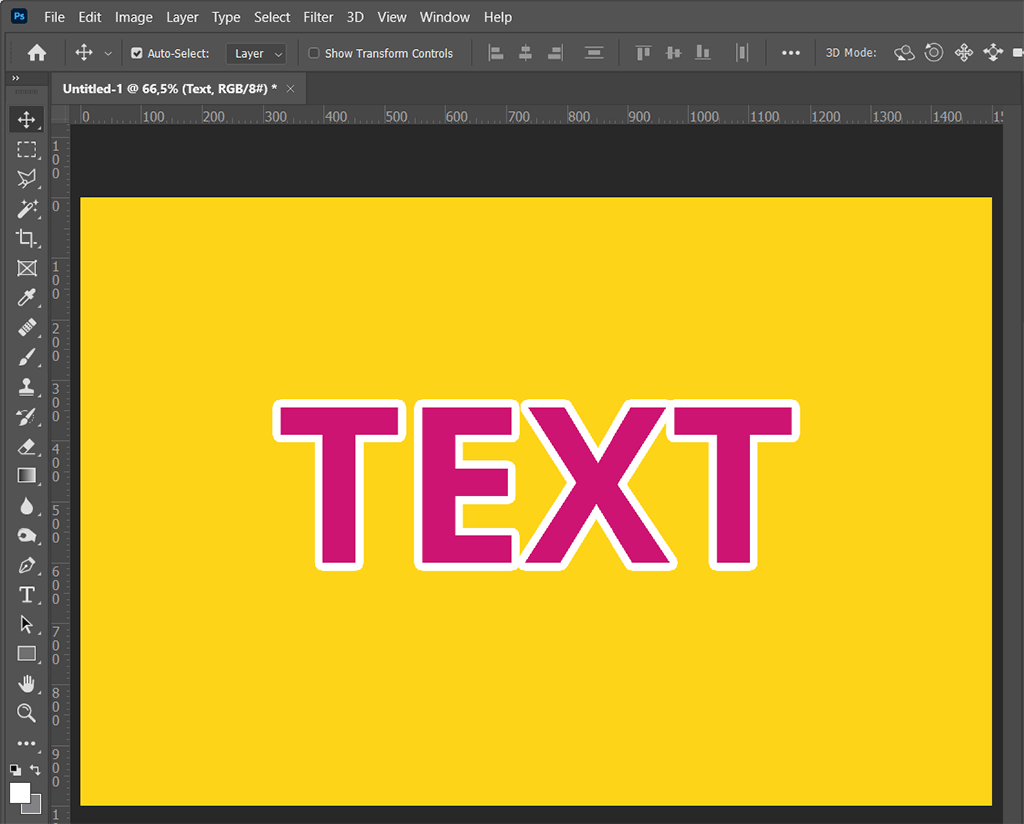
The second method of how to outline text in Photoshop is rather widespread – you must have seen such a nice text effect in web banners and social media posts. Many texts on pictures apps are capable of outlining text this way. However, with Photoshop, you are free to customize the resulting effect even further, even creating a new font each time.
Import the picture to Photoshop. With a monochrome color background layer, you may sort of move the picture to the side and have some portion of the text fall on the picture while the rest will be on the colored background.
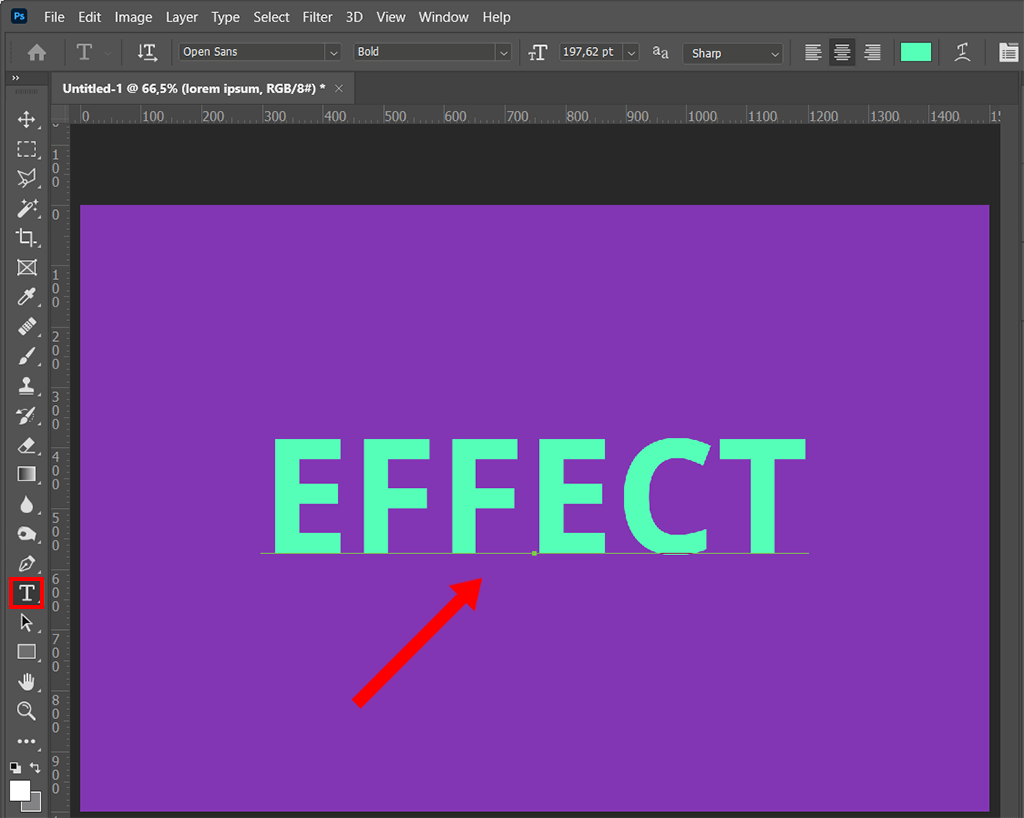
Type in the text on the picture or background. Then create a copy of the text layer with the name “Transparent”.
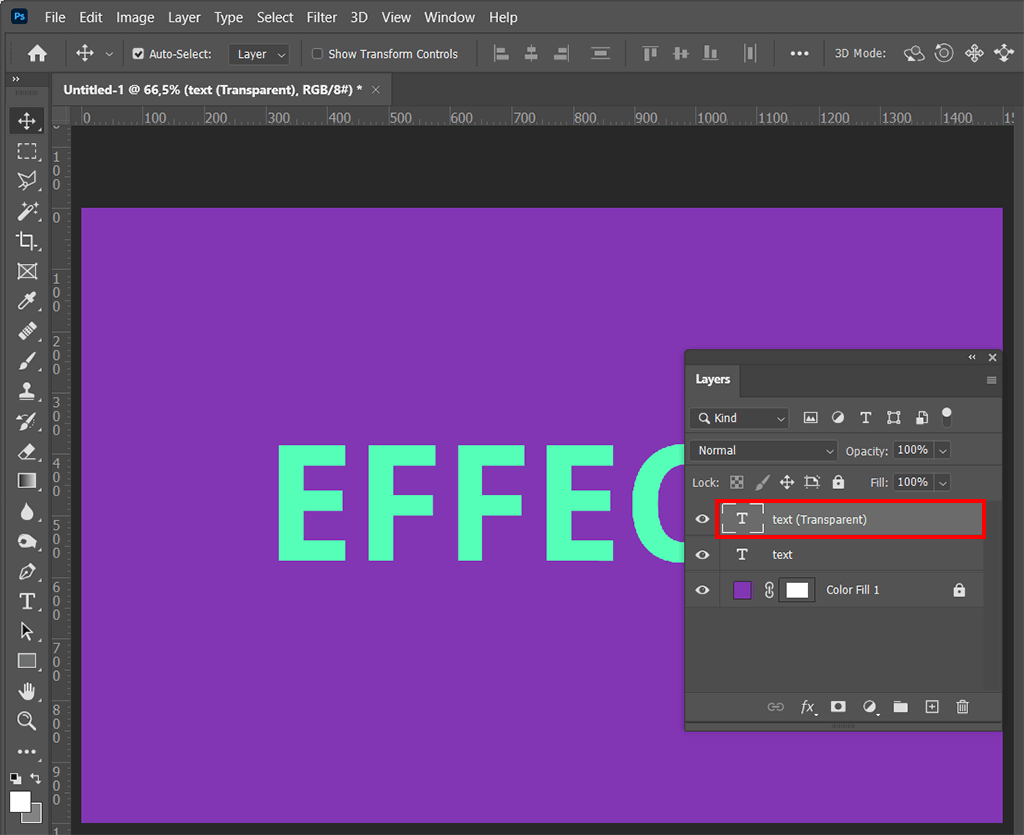
Convert one text layer into an outline. The other text layer should remain with the fill inside. Now proceed to the “Transparent” text layer and add the outlined text effect to it. The instructions are given in the next step.
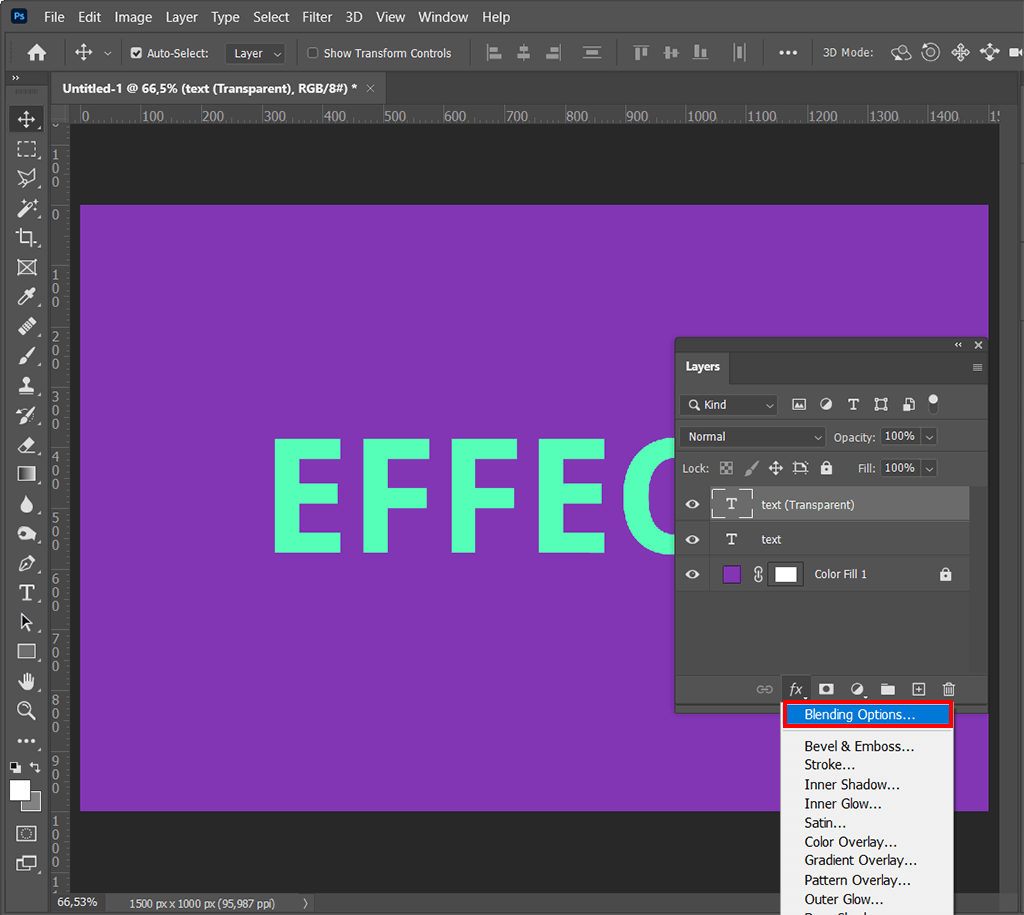
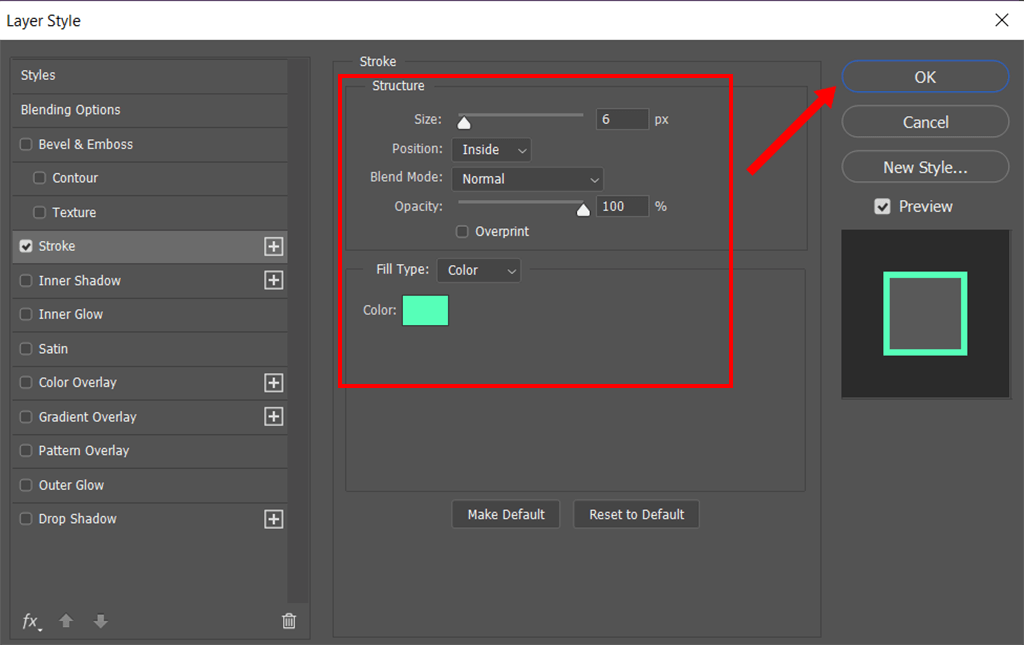
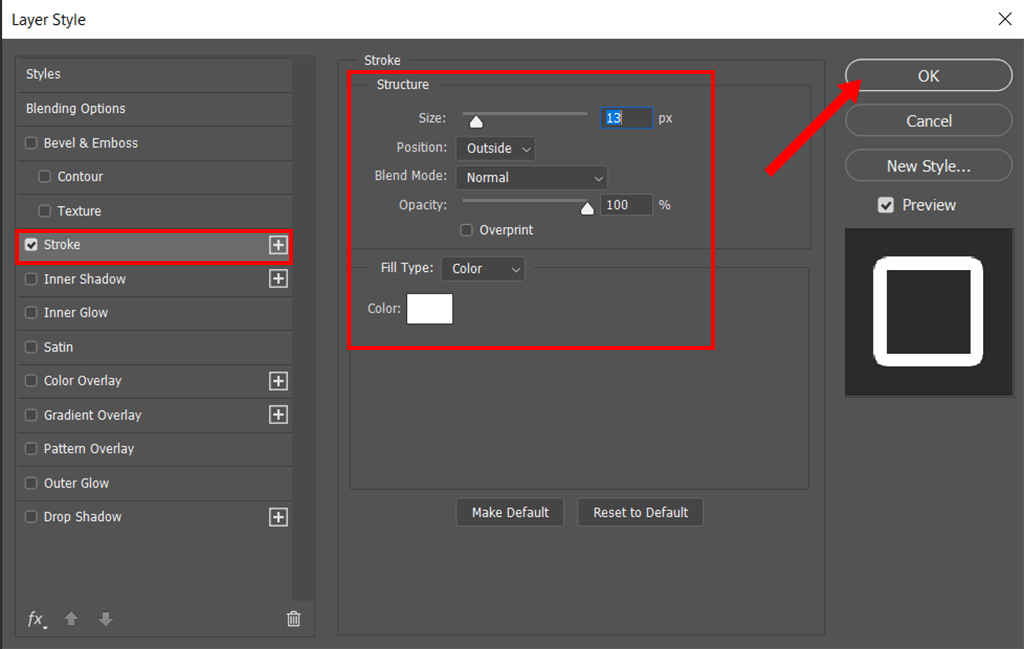
Right-click on the text layer and choose Blending Options. Navigate to Layer Style > Stroke. Set the Position option to Outside. Opacity should be set to 100. Besides, adjust the Size slider to your liking. To confirm changes, click OK.
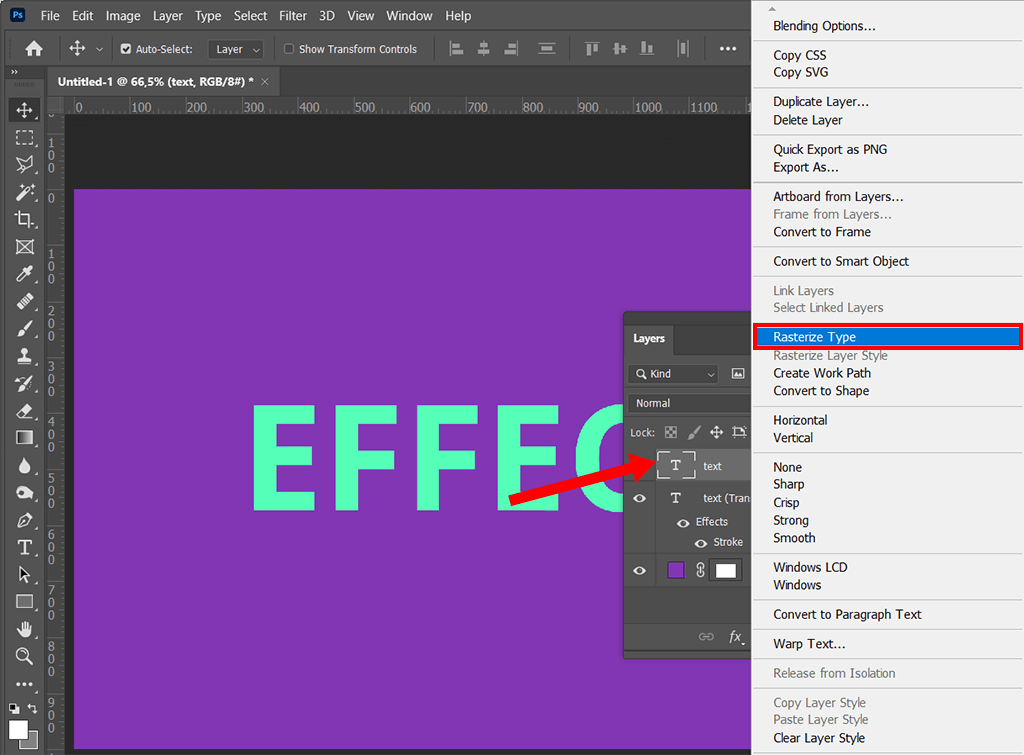
Once again, right-click on the filled layer and choose Rasterize Type. The text layer will be converted to a regular bitmap picture made of pixels.
Select a portion of the filled-in text you wish to conceal using the rectangular marquee tool.
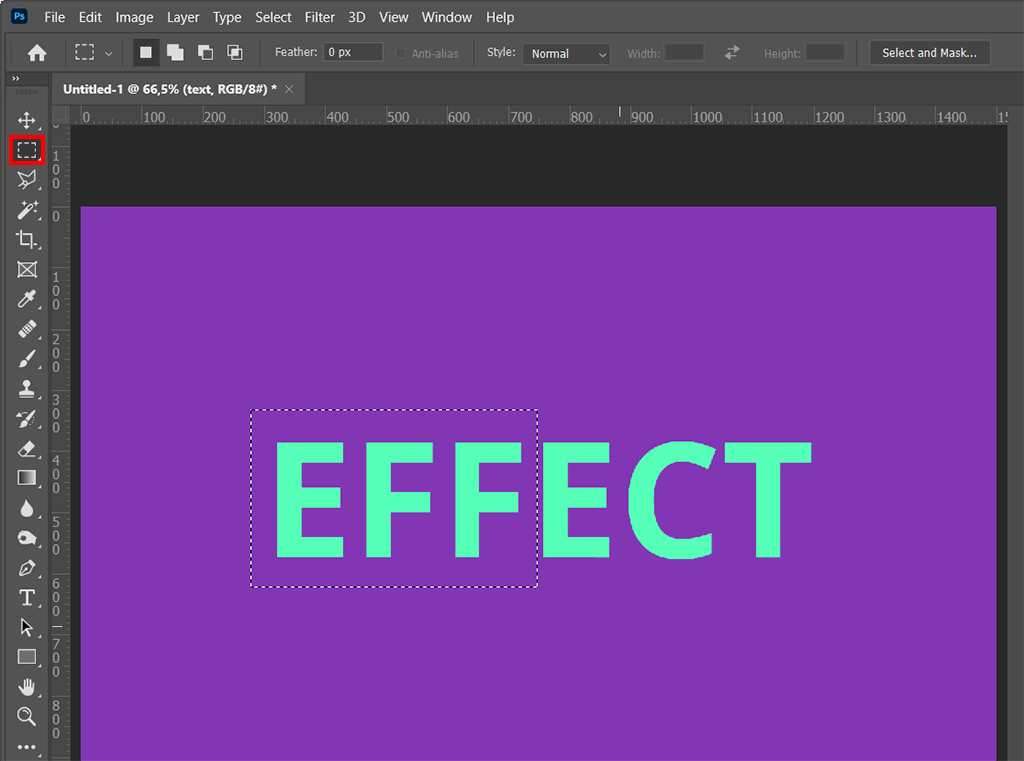
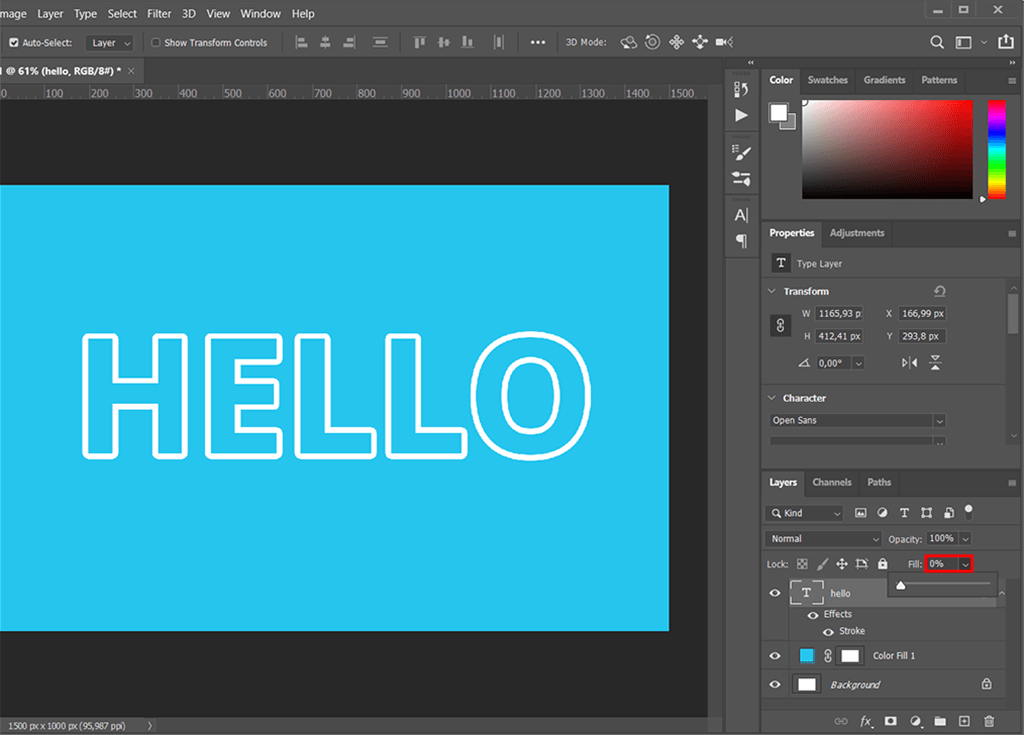
Press the Delete button to get rid of the selected filled-in part of the text. As a result, the lower text layer with the outline text Photoshop will become visible. Then set the Opacity to 0% in the Layers tab.
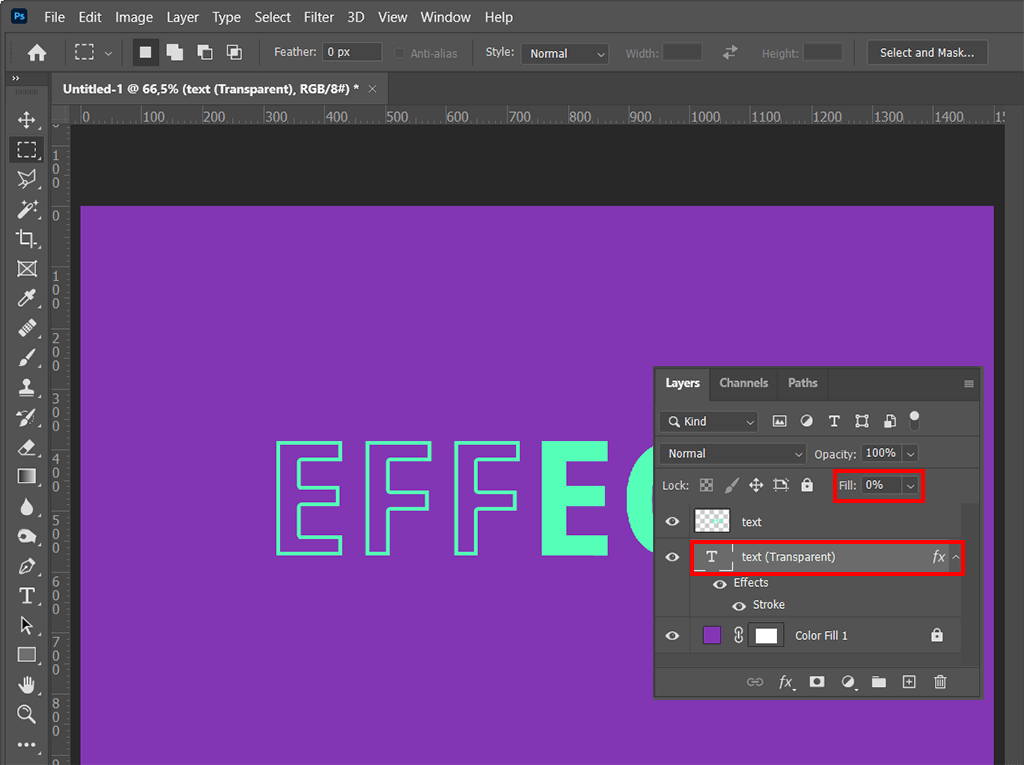
Lastly, combine all visible layers or flatten the picture with the help of the dedicated options in the Layer menu.
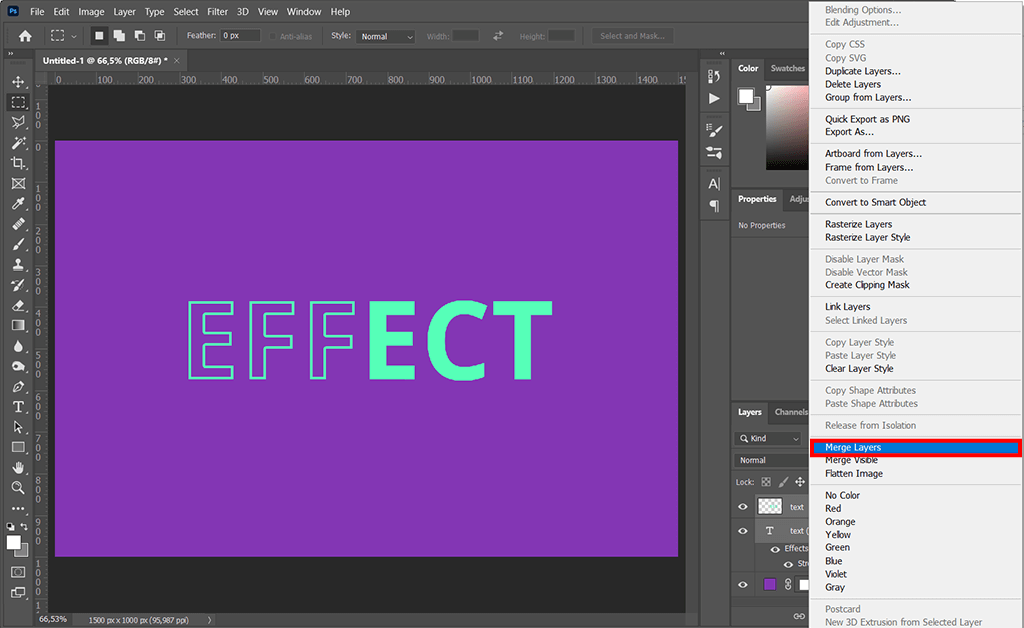
Another effective way of how to outline text Photoshop is to make the fill of the letters invisible. Only the border will be surrounding the text while the letters will be “empty”. To pick a perfect object for customization, try font management software. Such a method of outlining the text will definitely catch the eye of viewers.
Pick the desired font and enter the text you need to outline. Ensure that the text outline complements well the background of the picture. Ideally, the background should be of monochrome color.
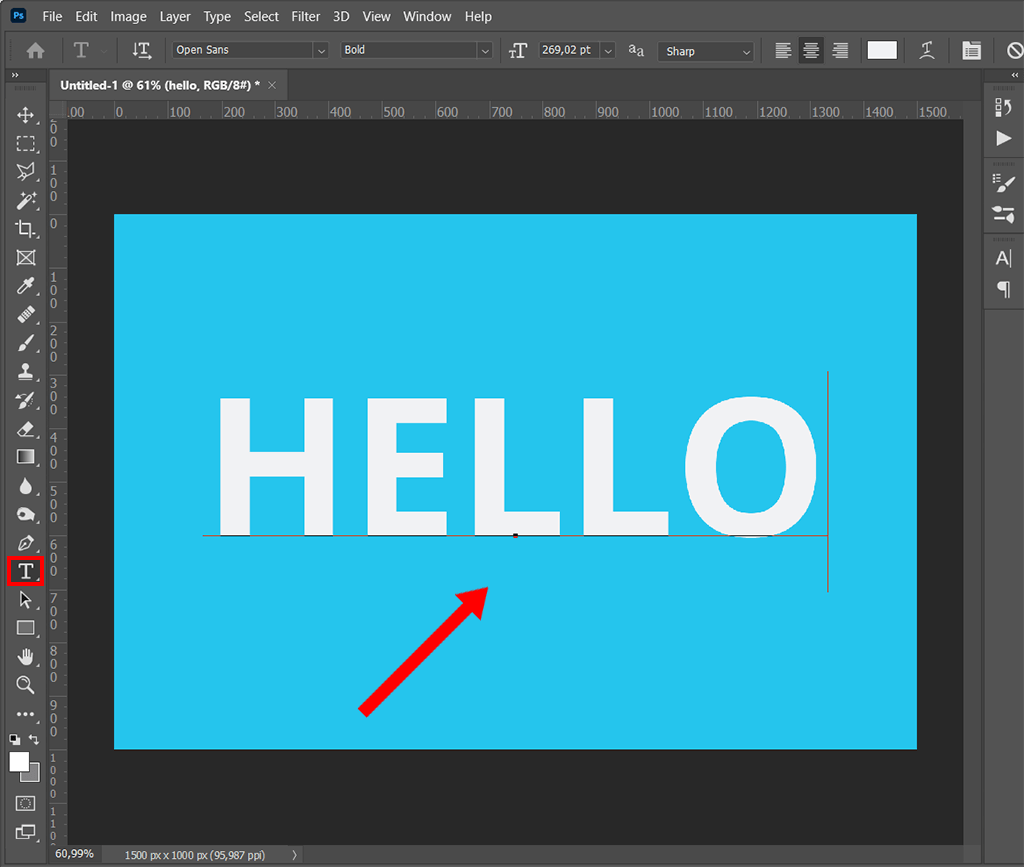
When the text is ready, right-click on the text layer in the Layers panel and select Blending Options. Look to the left of the pop-up window and check the box next to the Stroke option.
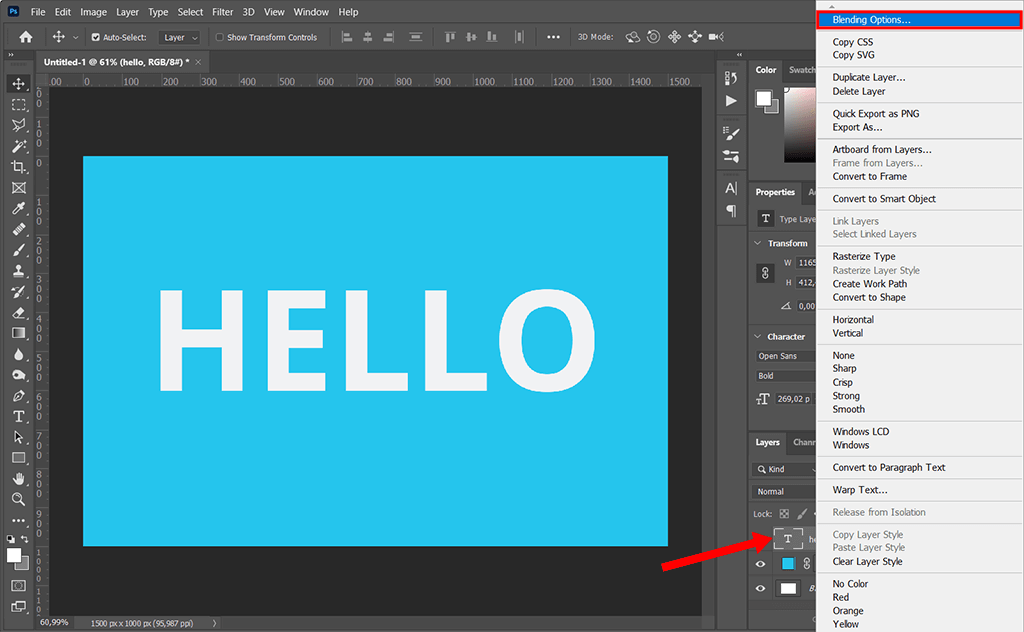
Fiddle with the Stroke settings – set the Position option to Outside. Also, adjust the Size slider to your liking. As for Opacity, the recommended setting is 100. To confirm changes, click OK.
Locate the Fill option at the upper right corner of the Layers tab – it is usually found below the Opacity setting. Select the text layers and set Fill to 0%. This way, the solid fill of text or any object will disappear.

All three described methods allow you to learn how to add outline to text in Photoshop, a well-known picture editing software. However, for a quicker result, you may try simple serif fonts. The only task here is to add a font to Photoshop that is outlined and not filled with color inside.
You will come across such outlined fonts in numerous signs, logos, etc. Click on the link above to download top-notch free outline fonts generously provided by FixThePhoto and enjoy nicely outlined letters in your pictures and projects.