Technically speaking, a vignette appears due to the distortion of light from the camera lens. It looks like darkened corners of the image. A vignette is often used to draw attention to the center of a photo.
Photoshop has several tools for creating a vignette. Each has its pros and cons, but if you put these tips into practice, you can figure out which one is best for your particular project.
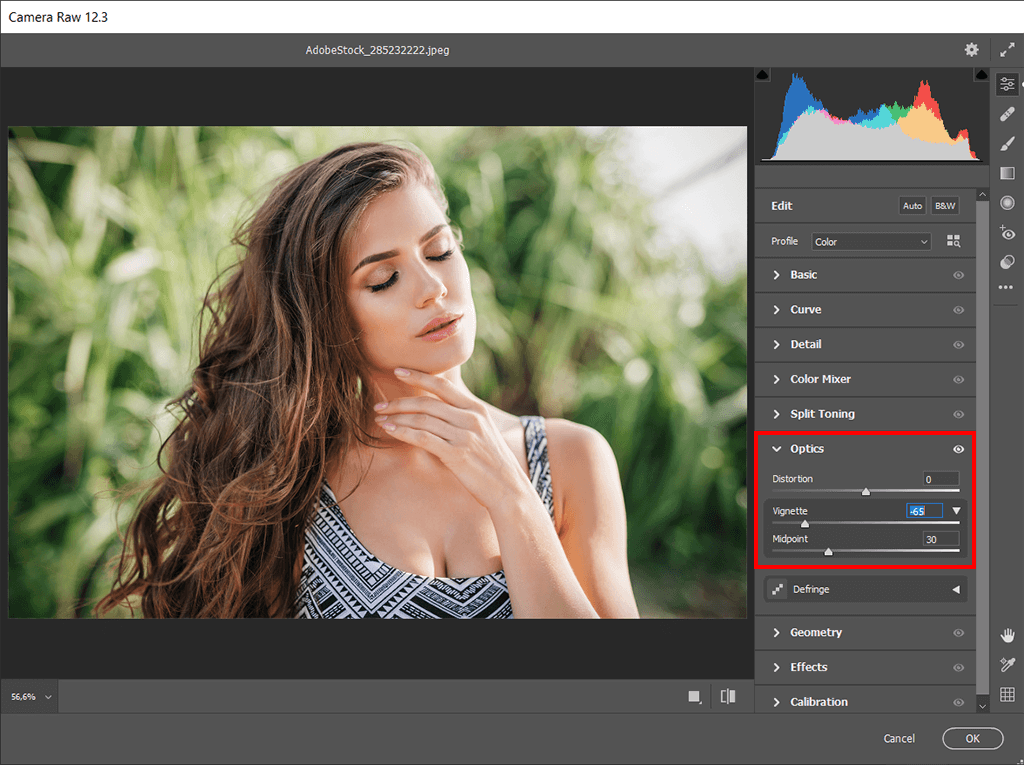
The fastest and easiest way of creating a vignette in Photoshop is to use Adobe Camera Raw.
STEP 1. Open an image in Camera RAW.
STEP 2. Find the Optics tab.
STEP 3. Press the button named Manual.
STEP 4. Move the Vignette slider to add or remove vignetting according to your preference.

You can add a light or dark vignette with the Radial Filter tool.
STEP 1. Find a Radial Filter on the right of the settings panel.
STEP 2. Make a circle in the picture that will slightly darken its edges. When the circle is applied, you can move or resize it.
STEP 3. Adjust the exposure to change Photoshop vignette gradient (with the slider, you can also blur and reduce glare).
This option in Camera RAW is similar to a layer mask, however, unlike Photoshop tools, it doesn’t allow for fine-tuning.
When you exit Adobe Camera Raw, you can use alternative ways to make a vignette in Photoshop. I’ve described the fastest ones below.
This way and the next one are similar to Adobe Camera Raw actions.
STEP 1. Choose Filter > Lens Correction when a file is opened.

STEP 2. You need to ensure that all Auto-Correction boxes are UN-checked. It will help you create a custom vignette Photoshop without correcting other lens issues.
STEP 3. Click on the Custom tab next to the Auto-Correction one.
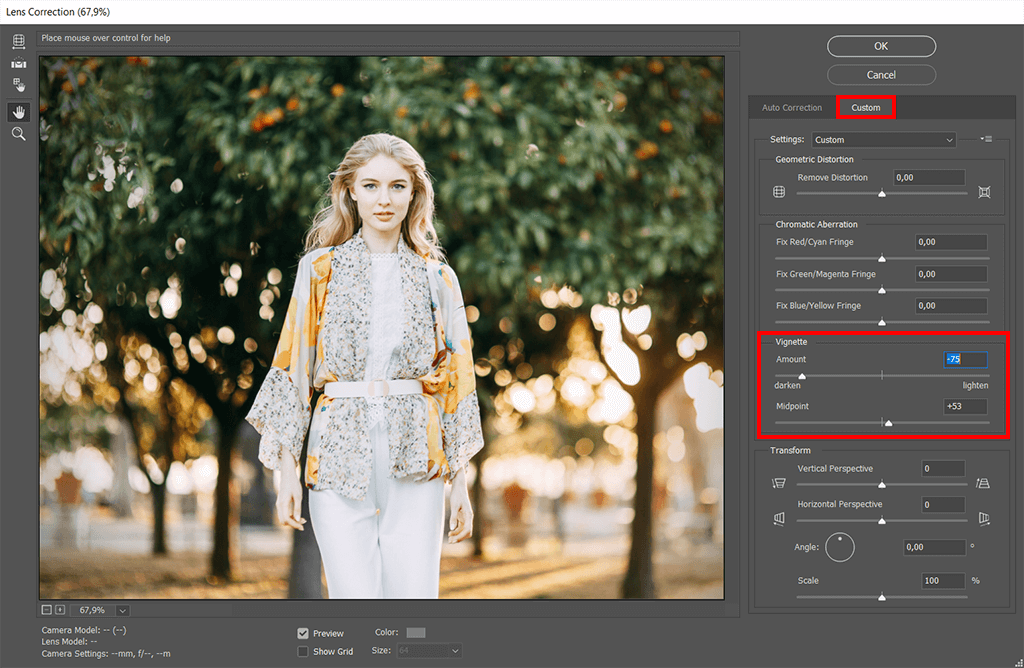
STEP 4. You will find a Vignette module under the Custom menu. There, you can adjust a vignette according to your needs.
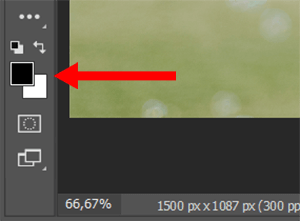
STEP 1. Keep in mind that you need to set the foreground color to black since the vignette will be dark.

STEP 2. You can apply the effect with Gradient Fill, choose Layer > New Fill Layer > Gradient.
STEP 3. Press Okay.
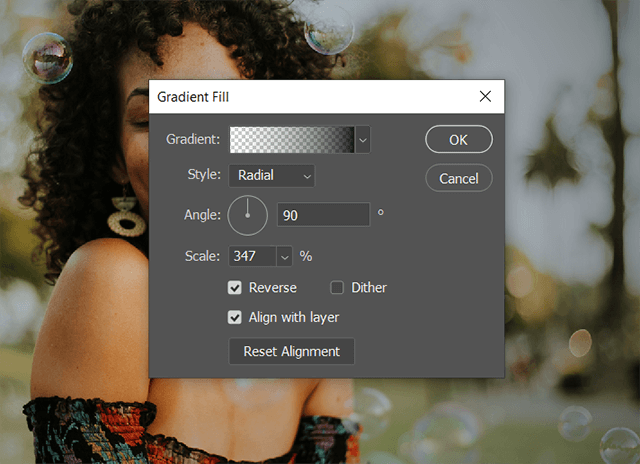
STEP 4. The box that is placed next to the Reverse tool will help you put the vignette on the outside of the picture.
STEP 5. Check whether the color changes from transparent to solid black everywhere except for the word Gradient. Then change the Style to Radial. I recommend leaving 90 degrees in the angle settings. You can change the scale, which affects the intensity of the gradient. When it comes to vignettes, being subtle is the best option. It’s better to set the intensity to 347%.
STEP 6. Once you have added a Photoshop vignette, the edges of the image will become dark. If the effect is too noticeable, you can edit the vignette by changing the Blending Mode of the layer to Soft Light or Overlay and lowering the Opacity.
STEP 1. Make a new layer (Ctrl/Cmd + Shift + N) and set a black color to fill it (Alt/Option + Delete).
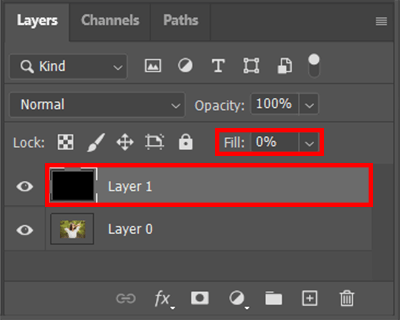
STEP 2. Change the Fill to 0% in the Layers tab.
STEP 3. Open the Layer Style dialog by double-clicking on the layer name in the relevant panel.
STEP 4. Use the Inner Glow effect.
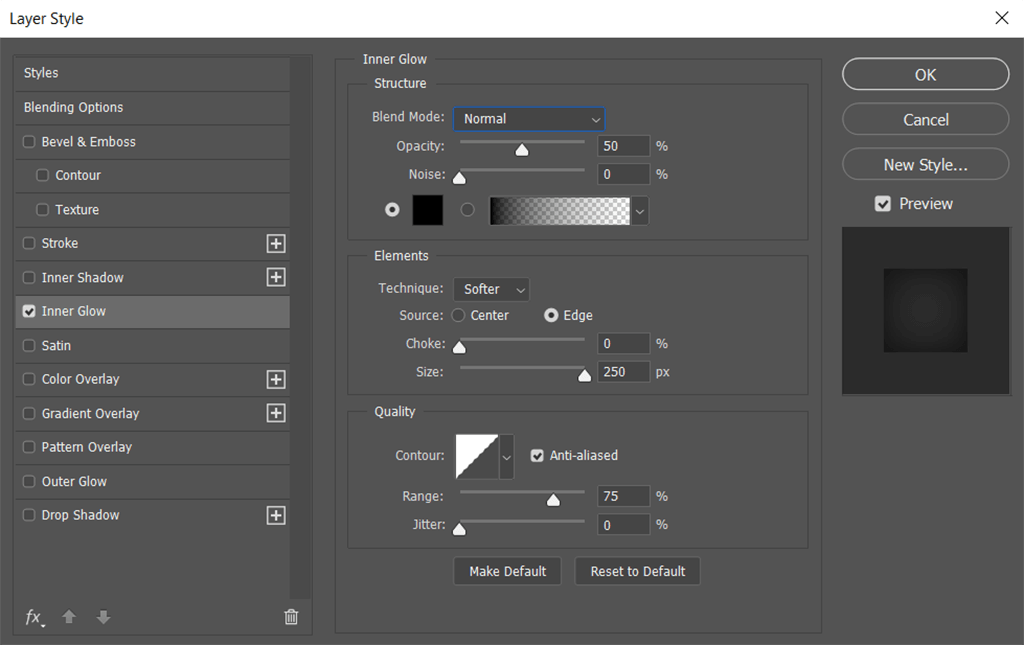
STEP 5. Apply the settings as in the example above.
Although this method is limited by the size of your photo, it allows you to adjust the vignette later on.
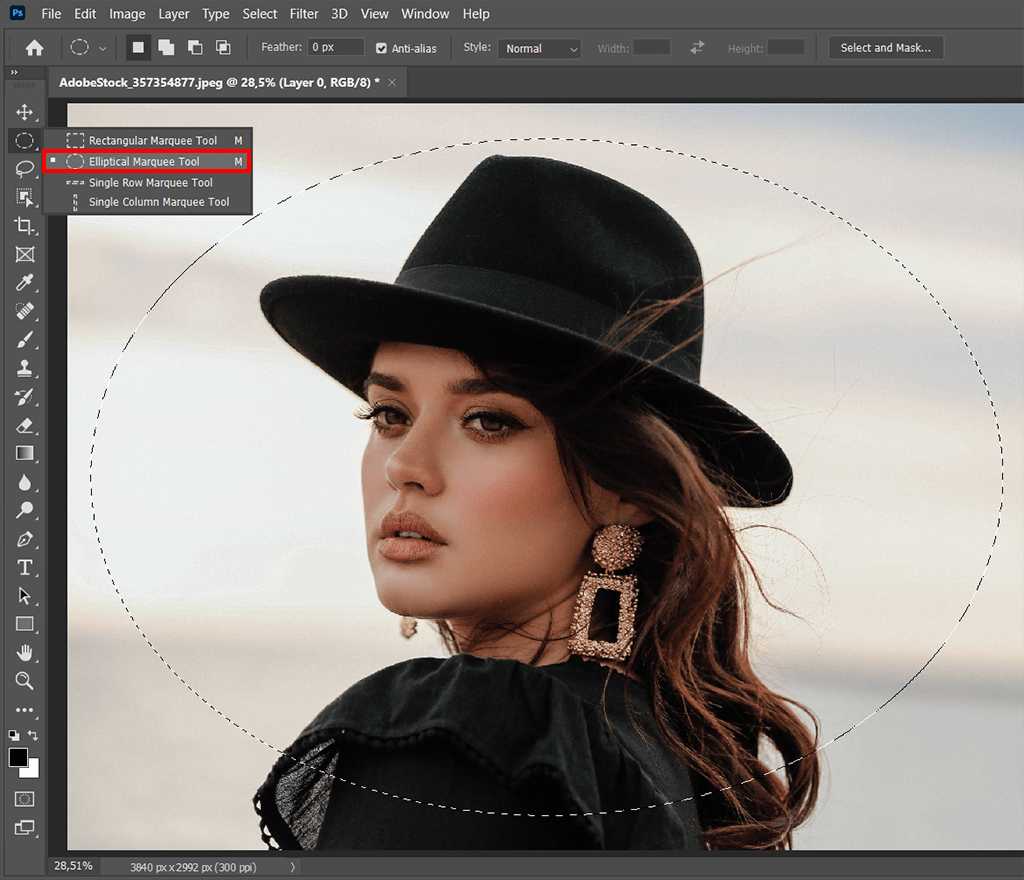
STEP 1. Choose the Elliptical Marquee Tool (M) and place an oval over the entire image.
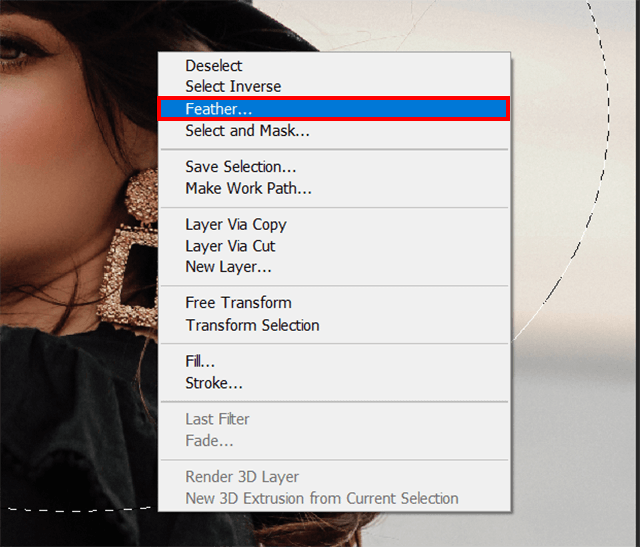
STEP 2. Make a smooth transition by right-clicking on the Feather option. You need to choose a feathering value experimentally, as it will create a different effect for pics of different resolutions. I’ll apply 300.
STEP 3. Invert the selection. To do it, you need to move to the Select – Inverse tab or simply press Shift + Ctrl + I (Shift + Cmd + I).
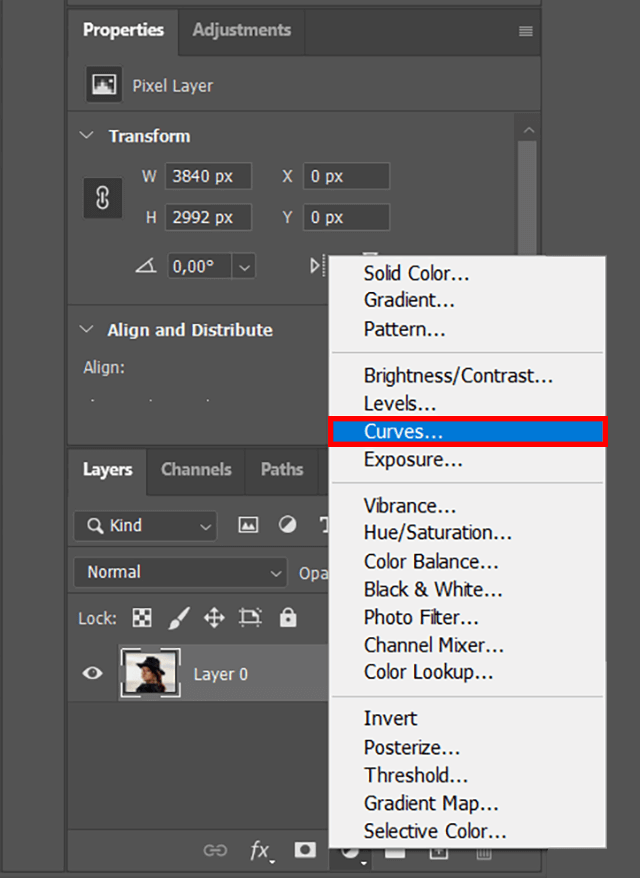
STEP 4. Go to the Layers menu and find the New adjustment layer and Curves. A new layer with an oval mask will appear.
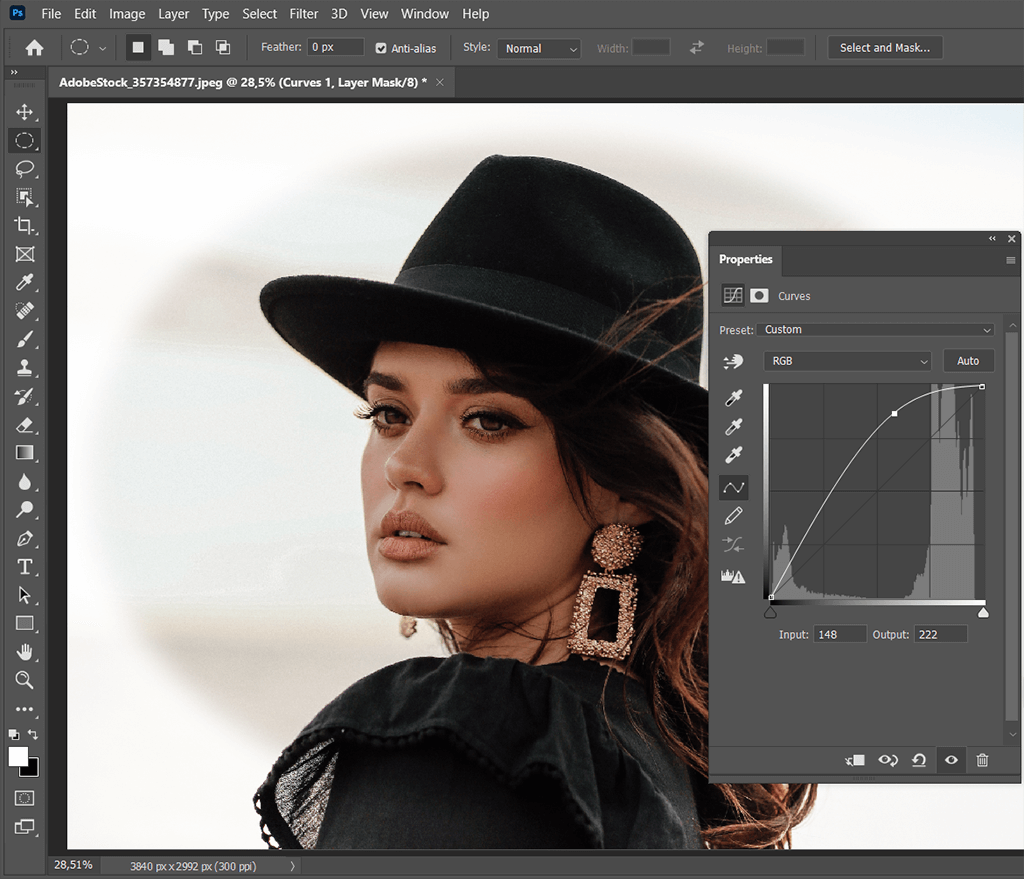
STEP 5. To darken the edges, drag the middle of the curve down. This way, you will adjust the intensity of dimming.
Photoshop Actions help you reproduce all the image editing steps taken by another person. You need to press on Play, and the program will apply the selected effect to your photo, whether you need to apply the Mirror an Image, Rotate an Image or more advanced actions, like Change Hair Color or Remove the Background of a Picture.


