Mirroring photos can change the perception of the frame and make it more expressive. People whose gaze is directed to the right are perceived more positively than those looking in the opposite direction.
In fact, leftward motion makes us think of going towards the past. In landscape and city photography, the situation is almost the same: bridges, rivers, streets directed rightwards signal movement into the future.
But, in addition to changing the perception of the picture, by using mirroring and copying, you can achieve some interesting effects. Check out photo editing tips for beginners to learn more about what Photoshop can do.

Applying simple mirroring to landscapes can create mesmerizing reflections, turning a tranquil lake into a captivating, almost kaleidoscopic scene. This approach offers a fresh perspective on reality and brings a sense of balance and harmony to your visuals.
STEP 1. Launch Adobe Photoshop and select the desired image. It will be reproduced on a Background layer.
STEP 2. To enable alterations to this layer, find the dedicated panel and double-click on the lock icon. Thus, you can unblock the layer.
STEP 3. Find Transform in the Edit menu and then indicate the mirroring effect you want - Flip Horizontal or Flip Vertical.

Using this method, you can place the original photo next to the mirror image in Photoshop instead of replacing it, thereby creating a panoramic impression.
STEP 1. Duplicate the base layer by clicking the appropriate action in the Layers menu tab. It is faster to use your mouse and drag its thumbnail onto the new layer icon.
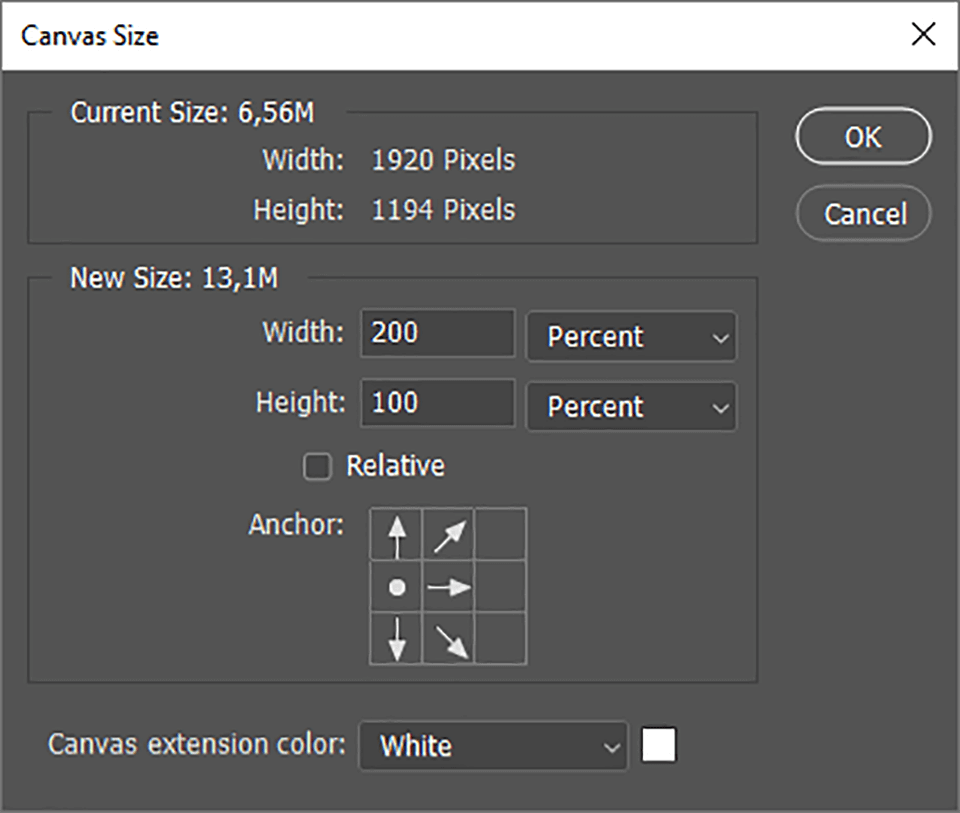
STEP 2. Increase the size of the canvas horizontally by opening the option in the Image menu. Adjust the parameters so that the expansion is directed rightward and equals the initial width.

STEP 3. Set the Anchor to the left edge to indicate that it should stay in place. Make sure to specify a width increase of exactly 200%.
STEP 4. Select the copied layer and go to Edit → Transform → Flip Horizontal. Then, with the mouse, change the location of the contents of both layers so that they are aligned neatly.
For precise and accurate positioning, it is convenient to use your keyboard and click the arrow buttons for slight shifting.

This approach involves a vertical reflection described in the previous method, so follow the above-mentioned instructions and continue the sequence with these.
STEP 1. Merge two current layers into one. This can be done with the command Layer → Merge Visible.
STEP 2. Let's extend the canvas one more time but over the opposite axis. The anchor point will be at the lower border, and we will increase the height by 200%, a clever move that's easy to achieve using handy Photoshop shortcut keys.
STEP 3. Duplicate the top layer. Apply the Flip Vertical reflection command to this copy. After that, use a mouse to place the mirrored layer in a new location.
