Since this professional software automatically makes the edges smoother when you resize pixel graphics, you might be wondering how to resize pixel art in Photoshop. Follow this short step-by-step tutorial to make your image look more detailed, without any sign of blur. It will allow you to resize, edit and enhance the edges of your pixel art images without quality loss.
When you resize an image, Photoshop uses default settings, which might result in blur along the edges. This happens because Photoshop uses AI-driven tools to hide imperfections when enlarging an image.
However, when scaling pixel art, you should avoid blurring the edges as they should stay as they were. The simplest way to fix this issue is to use other resize methods to ensure that the pixels at the edges won’t be blurred.
Follow this quick tutorial to prevent Photoshop from blurring the edges when you resize your pixel image. You can use this method when working with pixel art of various sizes, even 75x75 or smaller images.
Launch Photoshop and upload the image that you want to resize. Make sure to remove the background. If you have never done it before, take a look at my tutorial for those who want to learn how to remove the background of a picture in Photoshop or clean images with the help of the “Background Eraser Tool.”
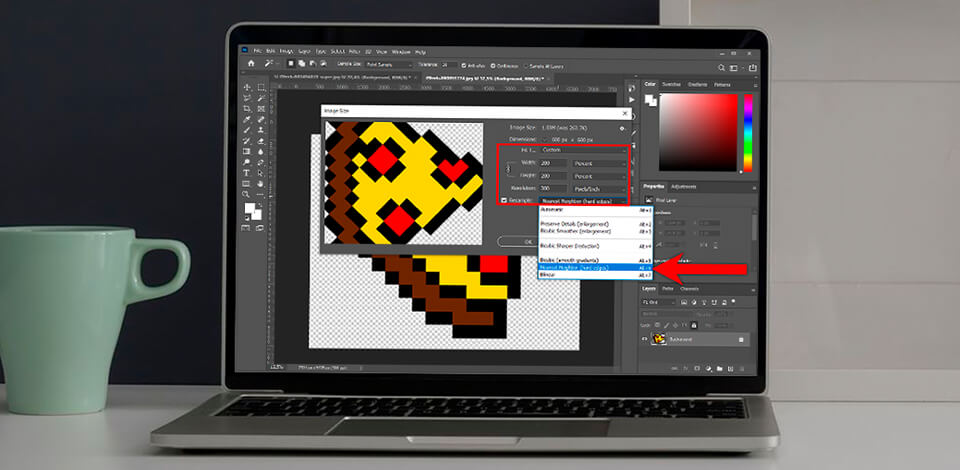
To find the settings menu, you need to open a new dialog window by pressing the Alt + Ctrl + I key combination. You can also open the Image menu, scroll down a bit and select Image Size.
In a new menu, you need to select the height and width of an image. Make sure to check if you edit pixel values. If you want to resize your image while preserving its aspect ratio, it’s better to edit percents. Change “Pixels” to “Percent” and raise the value to 200%, 300%, 400%, etc. To resize your image correctly, first, you need to check the "Constrain aspect ratio."
To ensure that the edges of your enlarged image don’t look blurry, find the "Resample" option at the bottom of the window, click on it and select "Nearest Neighbor (hard edges)."
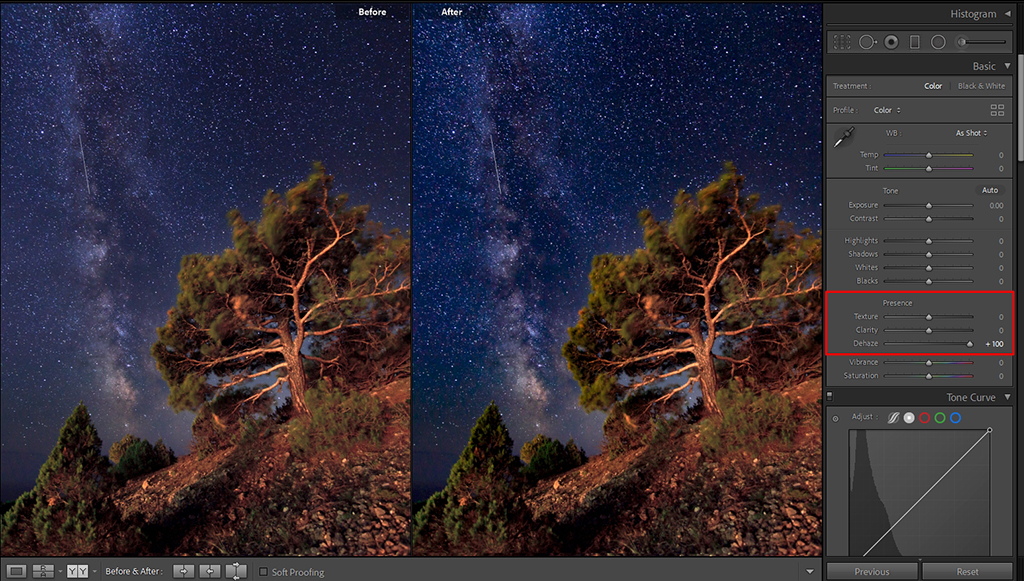
Despite the fact that the primary goal of the Lightroom Dehaze Tool is to restore the details in shots influenced by outdoor fog or haze, this tool will efficiently cope with light pollution, raising the contrast and vibrancy of the Milky Way in the night sky shots.
To find the tool, go to the Effects menu of the Develop Module. Remember to use it in moderation in order not to introduce unnecessary noise in the picture.
Done! Your image was successfully enlarged while its edges still look sharp. After scaling pixel art, you can edit it or save it to use in your future projects.
Yes, you can use exactly the same method to make your pixel art image smaller. The main thing that you need to do is to select the right size and aspect ratio and check the "Resample" option.
This way, you can enlarge your pixel image infinitely, without any restrictions. However, the file size will also become larger.
Once you have successfully learned how to scale up pixel art, you can save an enlarged image in its original format to ensure that the background will stay transparent. If you cut out your image from the background when editing a JPG file, you can save it in PNG format with a transparent background.
It might happen if you use the old version of the photo editor that hasn’t been updated for a long time. In this case, you can read a short tutorial to learn how to get the latest version of Photoshop free of charge.
No, Photoshop will automatically blur pixels when you try editing images in the future. However, you can read this helpful tutorial and learn how to сreate an action in Photoshop. It will allow you to resize your images in one click.
If you create pixel art, you must have often used ready-made brushes that allow you to work on grass, clouds, highlights, etc. Take a closer look at these free sets of brushes that will come in handy for your future projects.


