With Illustrator brushes, you can work on advanced projects and create intricate designs more quickly. Professional designers often create their own brushes as well. Some people also use them to quickly embellish their images by applying unique effects of styles.
You won’t face any difficulties with using brushes if you have ever tried to use Photoshop actions, Photoshop brushes and Lightroom presets to enhance your images more quickly. You can install brushes in Adobe Illustrator in a few clicks.
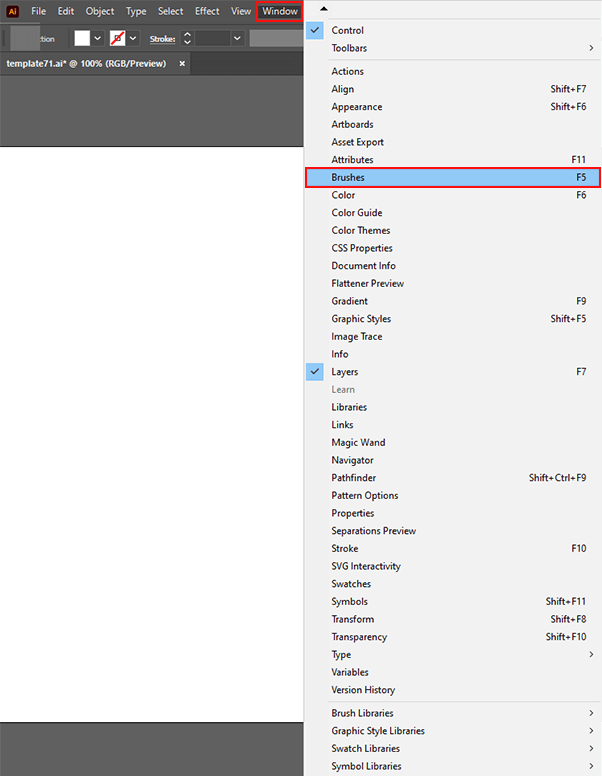
STEP 1. First, you need to check whether you have unpacked your set from an archive. Once it is done, you can launch Illustrator and open the Brushes panel. To do it, click on Window > Brushes.
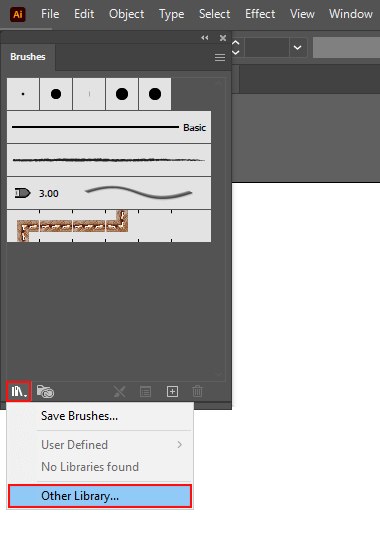
STEP 2. Click on the Brush Libraries Menu in the bottom left corner of the panel (a bookshelf icon).
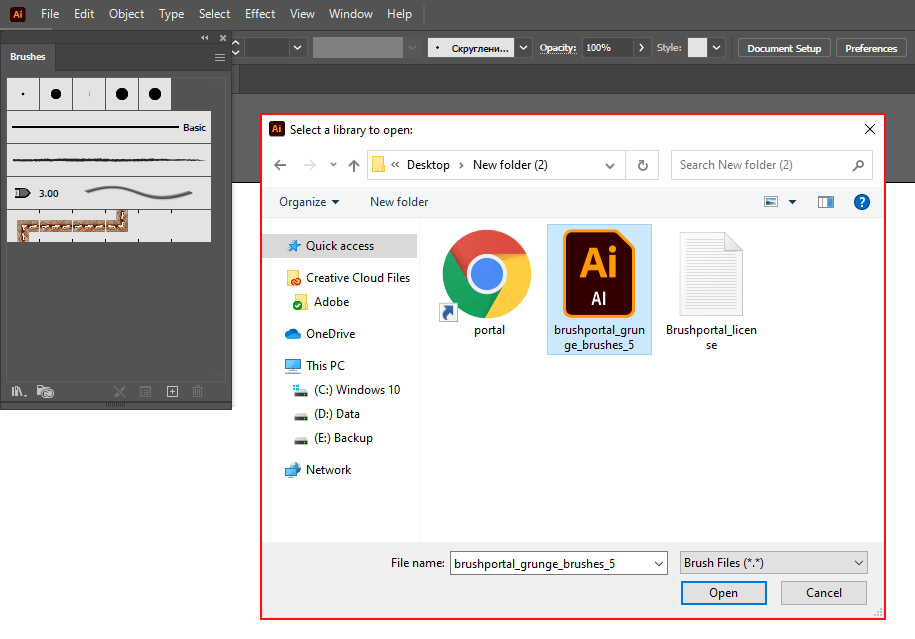
STEP 3. To add brushes to Illustrator, find an AI file in the brush library on your hard drive and click on Open to install it.
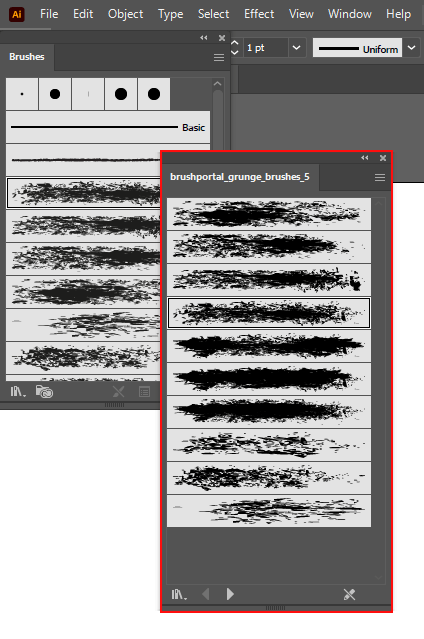
STEP 4. You will see the brushes in a dedicated panel in the brush library.
STEP 5. To view brushes by the name, select the List View option in a pop-up menu.
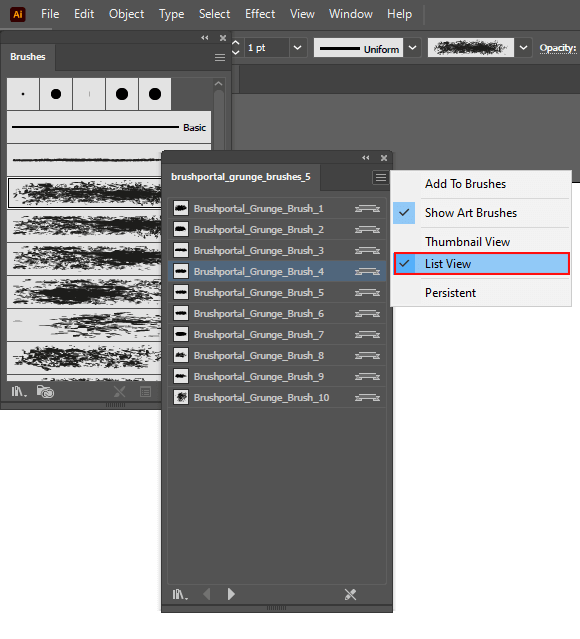
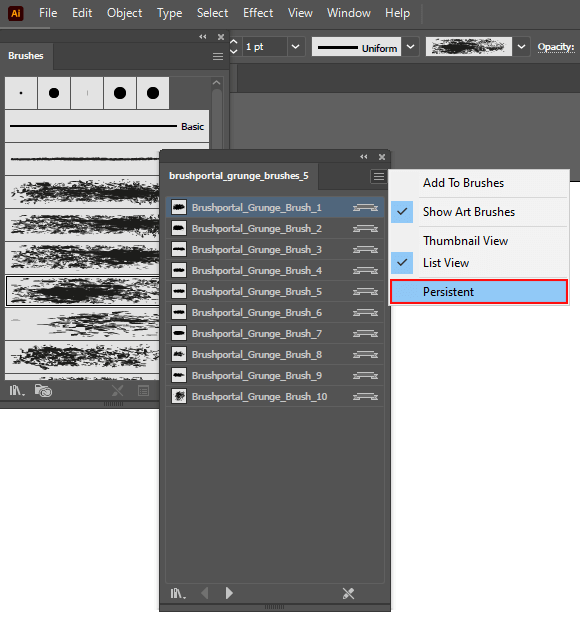
STEP 6. To be able to access these brushes whenever you start Illustrator, select Persistent in a pop-up window.
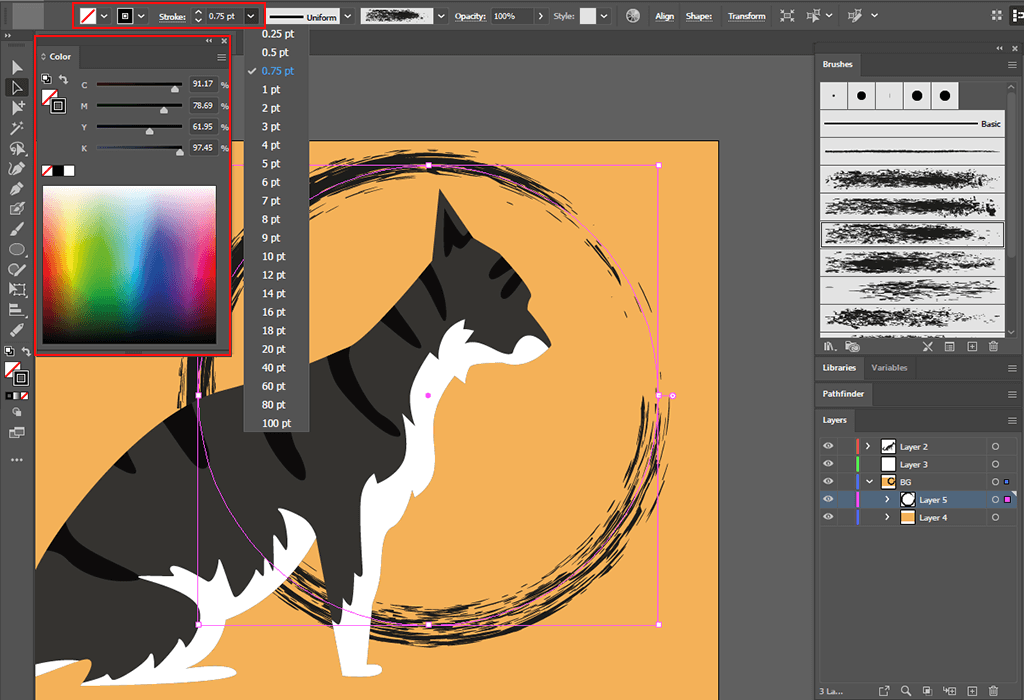
STEP 7. Now that you have learned how to import brushes into Illustrator, you will be able to draw images and elements as well as customize your newly installed tools by changing their color and size.
With these helpful brushes, you can expand your toolkit. They allow you to emulate a variety of artistic techniques and facilitate your workflow when you need to create complex or repeated objects, such as beautiful patterns.