Is there an easy way to change background color in Illustrator? When working with white illustrations, it’s impossible to edit them on the default white artboard background. Find out how to quickly solve this problem in Illustrator in 9 steps.
First, launch Illustrator, and create a new document.

The next step of Illustrator background color change is to click on the main File tab and then choose “Document Setup” from the dropdown list that appears. If you prefer using hotkeys for quicker access, you can use the Alt+Ctrl+P/Opt+Cmd+P key combination.

This will bring up a new window with a variety of general document settings. Find the “Simulate Colored Paper” option in the Transparency and Overprint Options, and check that box. Next, open the first of the two color grid panels that are situated next to it.

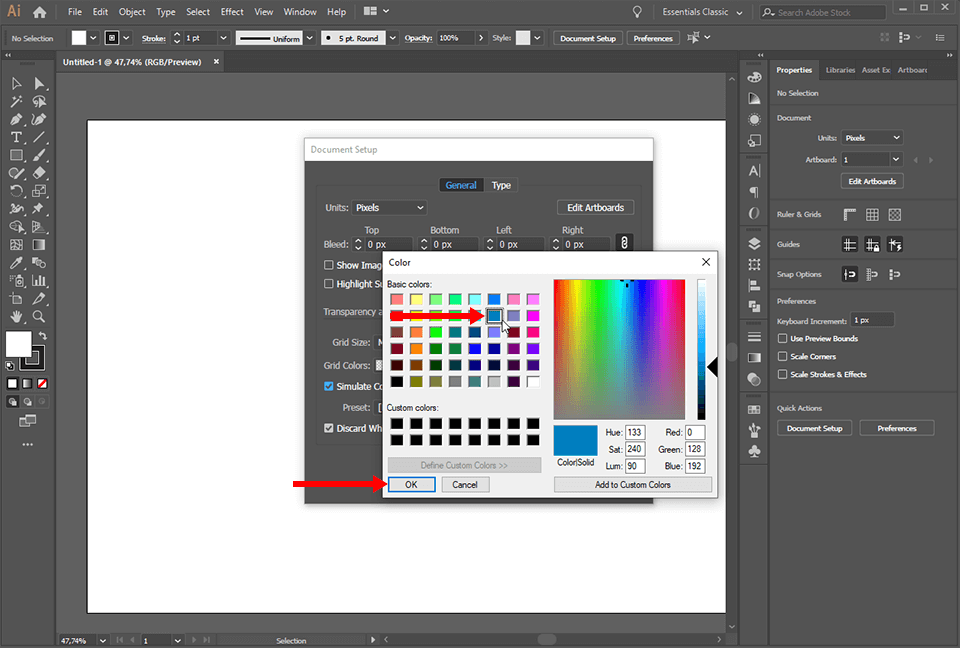
You’ll see a color picker appear. Select any color you’d like to set as the background color. You can either choose a basic color or a custom one. Once you’ve made your choice, click “OK.”

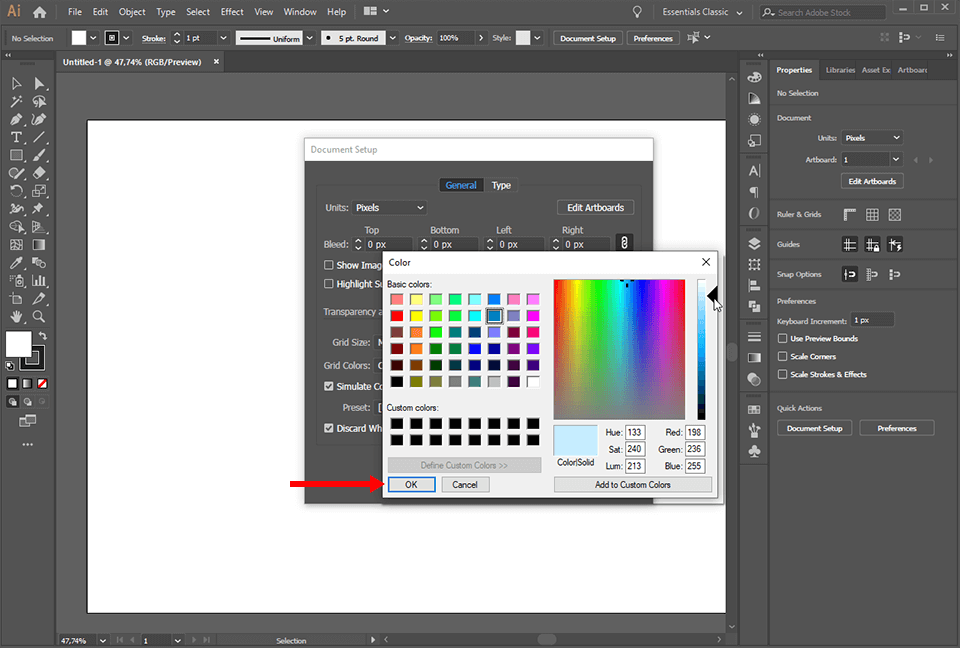
Once you have done that, click the second of the two grid color panels.

This will bring up the color picker you’ve seen before. Choose a second background color. Click “OK.”

Click “OK” to save the changes.

Activate the transparency grid by going to the “View” tab and selecting “Show Transparency Grid”. Use the Shift+Ctrl+D/Shift+Cmd+D hotkey for quicker access.

Problem solved! Now that you know how to change background color in Illustrator you can start following popular Adobe Illustrator tutorials.
You can also learn how to cut out an image in Illustrator, and remove its background completely.


Want to achieve professional results in Illustrator in minimal time? These must-have Illustrator freebies will help you realize your graphic design ideas much quicker.