The Dehaze filter in Lightroom can help you make the photos look cleaner by reducing haze, fog, or atmospheric distortion. It increases clarity and contrast, revealing hidden details and improving the Colors and overall look of the photo. Landscape photographers would find it useful to improve visibility or restore detail in skies and landscapes.
In this guide, I'll explain what the Dehaze filter does, how you can utilize it for photography enhancement, and I will also give you some tips on how to use it well.
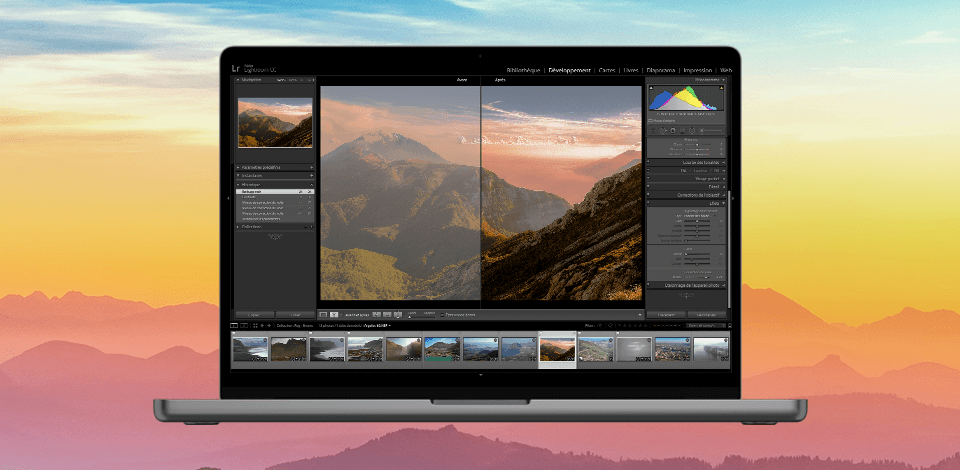
✔️ Enhancing landscapes. As I mentioned before, Dehaze in Lightroom is useful for landscape photography. It’s quite common for haze or fog to affect the details and colors of photos and their atmosphere. Applying the Dehaze filter during editing photos in Lightroom can help increase the clarity and vibrancy of mountains, trees, and lakes or rivers, and improve the overall atmosphere of a landscape.

✔️ Adding contrast. As a food and still life photographer, I usually add a little bit of Dehaze filter to my pictures – say from anywhere from +5 to +10. This helps me add some additional contrast. This technique fits well because rather than going crazy with the Contrast slider, you can build it up gradually using different features and the Dehaze is one of those features.
✔️ Improving distant views. When taking pictures of beautiful landscapes or atmospheric city pictures, the Dehaze filter in Lightroom can help increase the clarity and definition (especially if you have some distant elements in the photo). For example, if you are taking a distant picture of mountains, buildings, or any landmarks, this filter will be particularly useful as it can make them look more noticeable and sharper compared to the rest of the photo.
✔️ Making local adjustments. The Dehaze slider is great for boosting contrast on any picture or if you need to. You can either use it for your whole image or just a part of it. What I do sometimes is just use this feature locally with an Adjustment Brush.
❌ Editing low-contrast scenes. However, it might not be the best idea to use the tool for pictures with a lack of contrast as it may lead to some differences in brightness or color which make a picture look overedited.

❌ Working with fresh tones. The Dehaze effect in Lightroom is not suitable for the skin as it might make it look artificial. So, if you edit portraits in Lightroom I suggest you do not use this filter at all.
❌ Creating time lapse photos. The tool works differently on each picture. therefore, even small adjustments may change the results and lead to different effects. You may get a halo effect which cannot be seen if you are editing just one photo.
There are many other ways to use the Dehaze slider in Lightroom apart from just making photos look sharp. Here are some examples you might like.
Bringing back lost details in the sky. If you took a picture of a sunset but the sky seems a bit pale, you can use the slider to improve the colors and bring back the details that may have been lost even if the sky is blown out.
Let me explain how it works. The dehaze filter reduces dust in the image which can help if you need to show more details or keep the colors bright. It corrects the quality of the pixels by analyzing and reducing the effects of making the contrast stronger and overexposure.
Enhancing underwater scenes. Try using the Dehaze slider to make the underwater photos clearer and brighter. It helps reveal vibrant colors and details of the ocean by reducing the effects of water haze and improving contrast. By the way, all underwater Lightroom presets provide a Dehaze effect.

Editing B&W images. If you shoot a lot in black and white, you definitely know that the secret to amazing black-and-white photos lies in the level of contrast. If you need to increase the overall contrast of the photo, the contrast slider will help. However, do you know what to do if highlights and shadows are fine but your midtones are flat?
The Dehaze Effect in Lightroom will help you as it targets only dull mid-tones and leaves the high contrasted areas unchanged.
Creating moody atmospheres. Try using the Dehaze slider on indoor or low-light photos to add some atmosphere to it. This can be useful in creating a cinematic or dramatic look by adjusting the intensity of the slider to deepen the colors and make the shadows darker.
Making night photography pop. Lightroom’s Dehaze slider is perhaps one of the best tools for intensifying and emphasizing night sky. Night photography requires a high ISO and no matter how good your camera, a high ISO almost always creates a haze in between the stars.
Of course, you can try and increase the contrast and saturation to fix this. The Dehaze tool, though, in my opinion, is a much better solution. It’s generally far more effective than noise removing in Lightroom or adjusting the black levels to deal with the haze between the stars.

Removing light condensation from lens. If you shoot outside during winter, you probably end up with your lens fogging because you would take your camera out too fast. If you can’t wait for the condensation to clear, some photos will end up misty and Dehaze will help you fix that.
To be fair, it’s not perfect and you will get better results if you let your camera acclimate to the temperature outside the bad before shooting but it is a good way of getting rid of the fog on the pictures.
Simulating depth. Apply the Dehaze in Lightroom to distant objects in your picture to make them look further away and create this feeling of depth. If you reduce haze in the distant objects or background, you can enhance the image by making it seem clearer and more defined.
Enhancing textures. Try using the Dehaze slider to highlight textures in your photos. For example, rugged landscapes, weathered buildings, or rough surfaces can be all fixed by applying Dehaze as it will make the small details stand out, and textures look sharper and more interesting in your photos.

The Dehaze slider can be found in the Basic panel, however, this is not the only place where you can find Dehaze. As I already said, you can use the Dehaze throughout the whole image – or locally using the adjustment tools found under the Histogram in the Basic Panel.
You can combine the Dehaze slider with other brush and filter tools to achieve better quality and decrease the haze selectively in the photos.
You should also understand that sometimes, the dehaze slider by itself may not be enough to get the effect you want. To help with that, you could use Contrast, Clarity, or Tone Curve. The last one will help you increase the contrast in the mid-tones of your picture.


The Dehaze filter analyzes the image to reduce the effects of haze or fog by adjusting contrast and clarity, resulting in clearer and more vibrant photos.
You could experiment and utilize editing tools like the Clarity or Tone Curve with the Dehaze tool to get more detailed results. Also, it is important to know how much dehazing you need to do to keep the final photos look natural and realistic.
When you apply the Dehaze filter correctly, it typically improves clarity and contrast and, therefore, increases the image quality. Excessive use, on the other hand, may make weird dark spots and noise, especially in low-light and high-ISO images.
When you figure out how to use the tool and all the details of it, you can move to editing other bits, for instance, correct colors so that they don’t look flat, etc. You don’t have to use complicated editing as there are presets that can help you improve your images in several clicks. By getting those presets, you can make the colors on your picture look amazing without working too hard.


