If you need to highlight a specific color, perform color modification, or add a new tint to the palette, below you will learn how to use the Eyedropper Tool in Photoshop. While this tool is mostly used for picking a color, you can use it with other tools as well.
Since most Photoshop tools can be used with the Eyedropper, you might be wondering how you can use it.
This tool can be customized similarly to other tools in Photoshop. When you access this tool from another interface, including the adjustment panels, your adjustment options might be quite limited.
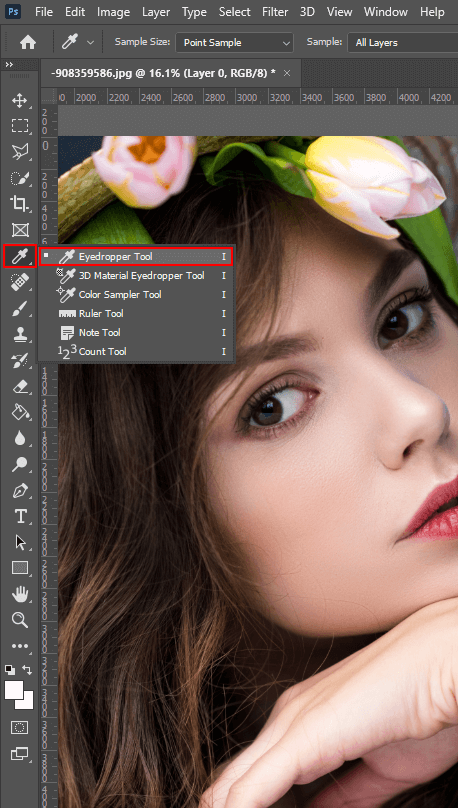
You can find the Eyedropper tool in the Tools panel. Its icon looks like a real eyedropper, so it’s easy to find it. Alternatively, you can use the Photoshop shortcut Ctrl + I. Select an area and click on it with the Eyedropper.
Before using the Eyedropper tool, think about whether you need to edit a foreground or background. If you want to change the foreground, you will find the current color in the top color box on the toolbar.
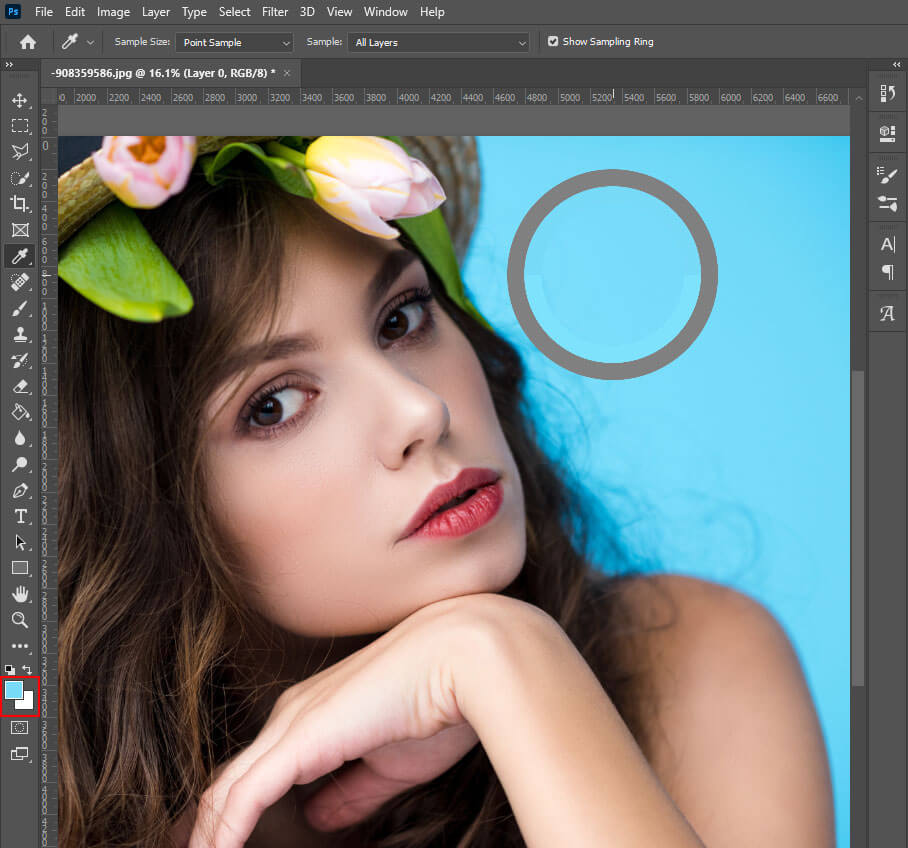
If you plan to work with the background, the current color is in the bottom box. To swap the foreground and background colors, you need to click on the Switch Colors button.
To use the selected color, you have to create a new layer in the Layers tab. The Eyedropper Tool allows you to use various customization options when working with layers.
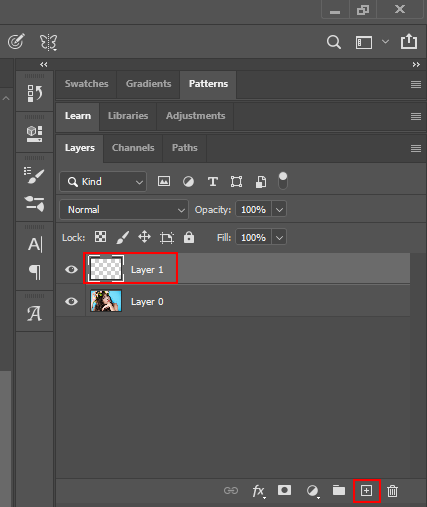
Since Photoshop is designed as a layer-based editor, it allows users to set layers from the Eyedropper tool samples by changing the settings in the toolbar.
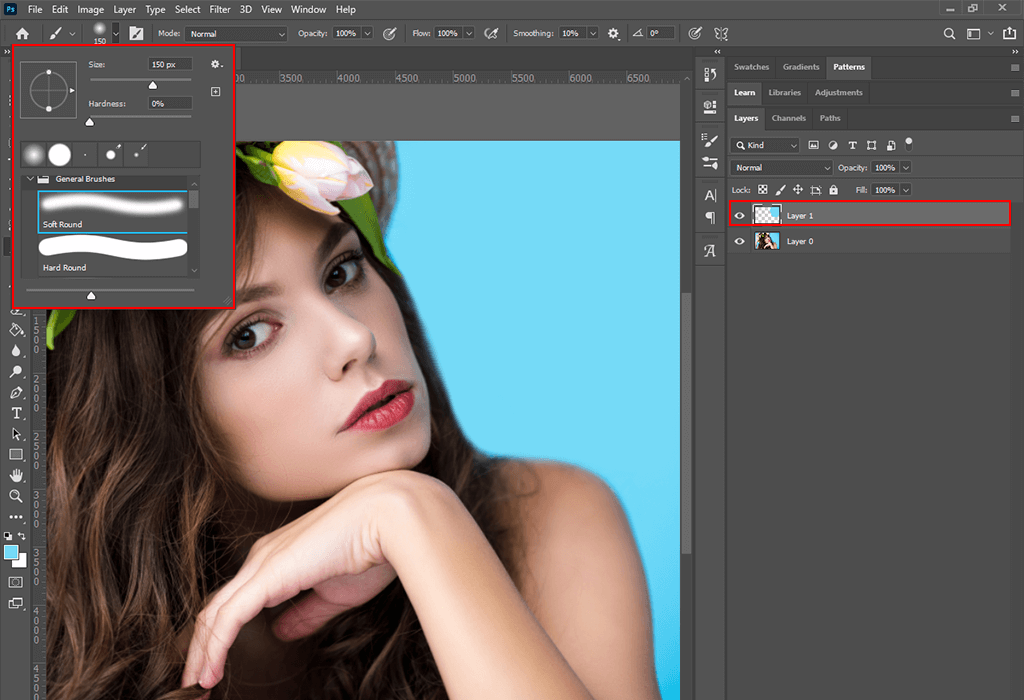
The Eyedropper is the most effective tool for those who need to change the color of an object in Photoshop. Once you have selected a color, you can use the Eyedropper in Photoshop. Use the Brush or Pencil tools to draw and add color to a selected area.
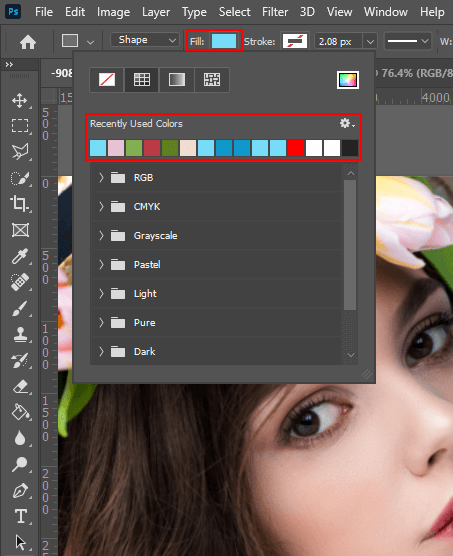
The Eyedropper tool can be paired with the Color Replacement, Gradient, Paint Bucket, or Shape tools. You can automatically apply the color you want to the selected objects. When using these tools, you can temporarily switch to the Eyedropper tool. If you need to come back to the original tool, release the key.
Since the program saves each color selected with this tool, you can create your custom color palette. It is especially useful for those who use web design software similar to Photoshop.
You can choose a color from any picture, even if you are not working on it right now. Besides, the program allows you to select colors from files that are open in other programs.
Users can select the color value of a pixel with the Eyedropper in Photoshop. The program will save it as the primary color in your palette.
Left-click with the Eyedropper to perform the action by default. After right-clicking, you will see a list of several options. It will allow you to resize the tool sample and save color information in alternate formats.
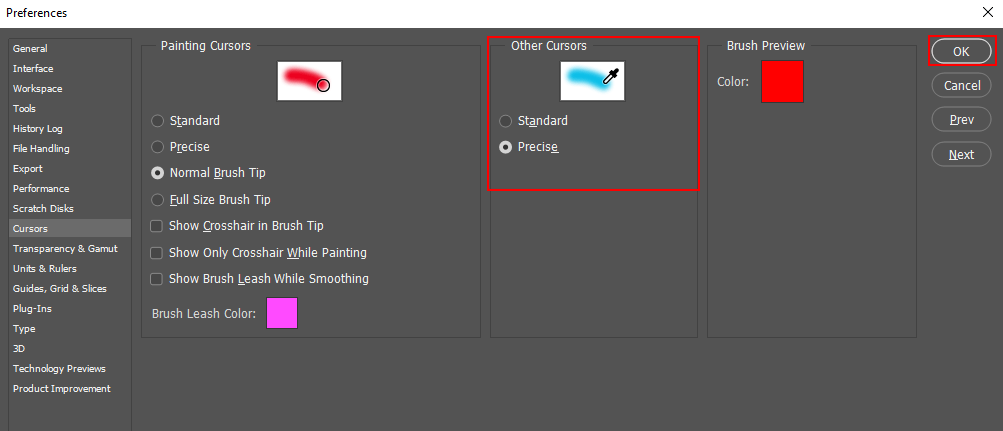
You can optimize your workflow by making your cursor more precise. To do this, choose Edit> Preferences> General in the toolbar. Go to the Cursors tab and select Other Cursors. Select “Precise” instead of “Standard” and confirm.
For professional help with colors and tints on your photos, you may refer to Fixthephoto experts who will apply and effect you want easily and fast.

The Eyedropper Tool is useful for working with colors in general. Besides, it helps you create an eye-catching color palette of an image, which makes it perfect for advertising and media. However, if you are a beginner, the task might be a bit challenging.
You can use ready-made actions that will help you optimize your workflow. With them, you can quickly select a color scheme for your photos, pictures, and brochures.