Want to learn how to add glow in Photoshop? There are many techniques for creating glow in the whole picture or a separate object with different light settings and glow colors. This tutorial covers the easiest method of adding the moon glow effect by using simple additional tools.
Go to File – Open to open an image. Make sure to keep the necessary picture in the folder, which you can access in an instant.
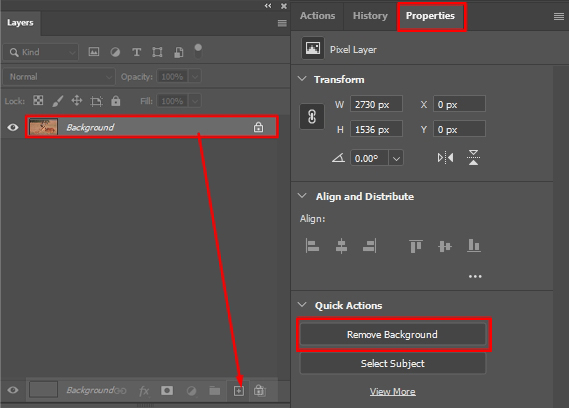
Duplicate the layer with a picture you need to edit. Then open the Properties window and choose Remove background.
At this stage, we recommend conducting all the preparatory adjustments like rotating and resizing. In case you don’t fully understand how to crop image in Photoshop, use the auto-crop borders option and you’ll get the image with certain dimensions.

Activate any selection tool you like. Photoshop will outline the object you want to apply the glowing effect Photoshop to. Choose Select and Mask.
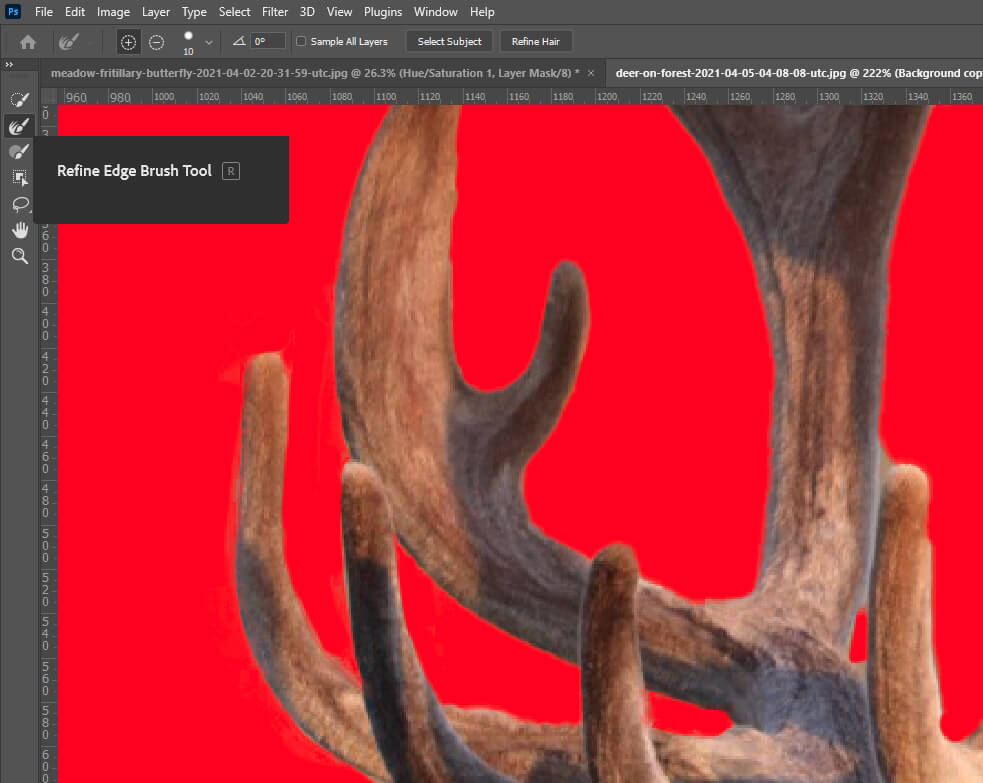
In the window that opened, refine the edges of the object using the Refine Edge Brush Tool and save it as a layer mask.
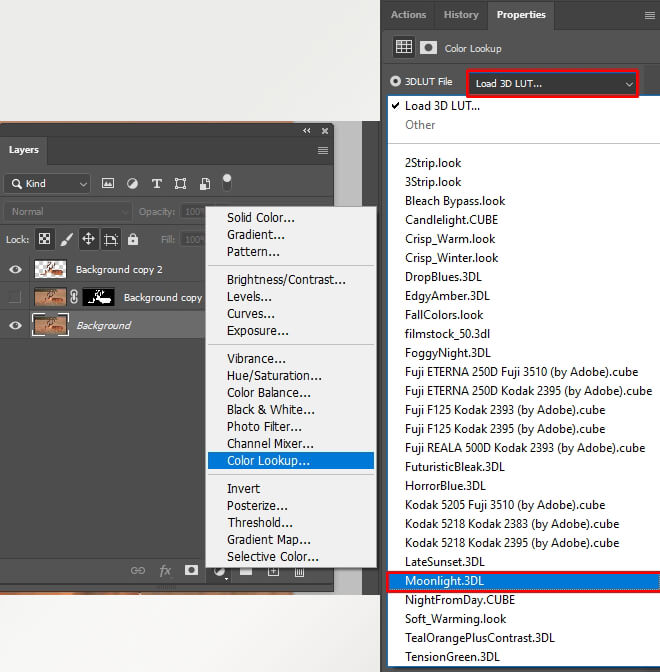
On the Layers panel choose New Adjustment Layer > Color Lookup. In the drop-down list, choose Load 3D LUT and find moonlight.3dlut effect. If you don’t know how to use LUTs in Photoshop, we recommend checking the tutorials.

Select Apply Layer Mask command to cut only the horns out. Then right-click on the layer and convert it using the Convert to Smart Object option.
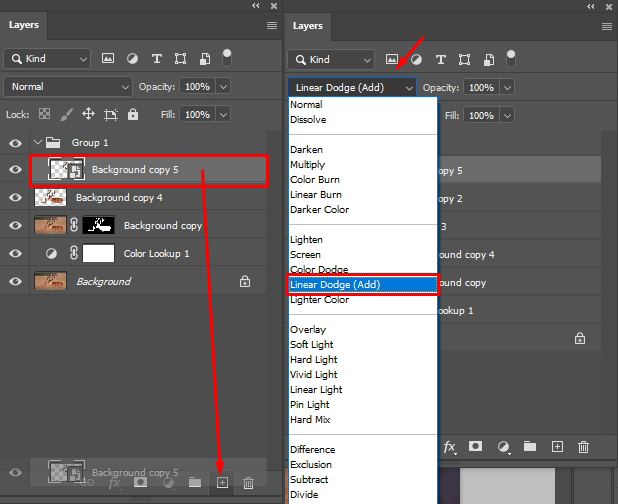
Duplicate this layer and activate Linear Dodge blending mode. Thus, you can add brightness of the processed image linearly to the brightness of the original file.
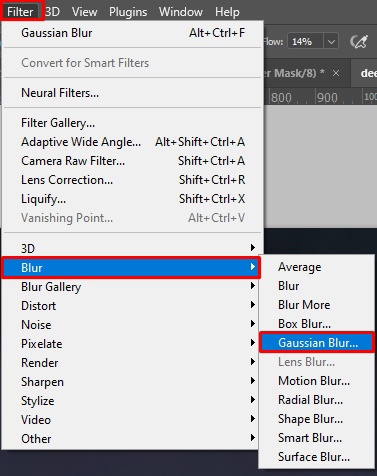
You should perform this operation 4 times with different values. Open the Filters list in the toolbar and select Blur - Gaussian Blur. Set the value to 5 by dragging the slider or enter the necessary number manually.
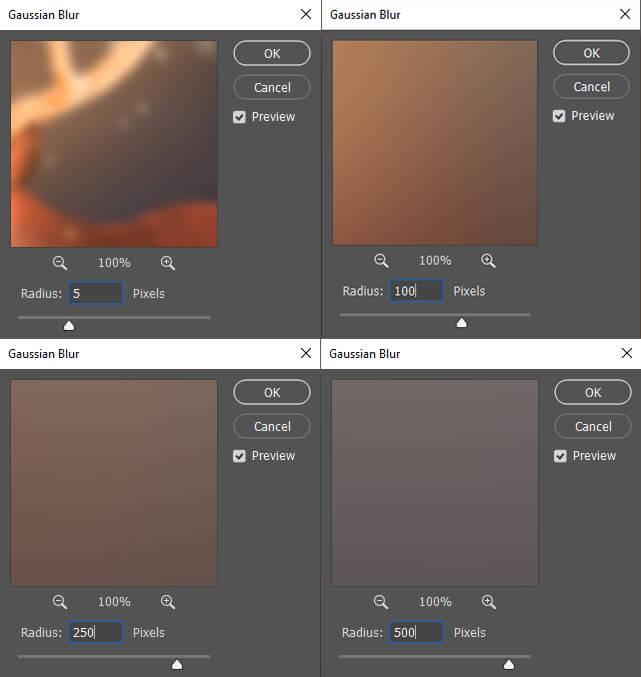
Duplicate the layer and repeat the same steps with the value 100, then duplicate the layer and select the value 250, and on the last duplicate, change the value of Gaussian Blur to 500.
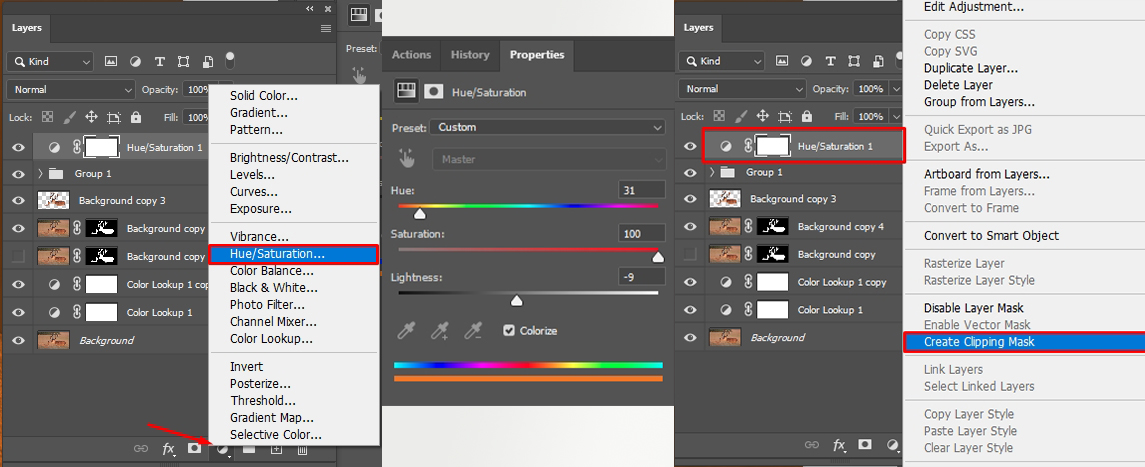
On the Layers panel select New Adjustment Layer and press Hue Saturation. Adjust the color toning settings as shown in the screenshot. Modify values depending on your picture. On this layer, right-click and select Create Clipping Mask.
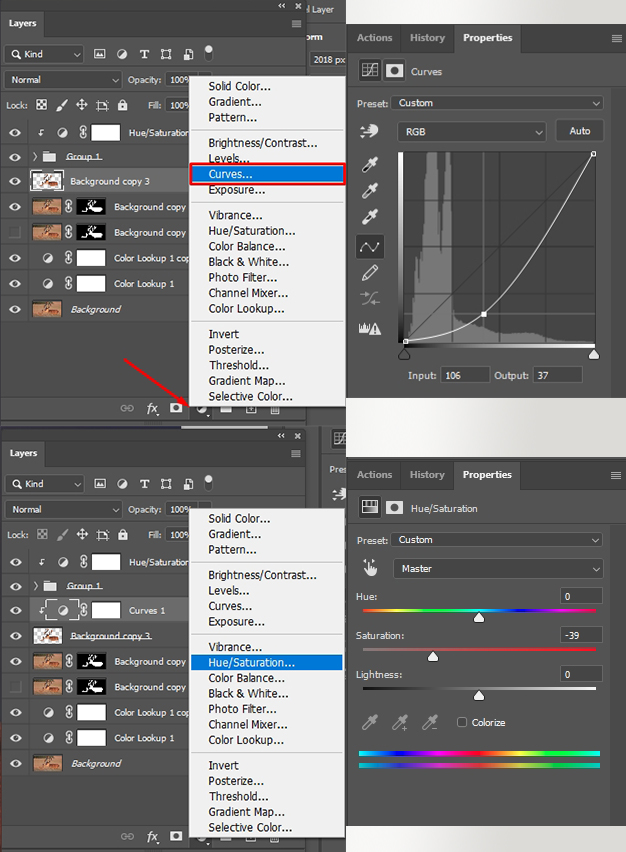
On the Layers panel, select New Adjustment Layer and press Curves to darken the curve downward so that the image acquires a dim shade. Then select New Adjustment Layer and press Hue Saturation, set the value that is shown in the screenshot, or analyze the picture to define the level of saturation (emerged from the curve) that you need to reduce.
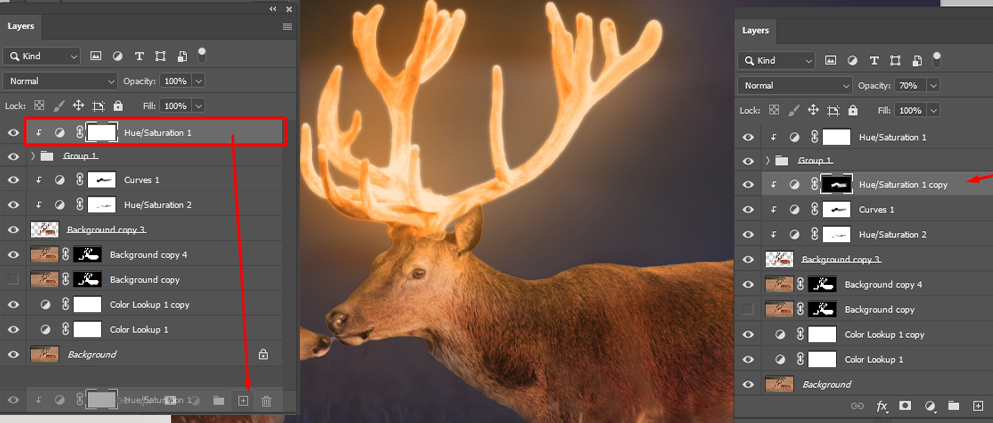
Right-click on the upper part of the curves layer and choose Create Clipping Mask. This is necessary to make sure that the Curves adjustments affected only a specific element.
Click on the mask and select the Brush tool from the toolbar. It is recommended to choose a soft brush to get a smooth transition. With a black brush, draw only the areas affected with light emitted from the deer, namely the back and heads.

Duplicate the layer that defines the color of horns and invert the mask. Then, just like in the previous step, draw the necessary places with a black brush to add a warm tone created by the glowing horns.
Get an additional magic effect by adding Shining Fireflies Overlay. To reduce the number of fireflies, you need to apply a mask to this layer and use a hard black brush to remove unnecessary fireflies.
Now you know how to add glow in Photoshop. By taking these simple steps, you can create an incredible moon glow effect on the selected object. But if this process seems too difficult for you, turn to professionals who can fulfill this kind of job fast and easily.
If you want to create glowing Photoshop effects in a quick way, use ready-made Photoshop effects. With these filters, you can refine your photos with mild and natural glowing applied to the whole picture or some a separate object.